There is a long history of combat-focused sidequests in The Legend of Zelda, challenges that pit Link against waves of enemies under trying conditions that are far more difficult than anything in the main story. The Wind Waker had the Savage Labyrinth, Twilight Princess sent us into the Cave of Ordeals, A Link Between Worlds hosted the Treacherous Tower, but none are more challenging than Breath of the Wild’s Trial of the Sword. This three-part, 54-floor mini dungeon temporarily removes all of your equipment, items, and Champions Abilities as it tasks you to build up your arsenal from scratch while overcoming scores of monsters. It is the ultimate test of Breath of the Wild’s rich combat mechanics, and these are the most memorable encounters you will find in the Trial of the Sword.
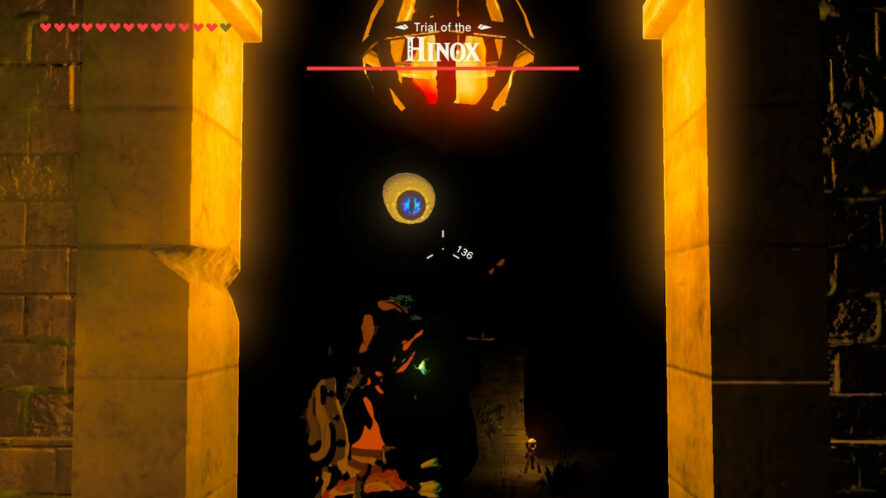
10. Middle Trials Floor 10
If you have plenty of space to move around, running away from a Hinox is always a viable option in Breath of the Wild. Not only do the Middle Trials trap you in a cluttered room with one, that room is shrouded in darkness. With just a few torches providing any semblance of light, it’s easy to become disoriented in the pitch blackness, which is the last thing you want while a gargantuan Hinox is bearing down on you. All that you can see of the towering brute is his single, glowing eye, making for a very creepy sight. The nearby towers provide some much needed cover from the Hinox, but with how many objects lay around for it to grab and hurl at you, no spot is totally safe from its reach.
9. Final Trials Floor 3
The Final Trials’ third floor starts out innocently enough. So long as you can keep your distance, the two Big Electric Chuchus rolling about can be taken care of with just a couple of arrows or a well-thrown Remote Bomb. All is quiet for a few moments after they’re eliminated, until a gang of five Stalmoblins suddenly emerge from the ground. Some of these will pursue you all throughout the room, even chasing Link up the tree platforms, while at least one is content to hang back and take aim with its bow. All the while, a thunderstorm rages within the room, casting lightning strikes down to the ground and making it risky business to have any metal weapons equipped.
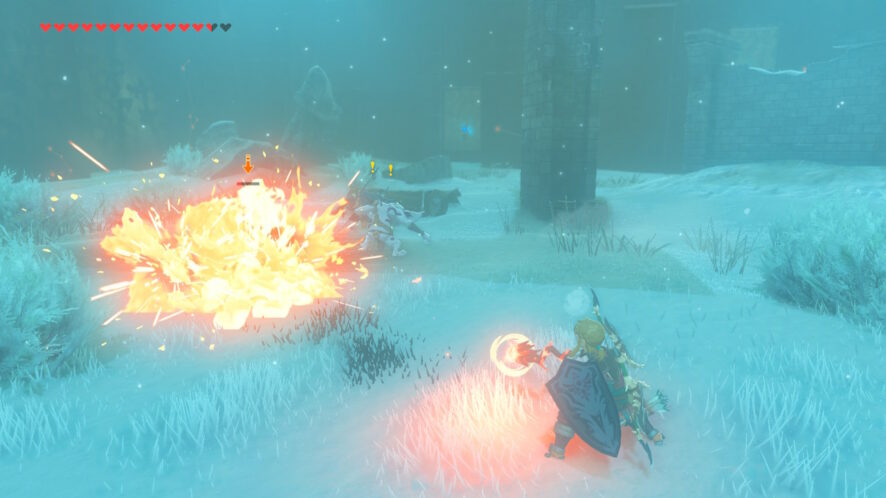
8. Final Trials Floor 15
Although players are able to find and equip the Flamebreaker Boots to withstand the overbearing heat in the Final Trials lava-themed rooms, they are afforded no such armor to survive the cold of the snow-themed rooms. This forces you to either gobble up a meal that provides cold resistance, or equip a weapon that possesses the fire element. But even all the cold resistance in the world doesn’t keep Link from having his movement slowed by the thick snow. Of all the icy challenges in the Final Trials, Floor 15 is the most memorable for its layout. Facing the Blizzrobe, Black Moblin, and three Bokoblins (one of which is a Silver variant) head on is no easy fight, but the crumbling stone walls and towers that rise from the snowy floor offer perfect vantage points for Link to engage in some thoroughly entertaining guerilla warfare.
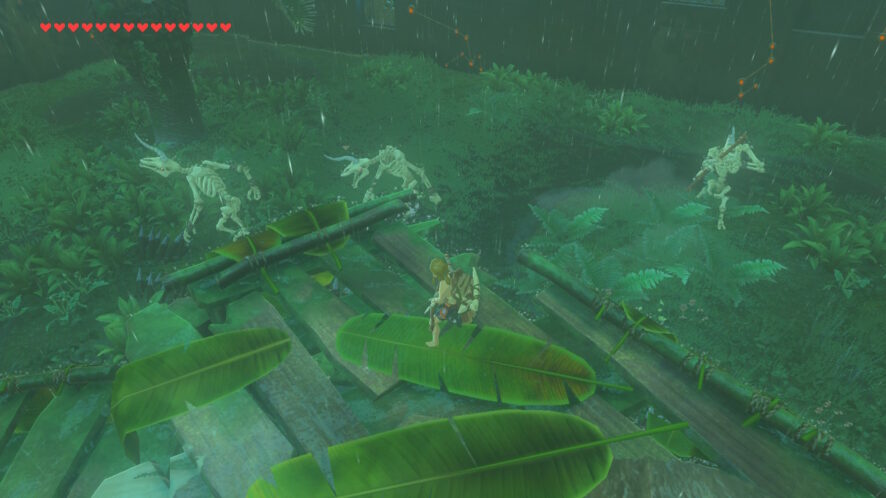
7. Final Trials Floor 4
Players have no time whatsoever to stop and carefully size up the competition once Link teleports into this room. The seven Stalkoblins, all mounted atop Stalhorses, immediately charge as soon as Link appears, leaving players in a sink or swim situation where they need to react on the fly. Your armor is sorely lacking at this point in the trials, so the Stalkoblins hit like trucks while they’re swinging around spears or firing off arrows. That’s not even getting into the regular lightning strikes that rain down upon the rusted weapons laying about the room. Once you take out a Stalkoblin or two, you at least have the chance to commandeer a Stalhorse of your own to even up the odds a bit.
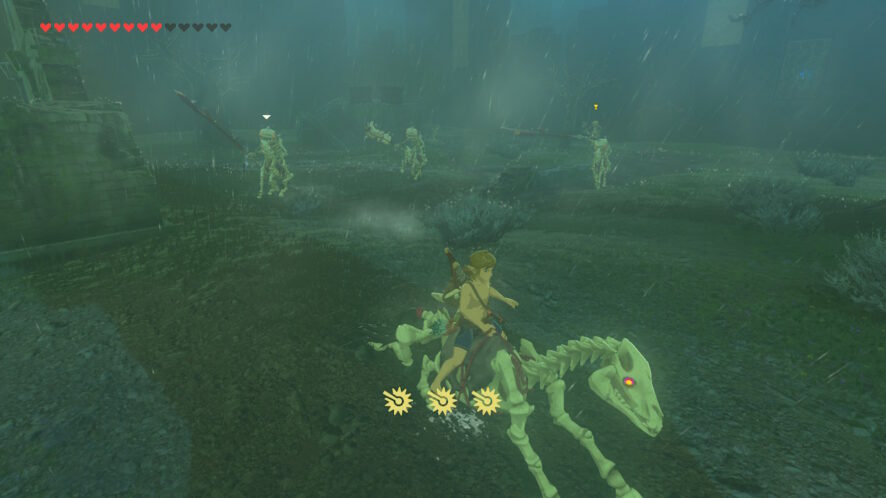
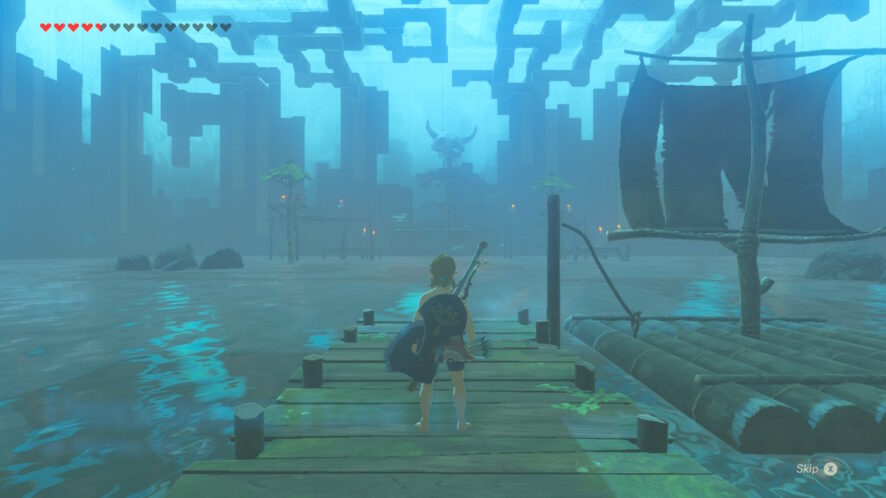
6. Beginning Trials Floor 11
At one end of the chamber stands Link and a puny raft. At the other end stands a whopping eight Bokoblins, and a Moblin, to boot, all taking position along a series of platforms that rise from the water. As soon as Link is within range, the Bokoblins wielding bows will waste no time bombarding him with volleys of Fire Arrows. The safest way to approach their ranks is to choose one side and slowly make your way over by swimming or using Cryonis blocks, but the fun way is to cut that raft loose and meet them head on in a full fledged firefight. With a convenient breeze pushing your craft forward, all you need to worry about is being quick with your bow and ducking behind the raft’s mast when the Bokoblins return fire.
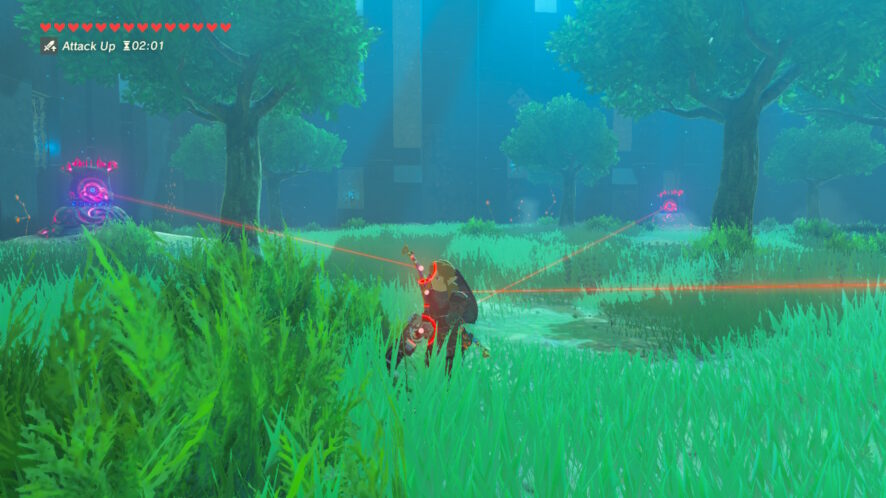
5. Final Trials Floor 19
When you first step foot in the final leg of the Trial of the Sword, things seem quiet, almost peaceful. That is, until the six Decayed Guardians lined up along the walls begin to awaken and set their laser sights on Link. Dealing with the first one is easy enough, but the room then ups the ante by having two of the Guardians activate at once, followed by a particularly hair raising encounter when three different Guardians triple team Link. If you’re a master at the shield deflection technique, this is a room where you can preserve a lot of arrows and weapons by smacking laser blasts back at the Decayed Guardians. That’s much easier said than done, of course, when said laser blasts are coming at you from multiple angles. For most players, it’s an exercise in frantically scampering between trees to use for cover, and then having to “Hulk smash” your way to victory up close and personal with the beam-spewing sentries.
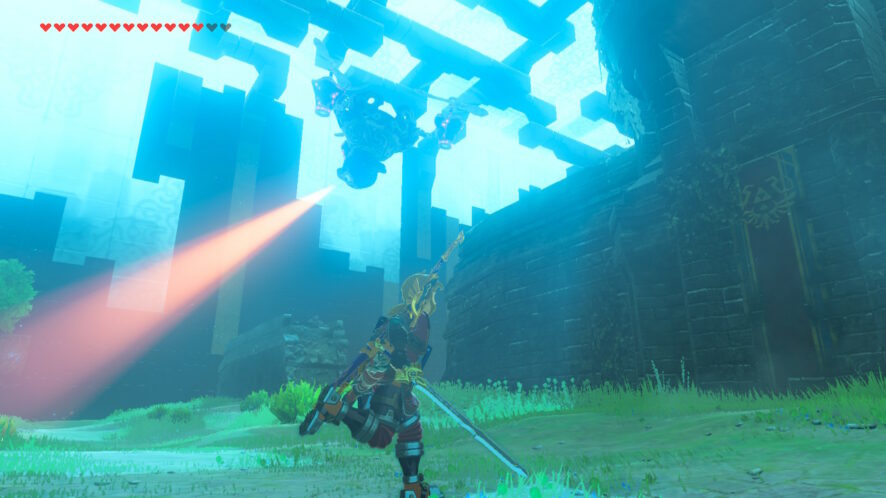
4. Final Trials Floor 22
Breath of the Wild’s three most fearsome Guardian types come together in one room to test the player’s capabilities. A Guardian Skywatcher flies overhead, a Guardian Stalker scuttles about nearby, and a Guardian Turret sits high atop a tower, all just waiting to spot Link so they can send a deadly laser beam his way. The huge stone wall that runs across the grassy expanse quickly becomes your best friend, thanks to the little room in the center of it where you can hide from the Guardians, or take a breather and devise your plan of attack. You’ll especially need to think up a good strategy if you’re running low on Ancient Arrows. Taking down each Guardian quickly is the name of the game here, lest you leave yourself wide open for the remaining foes to blast you while your back is turned.
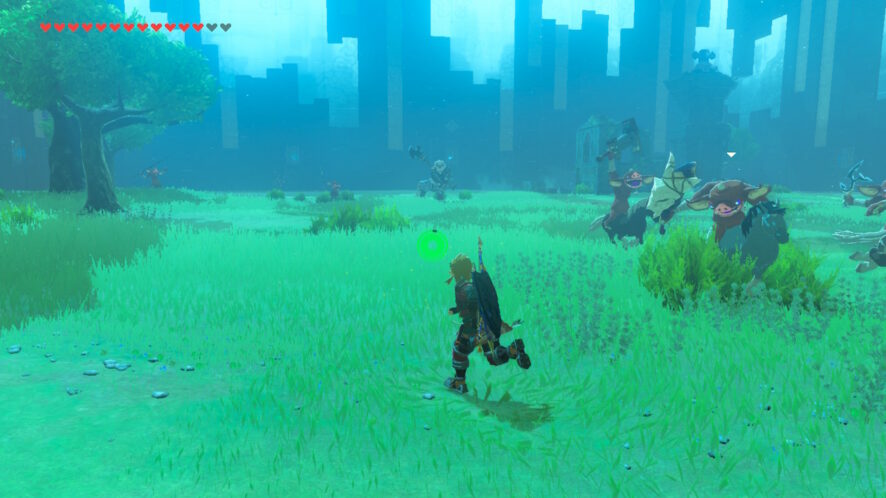
3. Final Trials Floor 23
The last battle in the Trial of the Sword throws a small army at Link, consisting of eight Bokoblins mounted atop horses, a White Maned Lynel (which is upgraded to a Silver Maned Lynel if you’re playing on Master Mode), and a Guardian Turret positioned in the far corner of the room for good measure. Most players probably needed a second to pick their jaws up off the floor the first time they saw that squad of monsters staring them down. That’s just about all the time you get to balk, too, because the moment that Link is in sight, the Bokoblins and Lynel will commence an all-out assault. There’s nowhere to run to and nowhere to hide, so you better come up with something fast to clear out that many enemies at once. If you didn’t happen to grab the Mighty Lynel Bow from the Blue Maned Lynel earlier in the Final Trials, you’re in for a long fight.
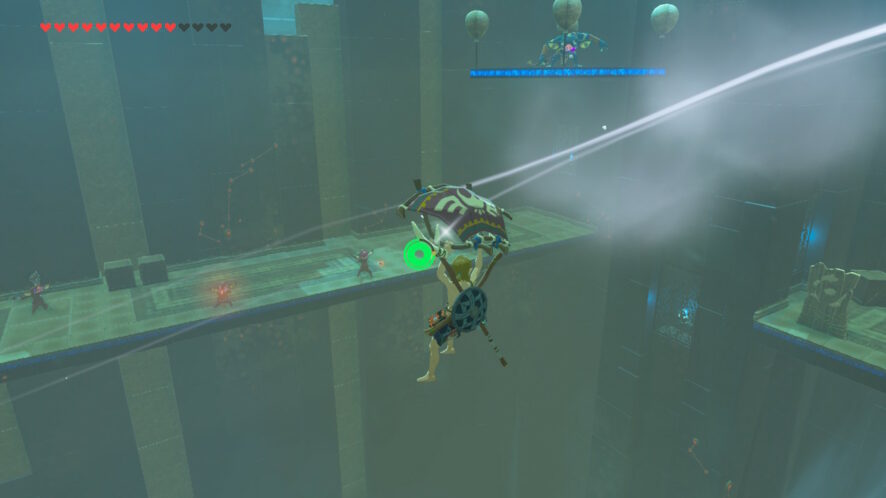
2. Middle Trials Floor 3
The first leg of the Middle Trials adds one heck of a twist to its environments. Constant updrafts flow skyward in each room, allowing Link to go airborne at any moment no matter where he might be standing. That means Remote Bombs, which would have been a saving grace for many players in the Beginning Trials, are fairly useless, but it also means that the slow-down effect becomes more accessible and more effective than ever. Players will need to put it to good use right off the bat in Floor 3 when they suddenly find themselves in a showdown against seven Bokoblin archers. These Bokoblins aren’t just packing normal arrows, either. They’ll be launching Ice Arrows, Shock Arrows, and even Bomb Arrows. It has all the makings for the most chaotic, exhilarating shootout that you can possibly find in The Legend of Zelda.
1. The Sword Monk’s Shrine
For all of the challenging and thrilling battles that the Trial of the Sword plays host to, its most memorable level is the floor at the end of every section, where the newly-empowered Master Sword waits to be drawn. The massive rotunda is a magnificent bit of Sheikah architecture, with platforms and stairways hovering above the depthless void. A depiction of Hyrule’s landscape is inlaid over the walls with that familiar, blue glow of Sheikah technology, portraying iconic sights like the Great Deku Tree, Death Mountain, the Dueling Peaks, and the Divine Beasts. Once you have finally overcome all battles in the Trial of the Sword, you are able to meet with seven Sheikah Monks who will grant you the fully powered Master Sword. In what is one of the coolest Easter Eggs from any Legend of Zelda game, each monk sits while making a hand gesture that mirrors the same gestures made by the Sages during the climatic scene in Ocarina of Time where Ganondorf is sealed away.
Jeffrey Pawlak
Jeffrey Pawlak is the Features Director for Zelda Universe, and has been a member of the website's community for more than 20 years. He is also a high fantasy author and an aspiring comic book artist.


")

