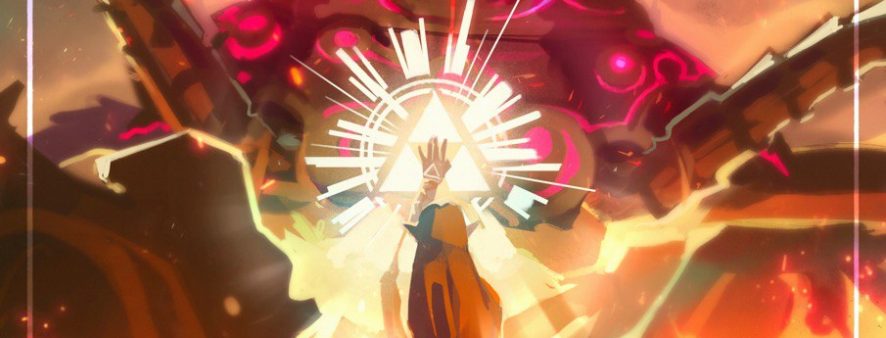
Throughout Breath of the Wild, Zelda finds herself being emotionally beaten down by her repeated attempts to access her sealing power. She spends hours traveling to the various holy springs, praying to the goddess, and listening to the disparaging comments of her father when she returns each day with the news of another failed attempt. Seeing all of these emotions swirling around Zelda throughout all of the game’s memories makes the one where she unlocks her magic so memorable. With her hand outstretched to hold back the guardians, Zelda’s sacred power bursts forth, banishing not just the malice manipulating the encroaching guardians but also the weight of her past failure.
From the moment we first view InkeyJay’s fantastic Breath of the Wild art piece, multiple artistic methods draw our eyes to Zelda. First, she is the figure most in the center of the piece, placing her in a position of prominence in the image. InkeyJay also uses the bright colors of the princess’s white dress and the light of the sealing power emanating from her hand to bring our eye to Zelda as well. The design of the Triforce and the way that rays of light shoot out of it creates a bullseye effect, drawing our eyes straight toward Zelda.
Another interesting detail about Zelda and the Triforce is how the sacred triangle is repeated. It appears in front of Zelda’s hand as well as in a more simplified triangle on her hand. Not only that but the rays of light shining from the holy artifact almost seem to form a third, larger triangle with the Triforce as the tip with the sides slanting down on either side of Zelda. The fact that the Triforce appears three times is very symbolic and imparts a greater weight to this moment and Zelda’s place in it. It’s significant in that it also appears first beneath the princess’s hand brings to mind the way that we’ve seen others wish on the Triforce in A Link to the Past and The Wind Waker. The way that it sits on the back of her hand is similar to how we’ve seen it in many games throughout the series as well as in Breath of the Wild. The largest, more vague, triangle encloses Zelda, placing her in the center almost as if she’s the door through which the relic’s power flows.
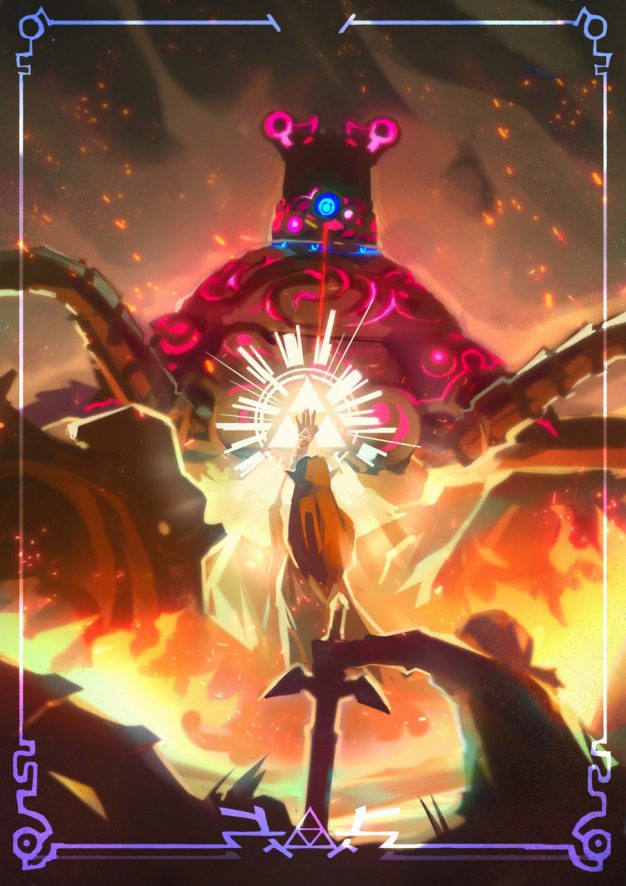
The bright red and orange hues of a wall of fire separates Zelda from the figure of Link, the Hero of Hyrule. The flames keep us from seeing Zelda’s feet, so we know that she stands in front of the hero, protecting her chosen knight. In contrast to the bright light of Zelda, Link is mostly cast into shadow. We see a few colors on his figure, just a little bit of the muted blue of his Champion’s Tunic and the brown of his hair, but for the most part, he is cast in a murky brownish gray. These dark colors seem to imply a shroud, almost as if they were chosen not only because of Link’s position relative to Zelda’s light but because he has suffered such grievous injuries that he is nearing death. The coloring of Link shows us that he is at Death’s door.
Beyond the symbolism of the colors, Link’s placement is also interesting because he is the figure closest to us. This creates a connection between us and him similar to that shared in the game. We are linked, so when Zelda is saving the hero, she is also saving us, the audience.
There are two other important figures in the painting. One that is apparent, looming over the action, and one that is in a more subdued role. The guardian’s tentacled mass dominates the upper half of the piece. It looms over the knight and the princess threateningly. Beyond the large amount of artistic acreage it takes up, the other interesting thing about its placement is that it’s off-center. Using the border as a guide, the guardian’s head is tilted to the side. The slanted position of the guardian along with the familiar pink glow of malice clues the viewer in to the fact that something is wrong with it. It’s tainted by Calamity Ganon’s evil influence.
Just as the guardian’s diagonal positioning hints of something wrong so does the Master Sword’s. It also lies nearly in the center, but it rests off-kilter. It also shares Link’s dark coloring, almost as if it mirrors his wounds. The sword lays at a steep diagonal, serving more as a crutch than a weapon. Both the hero and the sword are wounded and as much as they wish to continue to protect the princess, at this moment, it is they who need protection.
That final piece that we haven’t discussed is the border. It surrounds the piece, wrapping it in a glowing blue bow reminiscent of the power of the Sheikah Slate. The pattern of circles and angles found at each corner also hints at a connection to the mysterious tribe of the Shadow Folk. In the lower center, a position similar to Zelda’s, the border forms the crest of the kingdom of Hyrule, tying the two together.
InkeyJay’s masterful use of techniques invites us into a conversation about this pivotal moment in Breath of the Wild. The use of color and positioning emphasizes the role reversal between Zelda and Link that is also apparent in the game. While Link is the protecting knight, here he is the one who needs help, and Zelda is the protector. She saves the friend she loves, she saves the Sword that Seals the Darkness, and she saves herself. She is not the failure she has been told she was. She is not the failure that her brain told her she was when she was praying alone in vain. She only needed to find her own path, to find herself and what was important to her to unlock the sealing power within herself. The power lay in her center all along.