


Chapter 8: The Isles of Songs
Table of Contents
Preparation in Skyloft
When you’ve finished the cutscene at the Temple of Time, you can explore the Temple area a bit, where you can find a handful of treasure and bugs. When you’re done, head back to the Sky via the Bird Statue. Now that we have the Gust Bellows and have completed the third dungeon, there are a few new sidequests we can do in Skyloft and a few items we can buy. You don’t have to do these, though, and if you want to progress further into the game, jump ahead to the next section.
Now that we have the Gust Bellows, there’s a new – and fun – sidequest we can do in Skyloft. It takes place at Pipit’s house, which can be found in the east part of Skyloft, just over the bridge. You’ll notice that the house is in . . . pretty disgusting condition, and Pipit’s mother, Mallara, will ask you to clean it for her – she’ll even pay you. With the Gust Bellows, this task will be pretty easy and quick.


Equip your Gust Bellows and start working away at the dirt. You’ll have to get all the dirt that’s on the floor and the furniture. Mallara will automatically let you know when you’ve cleaned every part of the house.
When you’ve cleaned it all up, Mallara will thank you with a red rupee. You will also receive 5 Gratitude Crystals – you should now have a total of 30 crystals.
Now that we have 30 Gratitude Crystals (if you don’t have 30, you can check the Gratitude Crystals Guide for earlier crystals in the game), we can head back to Batreaux to get our next reward. It no longer requires to be nighttime to speak with him, so head over to his house and speak to him to get a reward for collecting 30 crystals – a Big Wallet, which will allow Link to carry 1,000 Rupees. With the 3 additional wallets we got earlier in the game, we can now carry up to 1,900 rupees.
A treasure chest will appear in Batreaux’s house after speaking with him and – after much arguing against it – you can open it to get a Cursed Medal.
Head over to the Bazaar and go to the Item Bank Teller. She’s actually starting to warm up to you because of your constant visiting. Make any trades you need to do; mostly, you’ll have to drop off that Cursed Medal, as you really won’t need it, especially if you have the Treasure Medal already.
There’s one more sidequest we can start before heading to our next destination. And it’s a sidequest concerning Fledge. When you talk to him outside of the Knight Academy, he will mention that he has started training at night to become stronger. If you go to his bedroom at night, you will find him doing workouts, including push-ups. He tells Link that he’s trying to work out but he gets tired too quickly and wishes that there was a potion that could give him energy. Well, there just so conveniently happens to be a potion for that, and we can get it at the Bazaar.
Go back to sleep until daytime and head to the Bazaar’s Potion Shop. The Stamina Potion is only available after completing the Lanayru Mining Facility, so that’s why we haven’t done it yet up until now. A Stamina Potion costs 50 rupees, and you’ll need a bottle to store it in. It’s recommended that you actually buy a second potion – we’ll need the second for the rest of this side quest.
Go back to see Fledge in his room at nighttime and give him the Stamina Potion by talking to him. He’ll drink the potion and then continue his routine. You can speak to him again at night and during the day and he will say that he is going to continue his training. We can’t complete the rest of this sidequest until we get further into the game, so let’s leave Fledge until later.
Before we head out, let’s go visit Beedle’s Airshop. If you’ve been collecting the rupees in the dungeons that I covered throughout the guide then you should have at least 600 rupees. We should purchase the next upgrade for our Adventure Pouch while we’re here.
He will currently have these items for sale:
- Bug Medal – 1,000 Rupees
- Piece of Heart – 800 Rupees
- Adventure Pouch Upgrade – 600 Rupees
The Imprisoned – Round 1
When you have finished everything you need to do in Skyloft, jump off a nearby pier onto your bird and head towards the Faron region. After jumping off your bird to dive down, an unexpected surprise will start chasing you from behind – Groose. A cutscene will occur, ending with Groose running off to the Sealed Temple. Before you go after him, go have a chat with Gorko the Goron, who’s inspecting the area. He’ll talk about special ‘walls’ that react to music. This isn’t really relevant right now, but keep note of it as it will come in handy later.
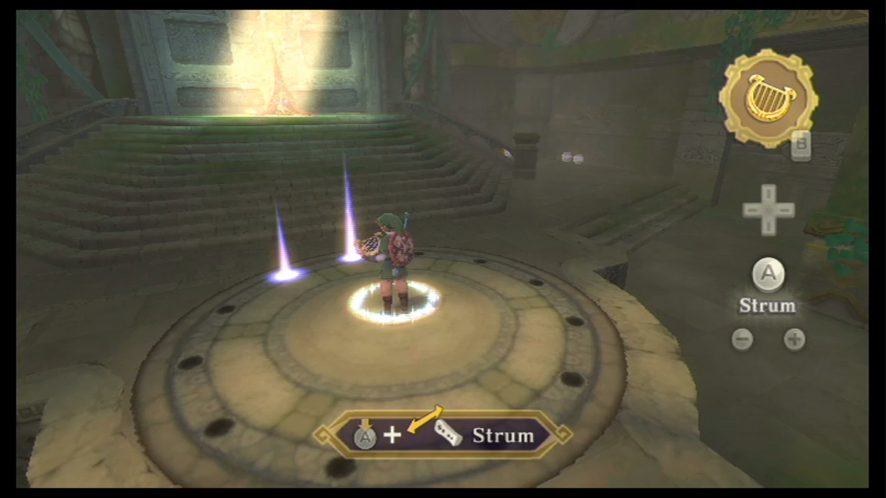
Follow Groose to the Temple and another cutscene will initiate between Link, Groose, and the old woman. You will learn a bit about Impa, the woman who is accompanying Zelda, and the old woman will also teach you how to play the Goddess’ Harp that we received from Zelda back in the Temple of Time. To play the harp, hold down the ‘A’ button to lift the instrument and move the Wiimote to strum the strings. After the short tutorial, the old woman will then teach you how to play the Ballad of the Goddess. The Gate of Time will then appear inside the Temple.
Another cutscene will occur in which a loud noise interrupts the old woman. Leave the Sealed Temple and make your way to the lowest level of the Grounds. A giant monster known as “The Imprisoned” will emerge out of the ground, taking the stone spike with it, which appears to be attached to his head. You will now be thrust into a boss battle with the Imprisoned.

The Imprisoned will start making his way up the winding path that leads to the Sealed Temple. He has four big white toes on each foot, with three in front and one in back. You will have to strike these toes with your sword to destroy them. The Imprisoned takes rather large steps that are quite easy to avoid. He will also release a red shock with each step that covers a certain amount of area around his feet, so watch out for that when he brings his foot down. Slash away at his toes until they’re all gone; once you’ve gotten rid of them, he will fall to the ground.


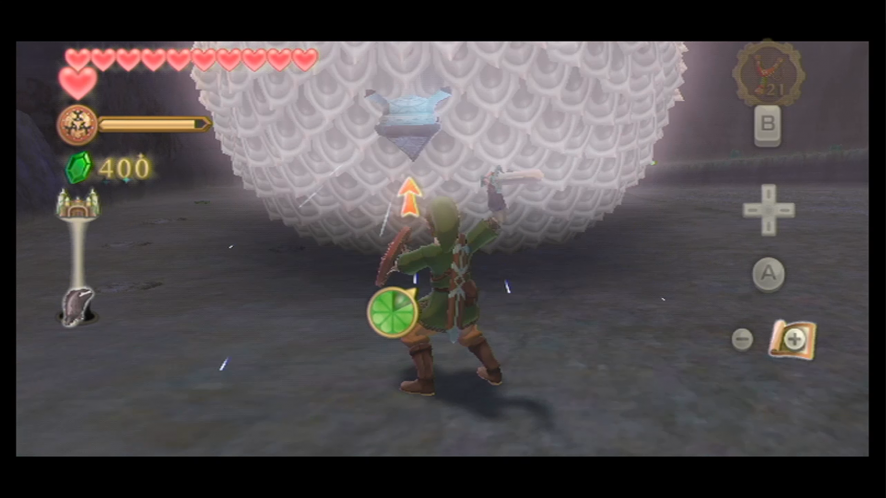
Quickly run to the front of the monster and strike the spike that’s embedded in his head. You have to strike it from below so that the spike cuts in deeper into the Imprisoned’s head.
You’ll have to deliver nine strikes to the spike in the Imprisoned’s head before it will be defeated, so you’ll have to do this process at least two more times. The Imprisoned will soon start to release a red charge each time it stomps its foot, so be wary of it and go in for a strike after it’s placed its foot. Once you’ve struck the spike enough times, you’ll have to perform the final sealing by using a Skyward Strike on the spike and doing a certain directional move that’s instructed onscreen. When you’ve finished this, the seal will have been restored . . . but only for a little while.
Another cutscene will occur, and the old woman will tell you that you need to find the three sacred flames to restore power to your sword. After the cutscene, leave the Temple through the eastern door and head over to the Bird Statue.
However, before you leave, go talk to Gorko again. Apparently, the spot he’s inspecting attracts Blessed Butterflies. Walk over to where the butterflies are and play your Goddess’ Harp. A talking Sheikah Stone will pop up from the ground. After you’re done with Gorko, use the Bird Statue to return to the sky.
The Light Tower
When you land in Skyloft, go directly to the Knight Academy and speak to Headmaster Gaebora, who’s in his office on the second floor. After asking about the lyrics to the song Zelda sang at the Wing Ceremony, Gaebora will give you the lyrics to the first two verses. We also find out something interesting about the Light Tower. You will be given the clue “two whirling sails”. Leave the Knight Academy via the first floor.
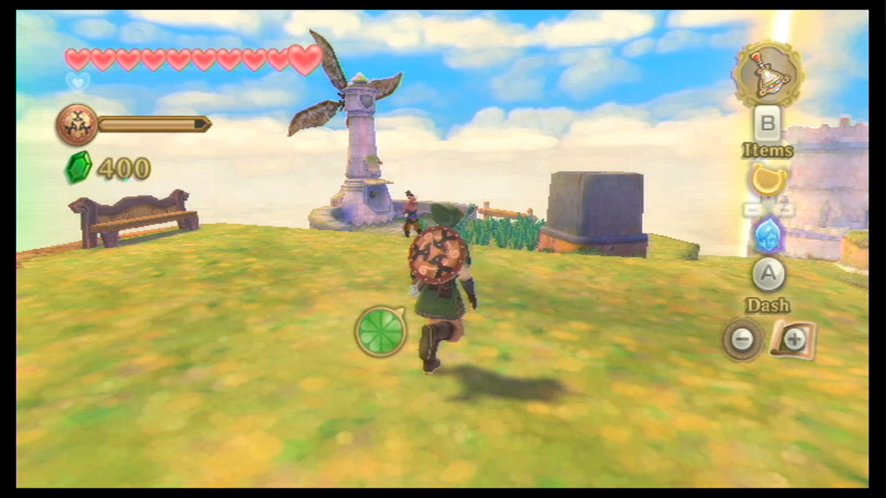
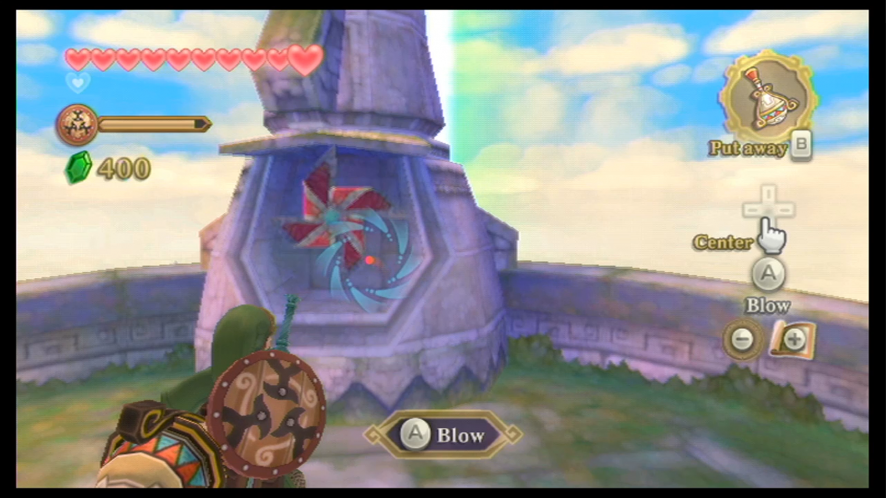
Go through the gate to the right and make your way to the Light Tower. Along the way, you’ll see a windmill to your right. There is a propellor on its backside – use your Gust Bellows to turn the propellor, which will turn the windmill, until it’s facing the Light Tower.
Now we have to go to the second windmill, which is located on the east side of Skyloft. When you arrive you’ll see that it’s actually missing its propeller. Talk to Jakamar, who’s right next to the windmill, and he’ll tell you how the propellor fell off the windmill and down to the land below the clouds – he will then tell you that Gondo at the Scrap Shop used to have a robot that could fly down below and retrieve items.
Head over to the Bazaar and go to Gondo at the Scrap Shop. He will tell you that in order to bring Scrapper the robot to life, he will need an Ancient Flower. If you followed the guide, you should have a few of these from where we picked them up in Lanayru, so give him one. This will bring Scrapper to life.
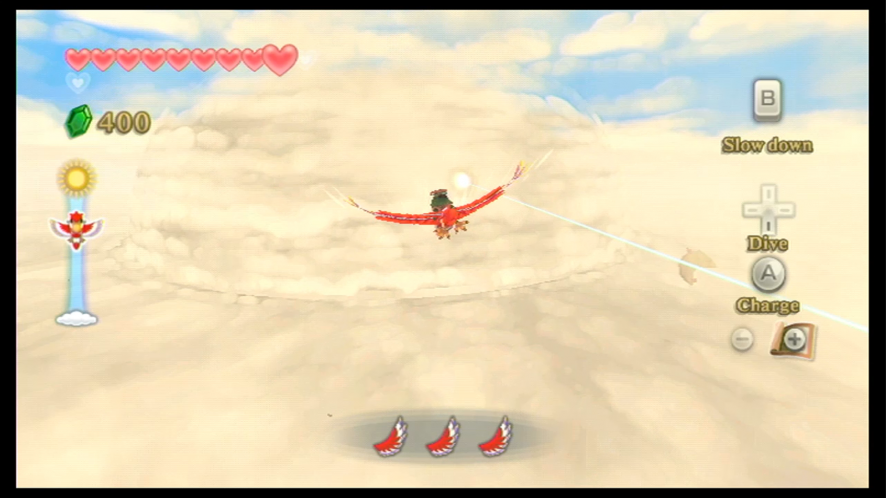
Fi will then register the propeller as one of your dowsing abilities. Scrapper doesn’t really seem to like Link but will agree to do anything that Fi wishes. When you’ve finished at the Scrap Shop, go to the nearest pier and jump onto your Loftwing. Head to the Eldin region.
You’ll want to land at the Bird Statue that’s located by the temple entrance. While using your Dowsing ability, make your way to the west side of the entrance where the sandhill is that leads to the knocked-down tower. Slide down the hill and find the propeller that’s sitting near the structure. After examining it, Fi will call for Scrapper’s assistance and he’ll lift the propeller for you. Head back to the Bird Statue and return to the Sky.

When you get near Skyloft, Link will automatically land near the windmill. Scrapper will then place the propeller into the windmill. Jakamar will then fix it into the windmill’s mechanism.
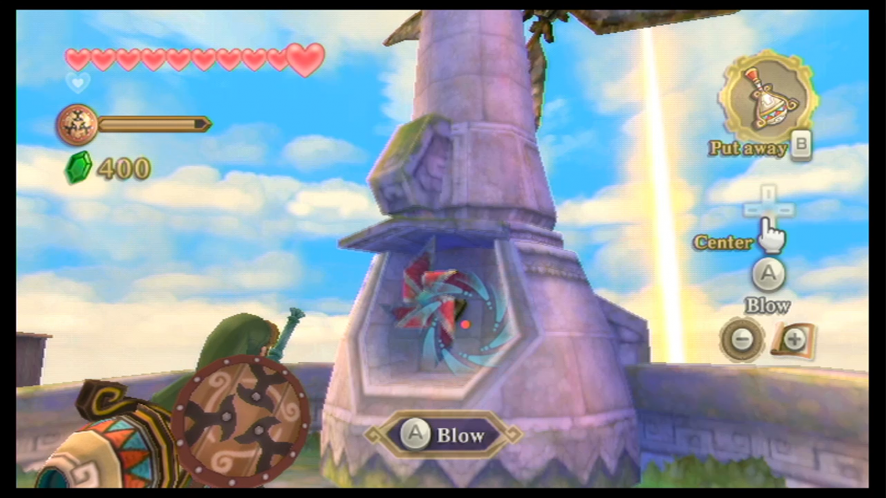
Equip your Gust Bellows and use it to blow the propeller and turn the windmill. Turn it so that – like the other one – it is facing the Light Tower. The top of the Light Tower will expand with both windmills facing it.

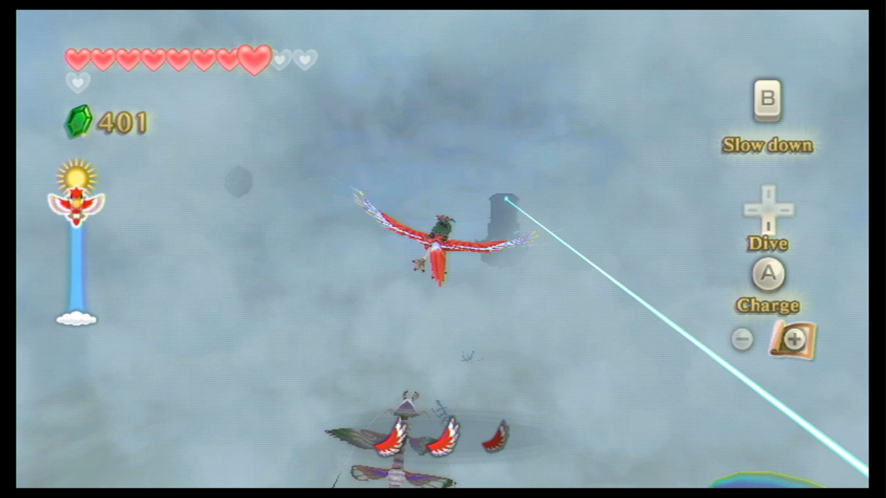
Head over to the Light Tower and climb up the steps to the top. Stand in the center and equip the Goddess’ Harp by pressing up on the control pad on the Wiimote. When you start strumming the harp, a song event will begin. You’ll have to play the harp to match the beat of the circles. When they’ve all lit up, Fi will sing and a light will appear from the Light Tower, pointing out to the northwest corner of the Sky. This light will go straight through to the Thunderhead, a thick wall of clouds that take up the northwest region of the Sky. Afterward, jump onto your Loftwing and follow the blue light.

The Thunderhead
Once you’re inside of the dark cloud, head over to the island where the light is pointing to. Be wary of the fact that there are monsters flying around in this strange part of the Sky. When you land, Fi will inform you that you have landed on the Isle of Songs. You will now have to solve a bit of a tricky puzzle, which – when solved – will help you cross the gap into the tall tower of the island. The stone tablet will tell you that you have to rotate the pedestal in the center to make the bridge.
In the center of the area, there is a bar that you can rotate, which will move the small rectangular blocks in a clockwise direction. You have to line up all three of these blocks so that they make a three-part pathway across the gap leading to the tower. To the left of the rotation mechanism, you will find a structure with crystals inside it. If you slash at any one of these crystals, it will change the barriers – the barriers prevent the blocks from moving on its given path.
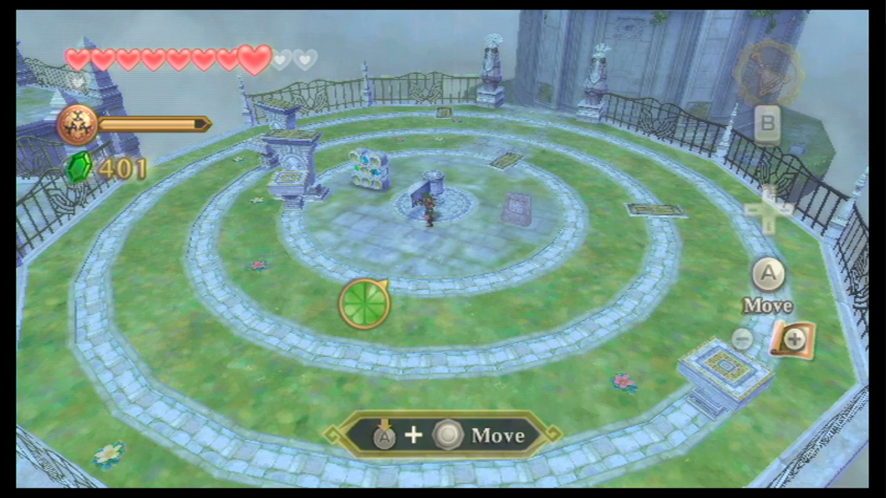

Here is a quick way to line up the bridge:
- Rotate the center block clockwise 7 times
- Hit the crystal on the right to change the barriers
- Rotate the center block clockwise 6 times
- Hit the top crystal to change the barriers
- Rotate the center block clockwise once
- Hit the crystal on the right
- Rotate the blocks 9 times
If you’ve done this all correctly, the bridge should be in place. Continue ahead to the building and crawl through the crawlspace. Run over to the emblem inside and strike it with a Skyward Strike.
A cutscene will initiate, and afterward, you will know a new song called Farore’s Courage, which can be used in the Faron Woods. Fi will also register a ‘gate’ in your dowsing ability, which will lead you to a trial that you must face before getting the first sacred flame.
There are a lot of side quests we can do now that we have defeated The Imprisoned. However, you don’t have to do these sidequests – if you want to go straight ahead to the next area, skip to Chapter 9: Faron Woods – Second Visit.
Side Quests (Optional)
Before we leave the Thunderhead, get Goddess Chest #6.