
Linked Game Hero’s Cave
- 1 Enter Hero’s Cave
- 2 Move some pots onto switches
- 3 Leap through the pothole peril
- 4 Swim to the third portal
- 5 Cross the magnetic void
- 6 Reach the fourth portal
- 7 Solve the ultimate pot puzzle
- 8 Survive the gauntlet
- 9 Solve the old man’s riddle
1 Enter Hero’s Cave
 The Linked Game variant of Hero’s Cave isn’t hard to find. It’s exactly where the Hero’s Cave exists in the normal version of the game. However, the Linked Game variation is much harder to get through with extra tricky puzzles and a slew of late-game enemies in the back half of the dungeon. To get through this cave, you will need all of the dungeon items up through Zora’s Cape in the Level Seven.
To get there, simply exit out the west end of Horon Village. Immediately on the next screen, jump down off of the cliff to go south a screen. There you’ll find the entrance to the Hero’s Cave. If you want to skip the first room — which merely houses an old man at the front — you can cut the bush down and fall into the well next to it. Otherwise, head around the cliff, enter the cave, and pass through the first room.
You’ll need the Zora’s Cape from Level Seven to finish the Linked Game Hero’s Cave.
2 Move some pots onto switches
The first three “real” rooms are somewhat complicated puzzles. Each involves pushing a series of pots onto some switches, and all of the switches need to be held down for the passageways forward to open. If you ever mess up, simply retreat a room and re-enter to get a second chance.
Before trying to tackle the pottery in the first room, do your best to clear out some of the Keese. They’ll just get in the way, and you might want to conserve a few hearts for later in the dungeon as there aren’t that many health pickups in this dungeon. Once you have mostly a clear shot, you’ll need to do the following:
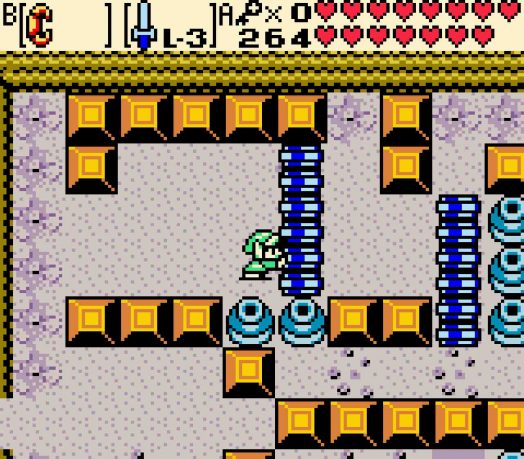
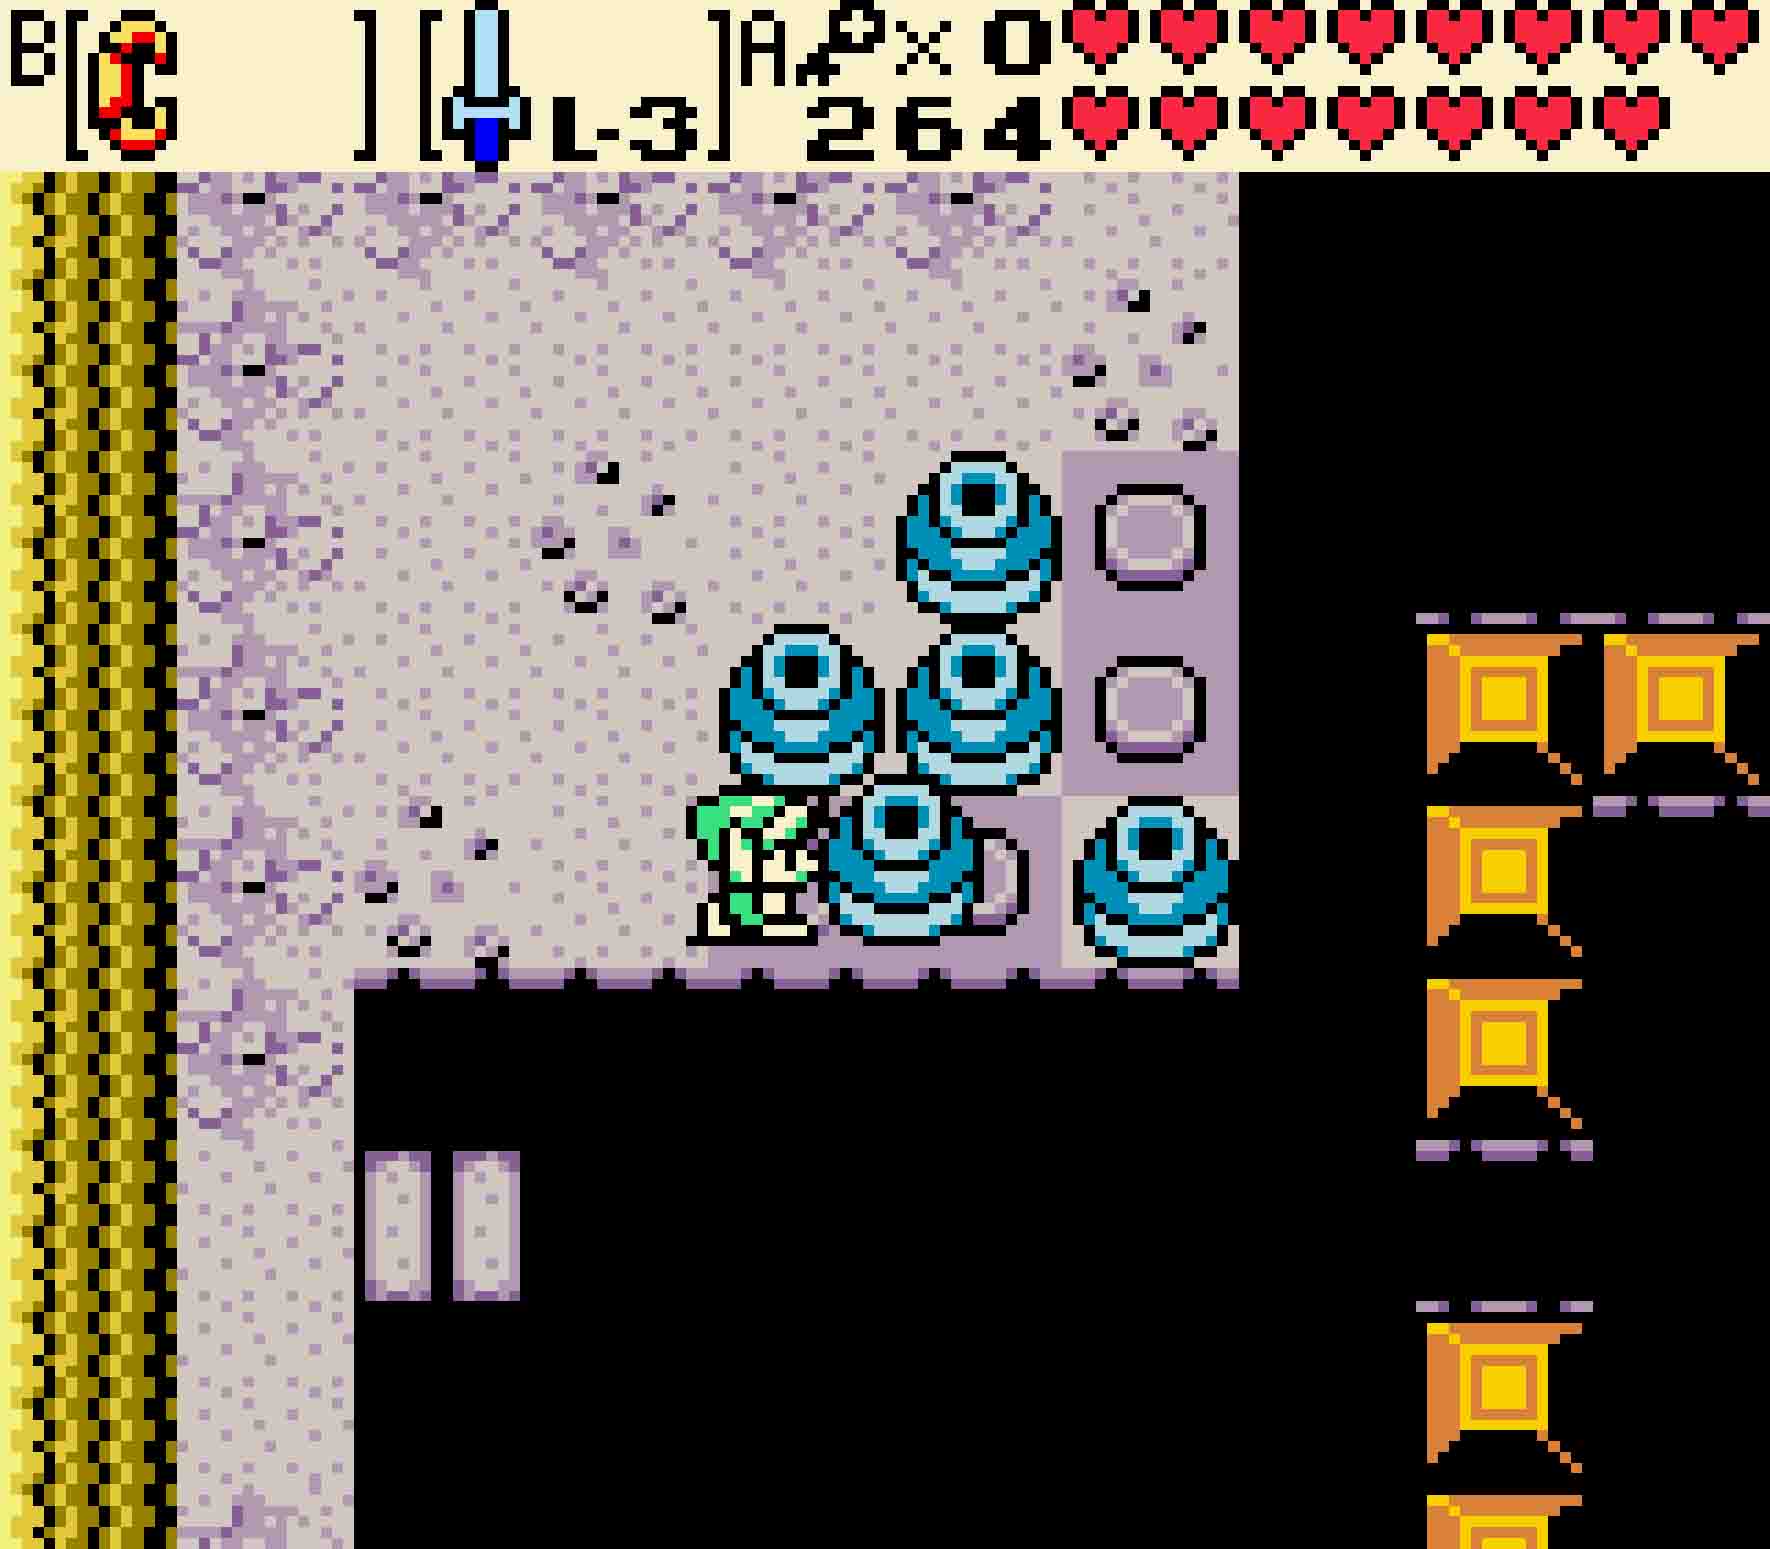
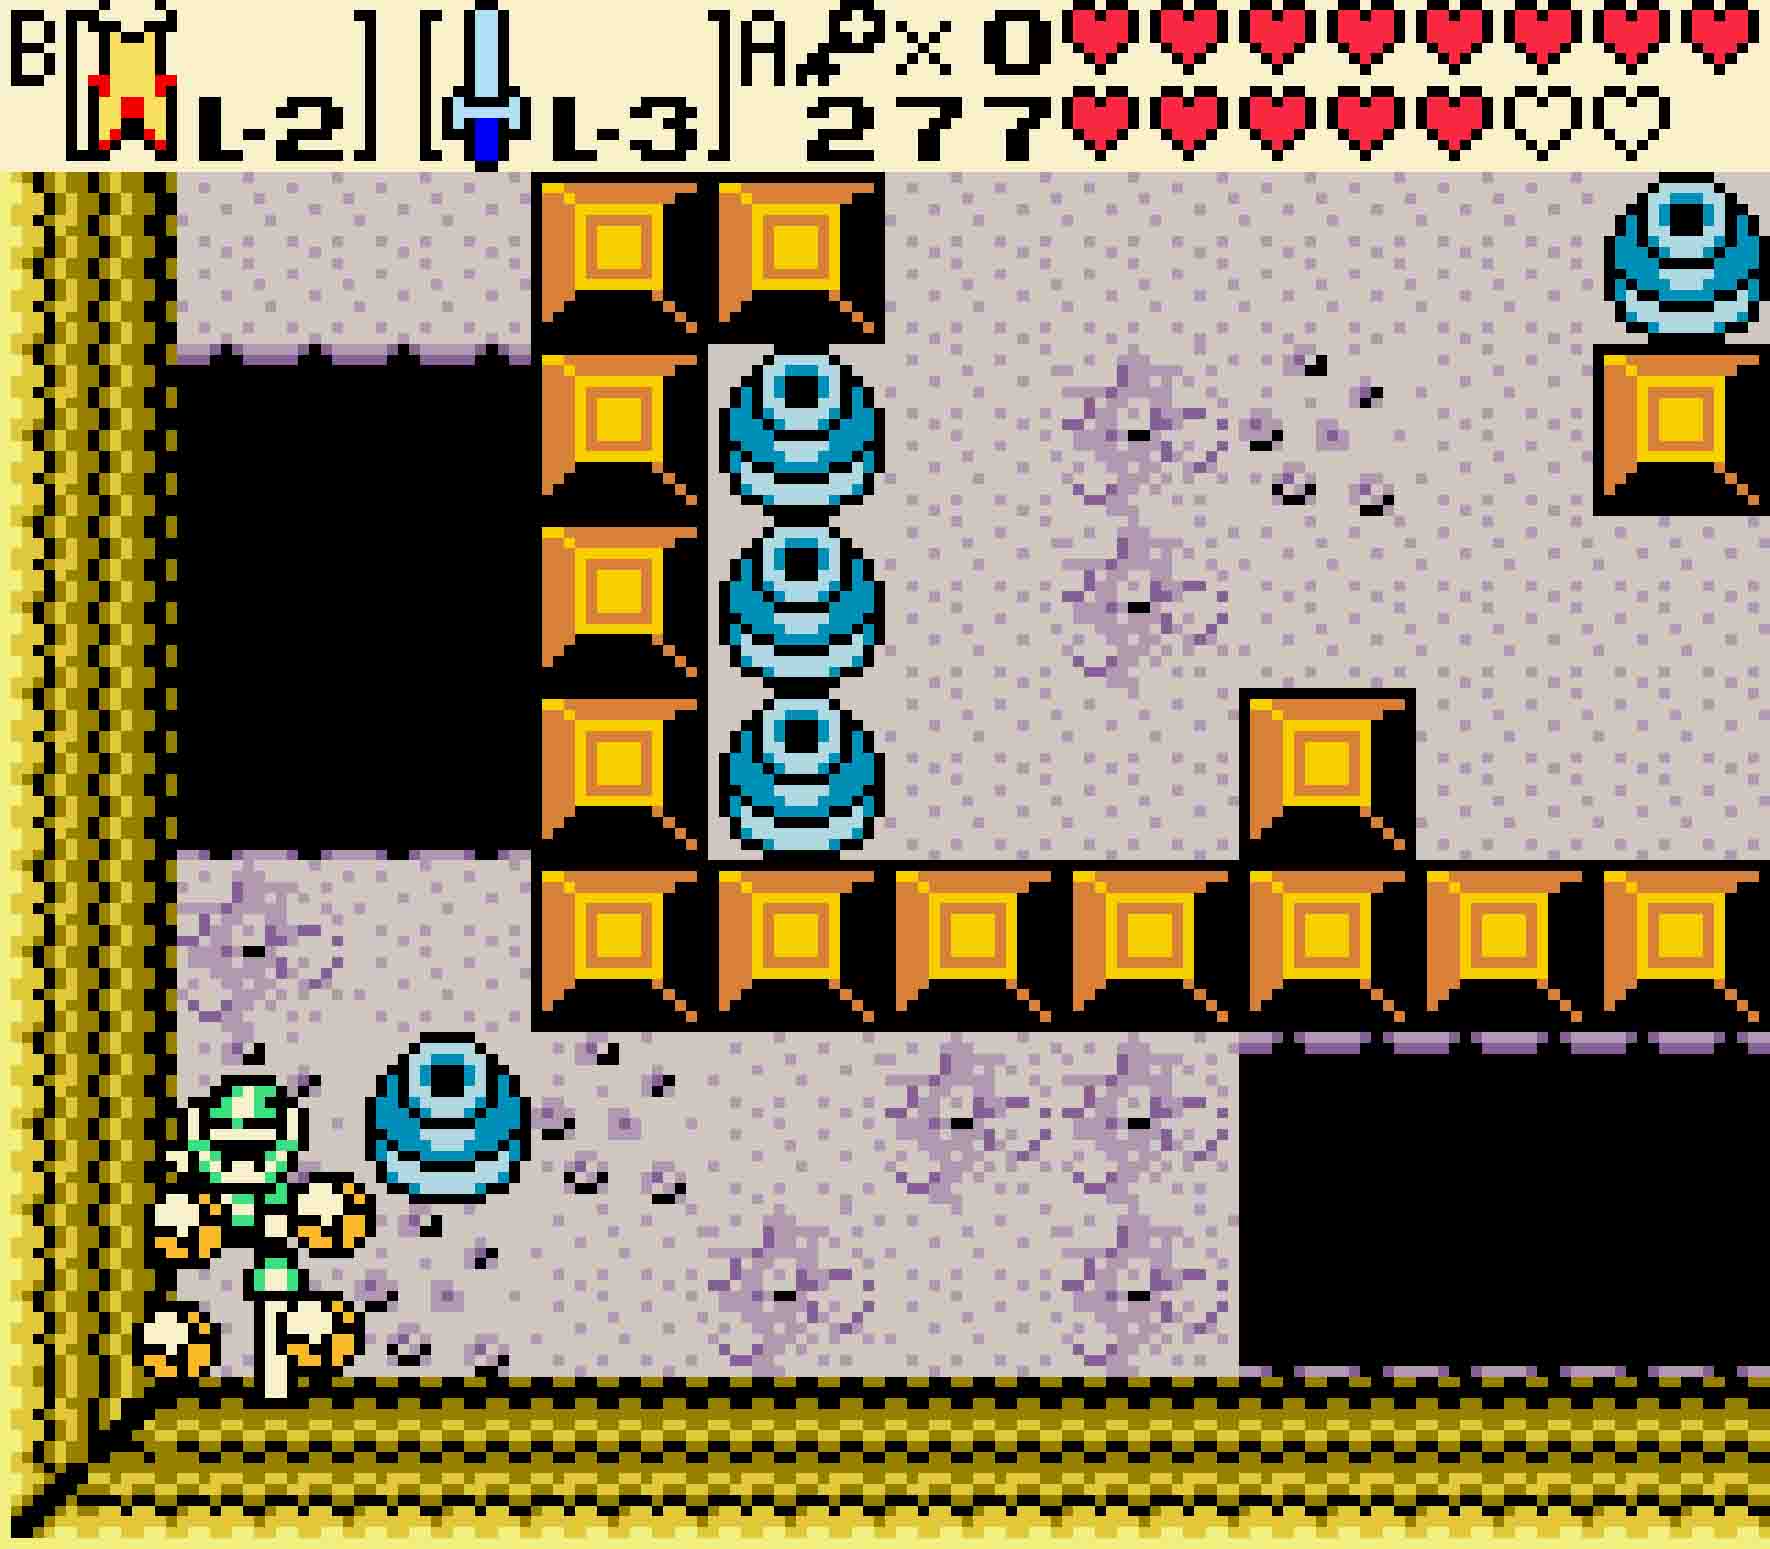
Holding down the first two switches
Step One Clear out — either throwing them with the Power Glove or breaking them with an upgraded sword — all of the pots in the first column.
Step Two In the horizontal row, break all of the pots except for the last one. You will want to push that pot one square to the right to escape the narrow corridor.
Step Three There’s one more string of pots leftover. Enter the pathway and start breaking pots…

Step Four But leave the last one (the middle one in the vertical group) unbroken. Simply push it to the right. You can then break the one above and below it in that group.
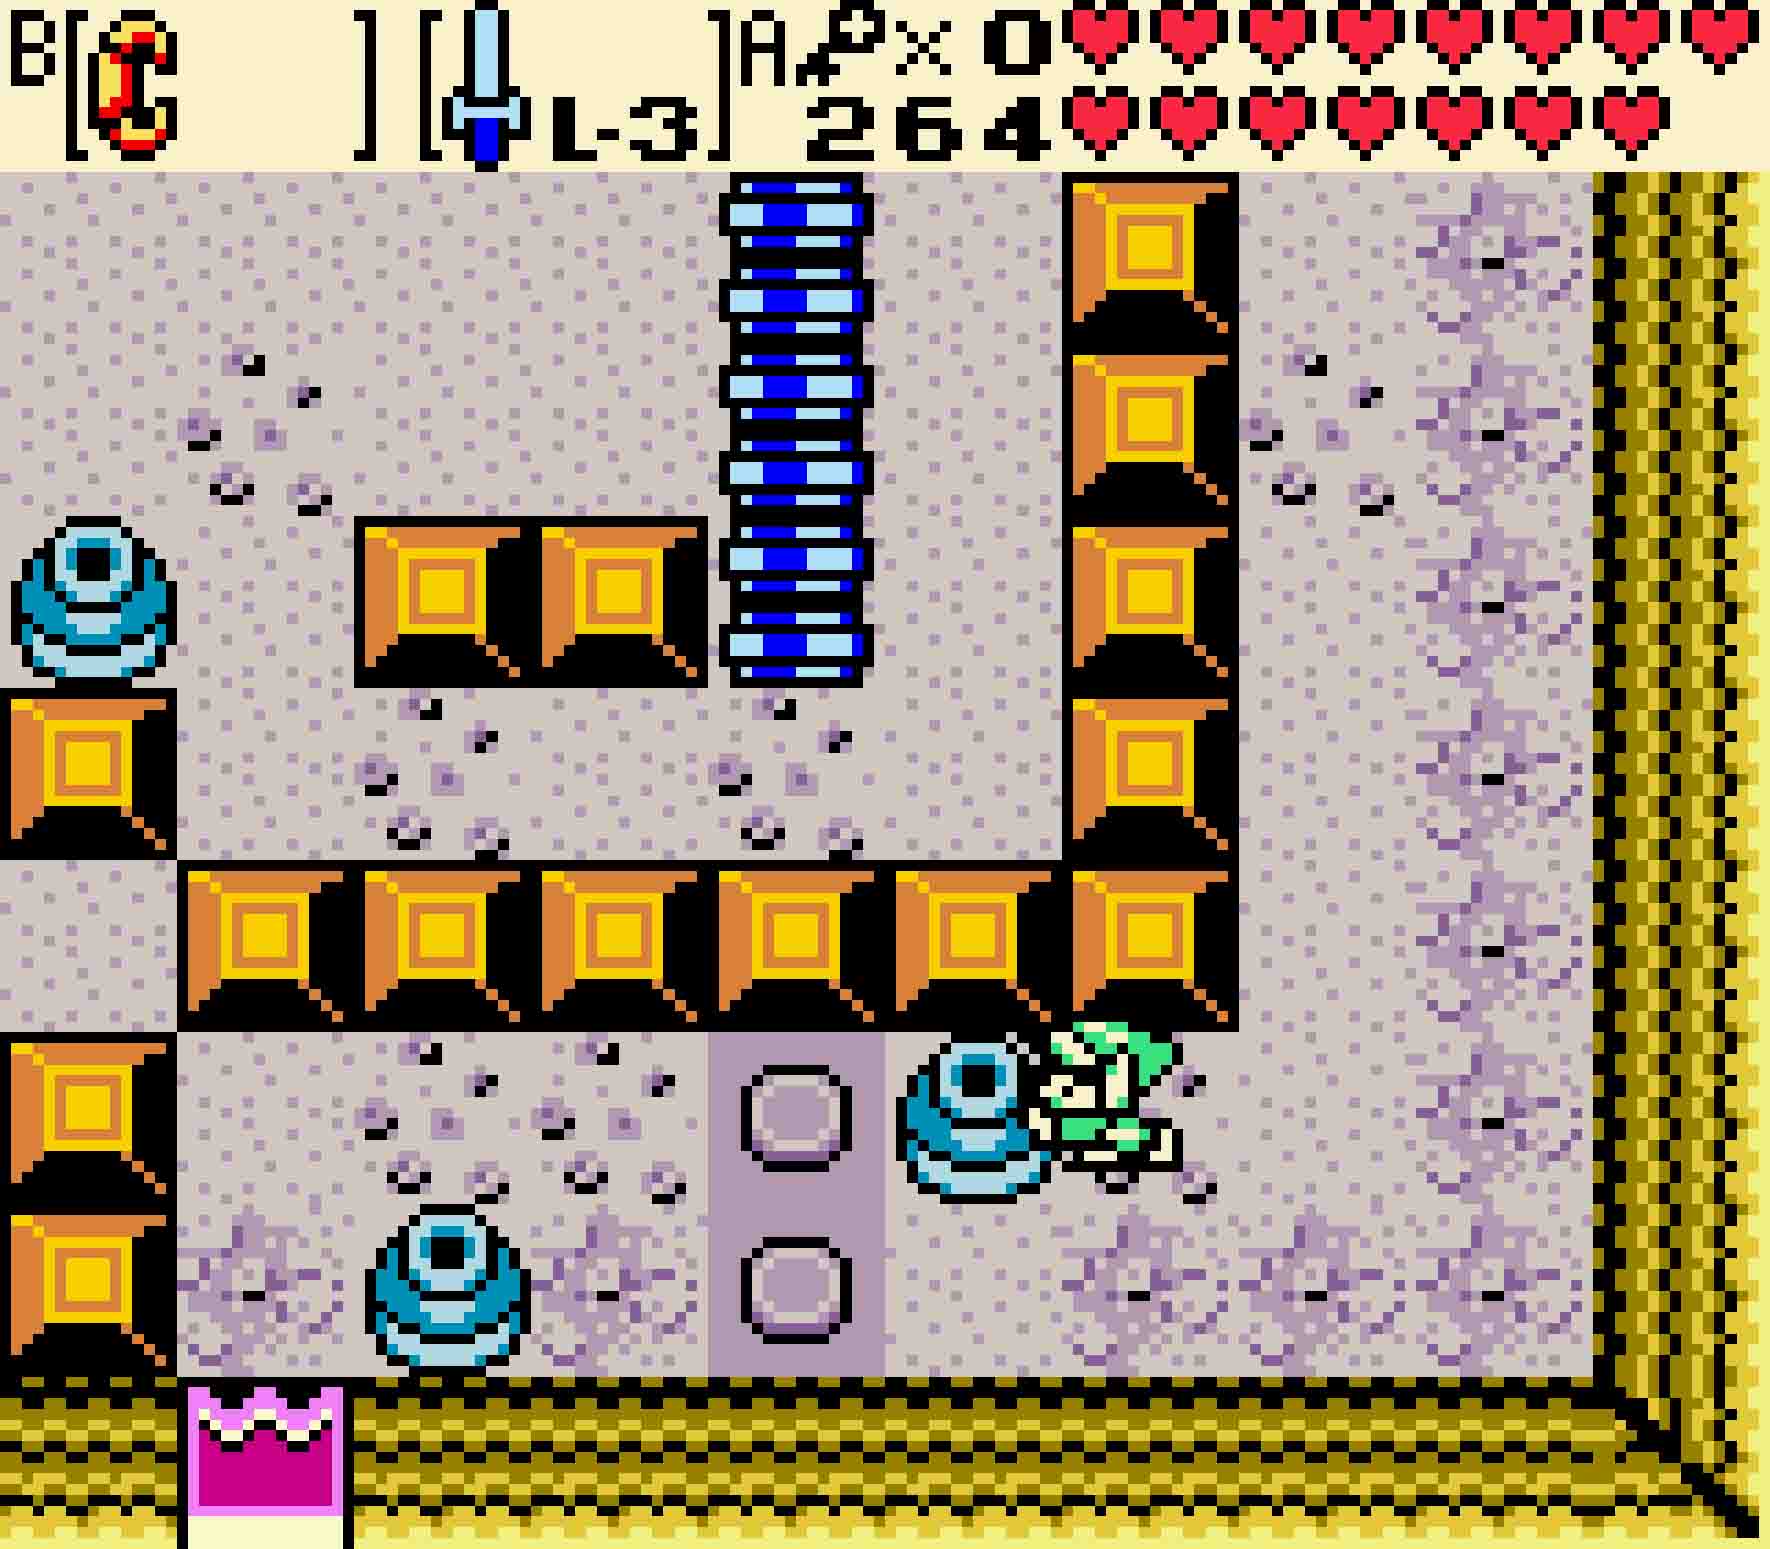
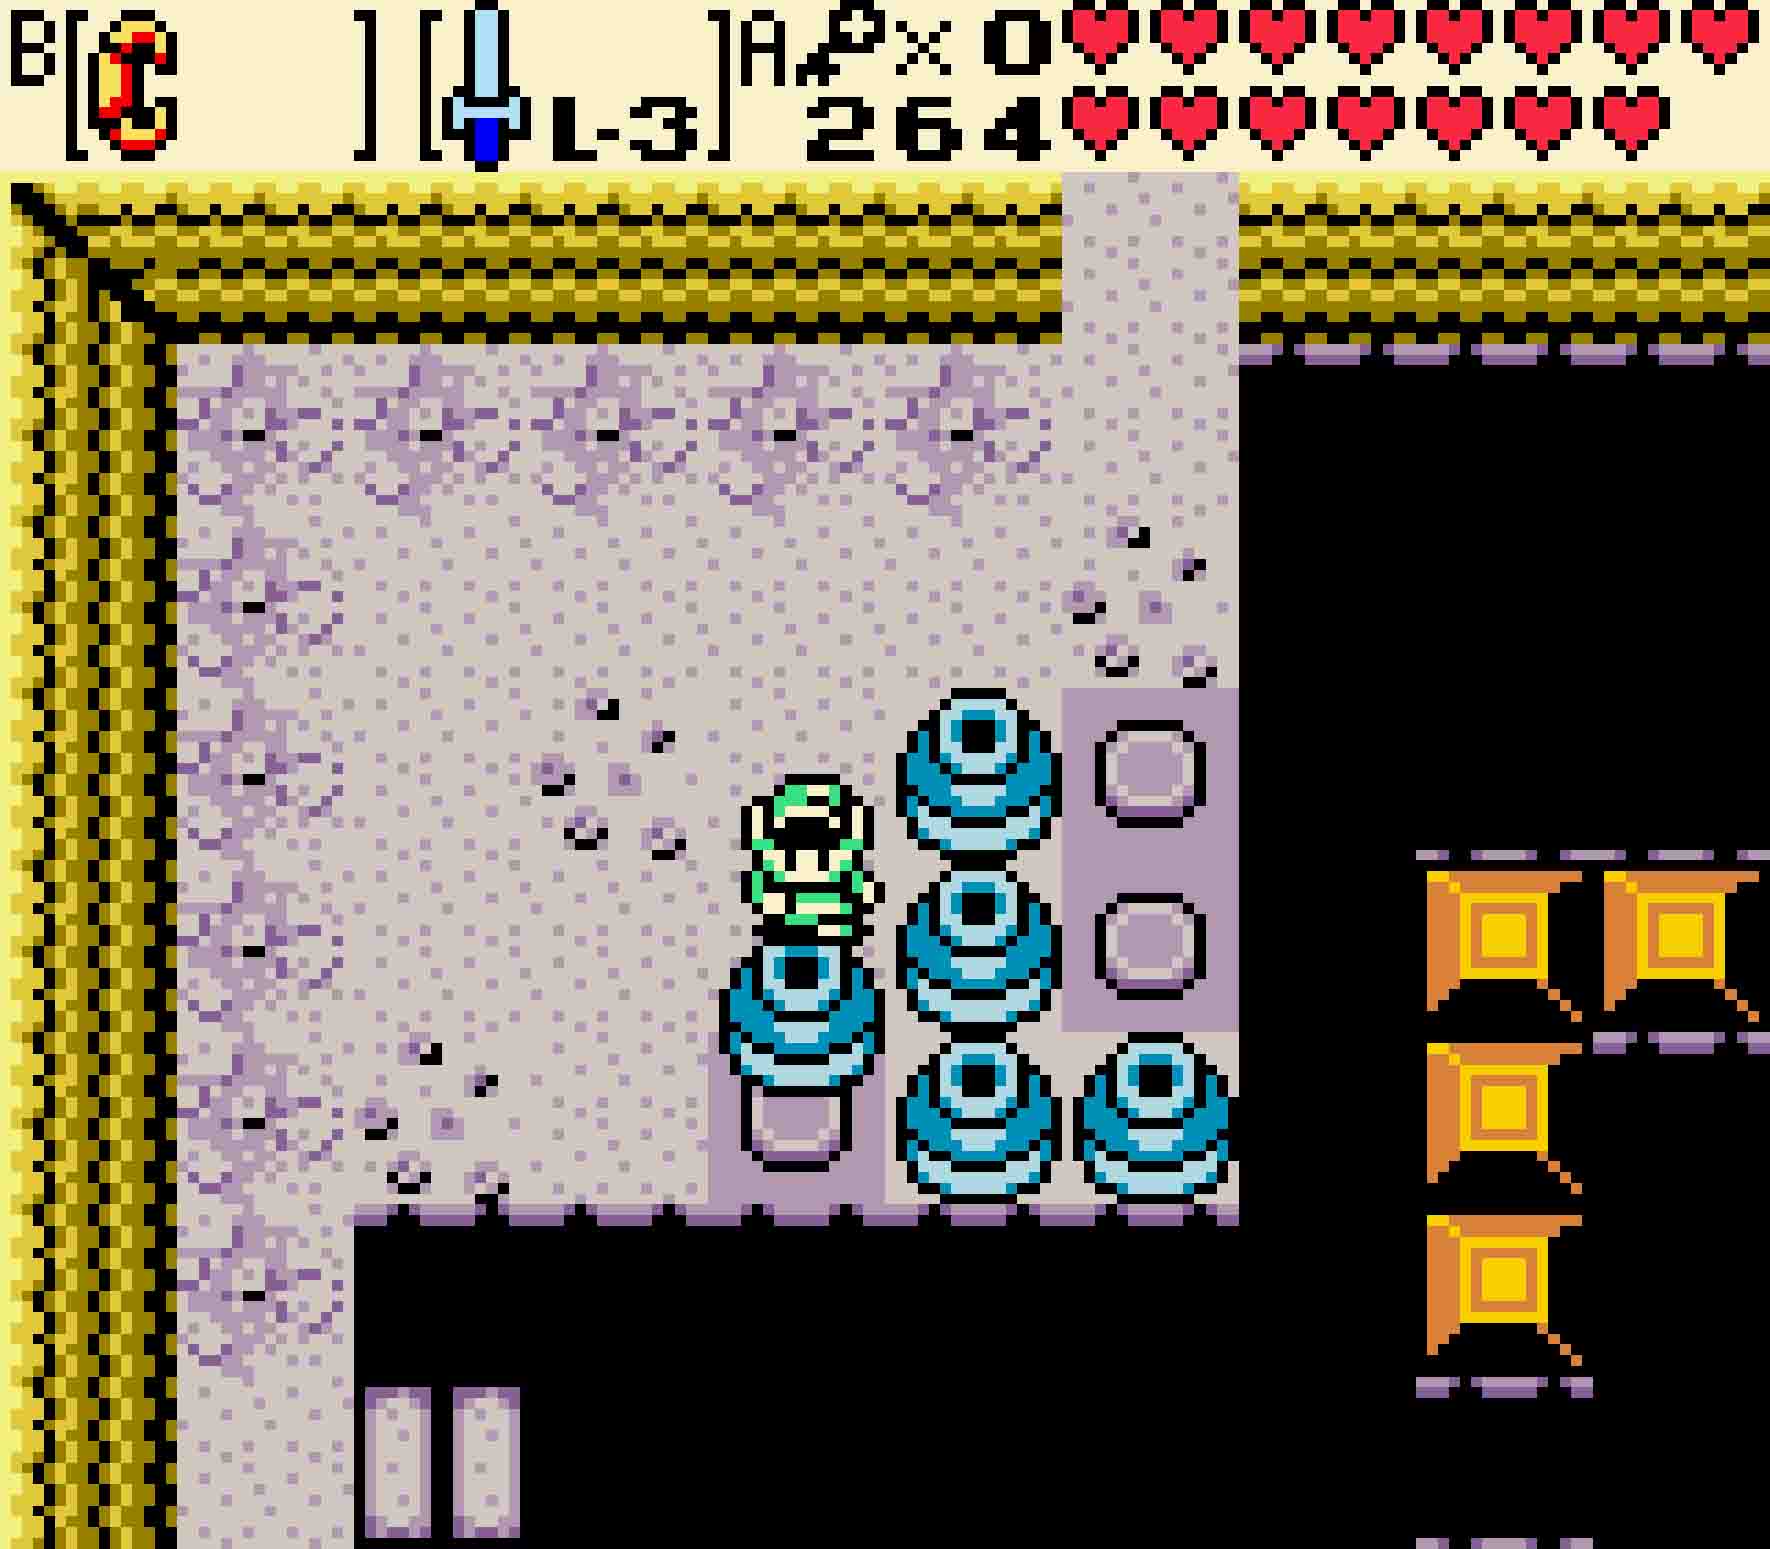
Step Five You should now have two pots left over, and these will eventually depress the two switches. Push the bottom pot onto the bottommost switch.

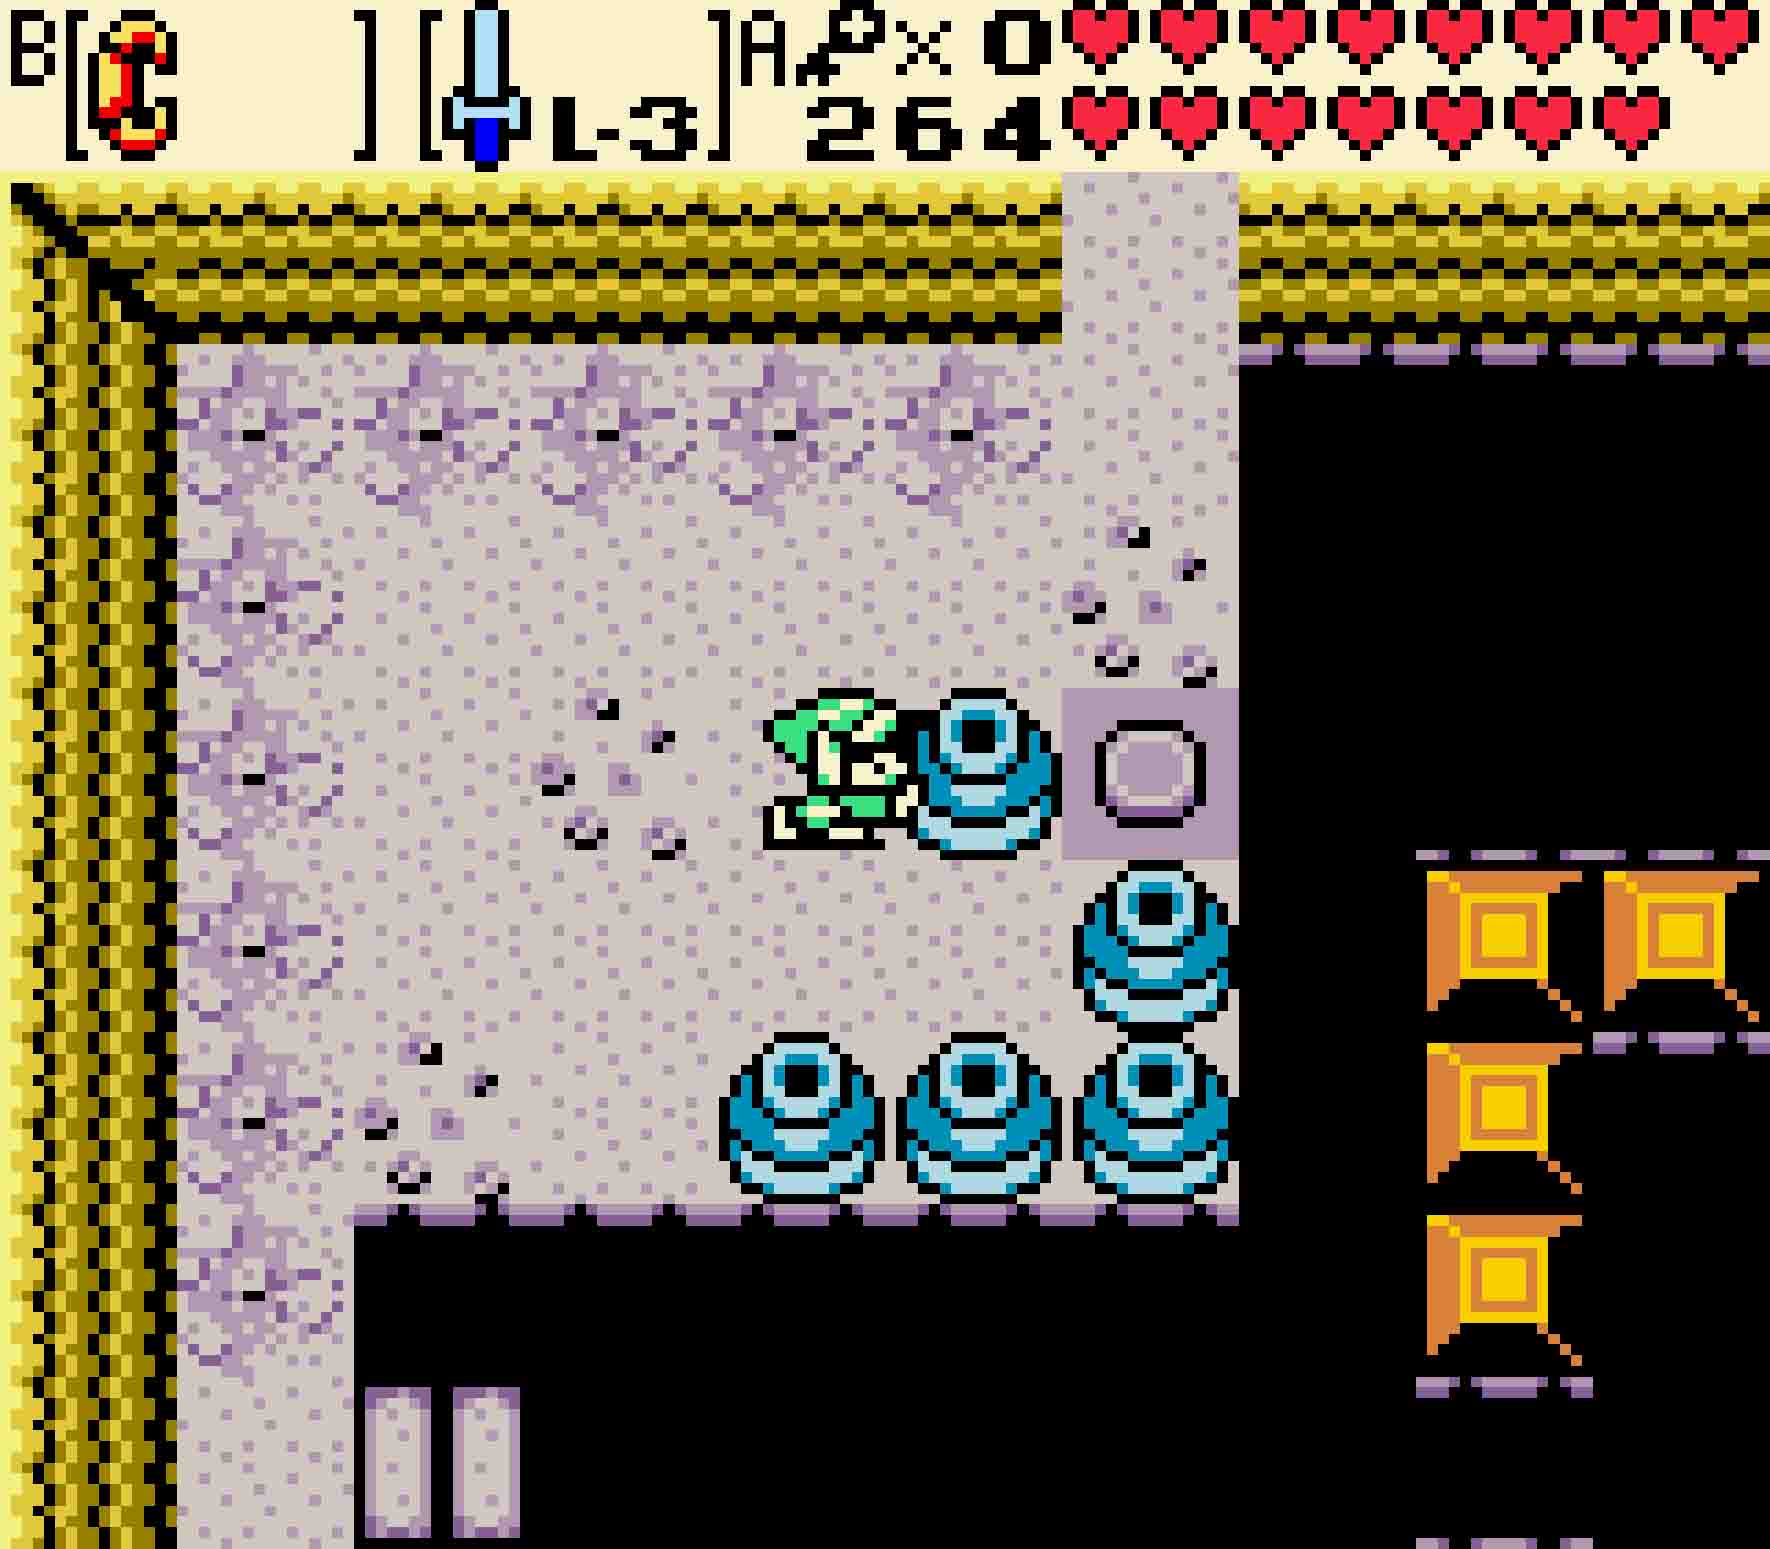
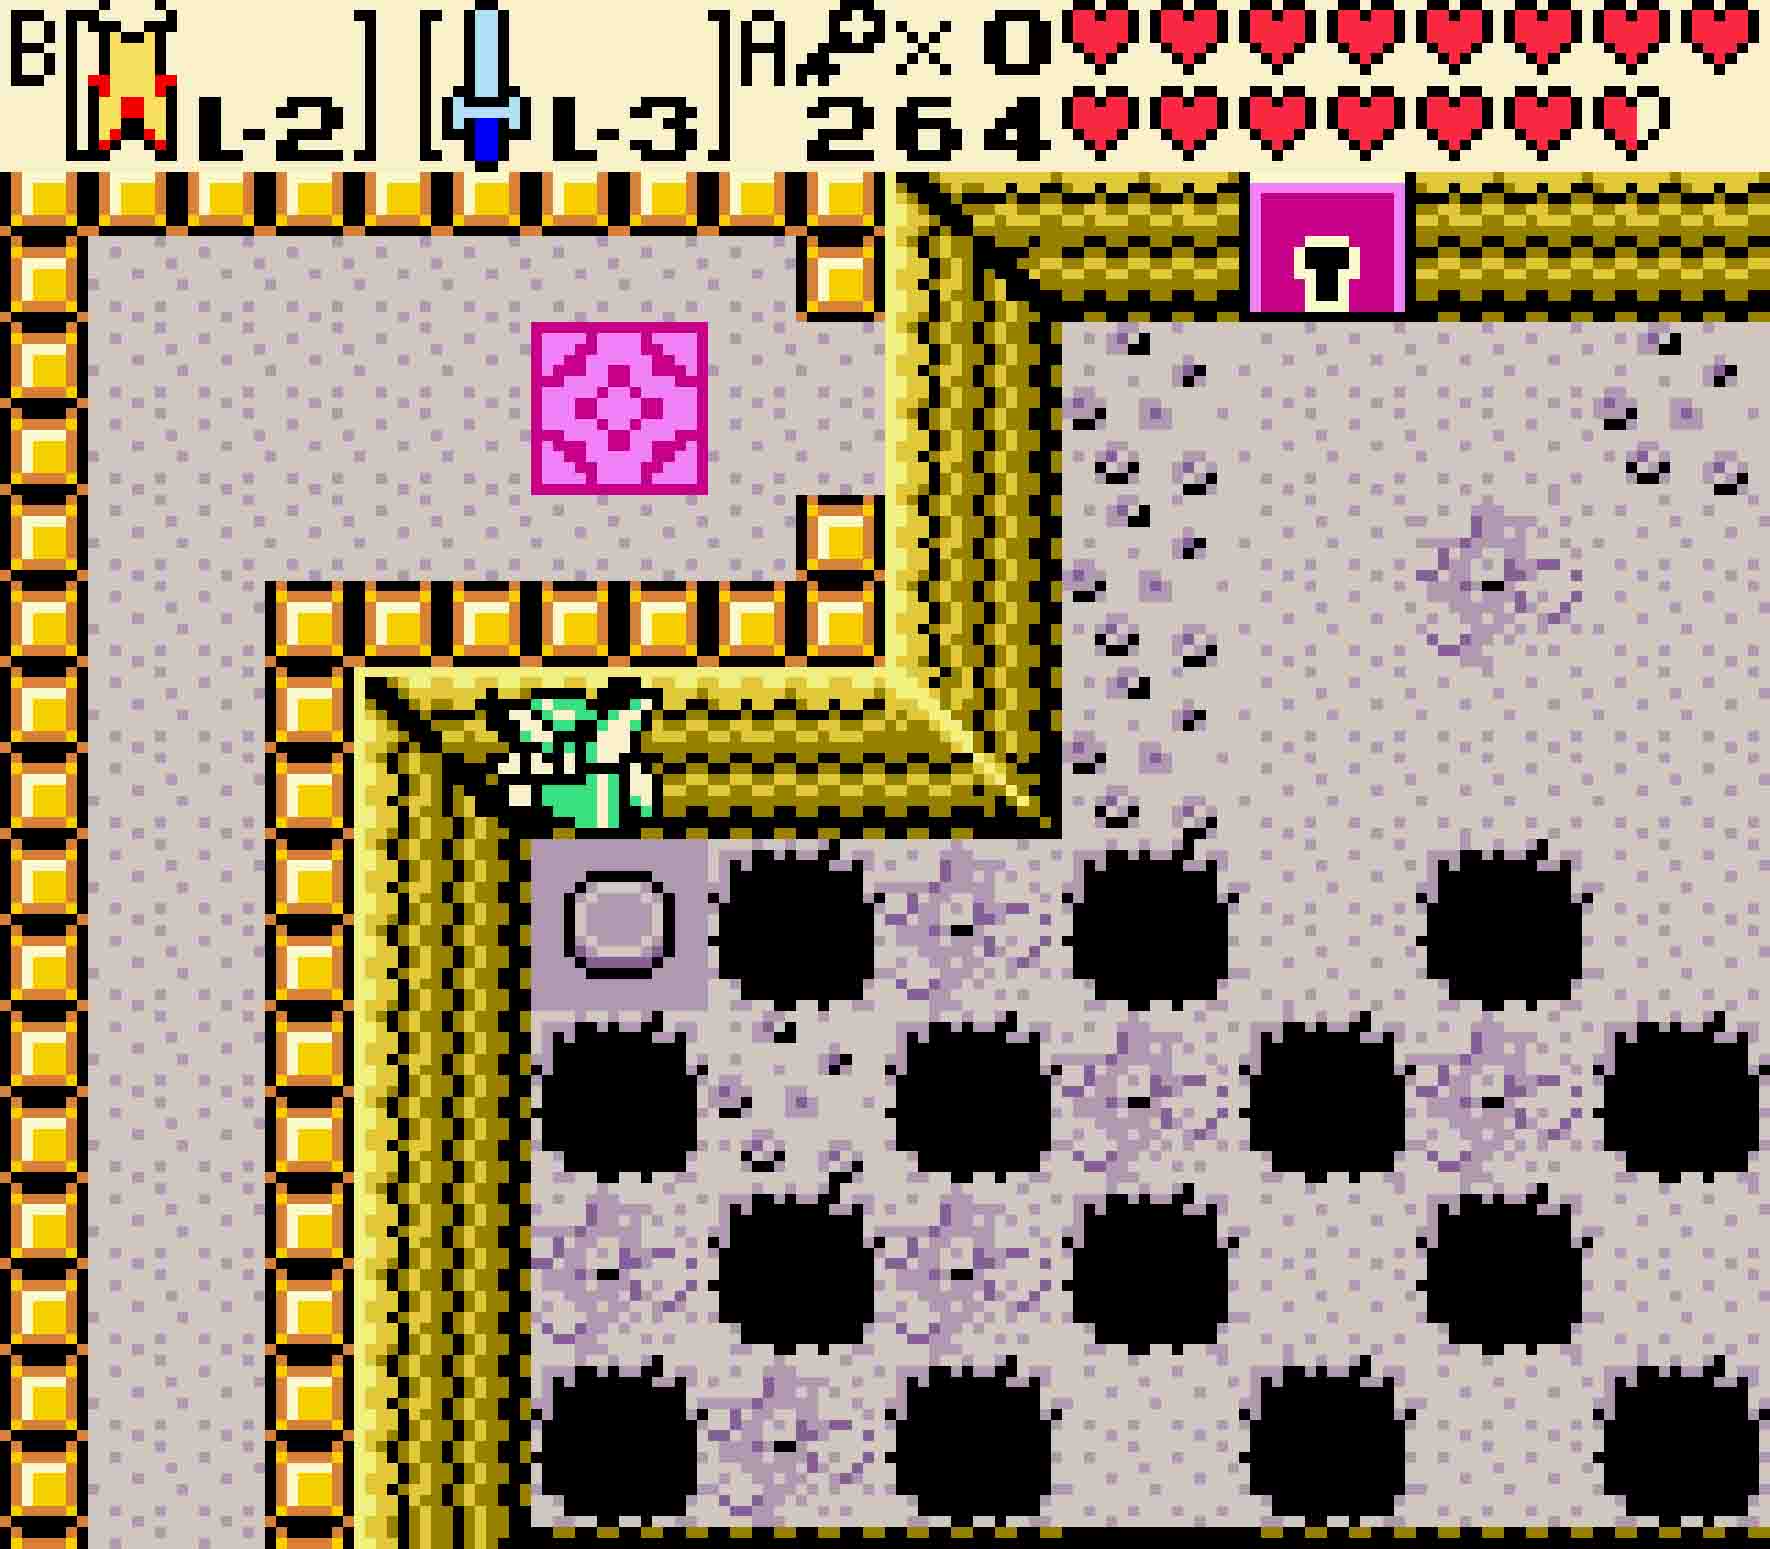
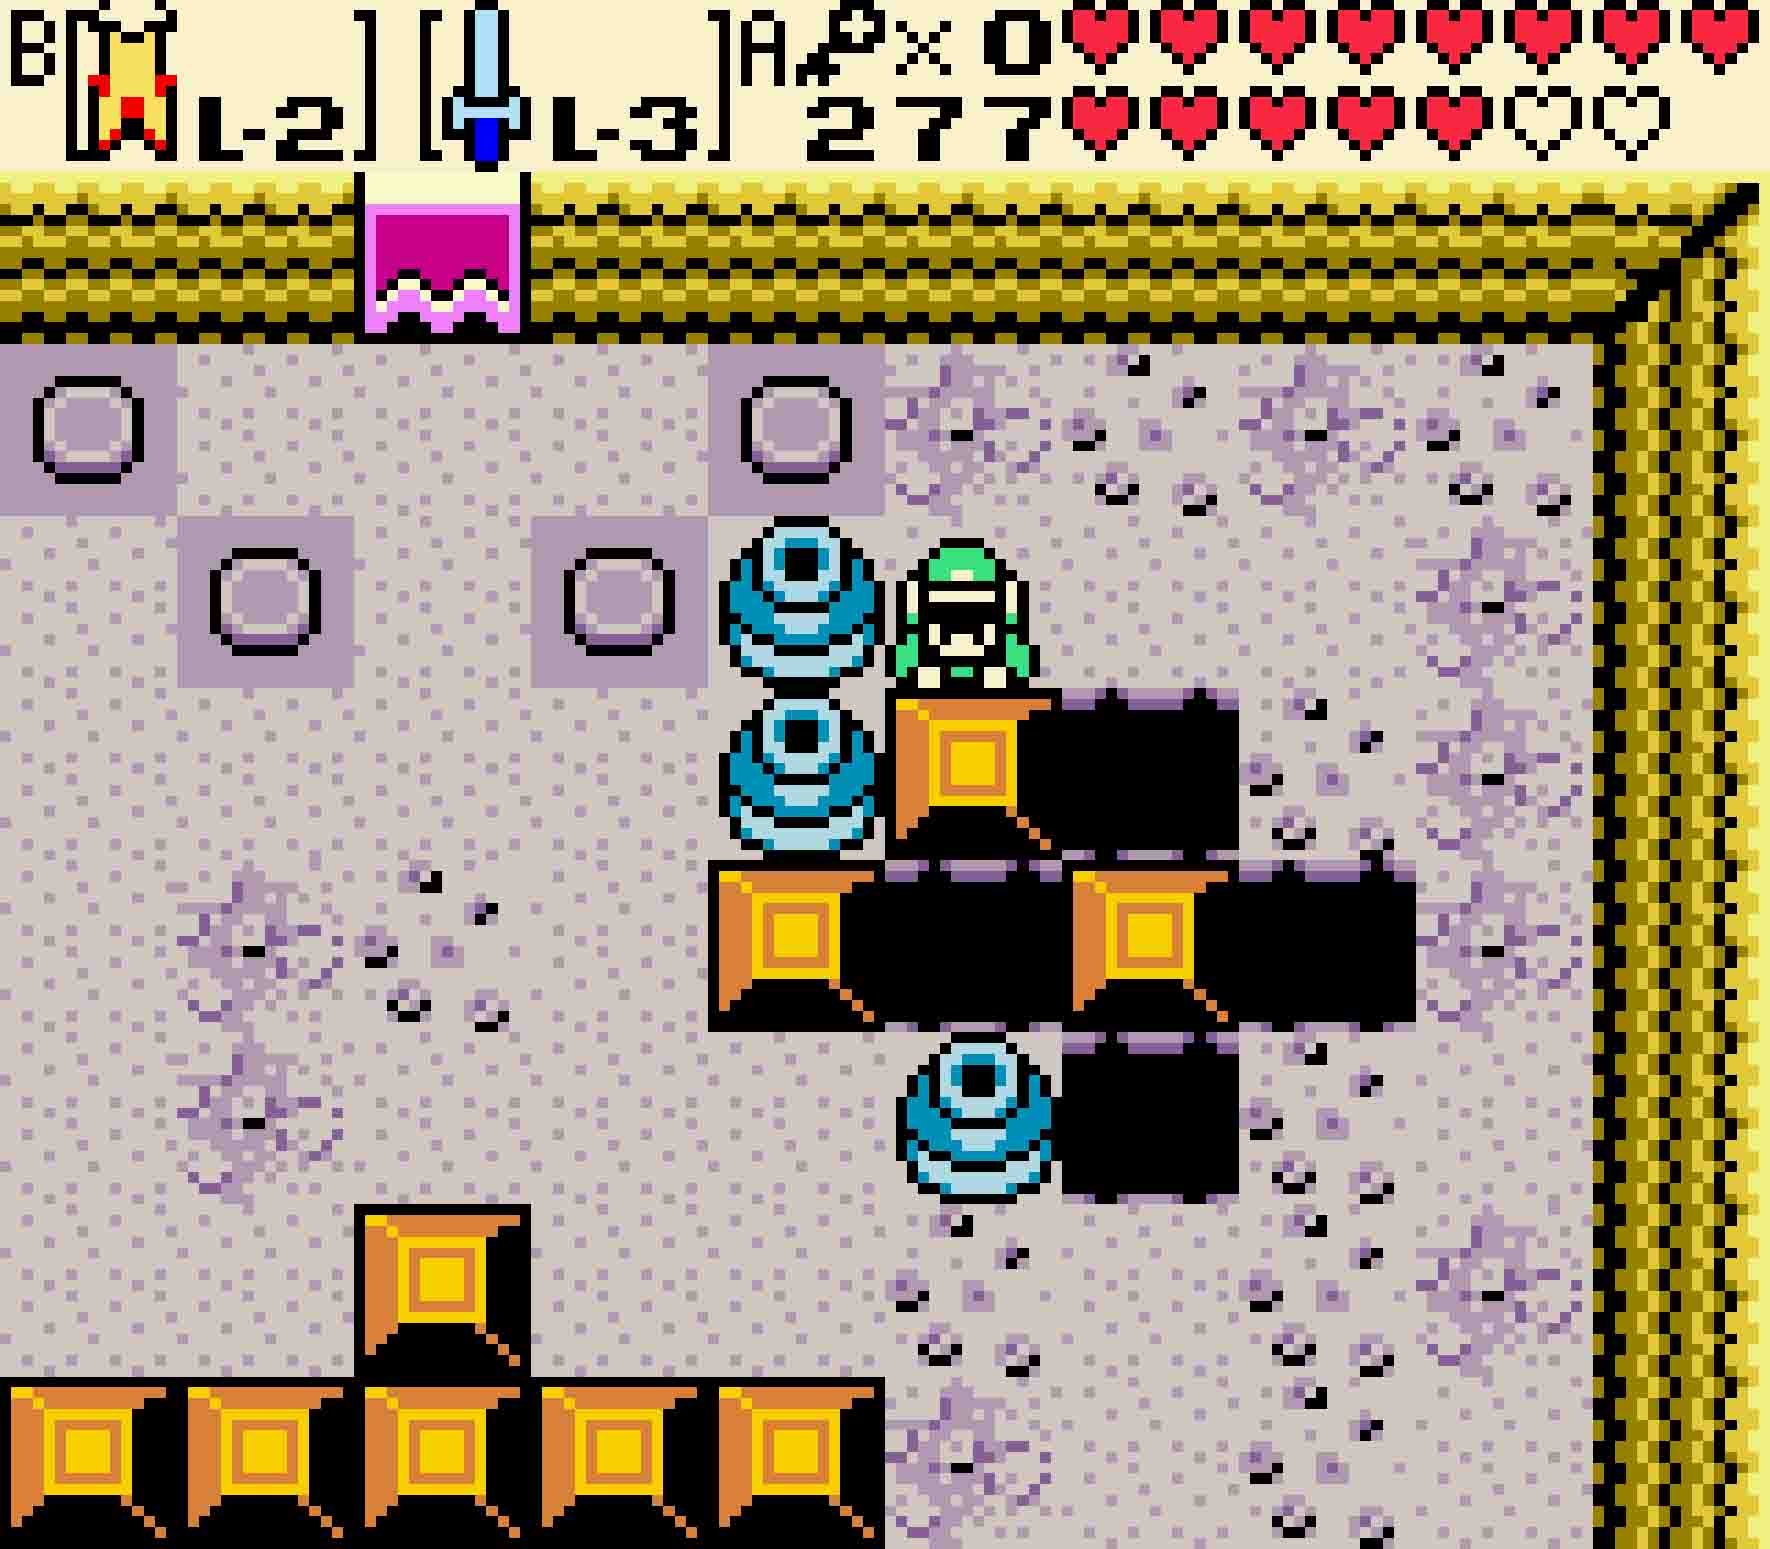
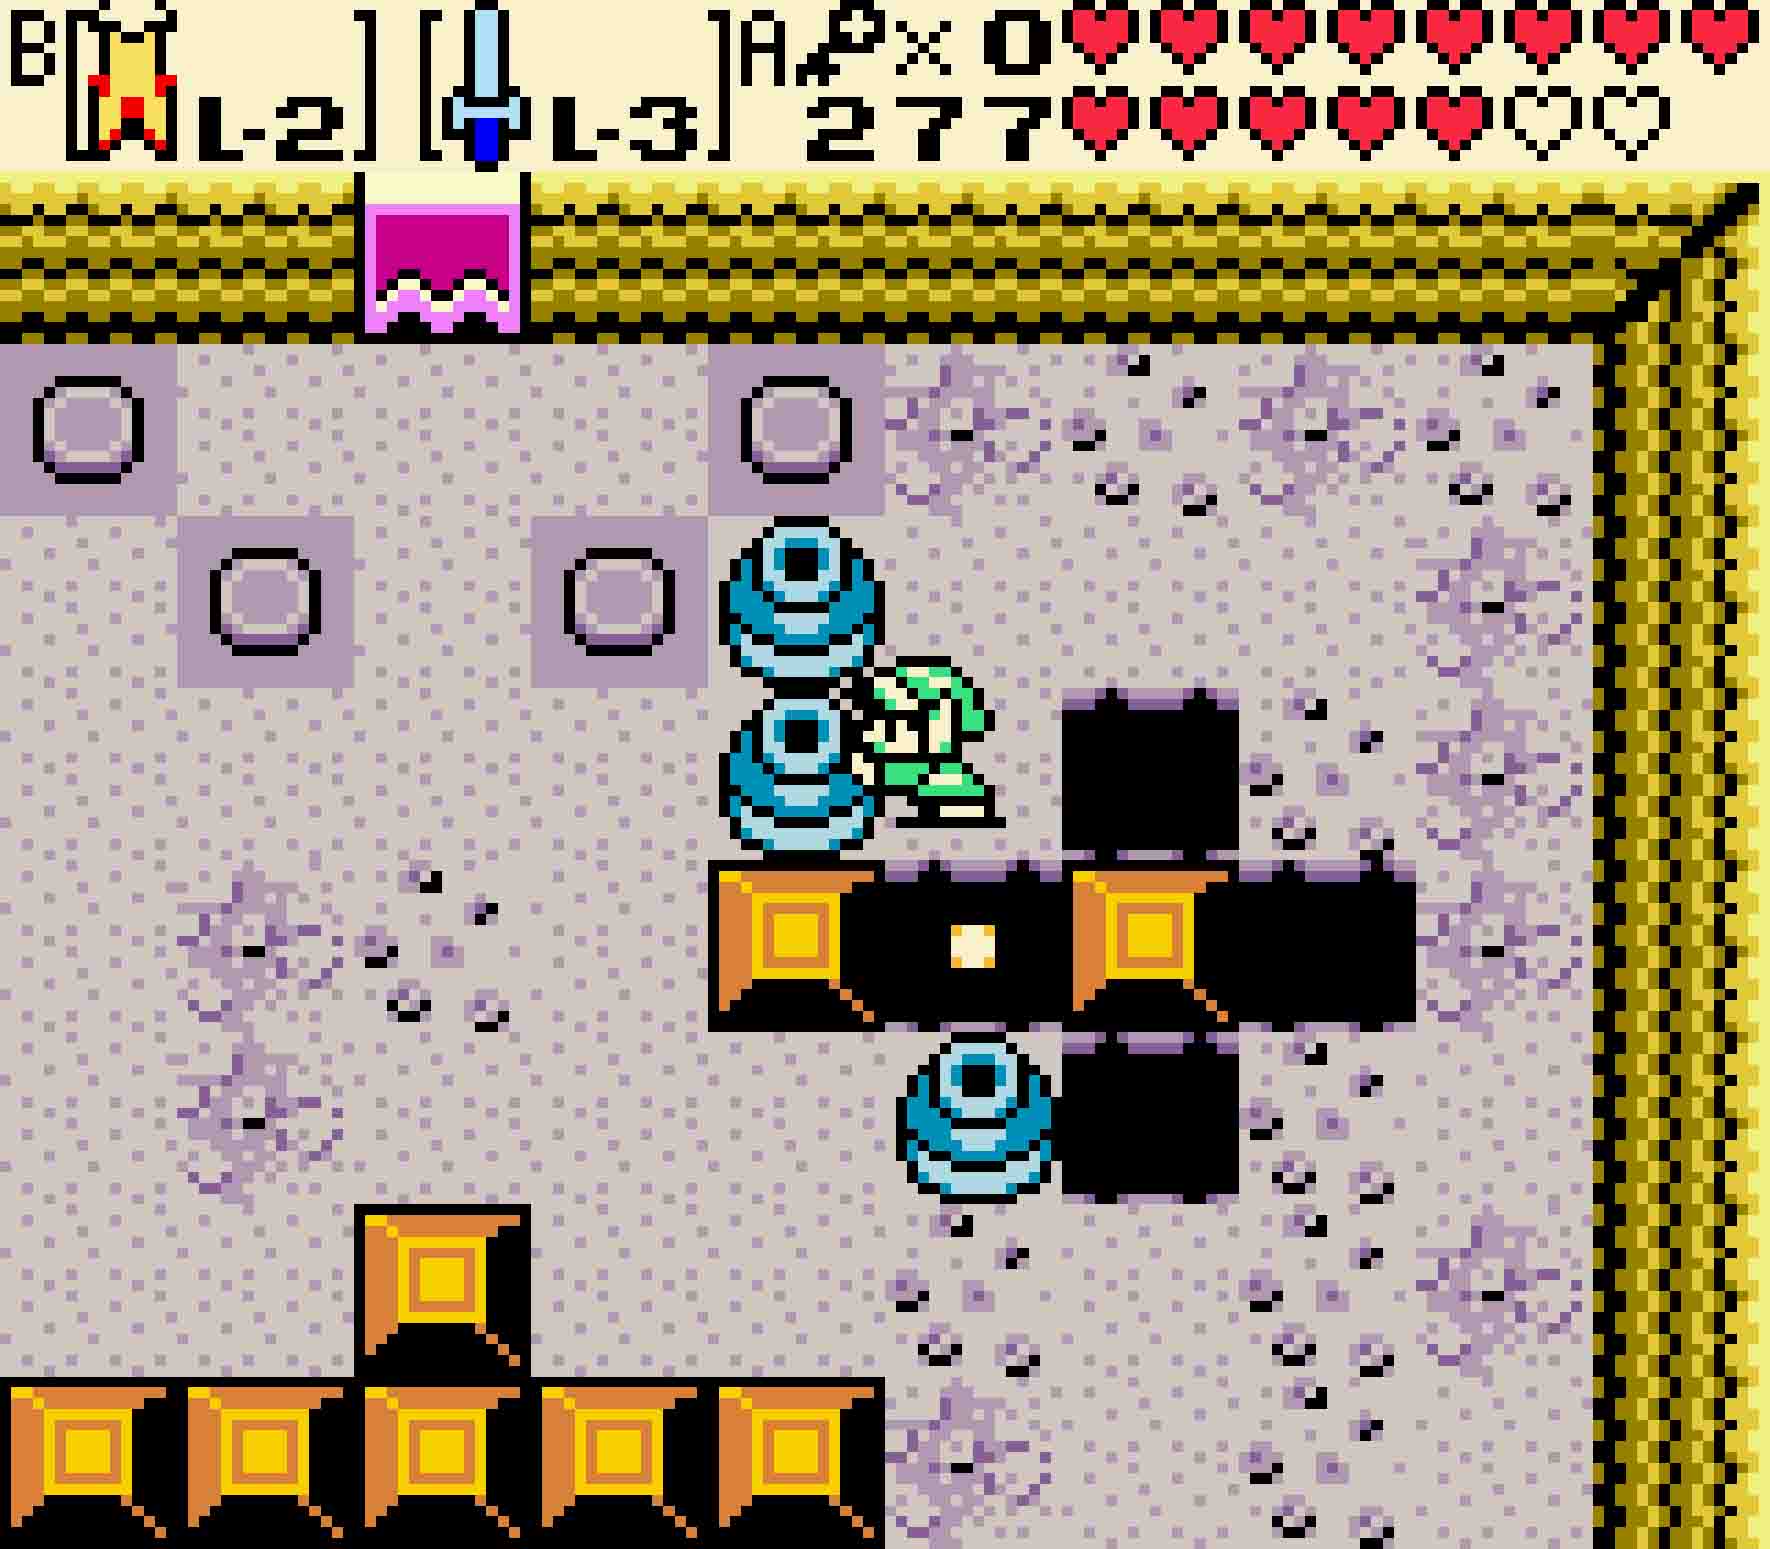
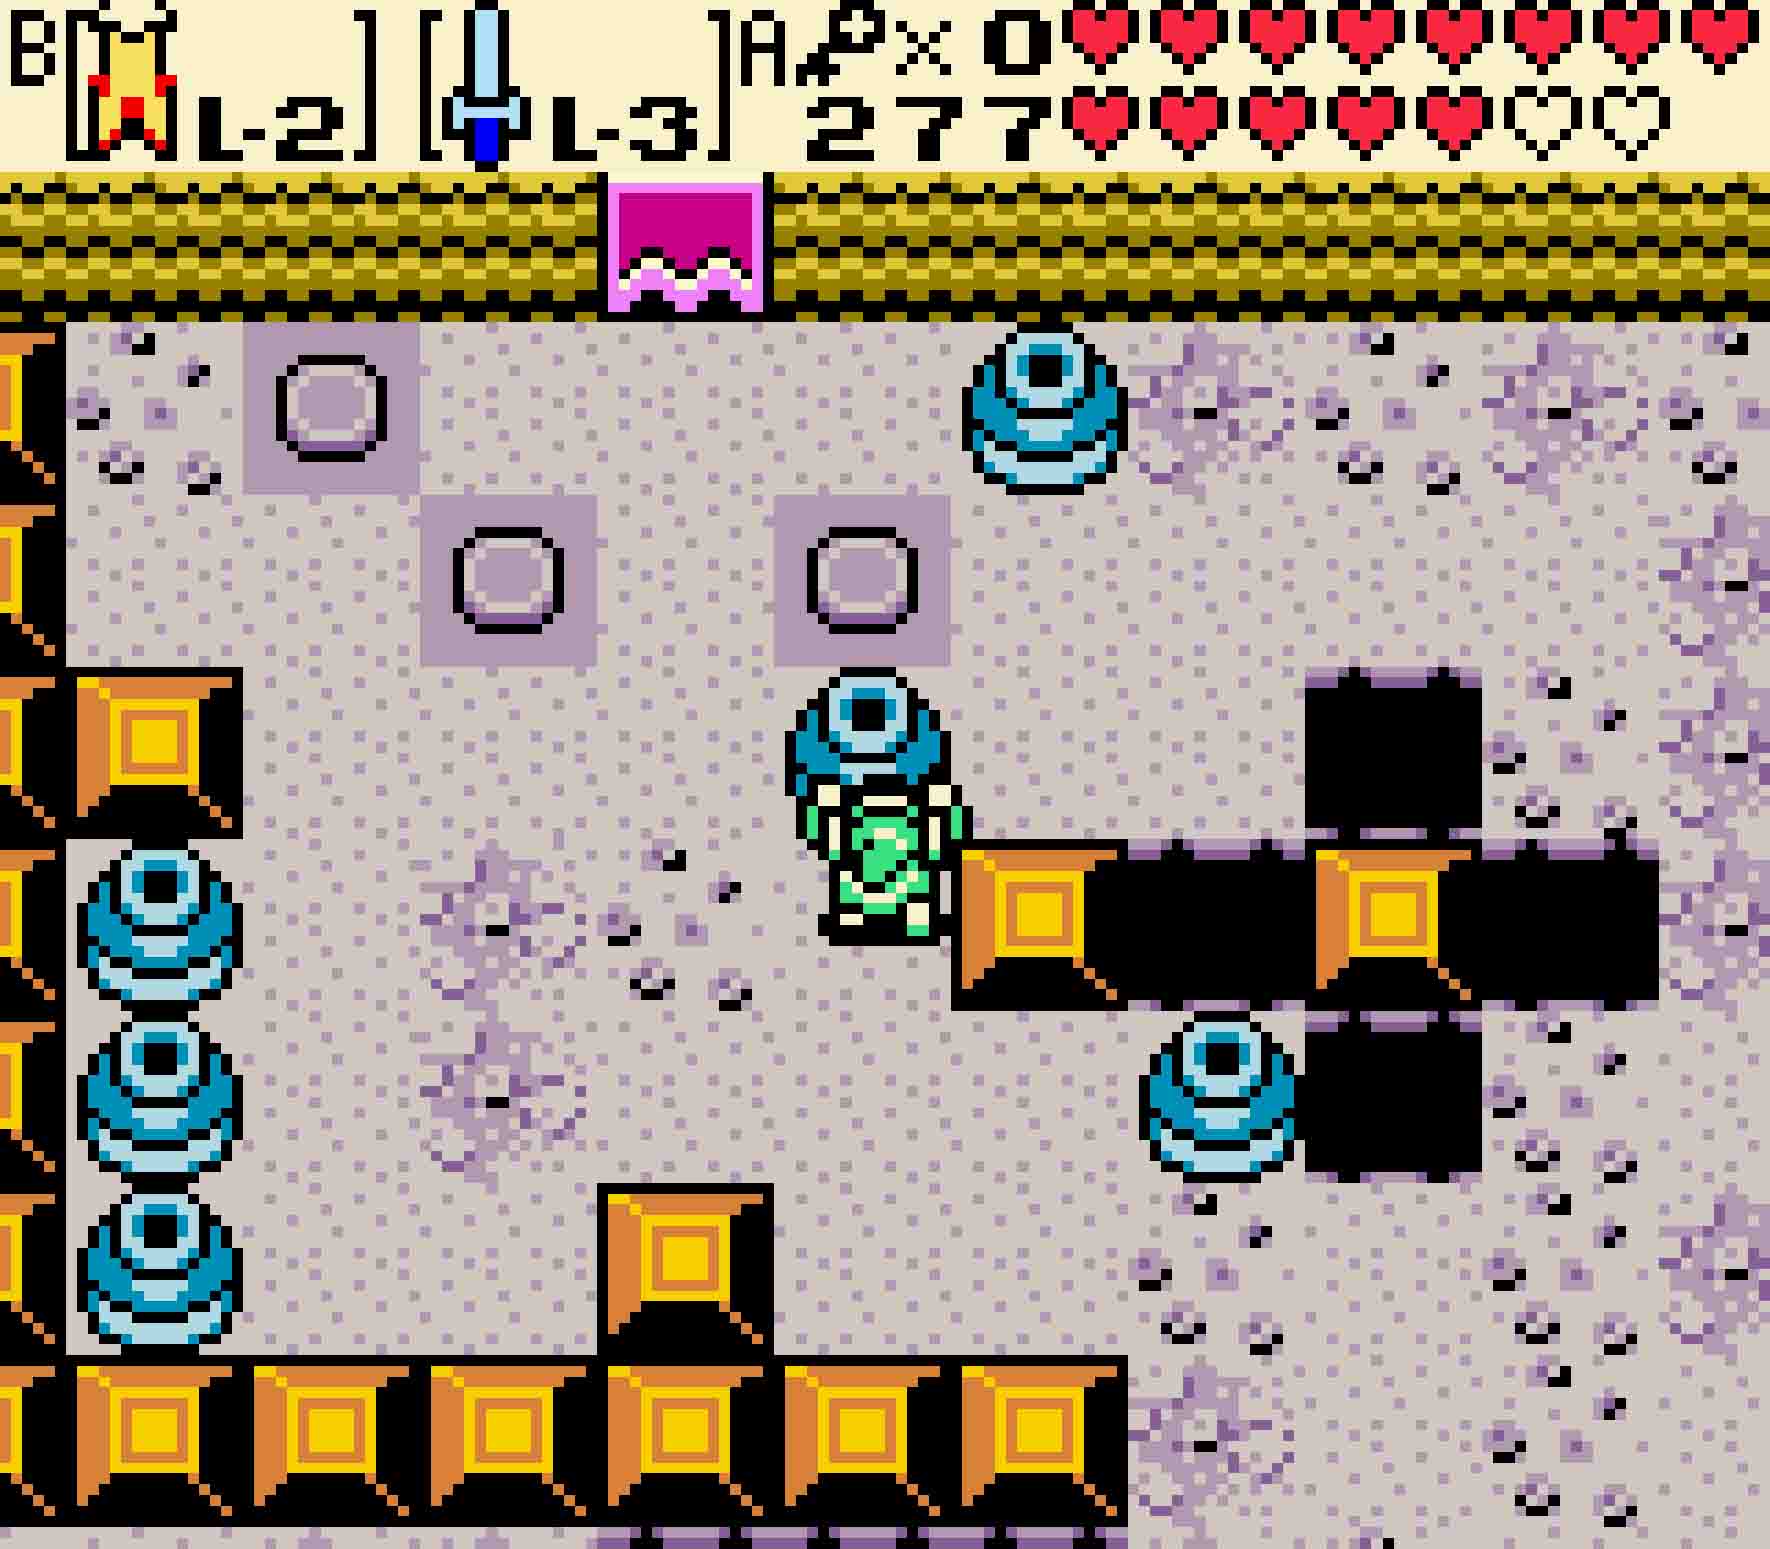
Step Six Just above the upper button, you’ll see a horizontal row of three blocks. Push the outermost two blocks up one square, and then push the middle of those three blocks to the side. Left or right: It doesn’t matter.
Step Seven This creates a corridor for the remaining pot to squeeze through. Head up to it and push it down until it’s in horizontal alignment with the switch.
Step Eight Push the pot to the right to open the door.
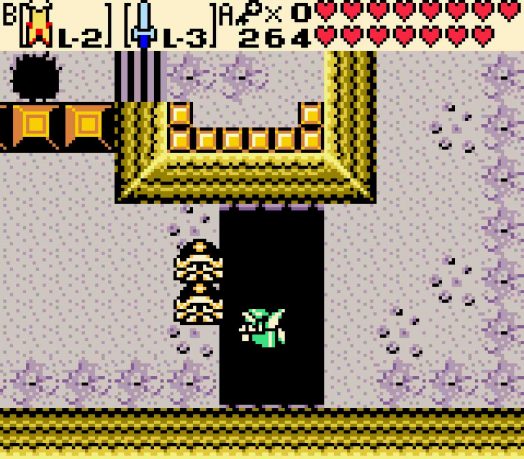
 In the next room, you’ll have to deal with some rolling logs. These shouldn’t prove difficult at all. Simply push the first one to the right, and then free a gap below you by removing the pots and ducking into the alcove. As you’re waiting for the rolling log to roll back to the left, also take out the vertical group of three pots all the way to the right. Then approach the second rolling log from the left, push it one square to the right, and then quickly squeeze through the gap.
After this, you’ve got two more pots that you need to rest on two switches. Don’t lift them up or else you’ll have no choice but to break them and restart this room. Push either of the two pots three squares to the left; push the other pot one square to the left so as to rest it upon the floor switch. This will leave you just enough room to get to the left side of the now-leftmost pot and push it back to the right. Once the pot is on the second switch, the door will open.

-
- Sneaking past these two pots while getting them into position is a bit touchy.
If you have an upgraded sword, you’ll have to be careful in this narrow corridor. You’ll first have to push the pot blocking the doorway down, but then get clear so you can deal with the Stalfos in the room. Kill them both, and then prepare to place the remaining pots on the five switches.
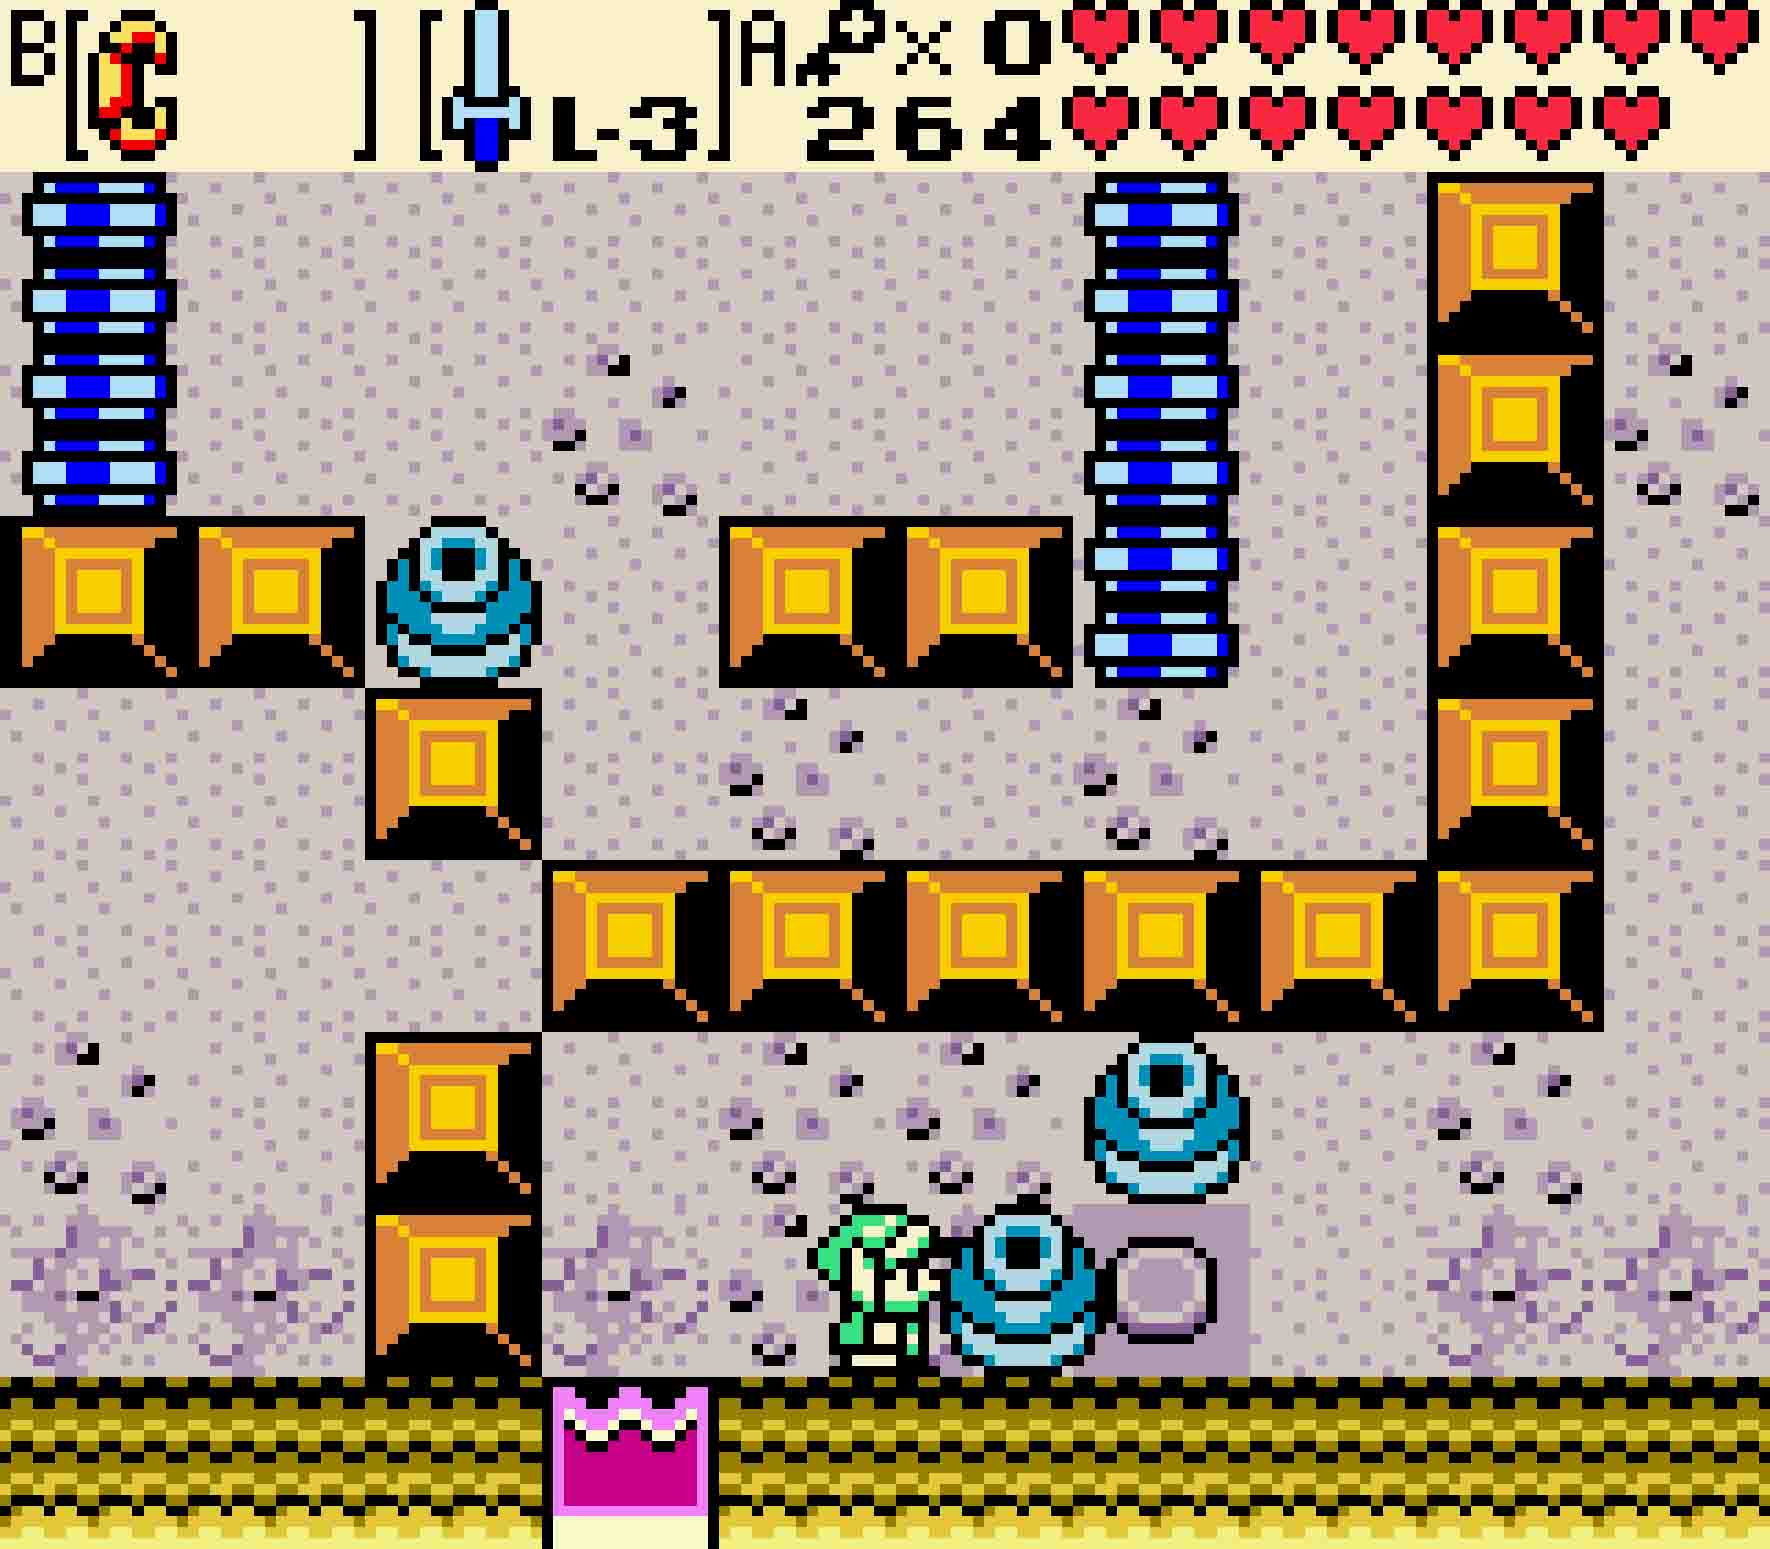
Solving the third button puzzle
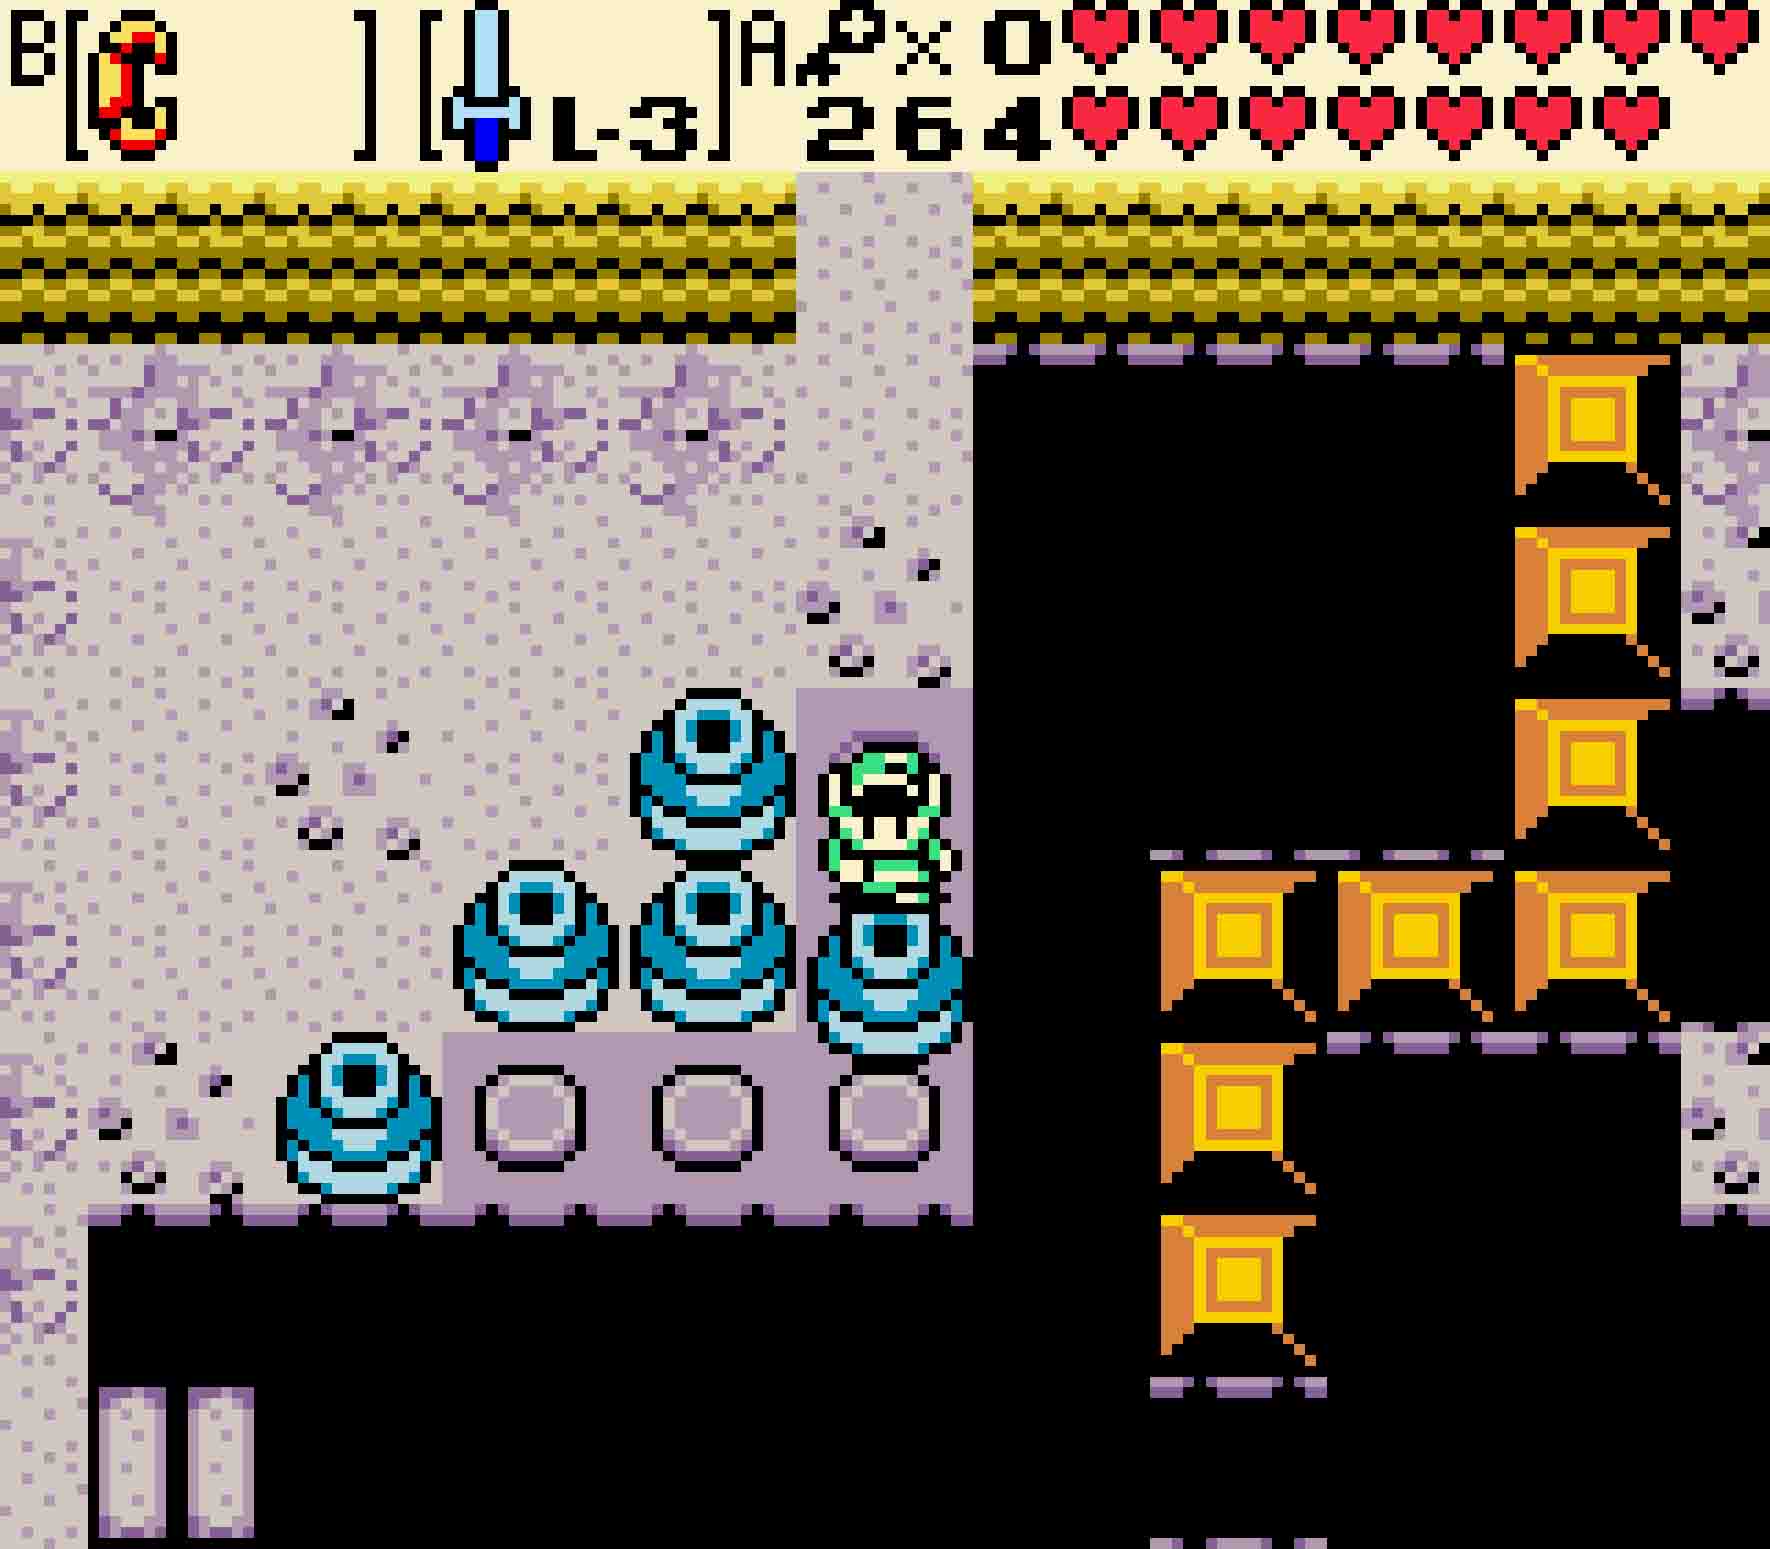
Step One Push the pot that used to be blocking the door down until it rests on the lower-right switch.
Step Two Push the leftmost pot right two squares so that it’s next to the pot that used to be in the doorway.
Step Three At this point, the leftmost of all the pots will be just above an uncovered switch. Push it down onto it.
Step Four Now you have two pots next to two uncovered switches. Simply push them both to the right.
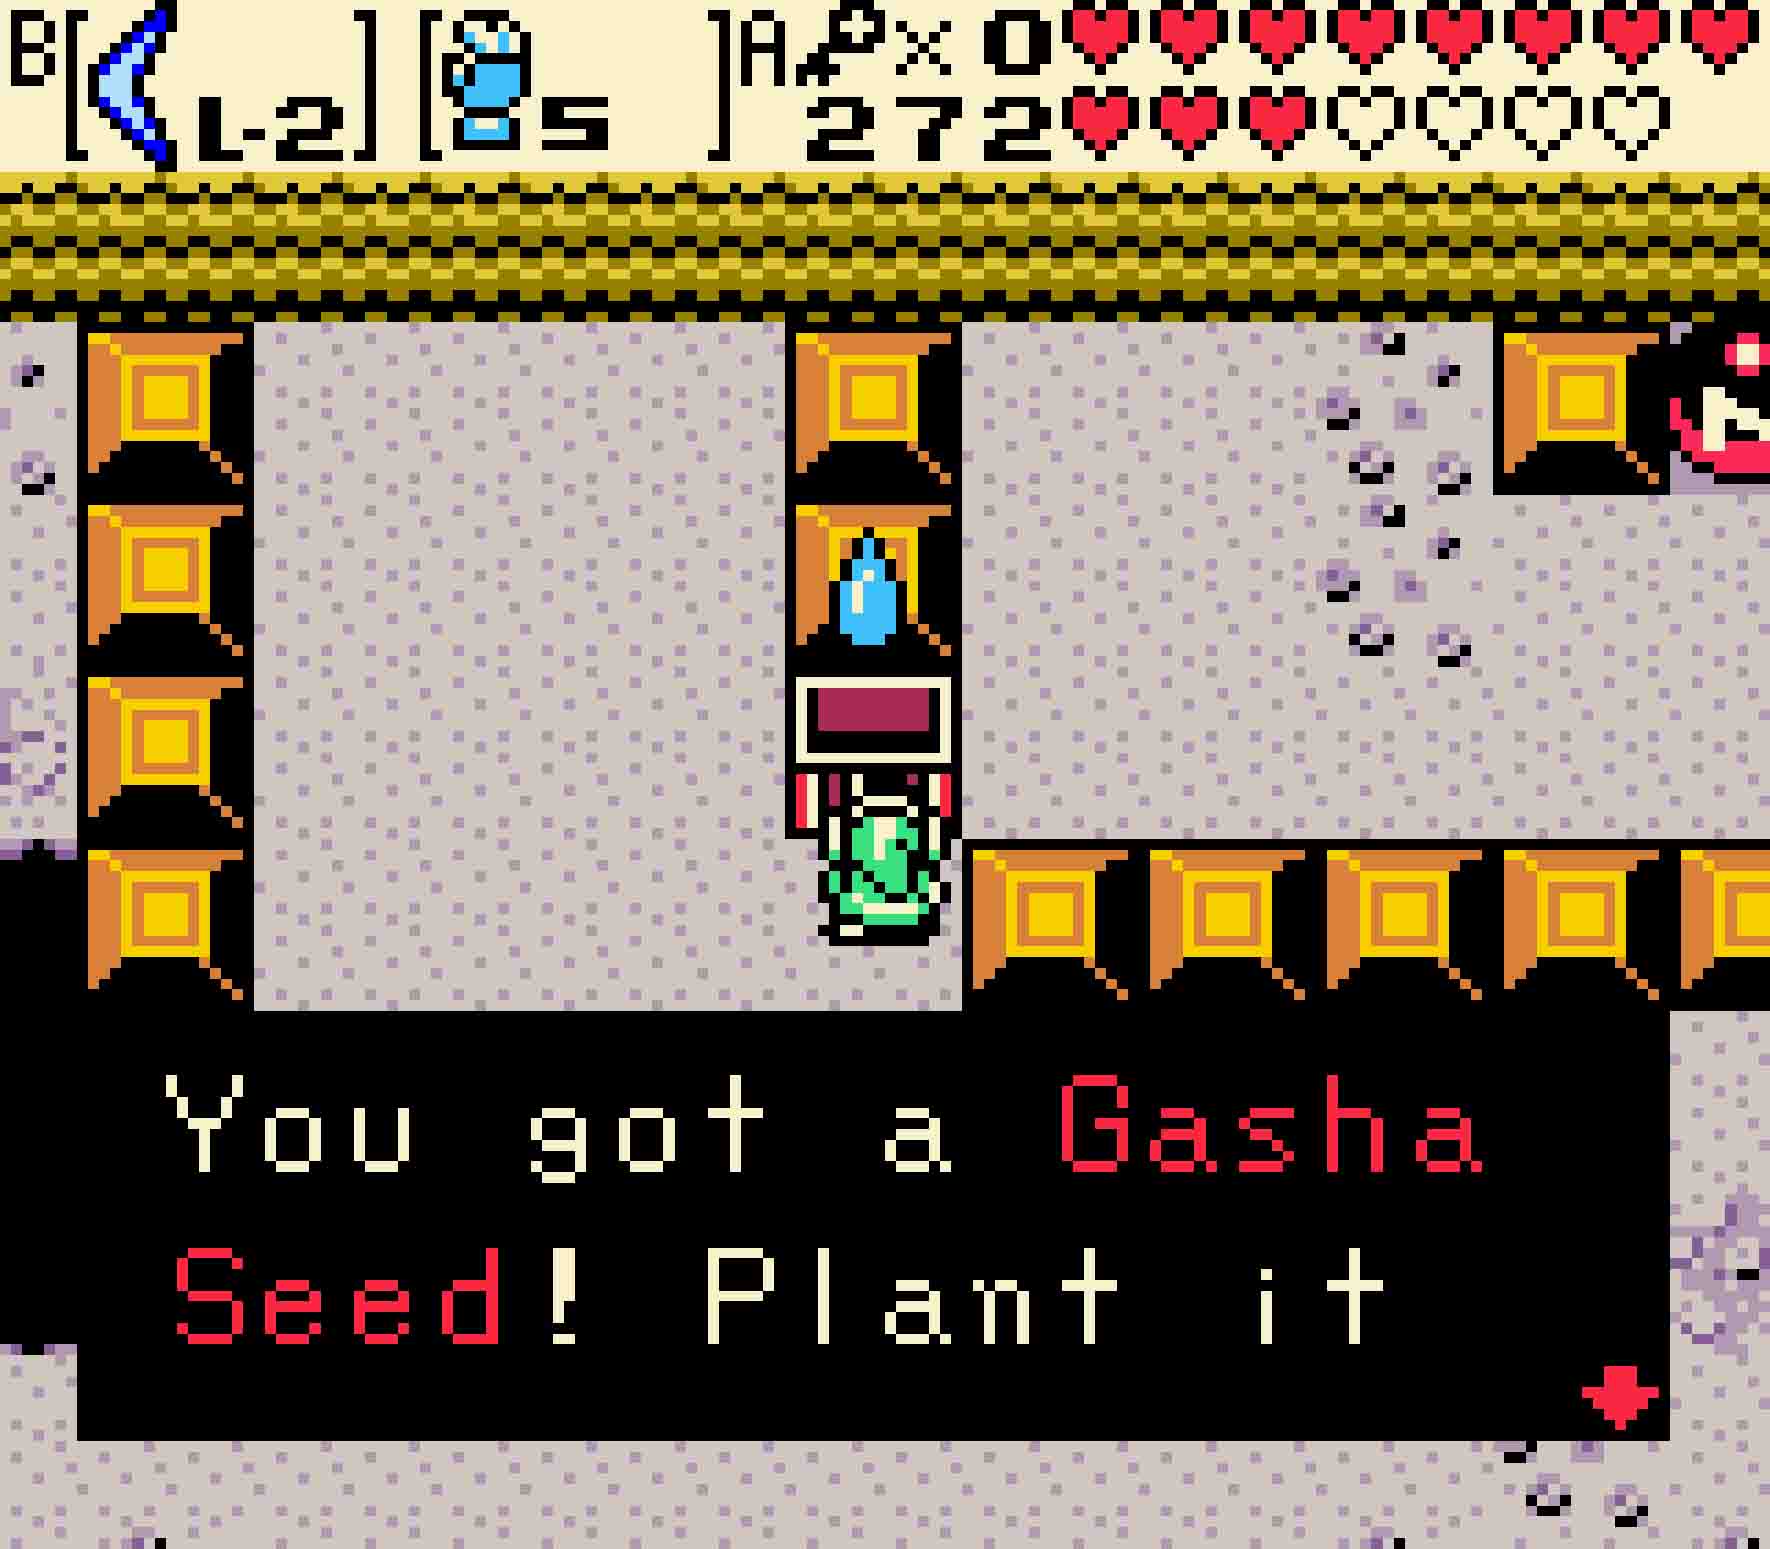
A bridge will extend. At the end of it, you’ll find a treasure chest containing a Gasha Seed. There’ll also be a teleporter. These teleporters exist every four rooms to take you back out to the entrance and otherwise serve as midpoints you can jump back to. However, if you want to proceed, you’ll need either a Pegasus Seed and Roc’s Feather or simply Roc’s Cape to make it to the portal.
3 Leap through the pothole peril
 The second quartet of rooms is mainly the showgrounds for Roc’s Feather or Roc’s Cape, though the fourth of these rooms will be something more familiar.
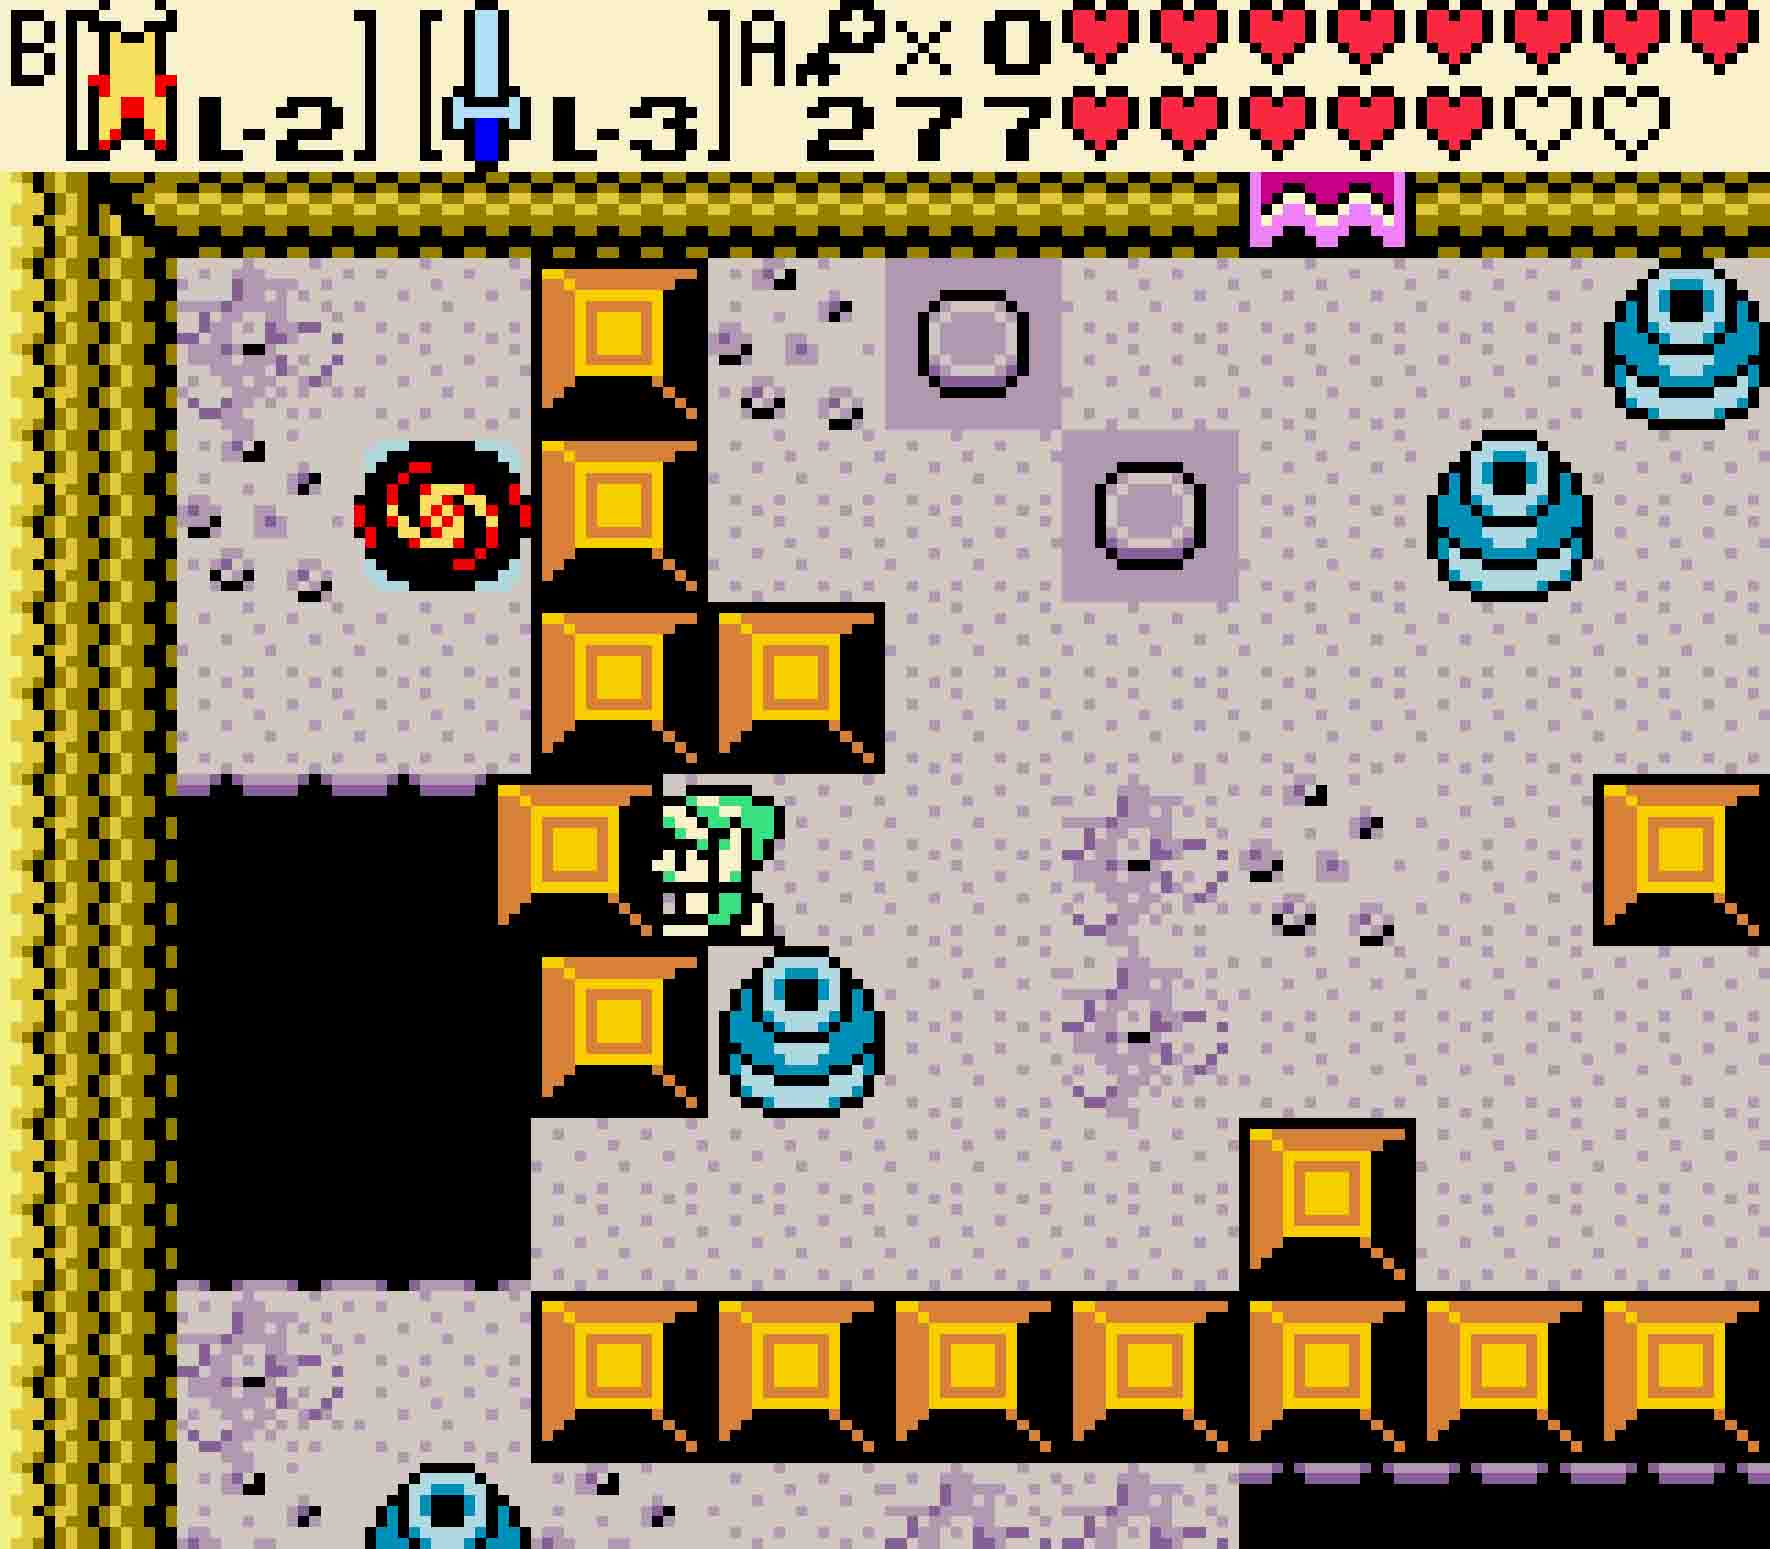
To start, there will be a simple gap that you need to leap over, though two Hardhat Beetles would like to say otherwise to you. Make sure you lead them to one corner of their rectangular pen. Then quickly head to the other side of the platform and leap over. You don’t even have to kill these guys! Just scoot past them into the next room.
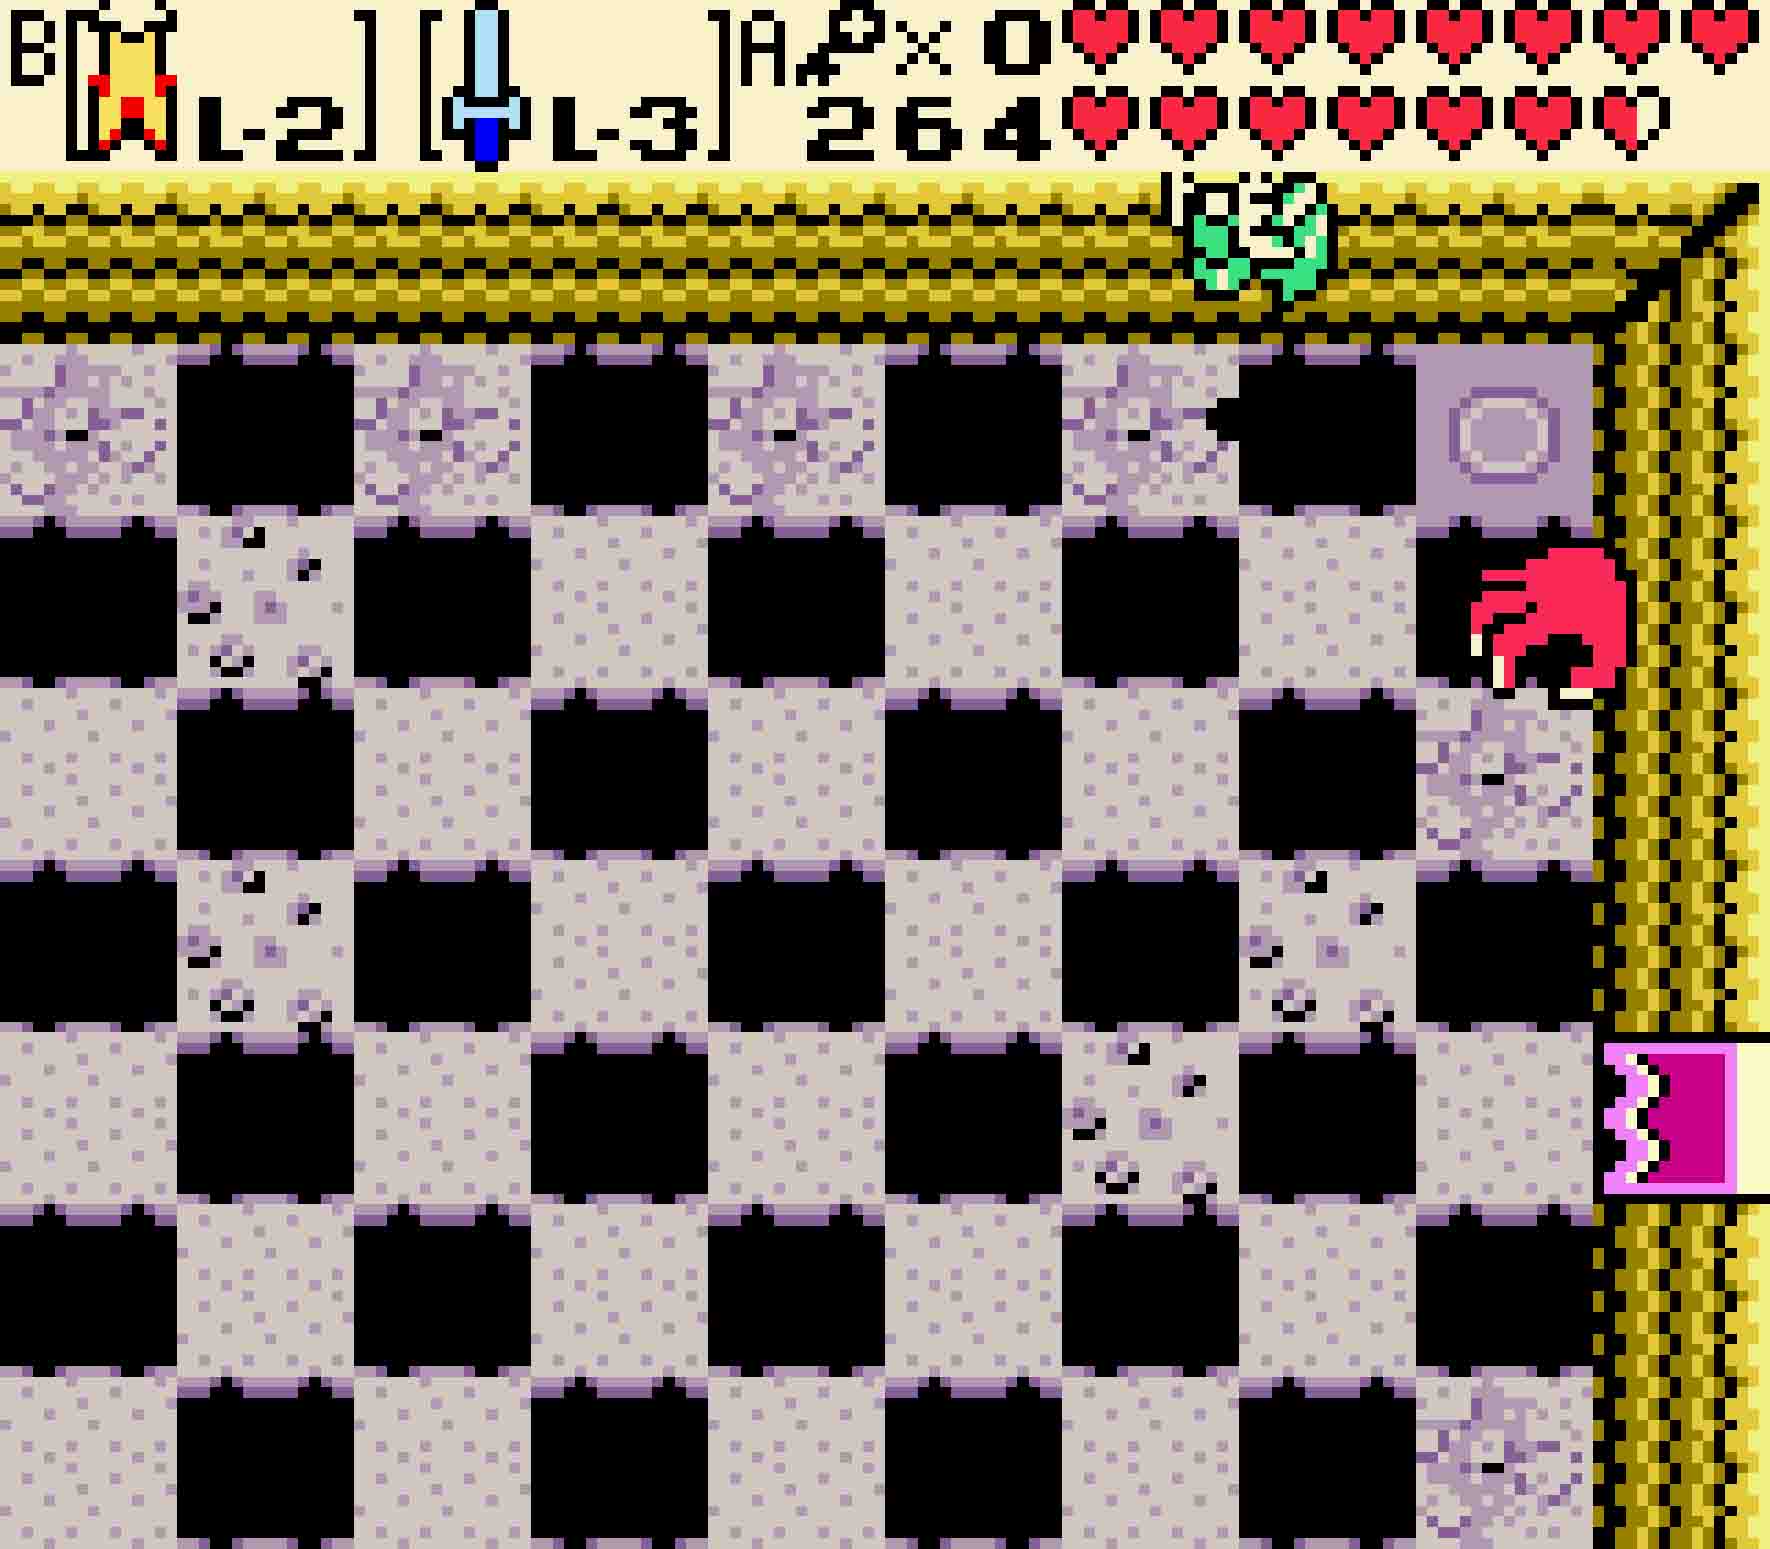
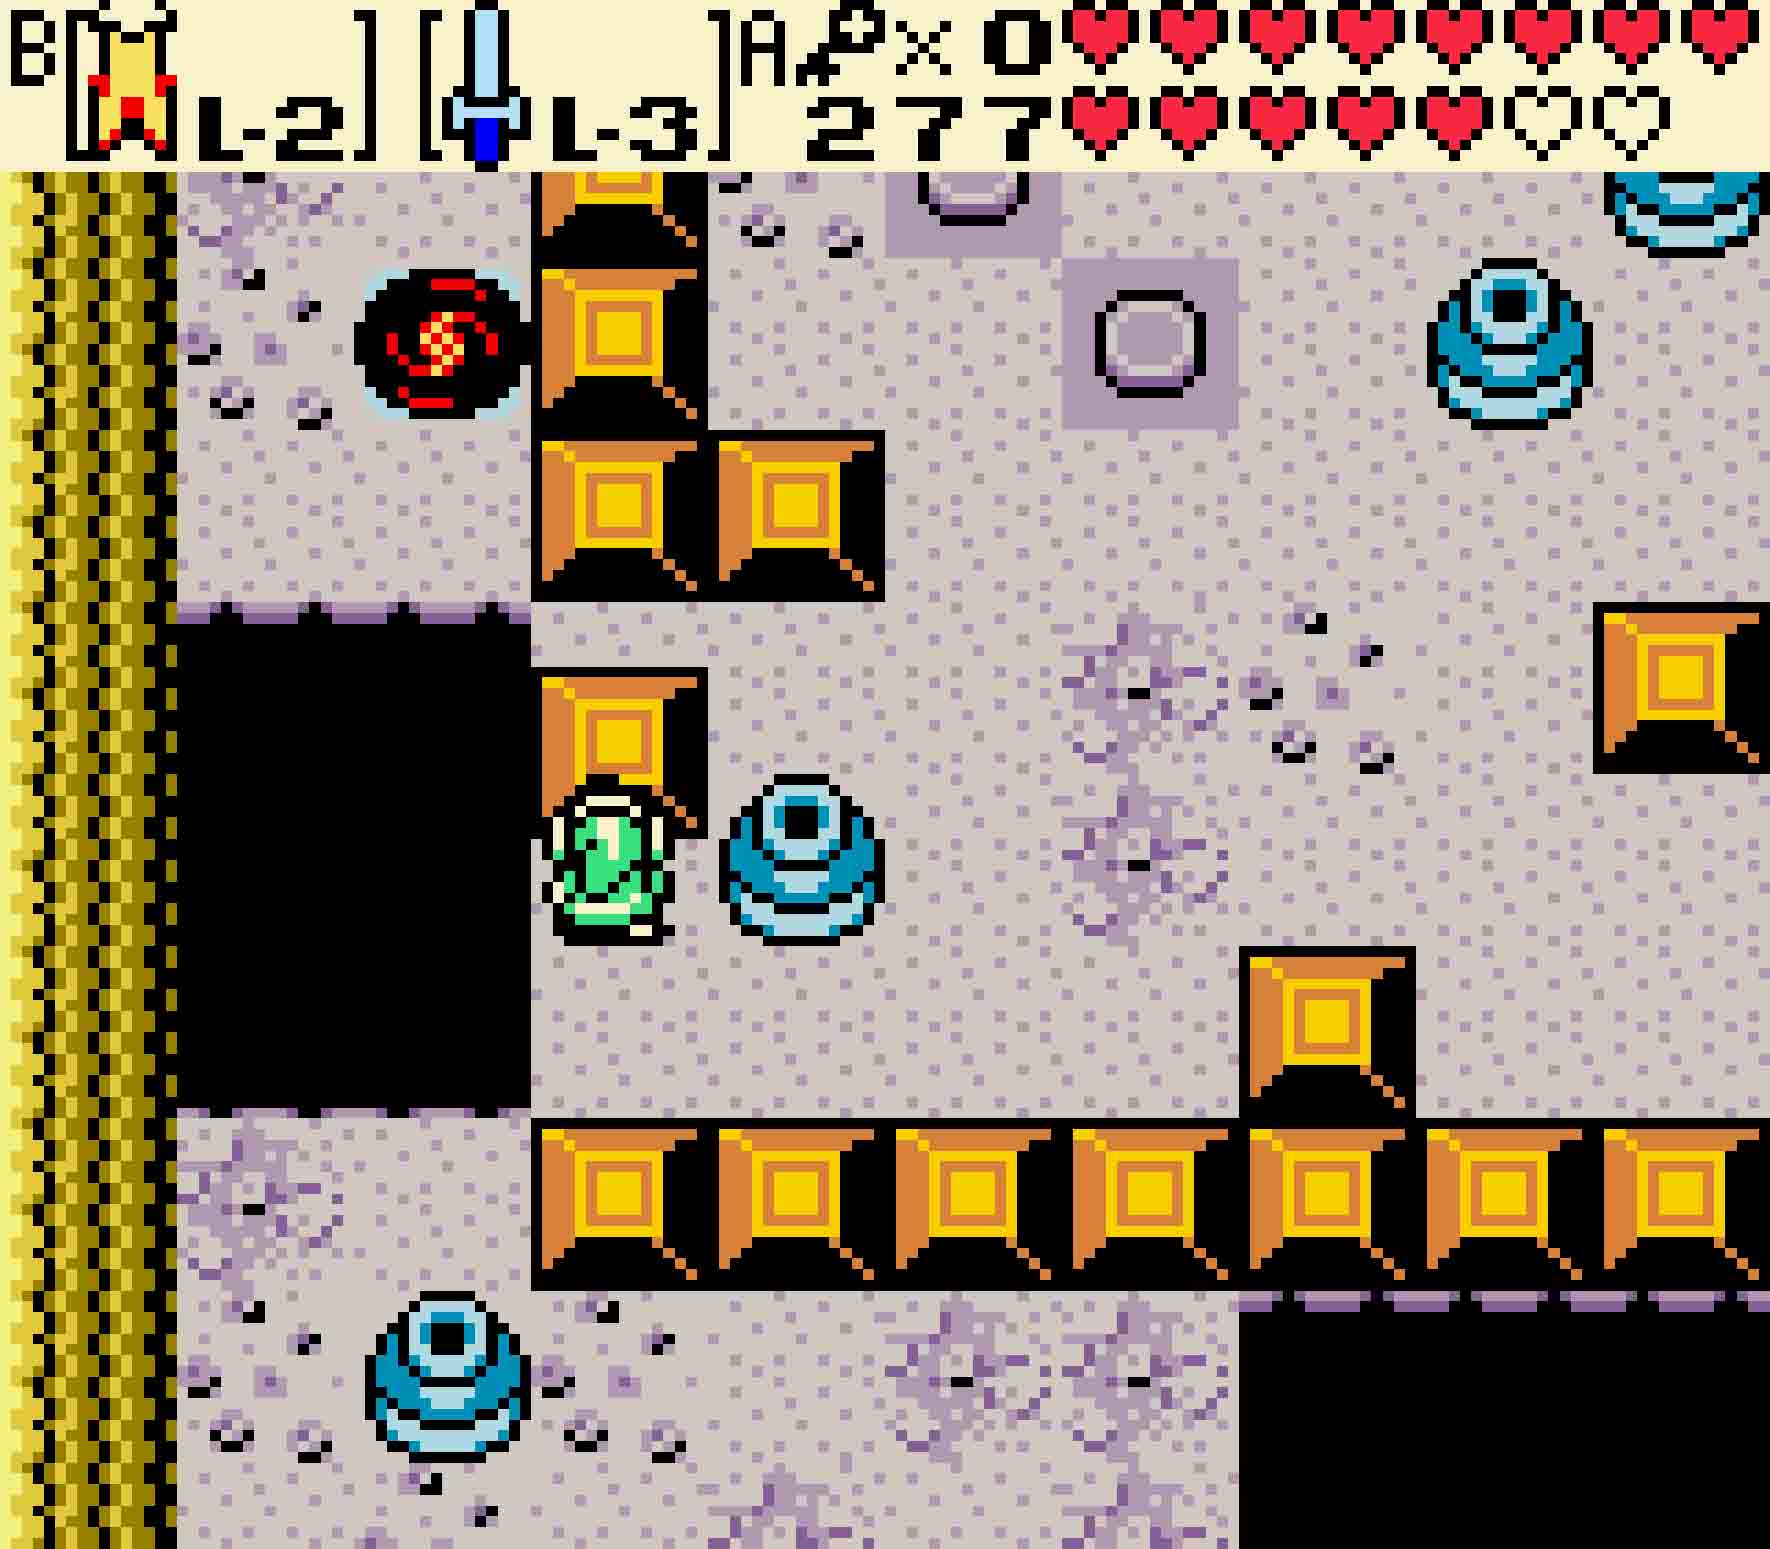
The second room isn’t any more complicated. You’ll find yourself on a veritable checkerboard of platforms and potholes. You need to use Roc’s flying gear to carefully jump from platform to platform so as to reach the northwesternmost 1×1 platform to press the switch. This will cause a key to drop down on the raised walkway above you. Head down to the stairs leading up to that platform, and then walk over to the key. This will allow you to open the door.
-
- Be careful s you cross the potholes. Zora’s Cape will help a lot though.
-
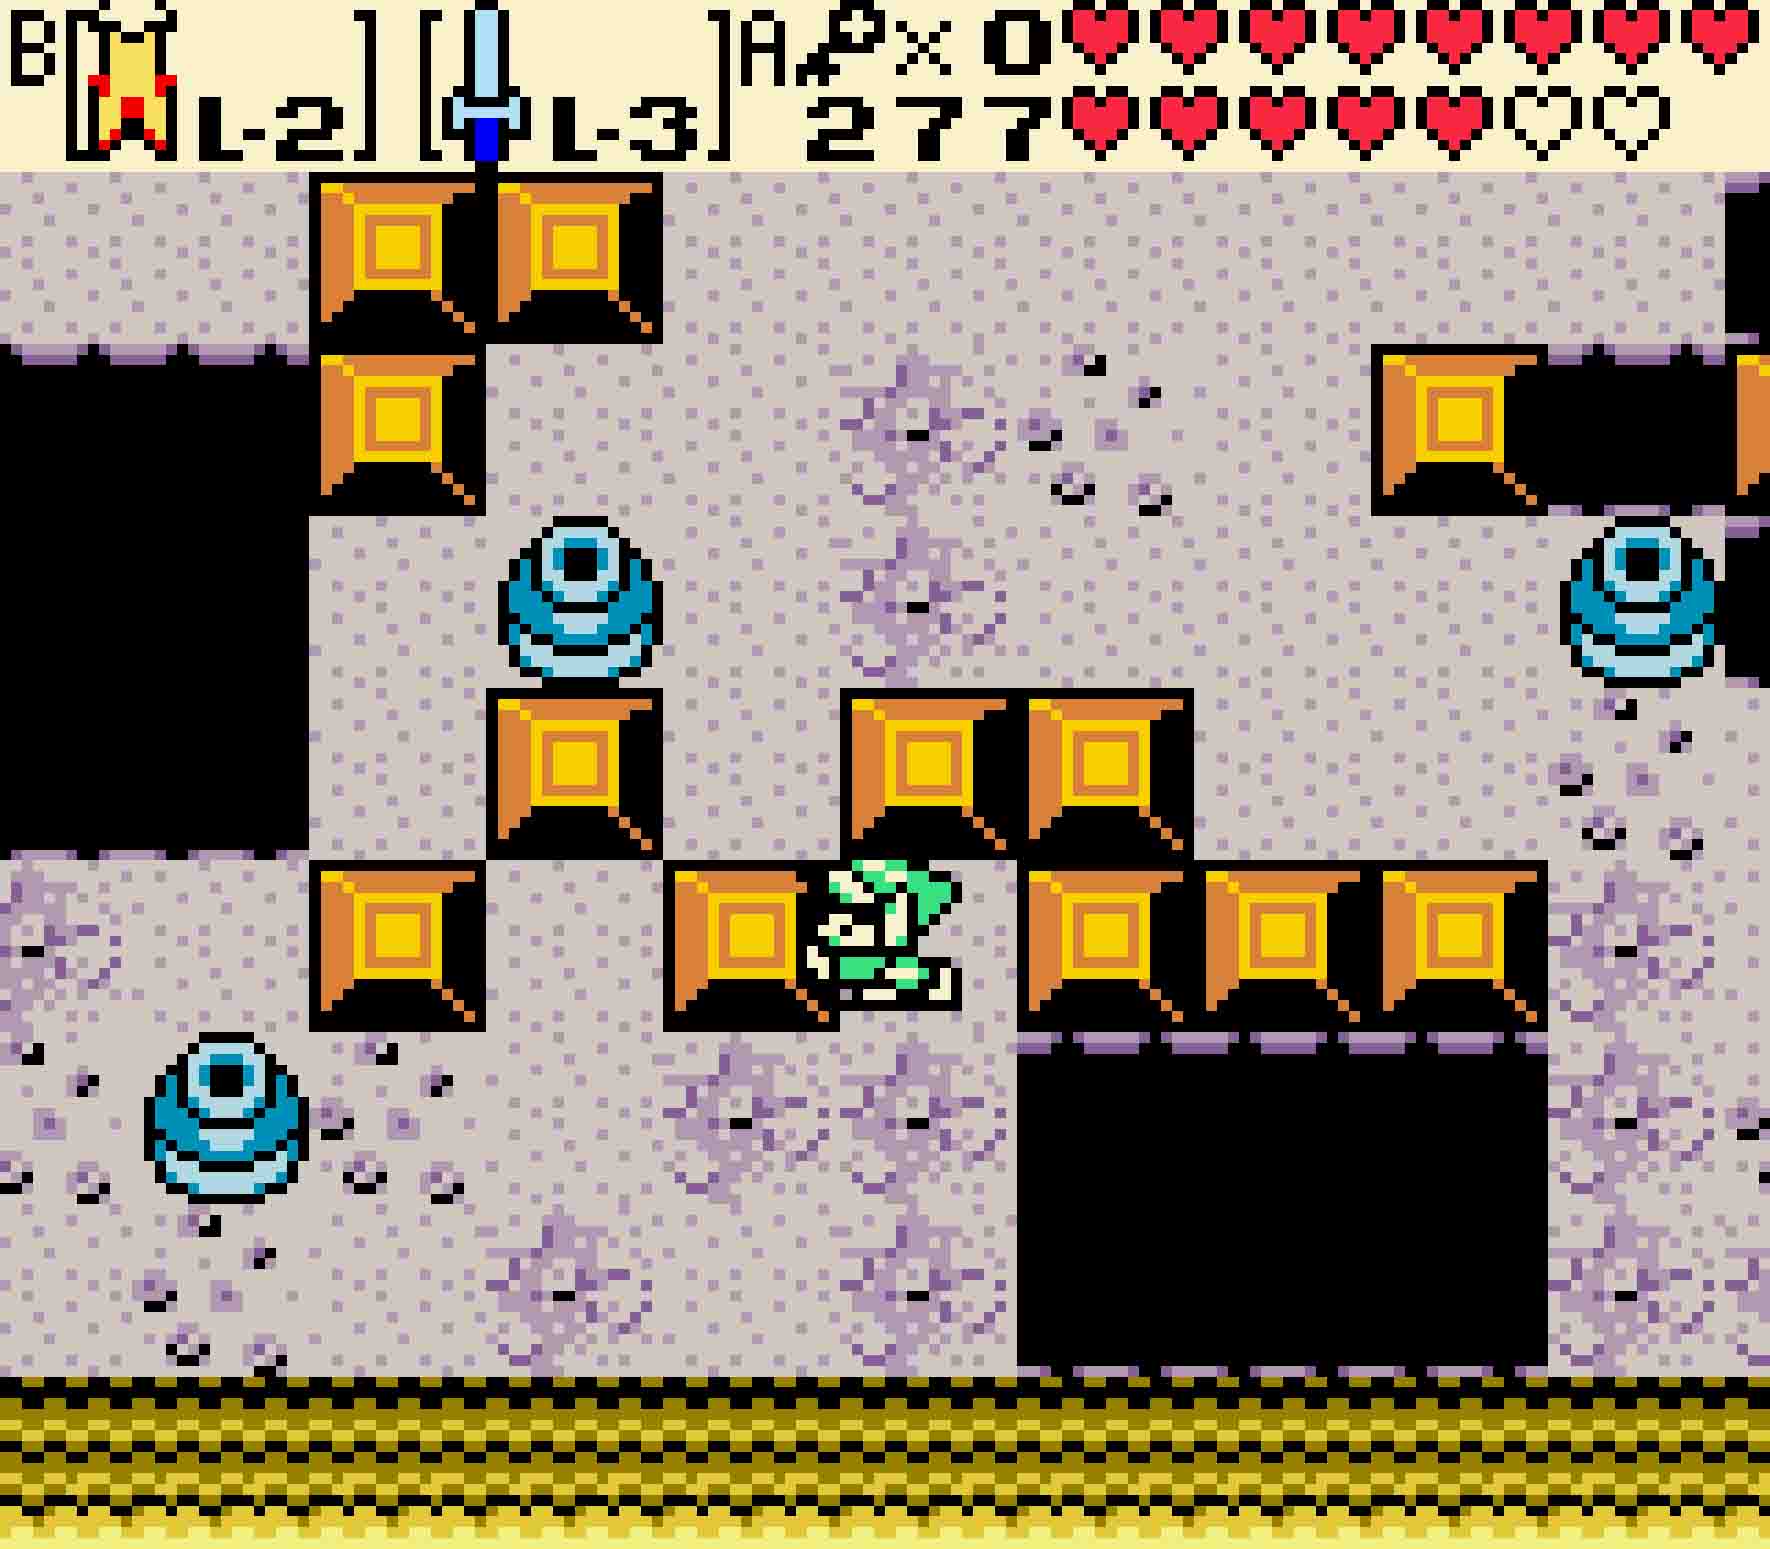
- The third room is trickier with the Floormaster. Don’t get caught!
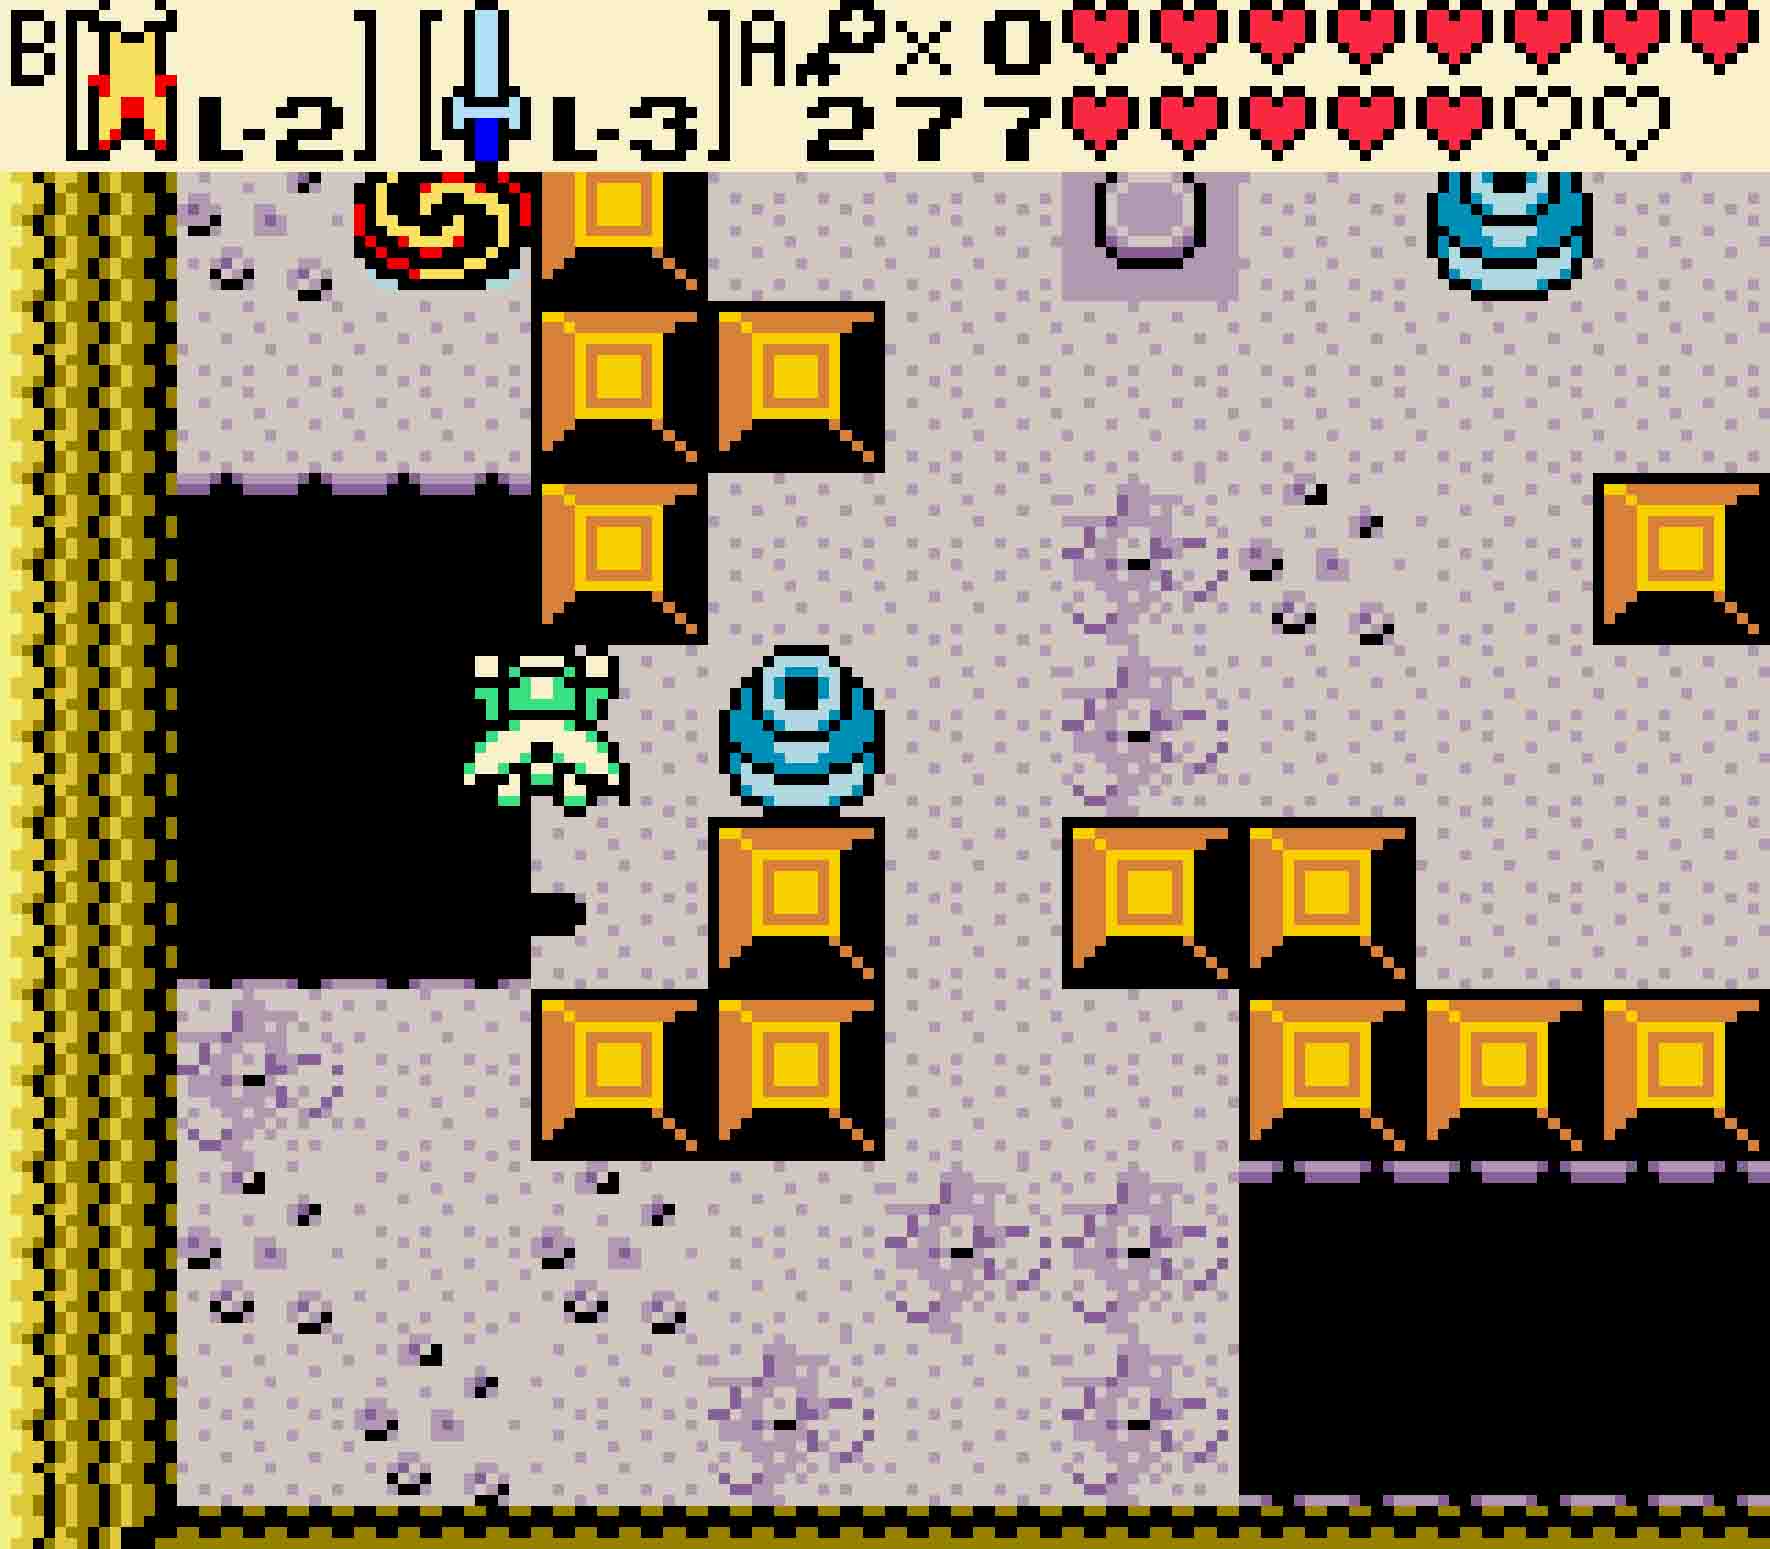
The third room doesn’t look any different from the second room at first blush but there is a rather sinister force at play here. Floormasters will occasionally drop down from the ceiling, and, if they catch you, you’ll be sent back to the beginning of the Hero’s Cave. Always stay on the move in this room. In each of the four corners of the checkerboard, you’ll find a floor switch. Step on each one of them; once all four have been depressed, quickly escape out the eastern door to put that Floormaster behind you.
Never push the rolling log while standing on cracked floor.
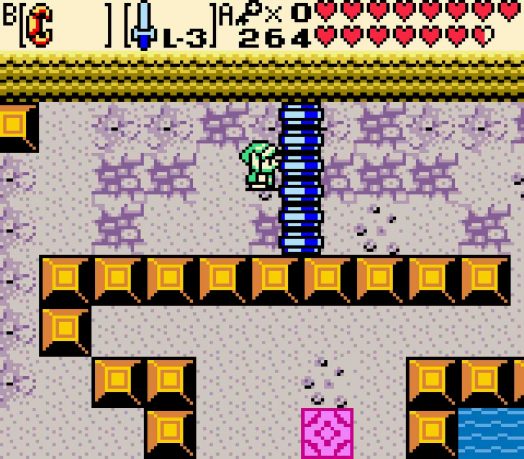
For the final room, Roc’s Cape won’t come into play here; instead you’re going to rely upon the Power Glove again. Just like in Snake’s Remains (and other dungeons), you’ll have to watch out for the crumbled floor as you push the rolling log off to the right. Ultimately, never ever stand on a piece of crumbled floor. Once you get to the gap in the blocks, get out, and then wait for the rolling log to roll back left. Once it does, sneak back in to push the button. This will cause a treasure chest to appear along with the second teleporter.
You might think you’re in the clear now, but you will be ambushed by four Zols once you approach the chest. Kill them to claim your Gasha Seed. Then swim through the S-shaped curve to reach the second portal.
-
- Watch out for the ambush as you go for the Gasha Seed in this chest.
-
- Then swim through in order to reach the teleporter to the third area.
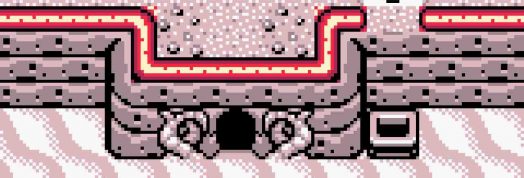
4 Swim to the third portal
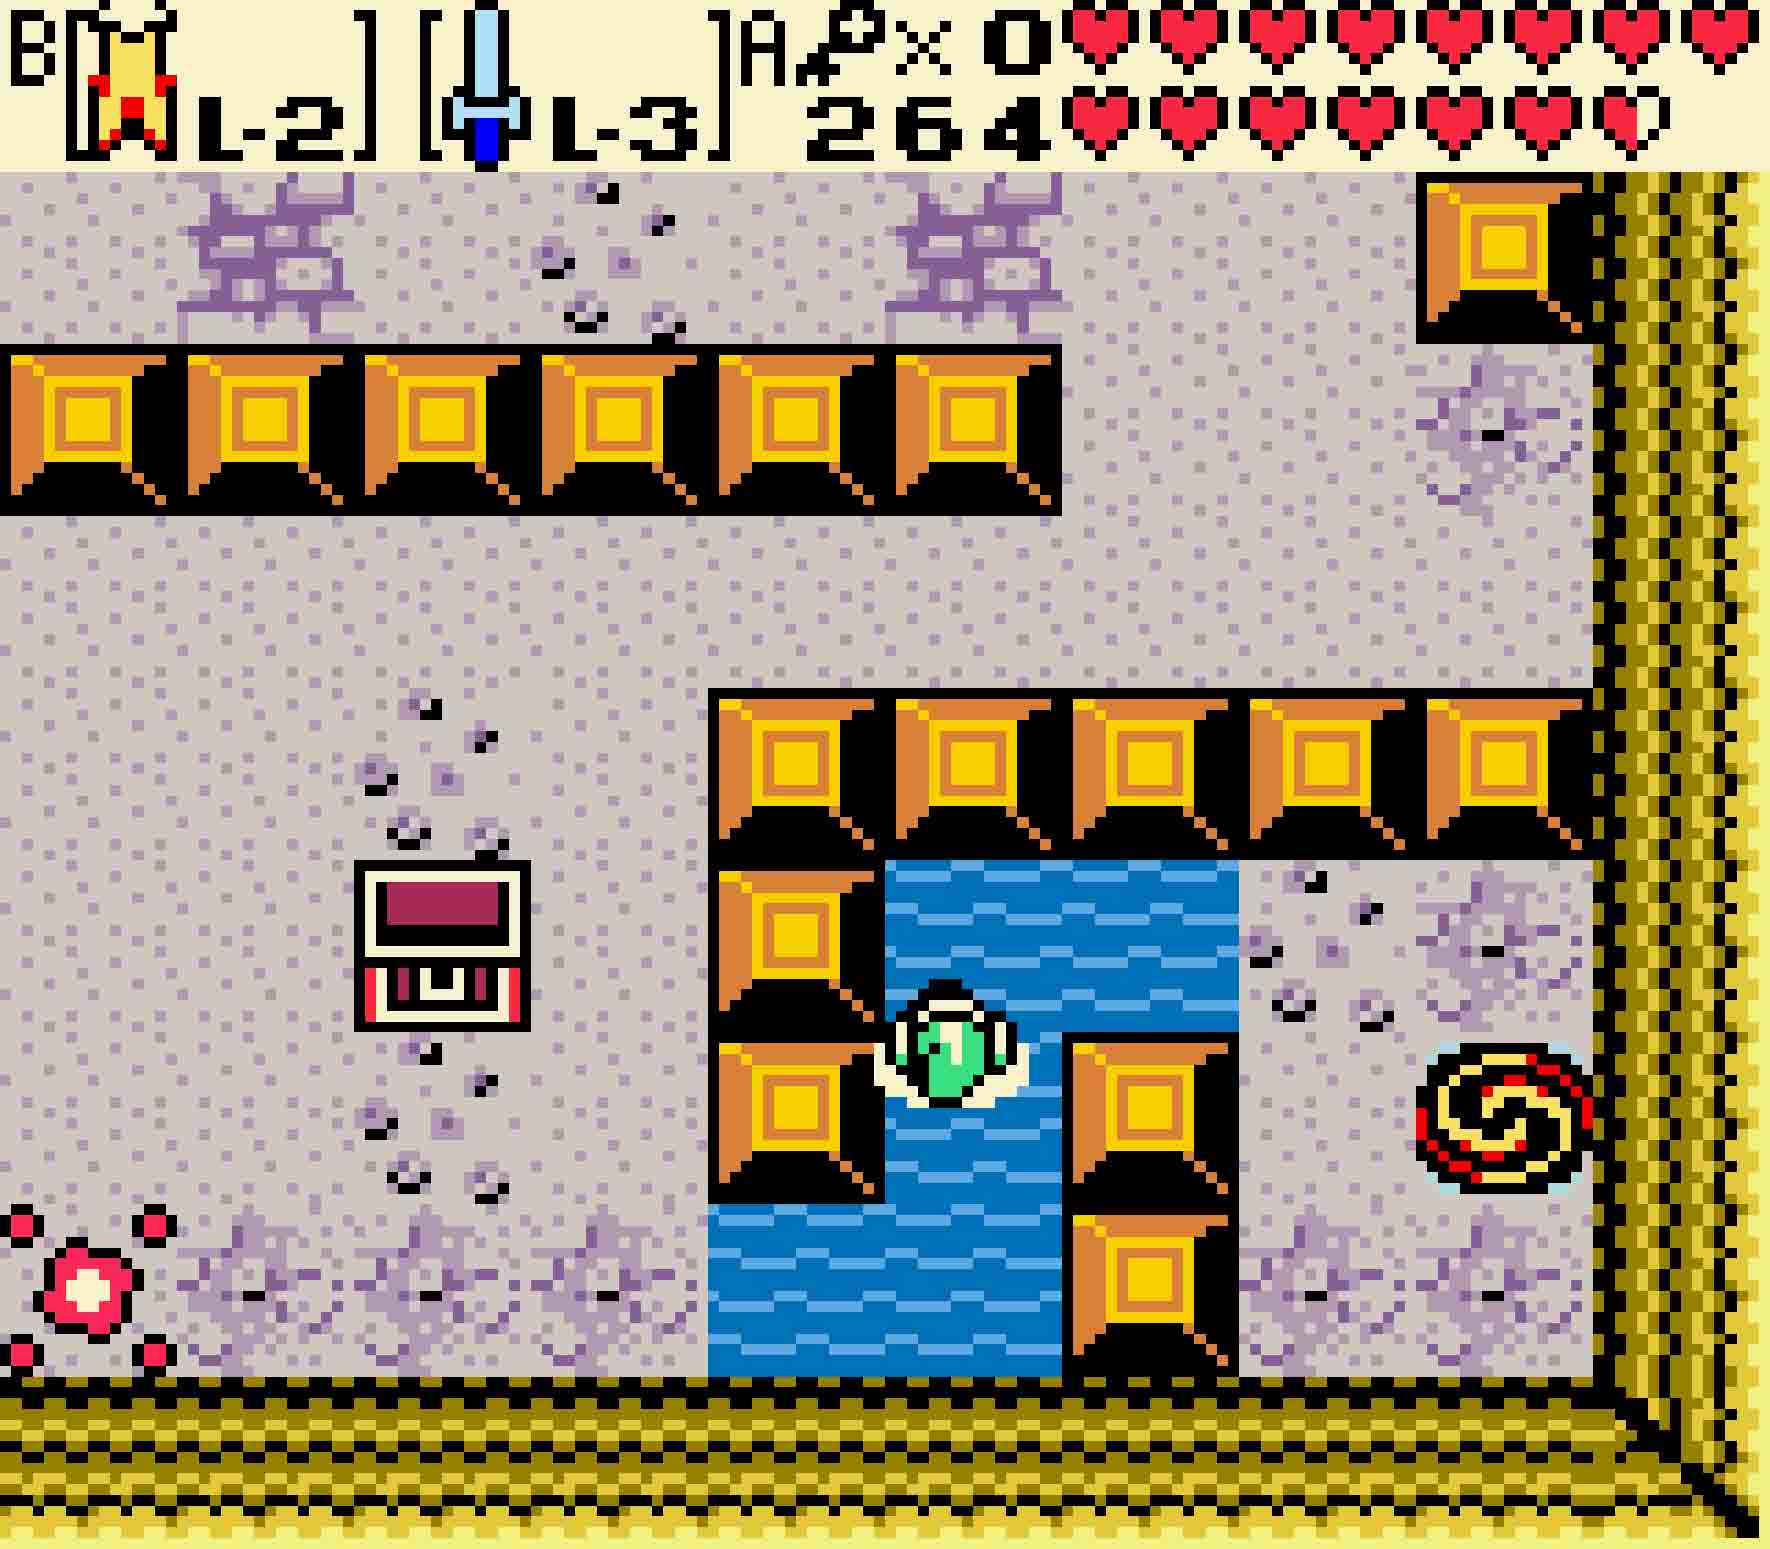
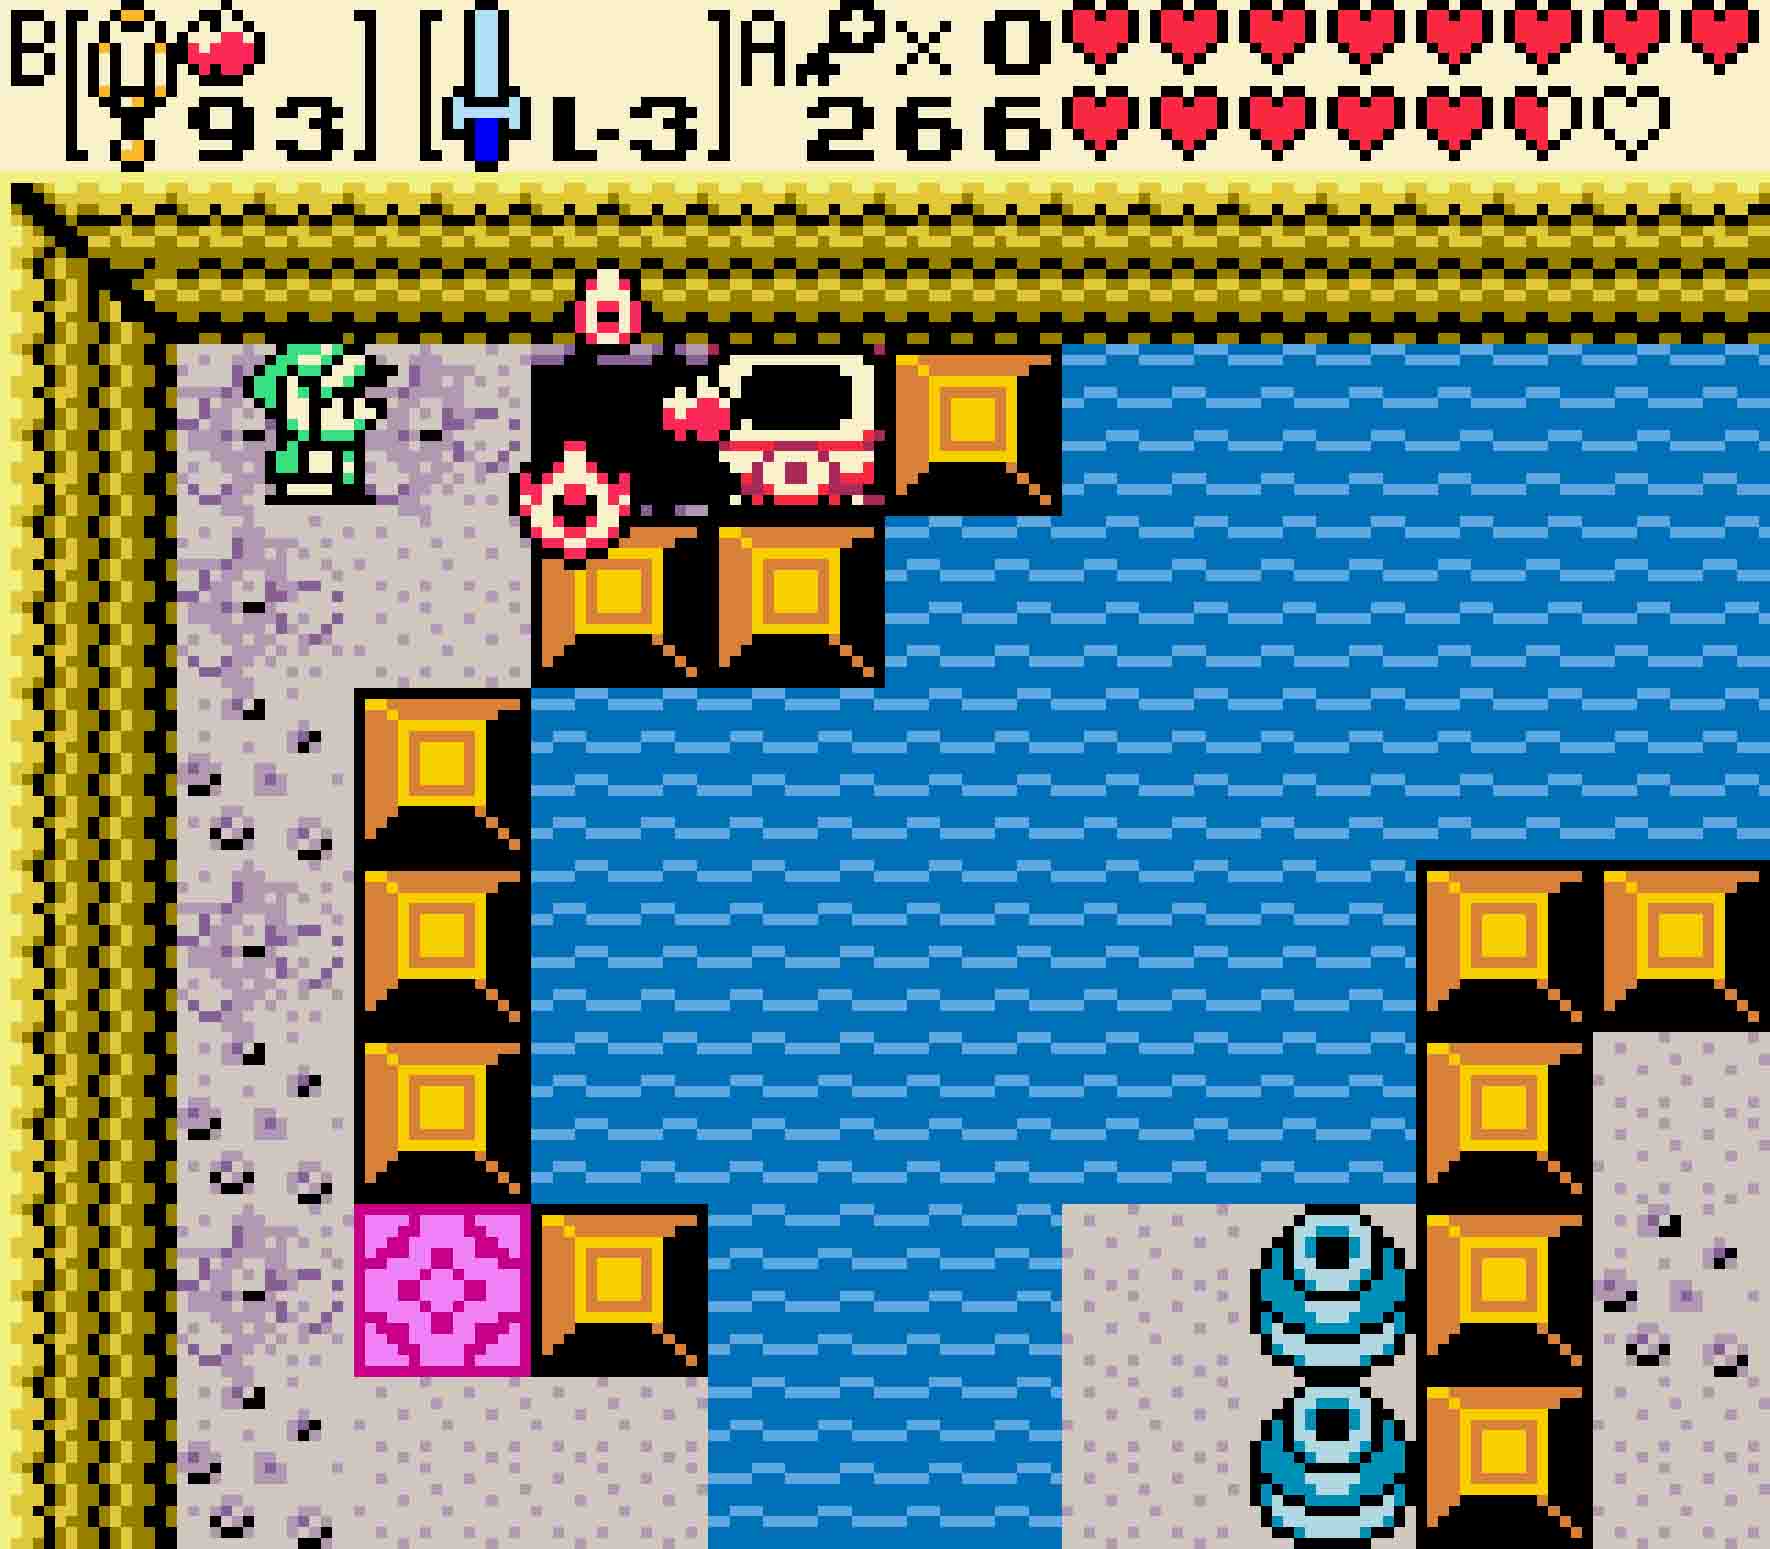
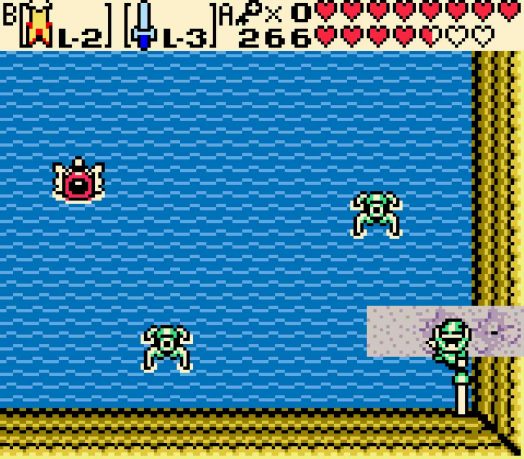
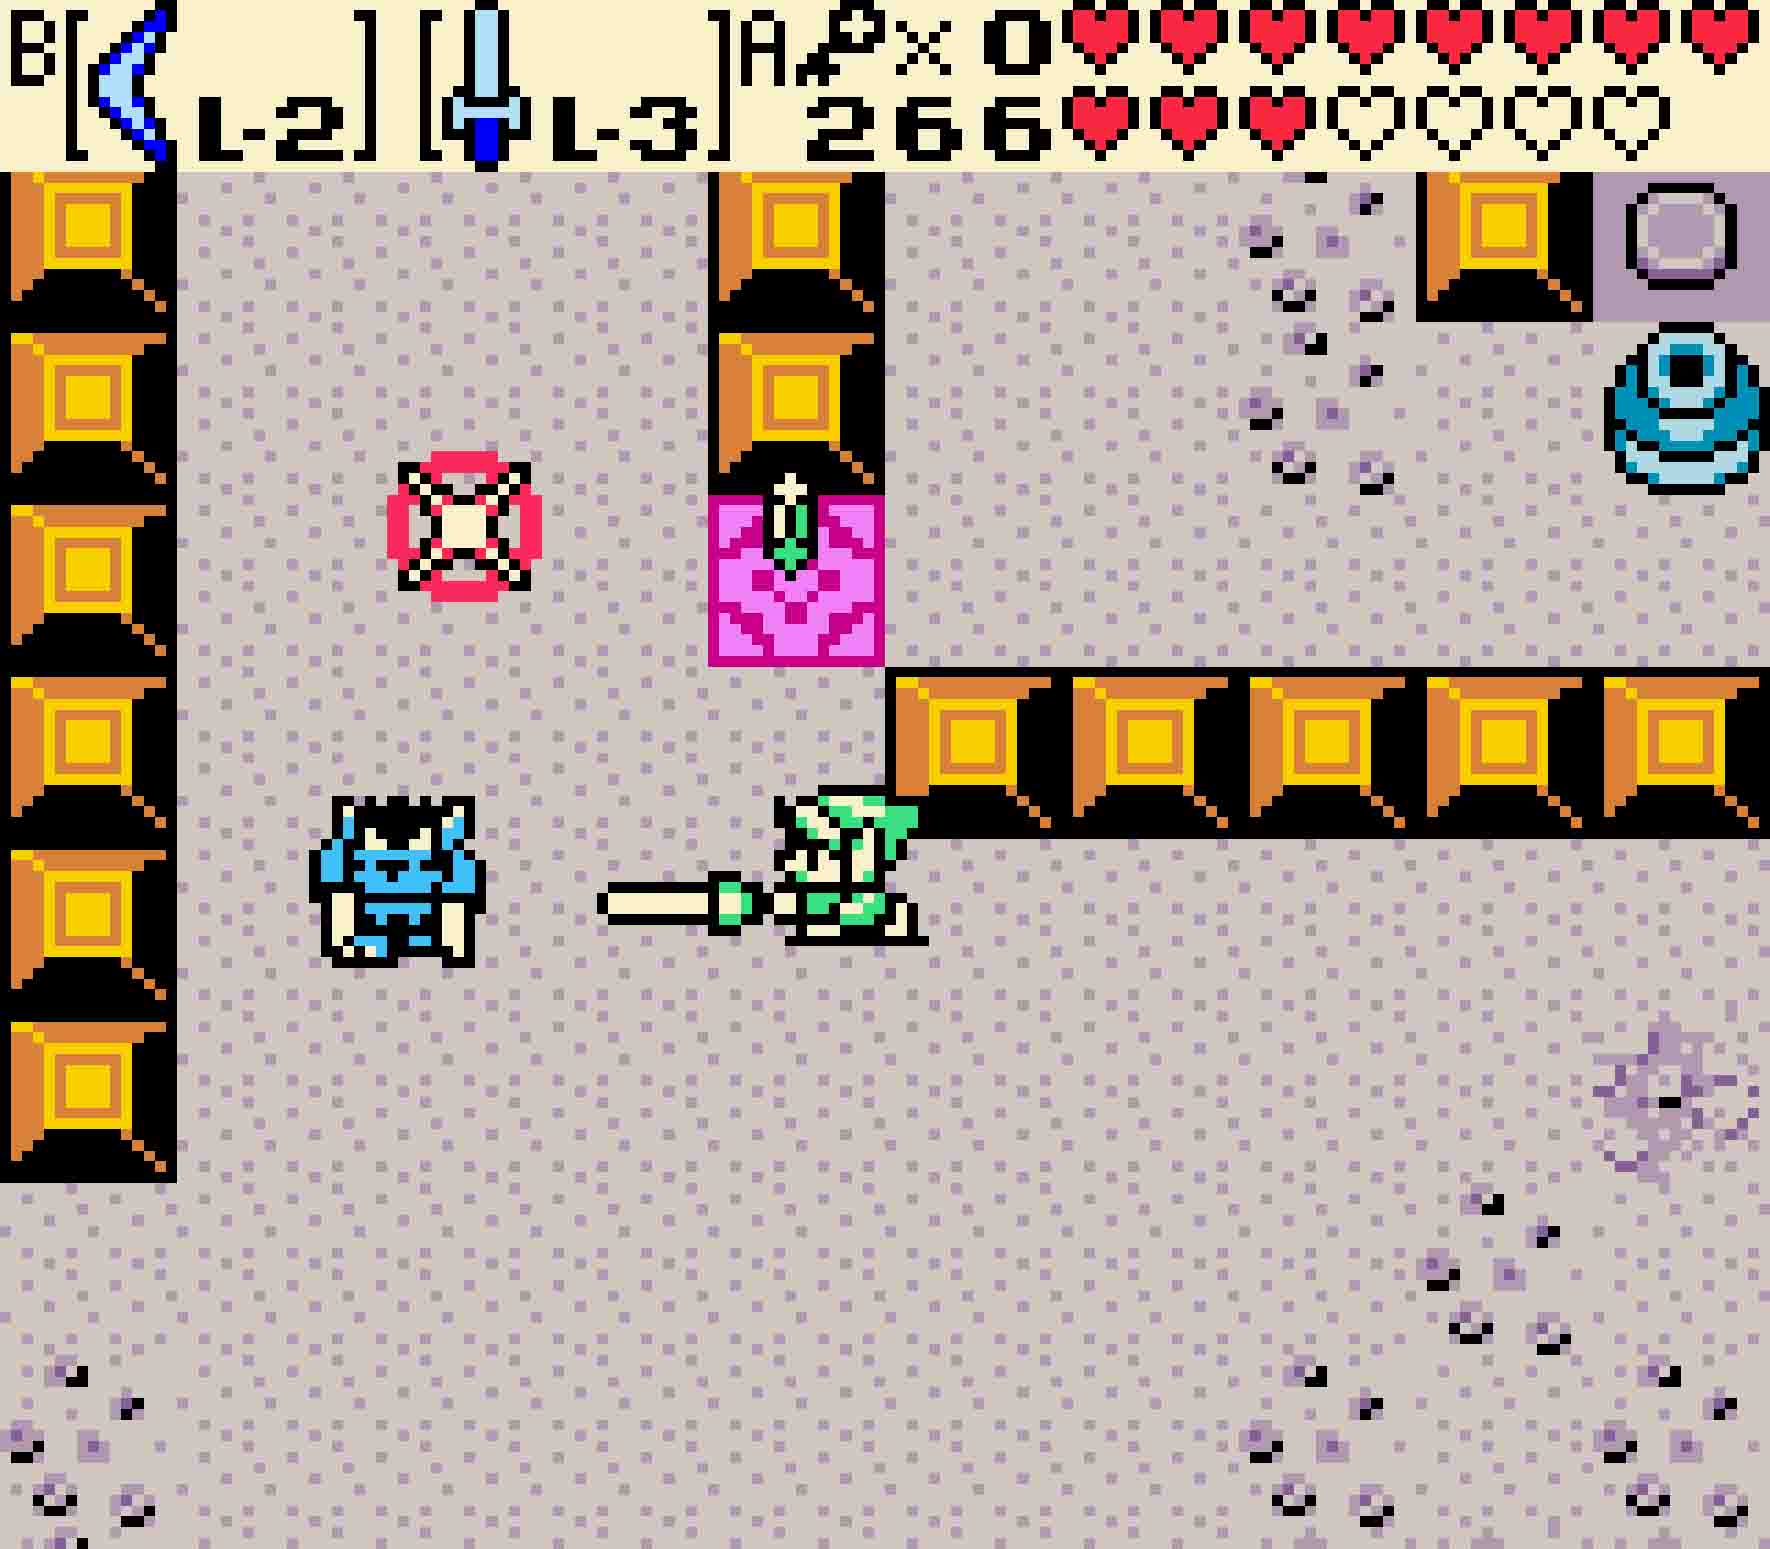
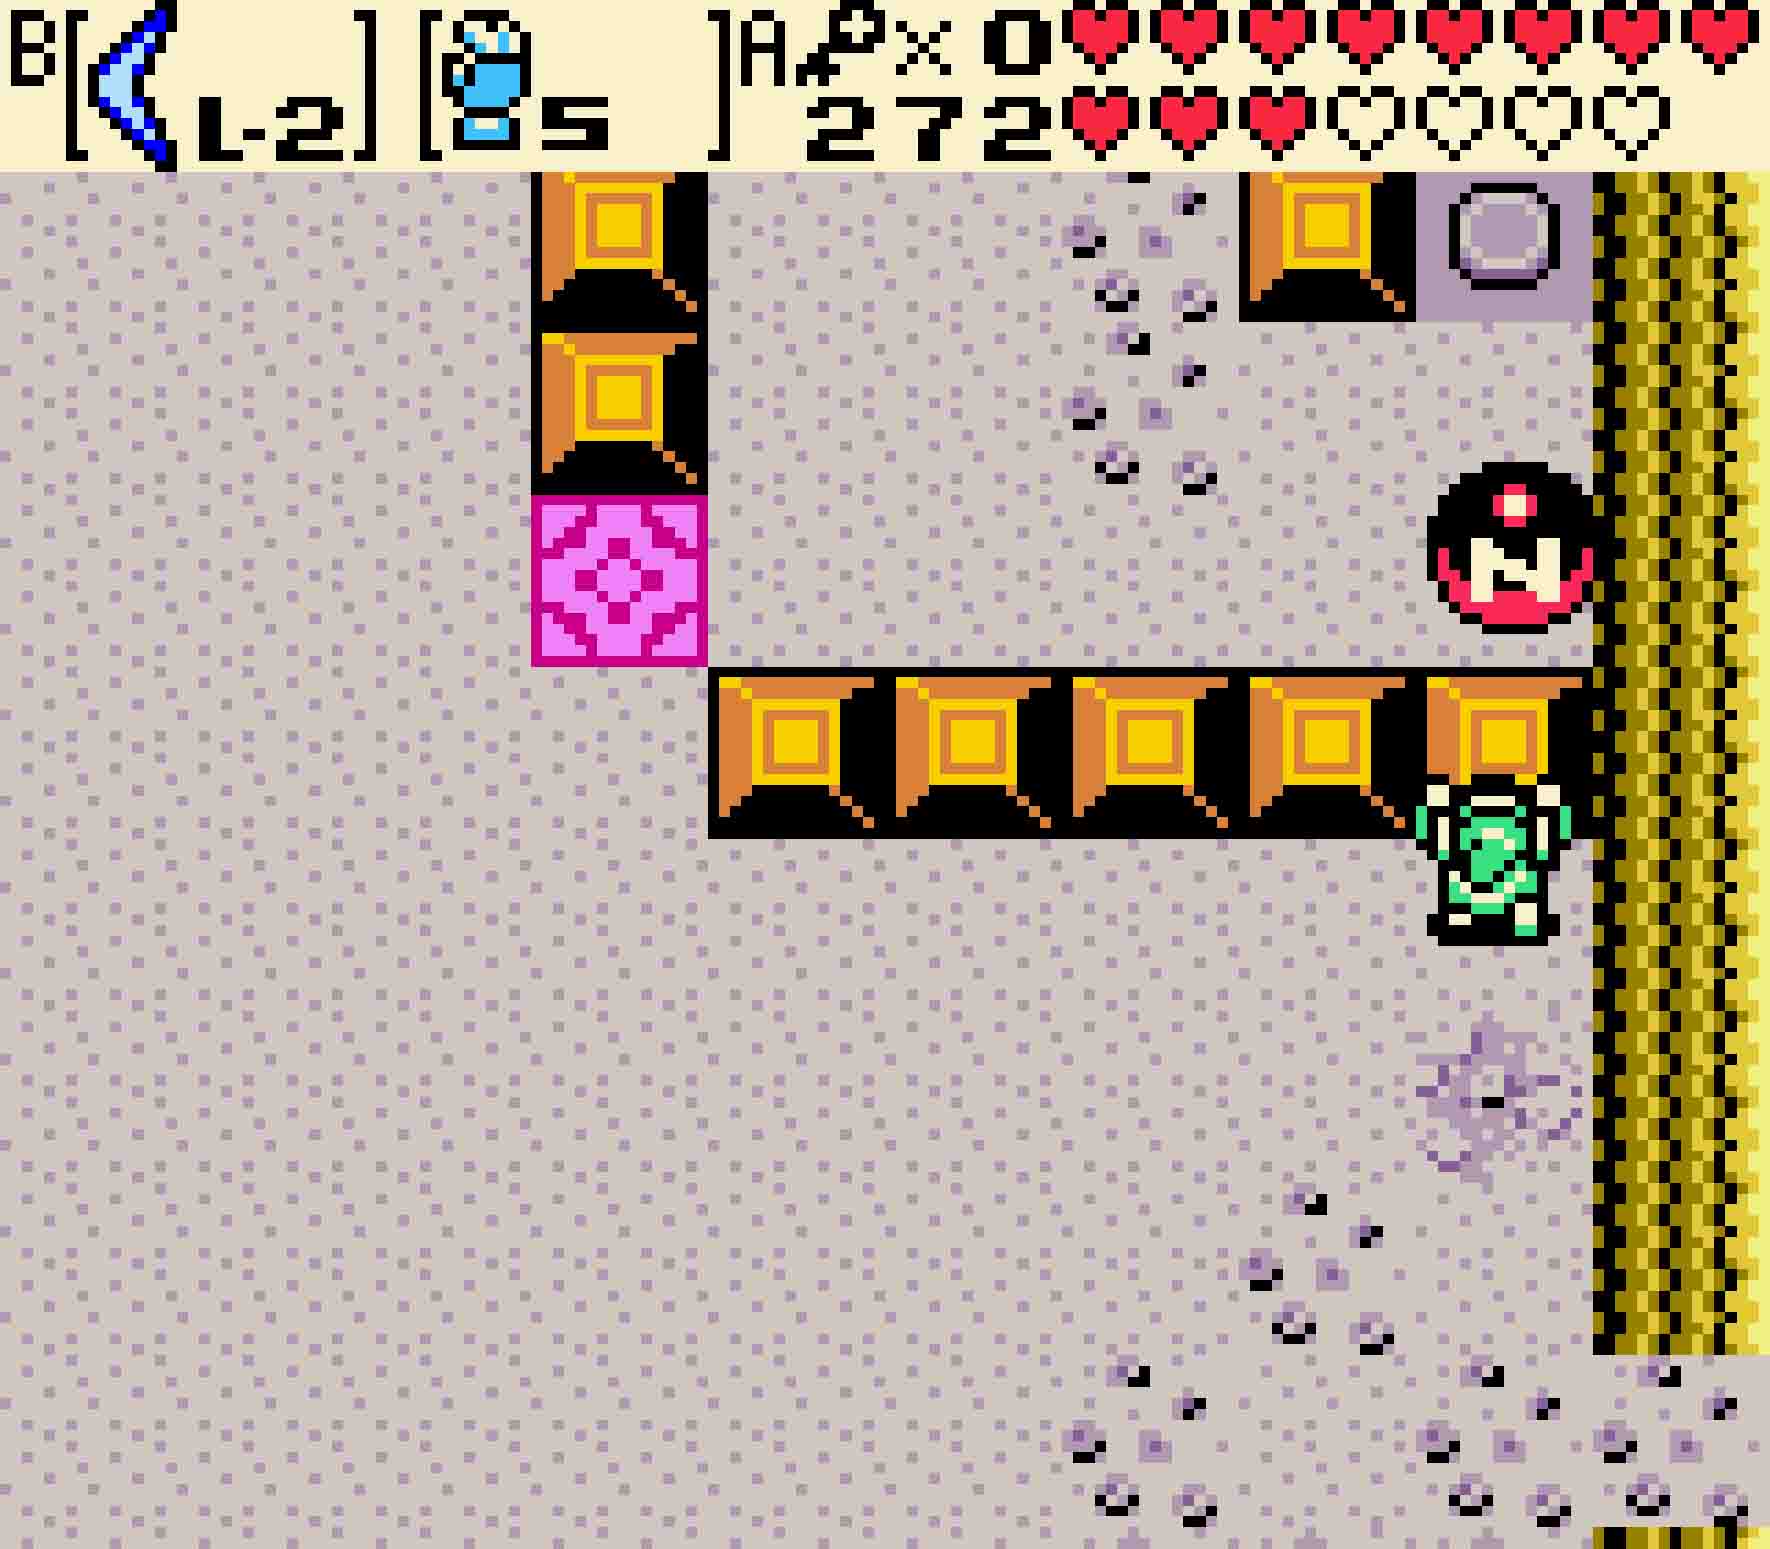
If you guessed that you’d be swimming in this next section, you guessed correctly. You’ll find a huge underground lake in this next room, complete with Water Tektites and Zoras throwing fireballs at you. If you’re lucky, you’ll be able to whack them with your sword or some long-range weapon. But you can also dive beneath the surface to avoid them for a time as well. The doorway to the south may be open, but there’s actually a key hidden here that you’ll need. Swim around the lake to reach the land on the west side of the room. Stand on the pink tile and push the block just below it down; that block will only move downward, and once a treasure chest appears on that square, you won’t be able to get it if you don’t. Head up to the north end of the room, and use your Slingshot to fire an Ember Seed at the brazier. The chest will appear, and you can get your small key.
-
- The chest will appear on the colored tile, but this block will be in the way.
-
- Then use the Slingshot to light the torch to make the chest appear.
There are more Zoras in the next room. You should actually take the time to kill them since it’s hard for them to spawn out of melee range. Once you do, you get the pleasure of solving another sliding block puzzle.
Opening the next door
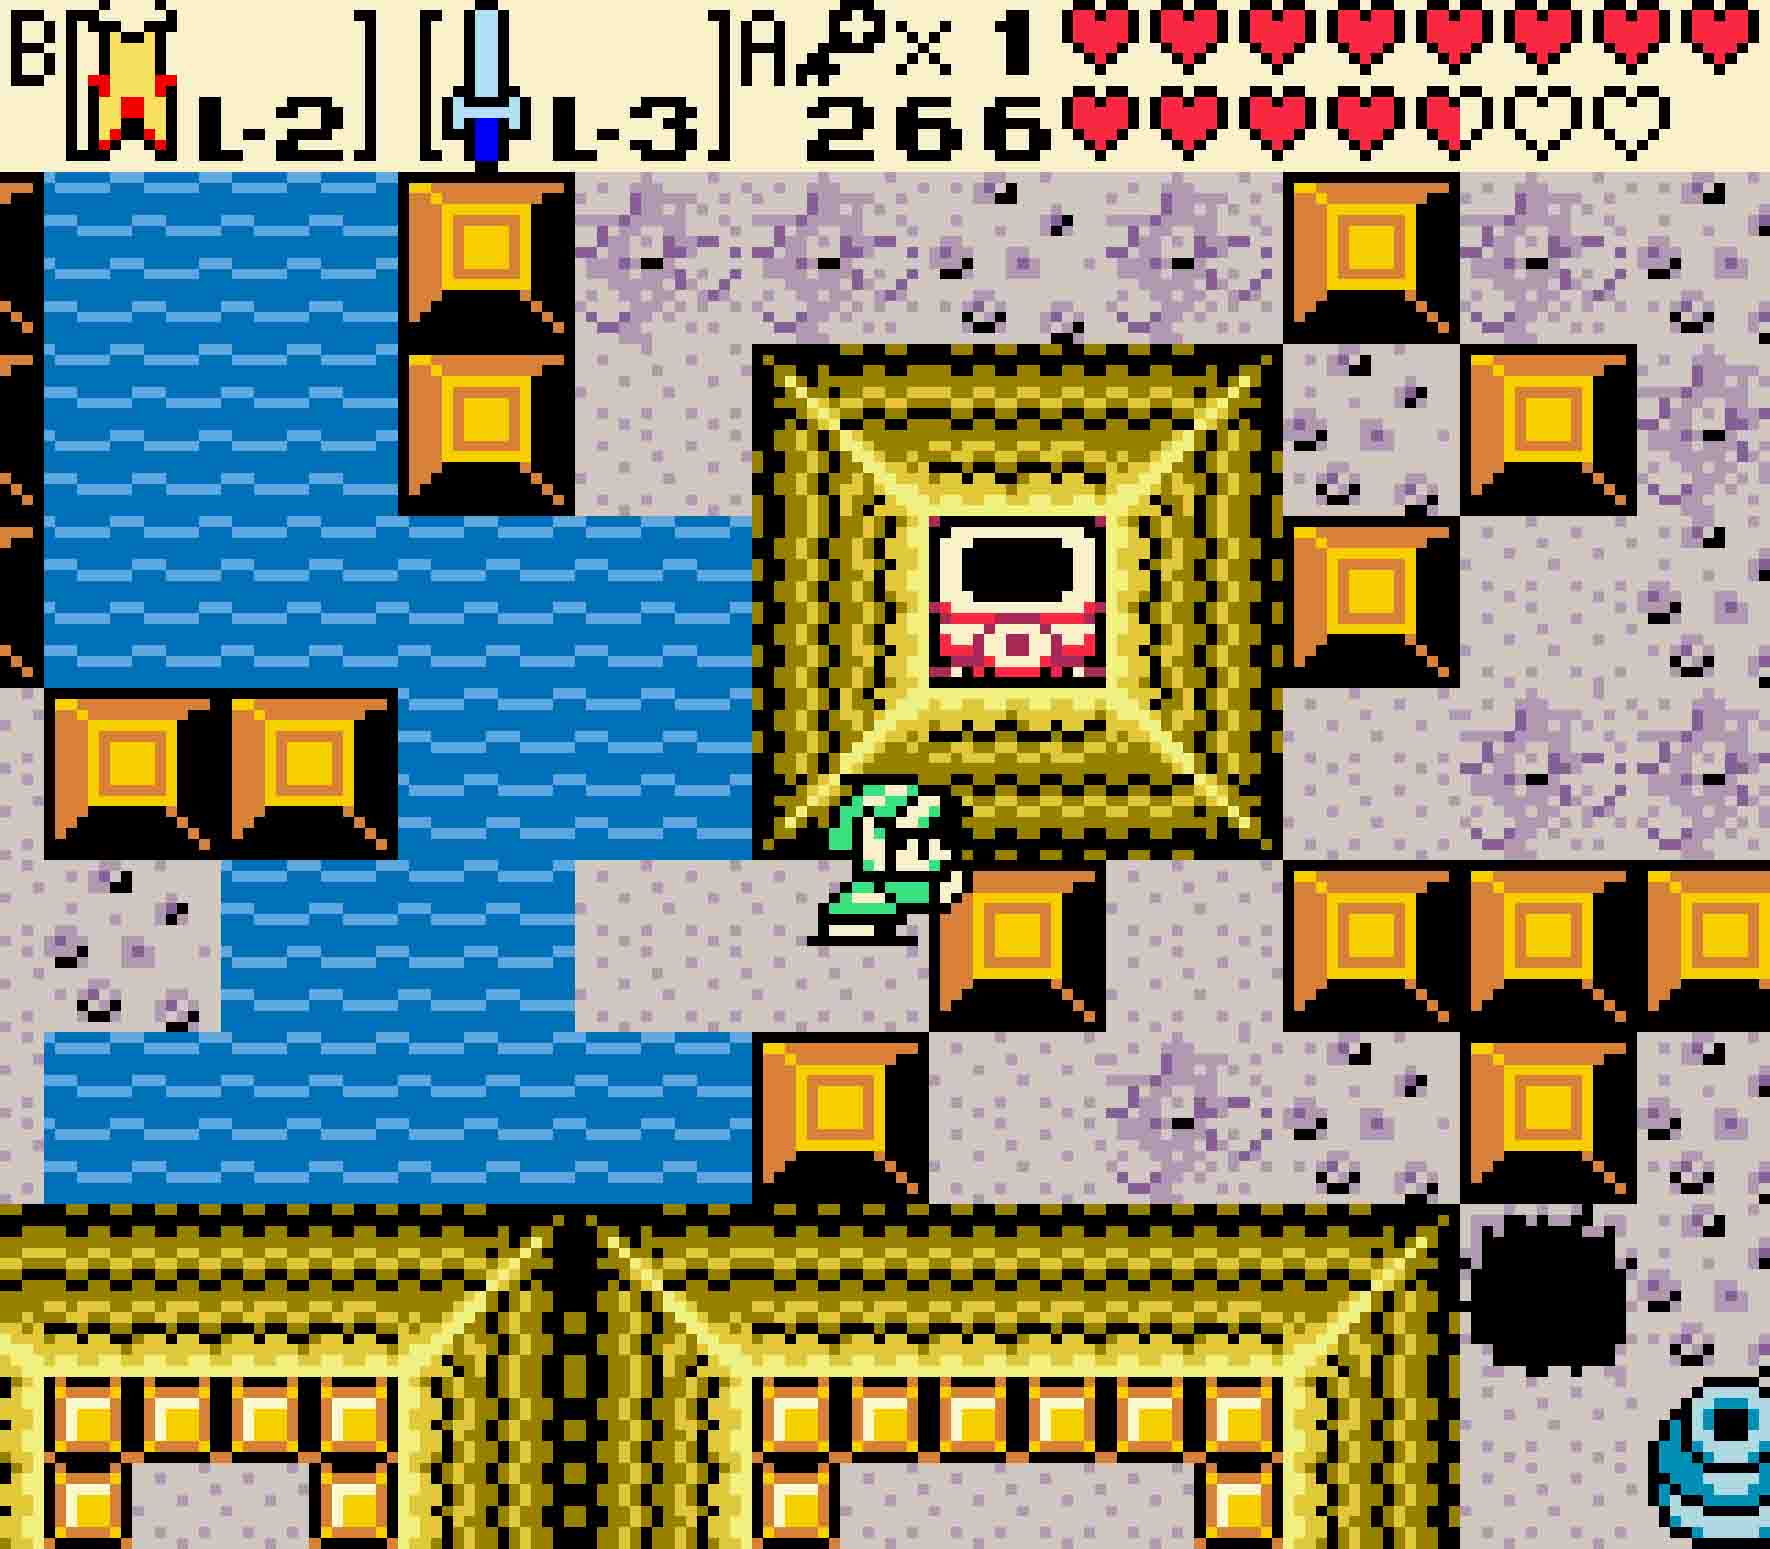
Step One Stand on the small ledge of land just southwest of the torch in the room. Of the two blocks there, push the one directly south of the torch to the right.

Step Two When you do so, that block will slide just to the left of another block. Push that next block up.
Step Three Head up through the northern gap and push the block there to the right.
Step Four Then push the next block just below the first one to the right as well.

Step Five Push the rightmost block down.
Step Six After you do so, there will be a block just on the left side of you. Push it to the left.
Step Seven Finally, you can push the block just above the pit southward into the pit. This will allow you to jump over it.
With that, you can finally access both of the torches after you unlock the locked block. Fire Ember Seeds into them with your Slingshot to open the door ahead of you.
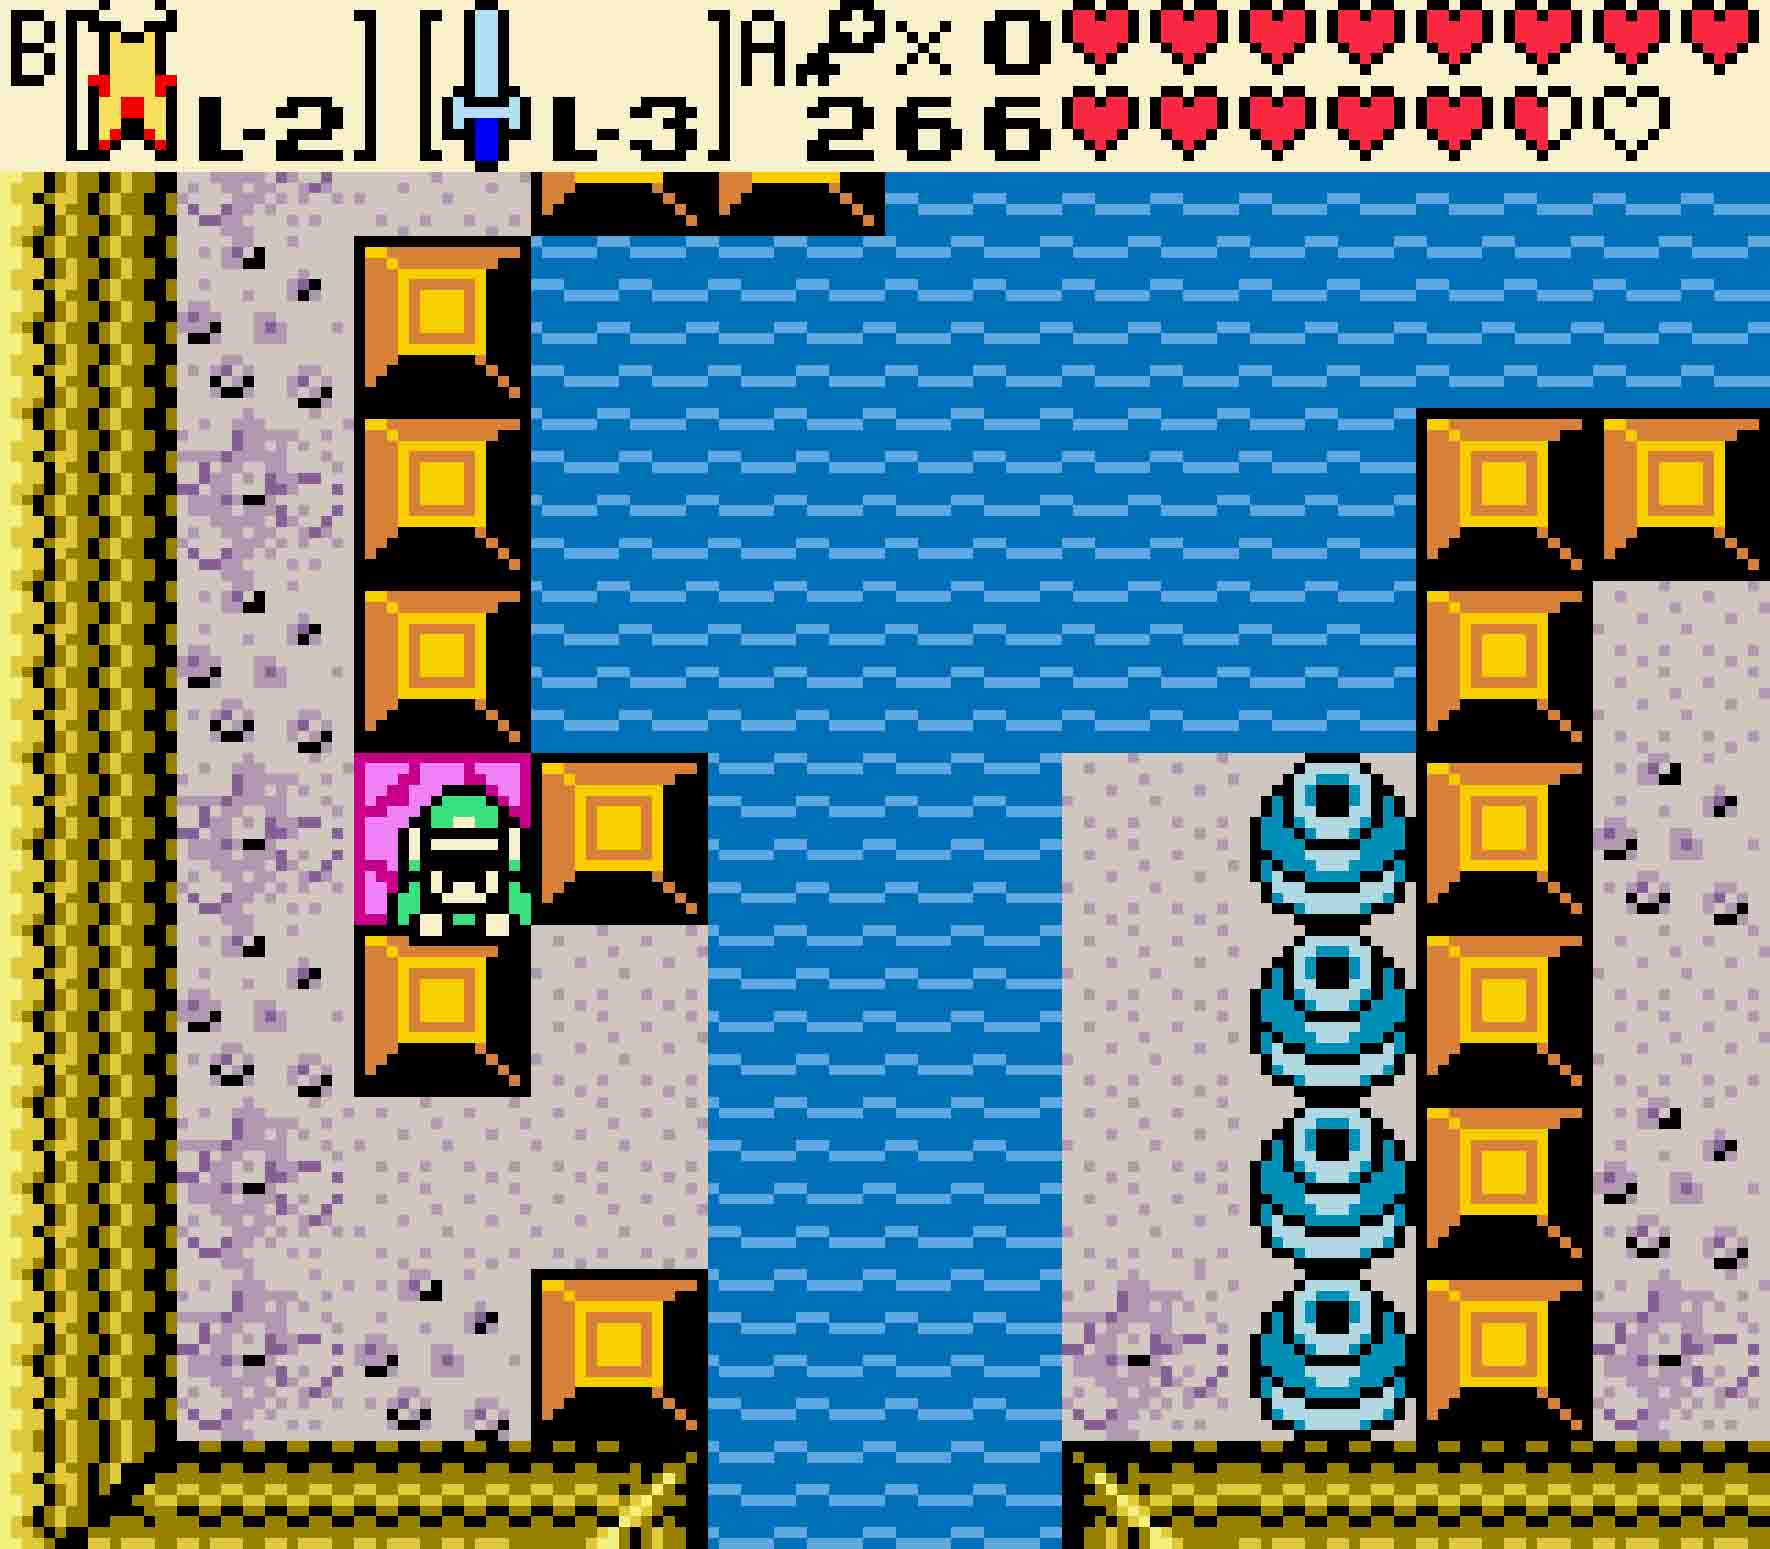
 In the third room, you’ll have to face some rather annoying enemies. Once again, Zoras and Water Tektites will plague you. But this time, you really do need to kill them all. So you’ll have to stand on the four narrow platforms and wait for clear opportunities. Once you kill them all, a key will drop down from above. Swim to it and dive down to collect it.
In this final room, it will finally switch gears. You’re high and dry, but you’ve got so many cracked blocks to blow through. Thankfully, you can take the much easier and cheaper route to the right. You can bomb through either of the two lower blocks on the right followed by the one in the lower-right corner of the room, or you can blow through the two cracked blocks sitting side by side. Once you do, you can push the block just up and to the right of the pair of cracked blocks up one square to escape. And finally you’ll be at the portal.
However, you may have noticed that the teleporter hasn’t appeared yet. To do that, blow up the cracked block just to the right of the upper torch. Then light both torches with Ember Seeds. This will cause both the teleporter and a treasure chest with a Gasha Seed to appear. Then enter the teleporter.

-

- The pathway to the left is full of lies. Take the shorter route!
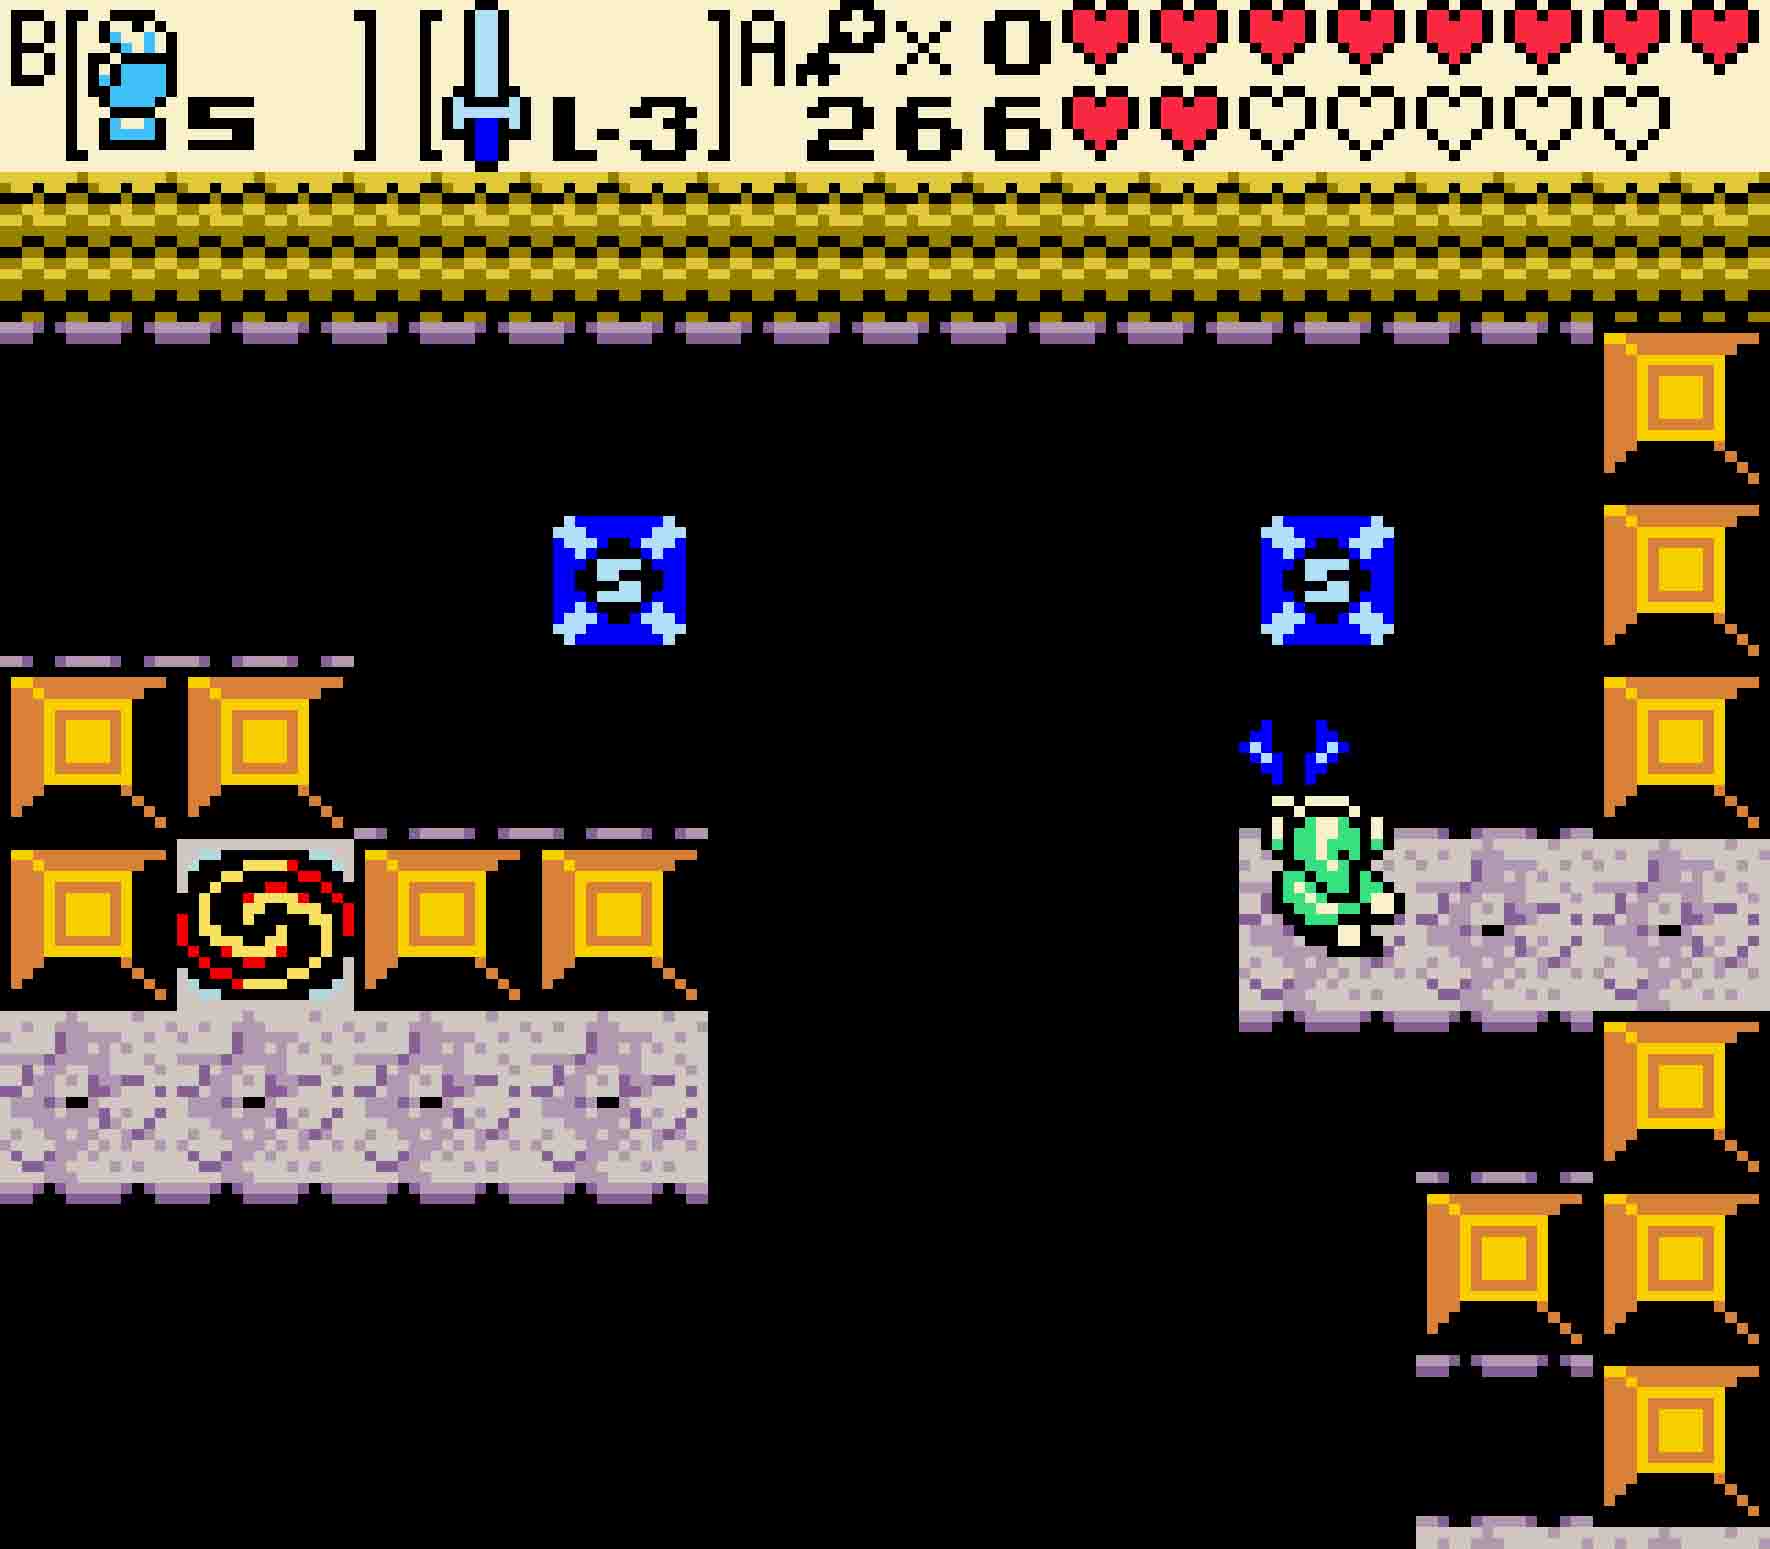
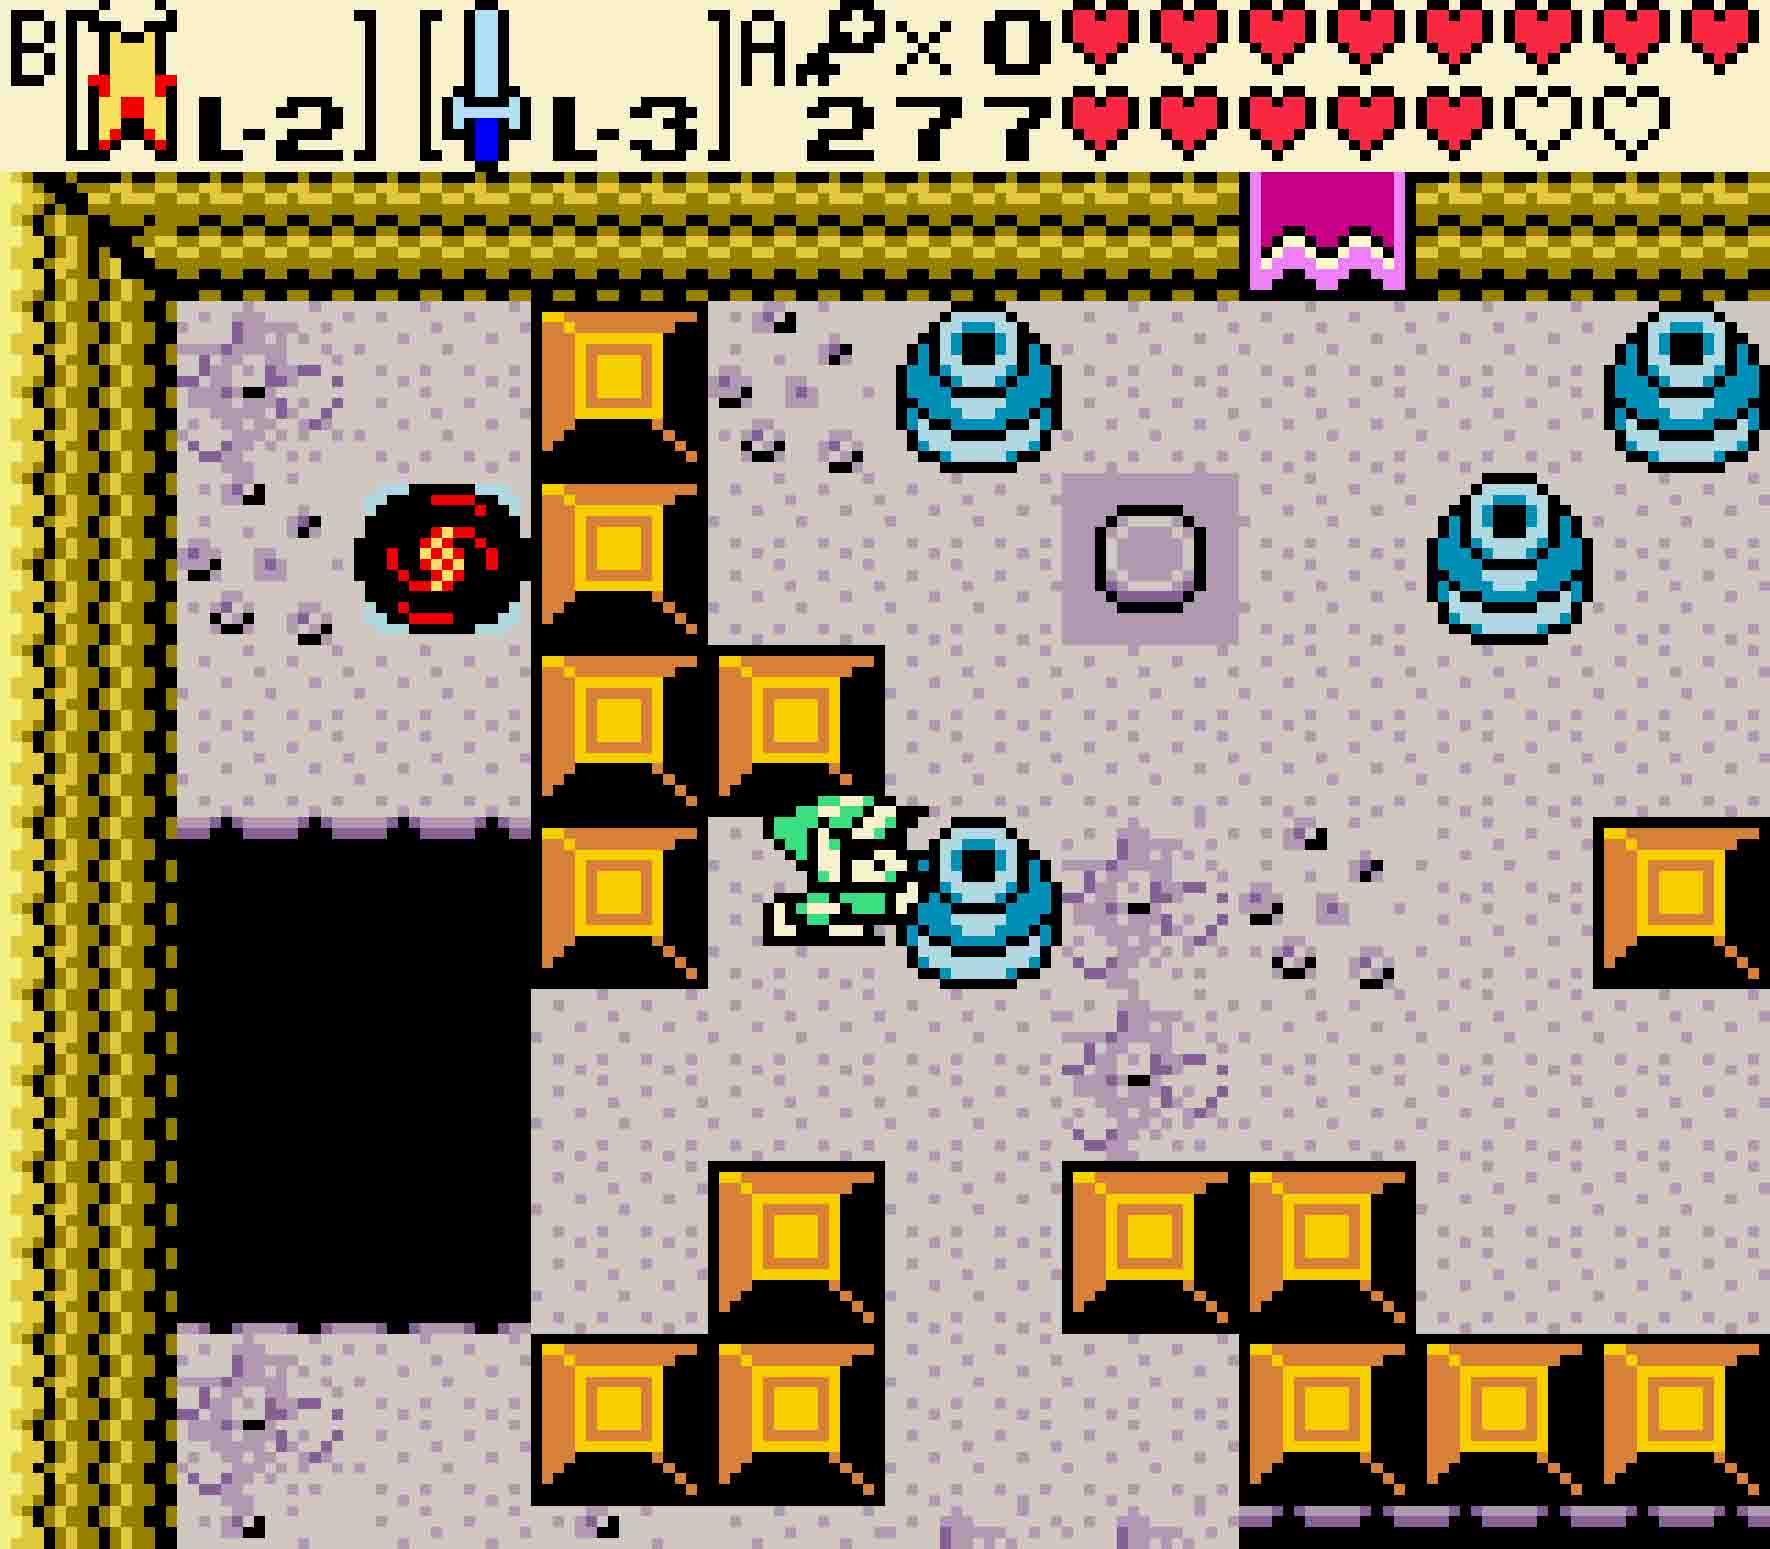
5 Cross the magnetic void
Who wants to cross another large gap with your Magnetic Gloves? Well, like it or not, you’re going to have to. The placement of the rotating magnetic pillars doesn’t make it clear which direction you’re supposed to go, but only by going clockwise (to the left from the magnetic block below you) will you be able to keep moving forward.
Use north polarity to attract yourself to the magnetic block beneath the portal. All of the magnets spin clockwise, so wait for it to spin you 270° so you can begin your transfer to the next magnet to the left. For each of these transfers, you have the choice of either immediately turning for your propel action and then quickly switching to an attraction action, or you can propel yourself first — reaching your destination magnet — and then flipping around quickly to grasp onto the rotation block. For some reason, the second methodology seems to work better, but your luck may vary.

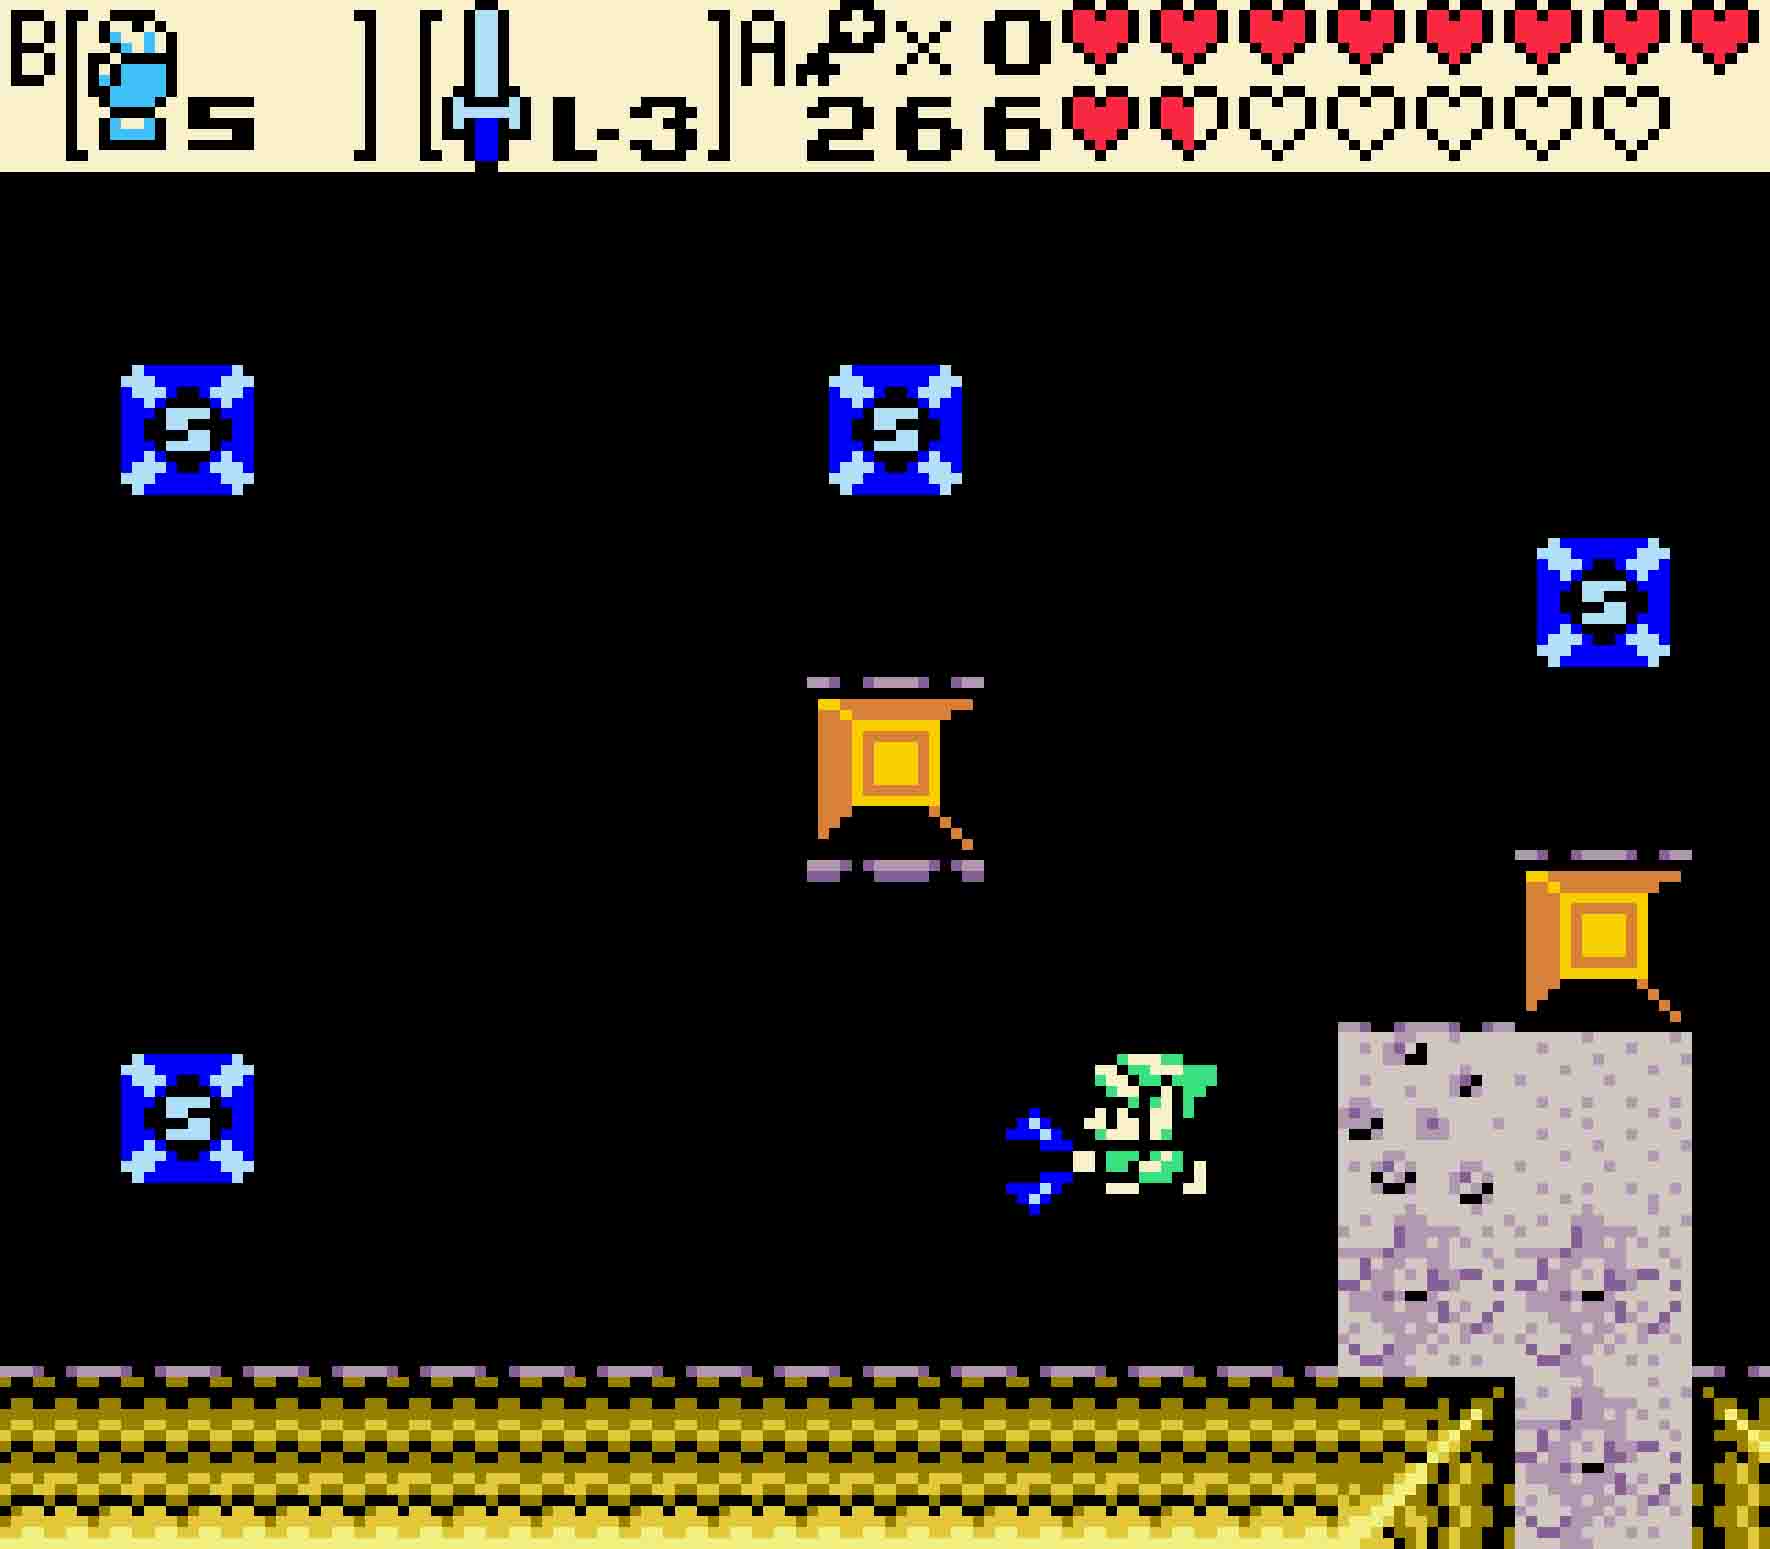
On the second magnet, let it spin you 270° as your next magnet is to the north. Then you’ll do a 180° to reach the upper-left magnet. You’ll then be headed right across two more gaps to reach the upper-right magnet. Once you reach there, you’ll be ready for the tricky dismount. There’s nothing to stop you from going too far, so letting go too late is just as bad as letting go too early. Stop propelling once you touch land; then proceed to the next room.
Again you’ll find two pathways leading from the initial magnet. While the upper path might feel more correct, it’s actually the wrong way to go. Attract yourself to the first magnet, and then spin 270° so that you fly towards the lower-left magnet. After a quick 90° spin, propel away. Thankfully the final platform is much wider here, so you’ve got a lot more room for error.
-

- Take the lower route in the second room.
-
- It’s also easy to hit the final mark.
6 Reach the fourth portal
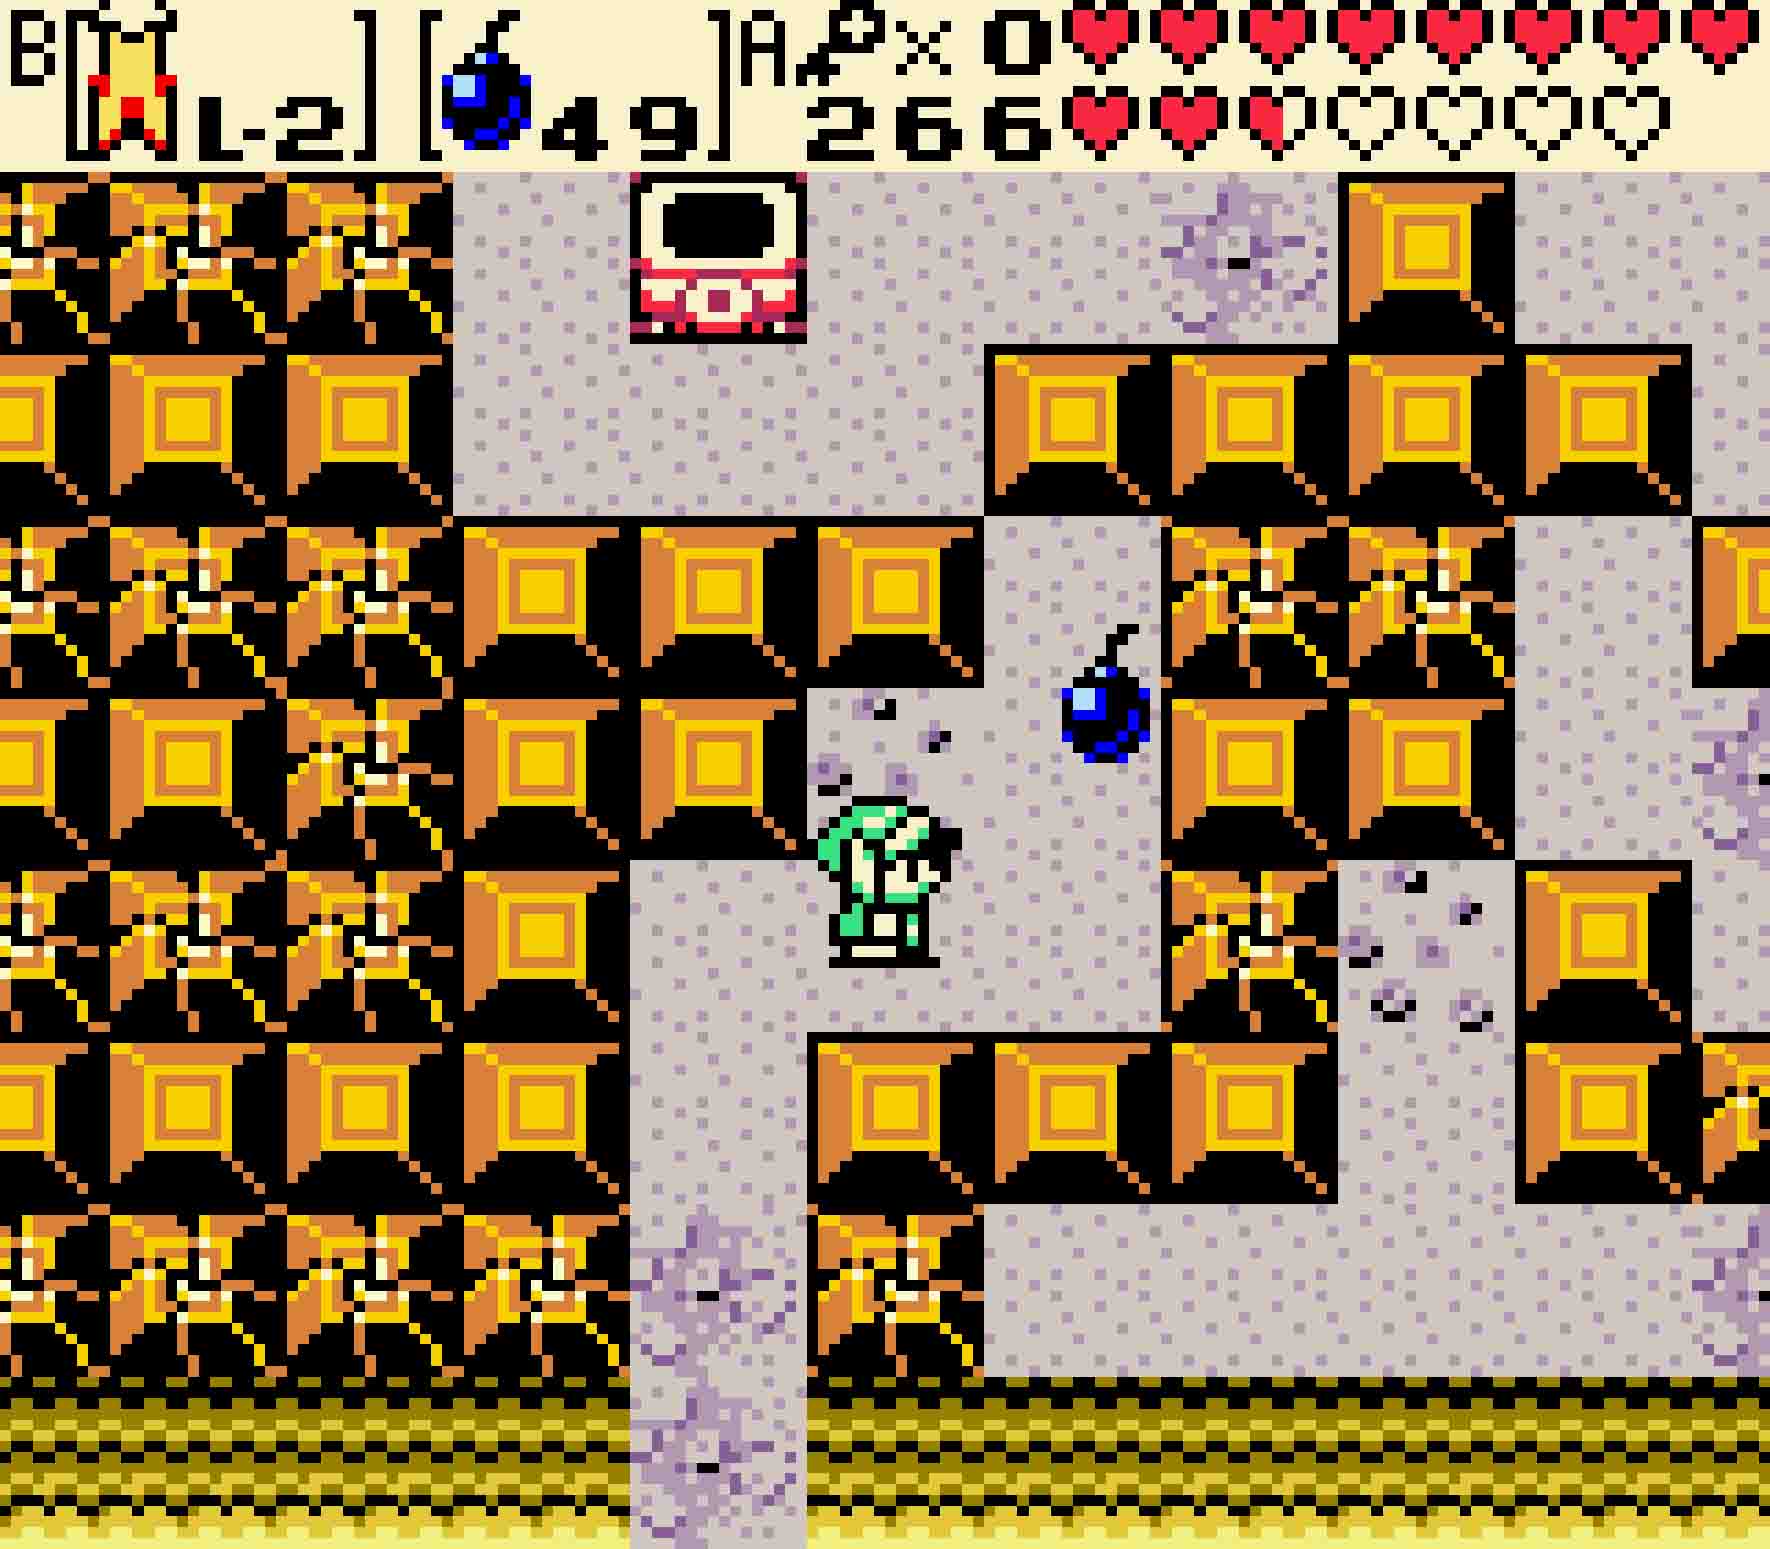
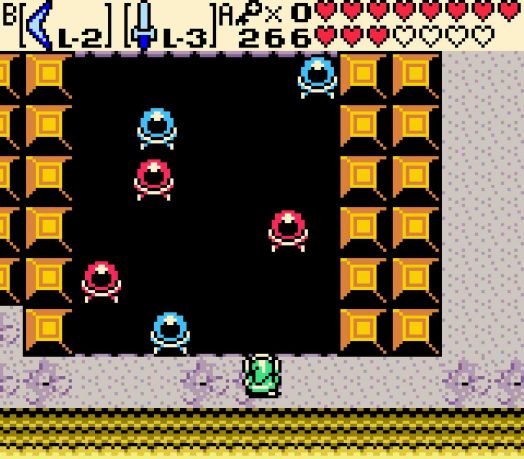 The 15th room of Hero’s Cave is perhaps the most annoying of them all. First, use a shield to kill the Spiked Beetles in the room; otherwise, you will be really sad as you try to perform your next task. In order to open the door to the next room, you will have to turn all of the Crystal Switches red. And this is by no means an easy feat. While you could possibly do it with the Slingshot, the Magical Boomerang is by far the best way as you won’t be wasting tons and tons of ammunition.
What makes this challenge particularly hard is not only the number of switches but just how quickly they move. Simply managing to hit the topmost switch of six is a feat unto itself! If you do manage to hit the top two switches (and don’t accidentally reset them), then you should be more or less fine as the bottom four are significantly easier. Certainly the best advice is to worry primarily about the furthest untriggered switch; only after getting it should you concern yourself over targeting the switches before it as the Magical Boomerang will trip several switches on its way back to you.

Getting the topmost Crystal Switch triggered is difficult, but focus on those first before worrying about the early ones.
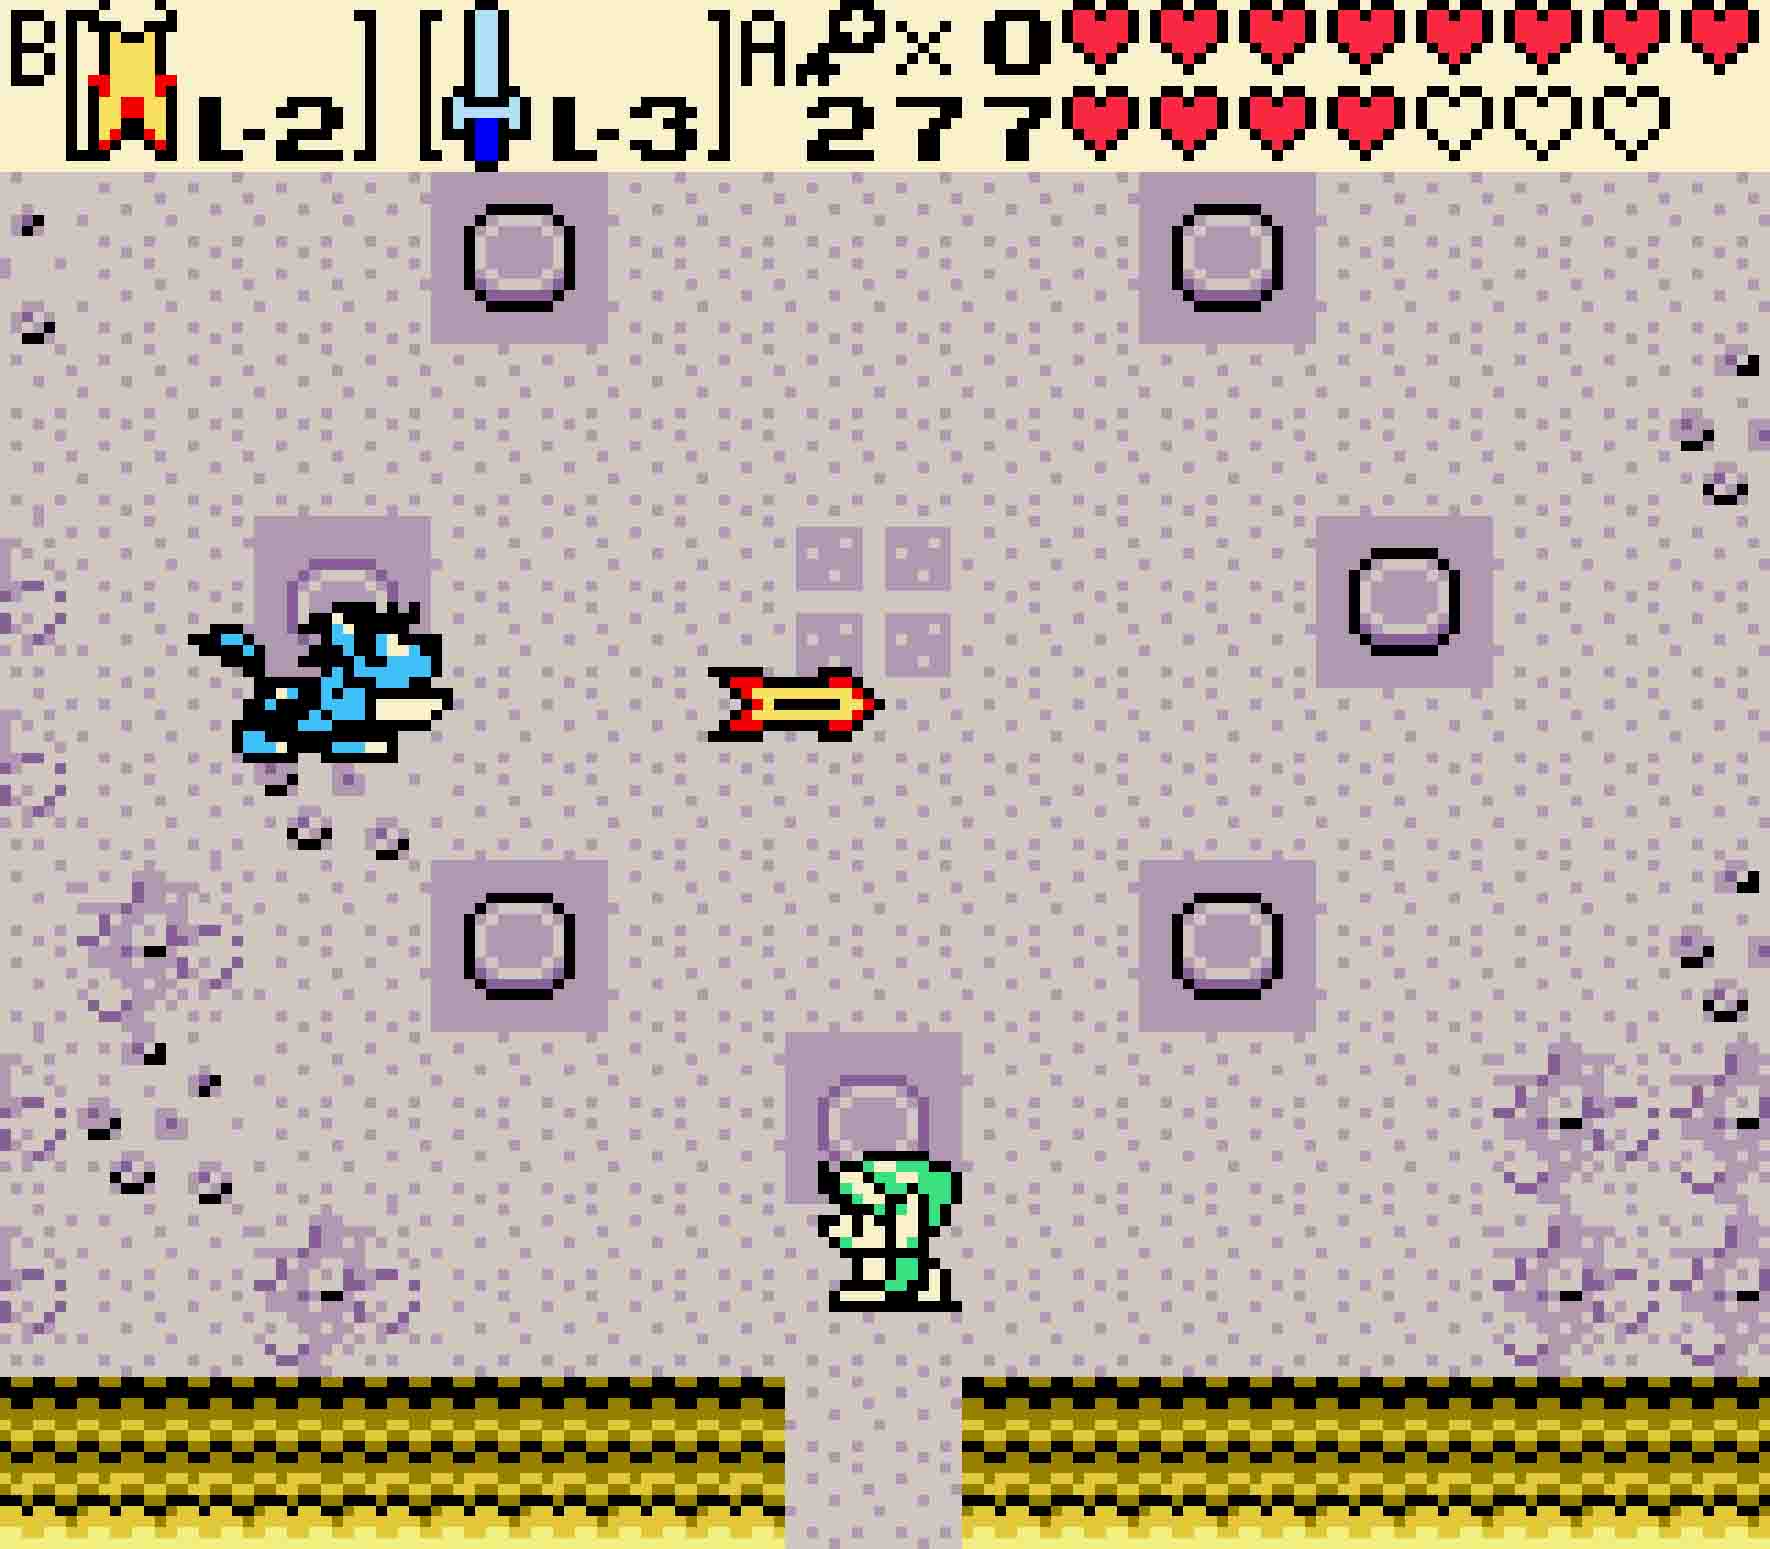
When you finally make it to Room #16, you’ll have to dispatch a trio of blue Lynels. These guys can pack a real punch, so be wary of them. It’s also possible to use the north-polarity ball in the upper-left corner of the room against them if you feel cheeky. However, that north-polarity ball serves an even greater purpose than killing Lynels. You’ll need it to access the Gasha Seed and the teleporter in this room.
Break the pot in this room, and then use your Magnetic Gloves to meander the magnetic ball through the maze of blocks. When you are finally ready to place the ball on the switch, be outside the cluster of blocks. Otherwise, you won’t be able to escape once the ball is in place; a treasure chest will appear on the colored tile and seal you in! But if you’re outside, you can get your Gasha Seed. Then use Zora’s Cape to fly over the long gap to the final teleporter.
-
- You have to be clever with this switch to get the Gasha Seed at the end of section #4.
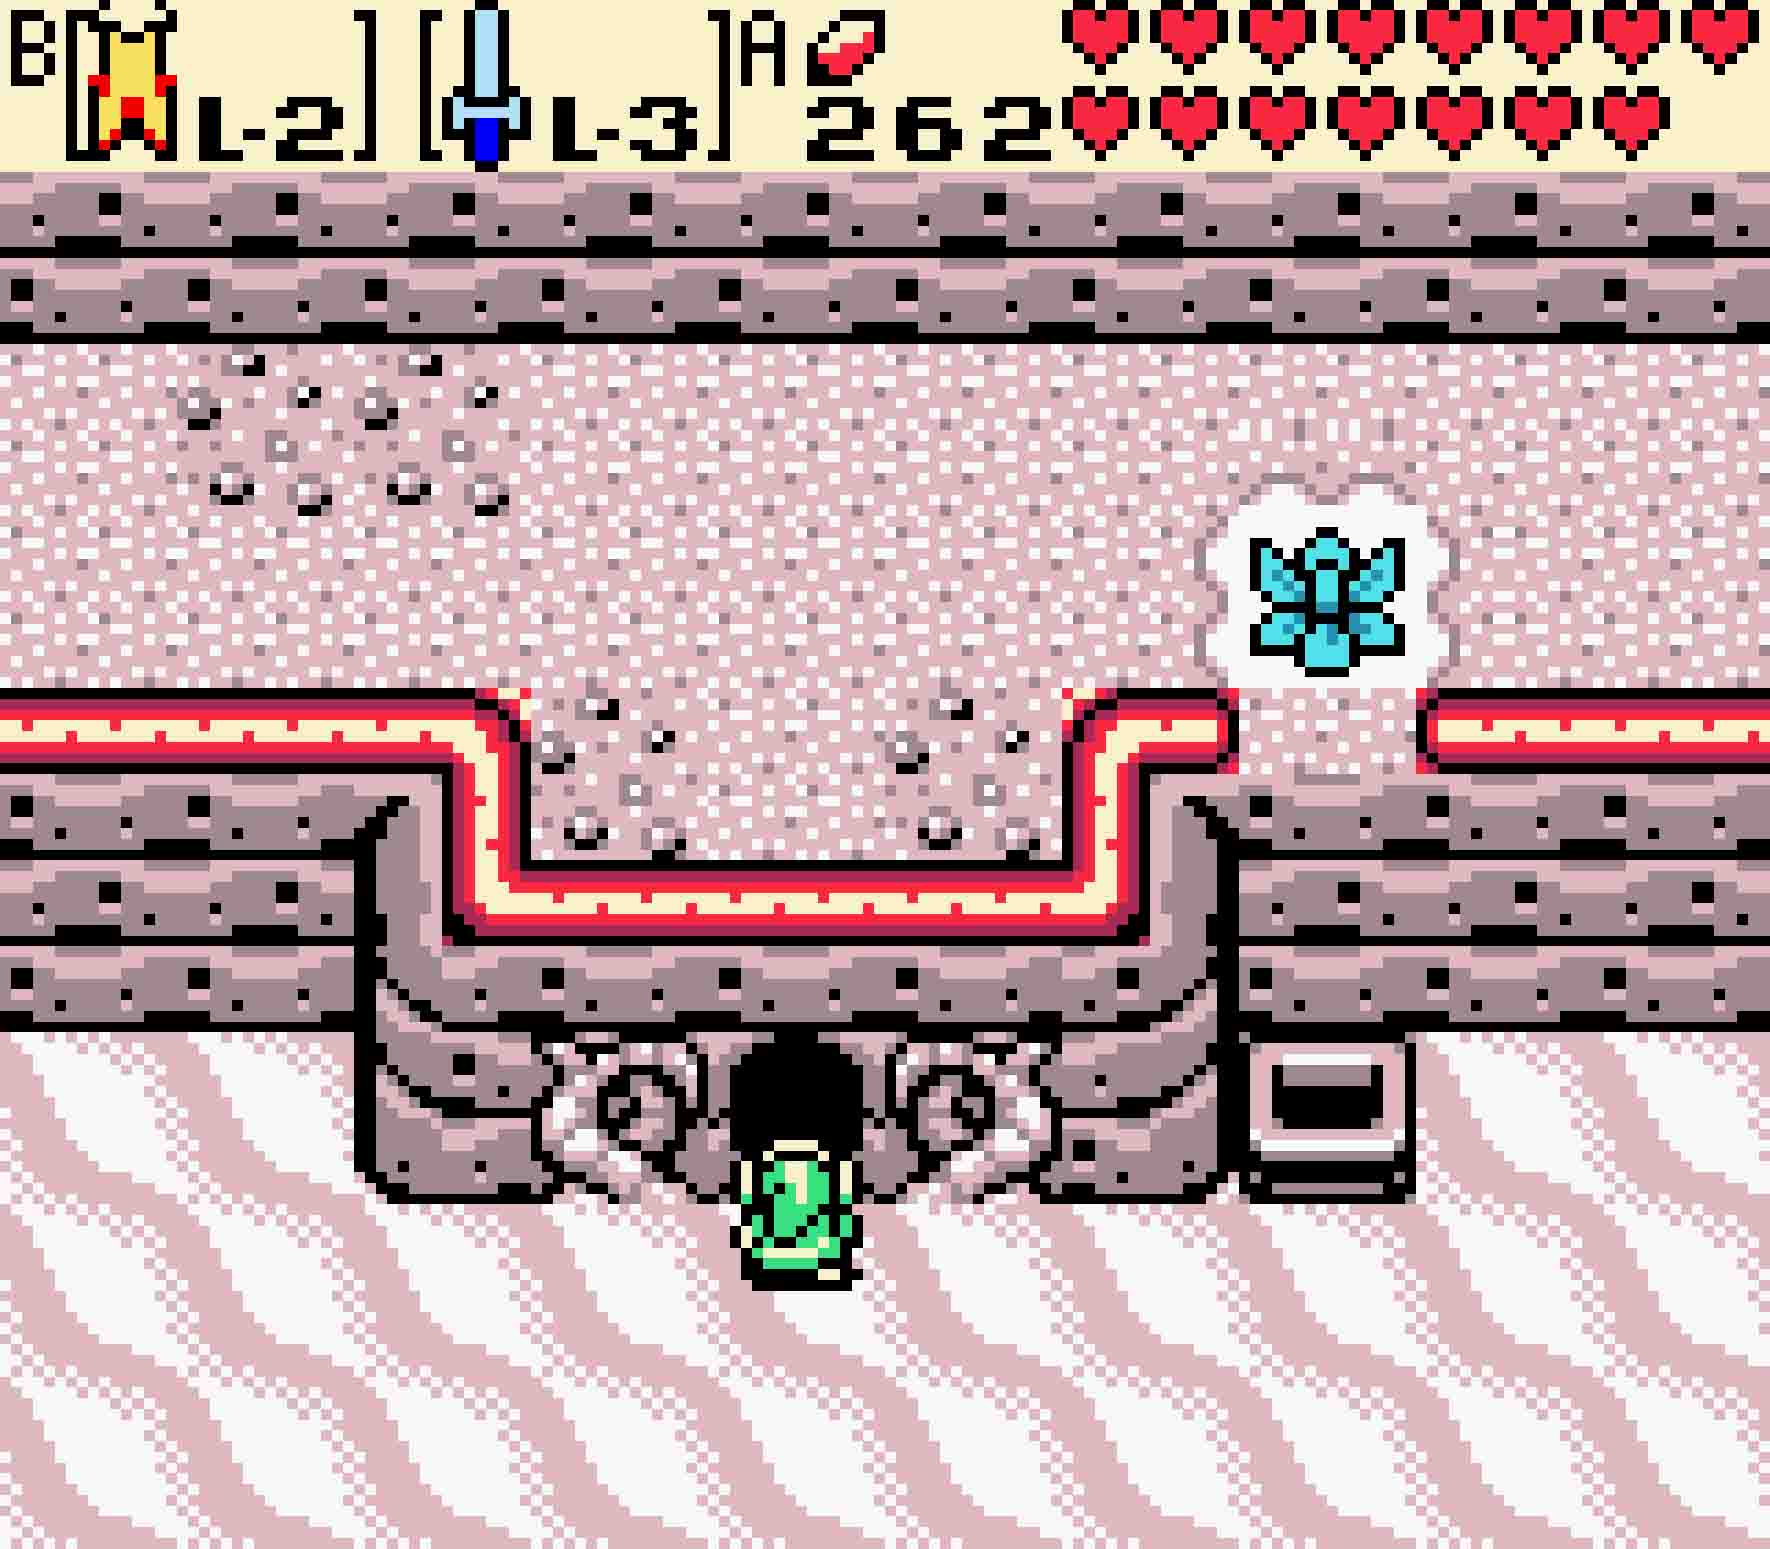
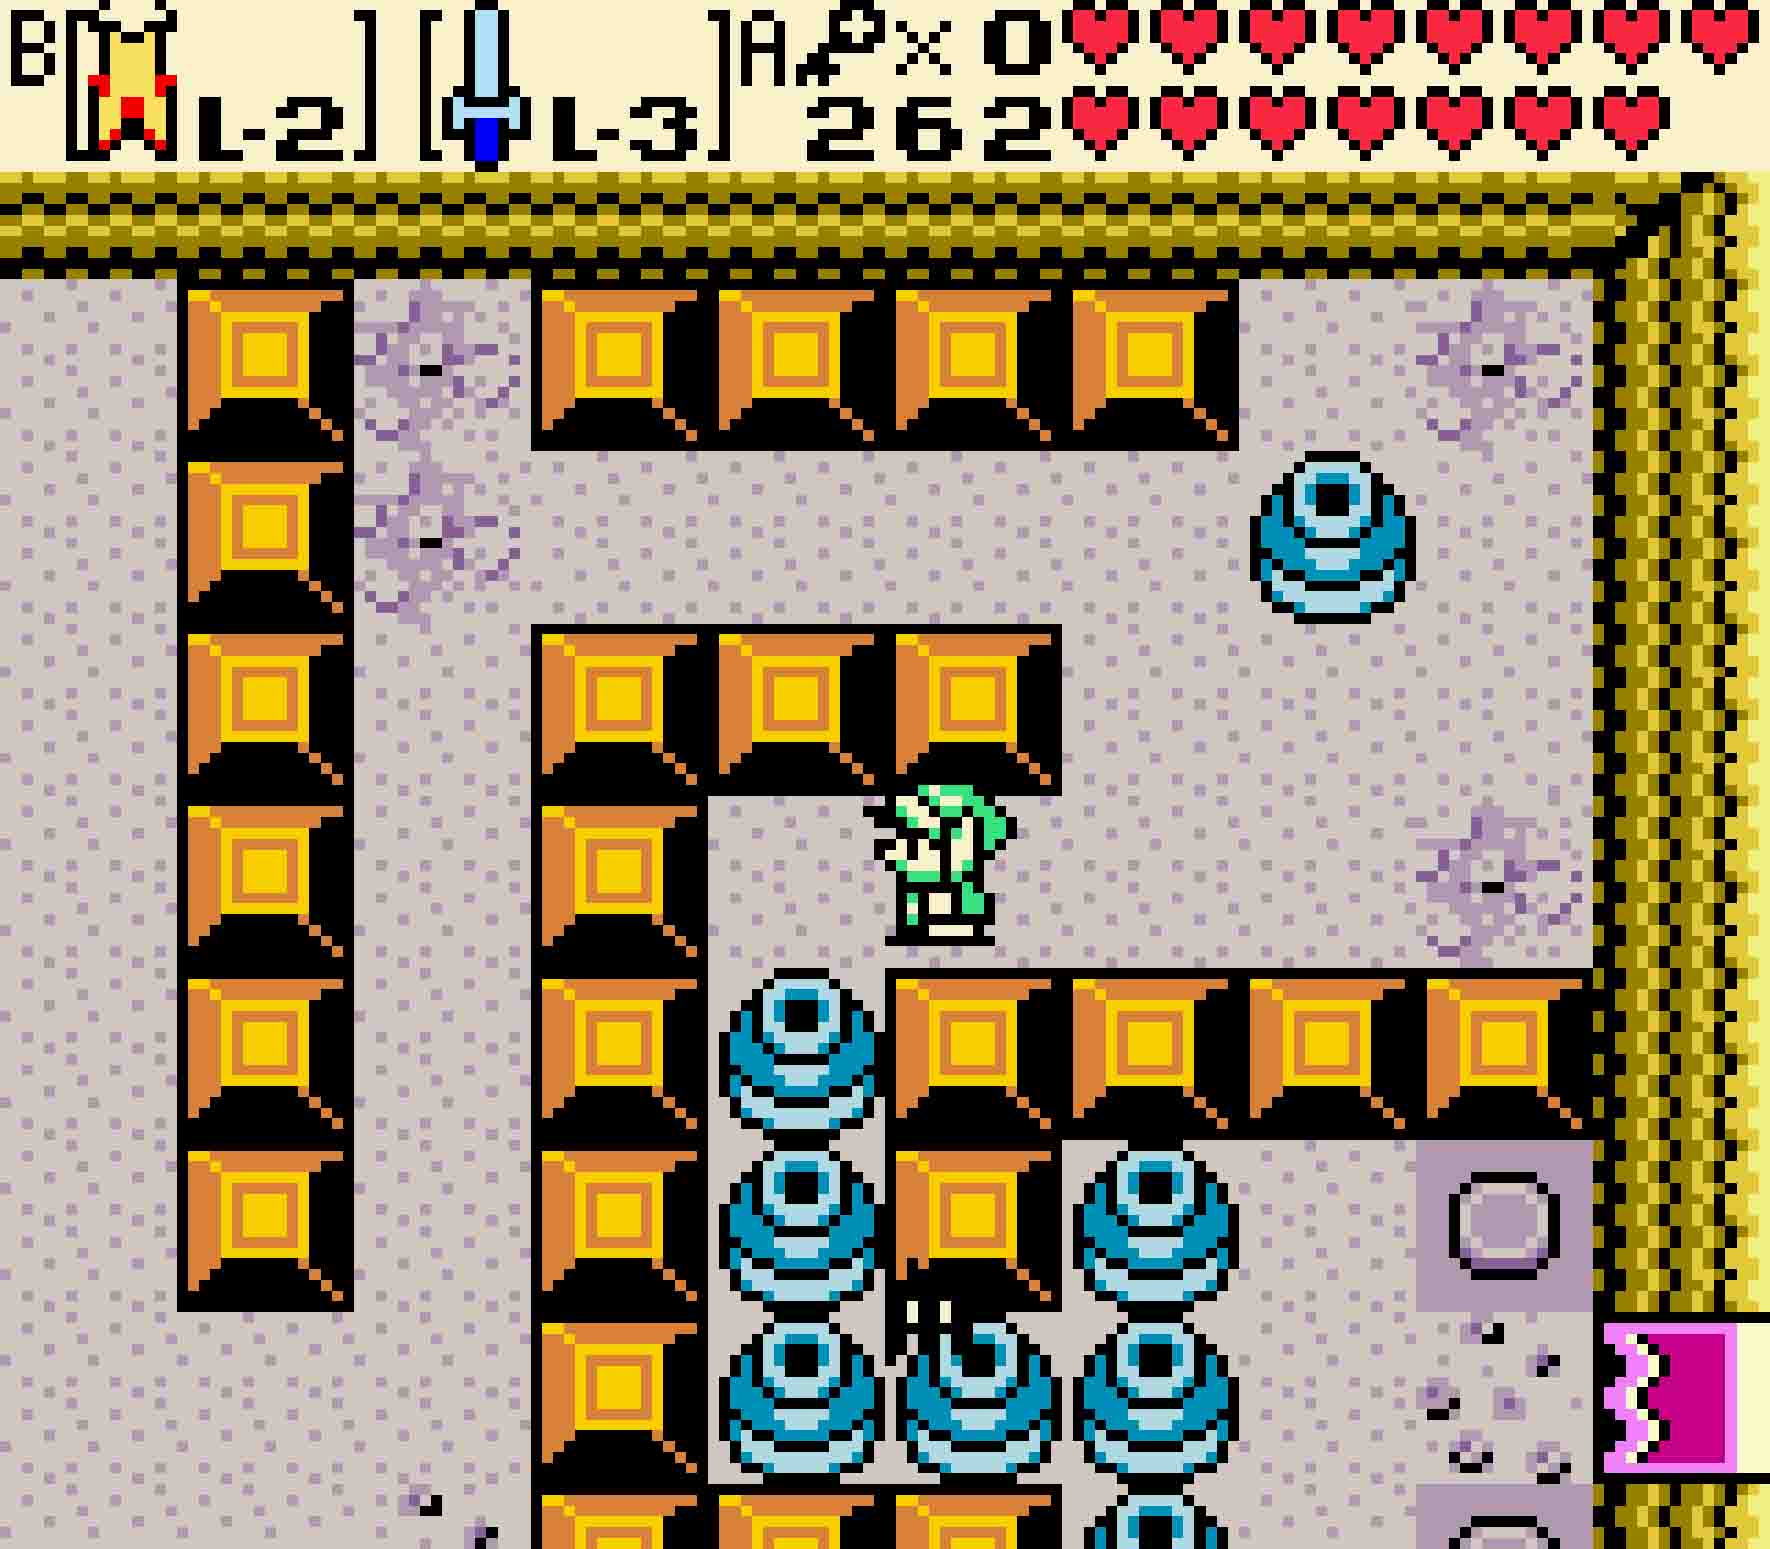
7 Solve the ultimate pot puzzle
At least, you’ve got one more pot puzzle to solve, and this one is a doozy. This one has a lot of steps and moving parts, so if you try it on your own you’re bound to mess up a few times. Simply head back through the teleporter and come back to give it another go.
Depressing the quartet of switches

Step One Use Zora’s Cape to fly over the first gap.
Step Two Destroy the pot in the lower-left corner of the room, but leave its sibling near it alone. Then use Zora’s Cape to reach the main part of the room.
Step Three Near the right-hand side of the door, there are two vertically aligned pots next to two buttons. Stand on the right side of the upper pot so that a block is below you. Push that block into the pit.
Step Four Push the lower of those two pots left one square.
Step Five You can now push both of those two pots up one square to rest on the rightmost two switches.

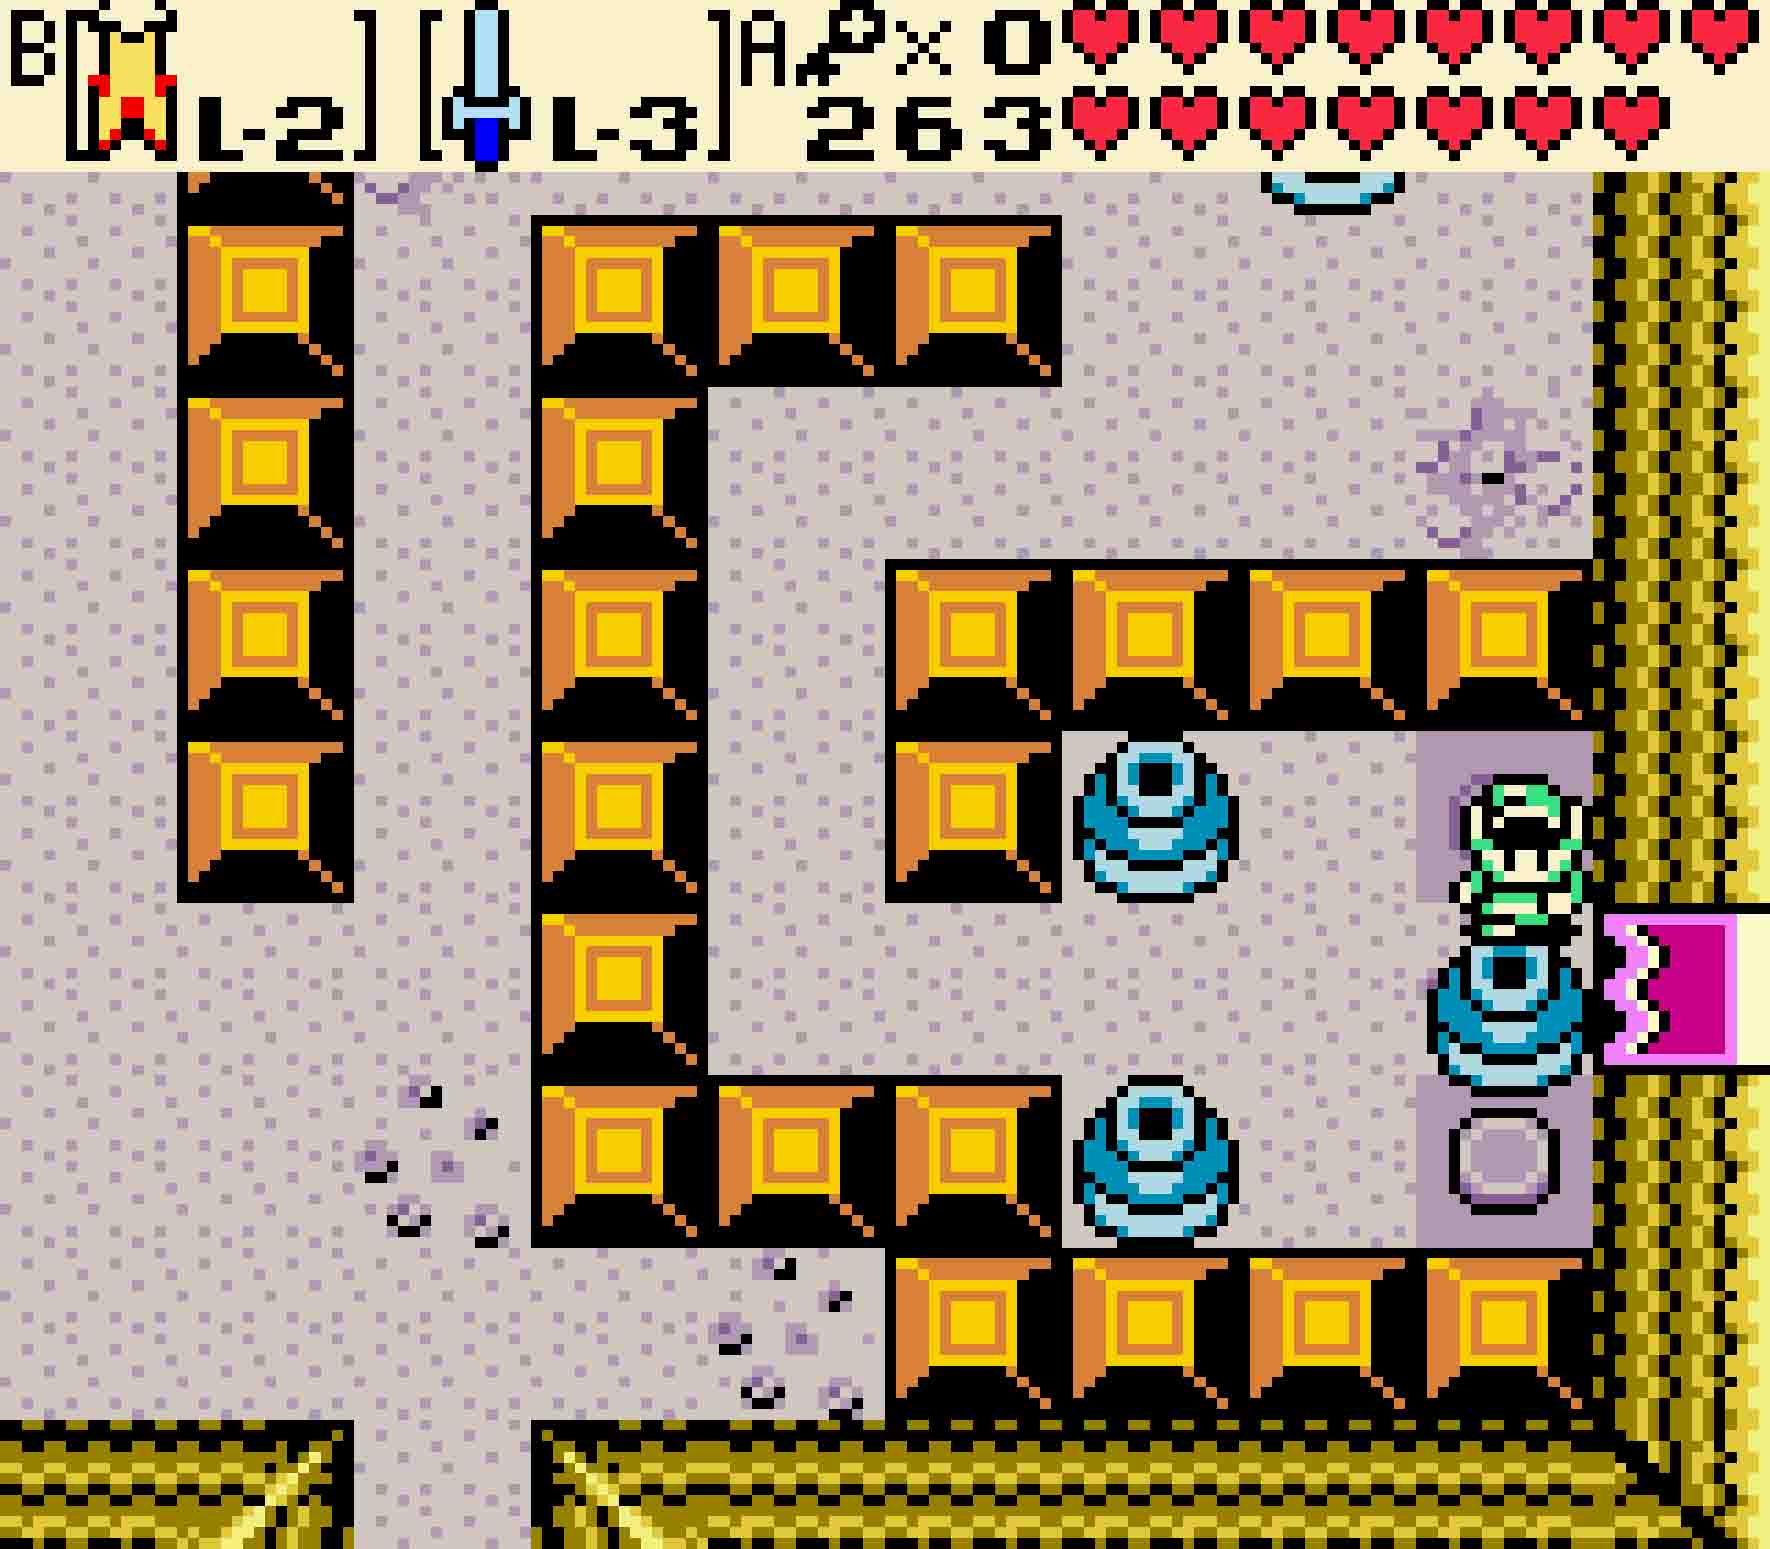
Step Six In the lower left of this space, you’ll find three vertically aligned pots. Destroy the upper and lower of this trio, but leave the middle one be.
Step Seven Push the blocks that used to be to the left of the upper and lower pots in the trio leftward into the pit.
Step Eight Push the isolated block up one square. This will free access to the middle pot that you left behind.
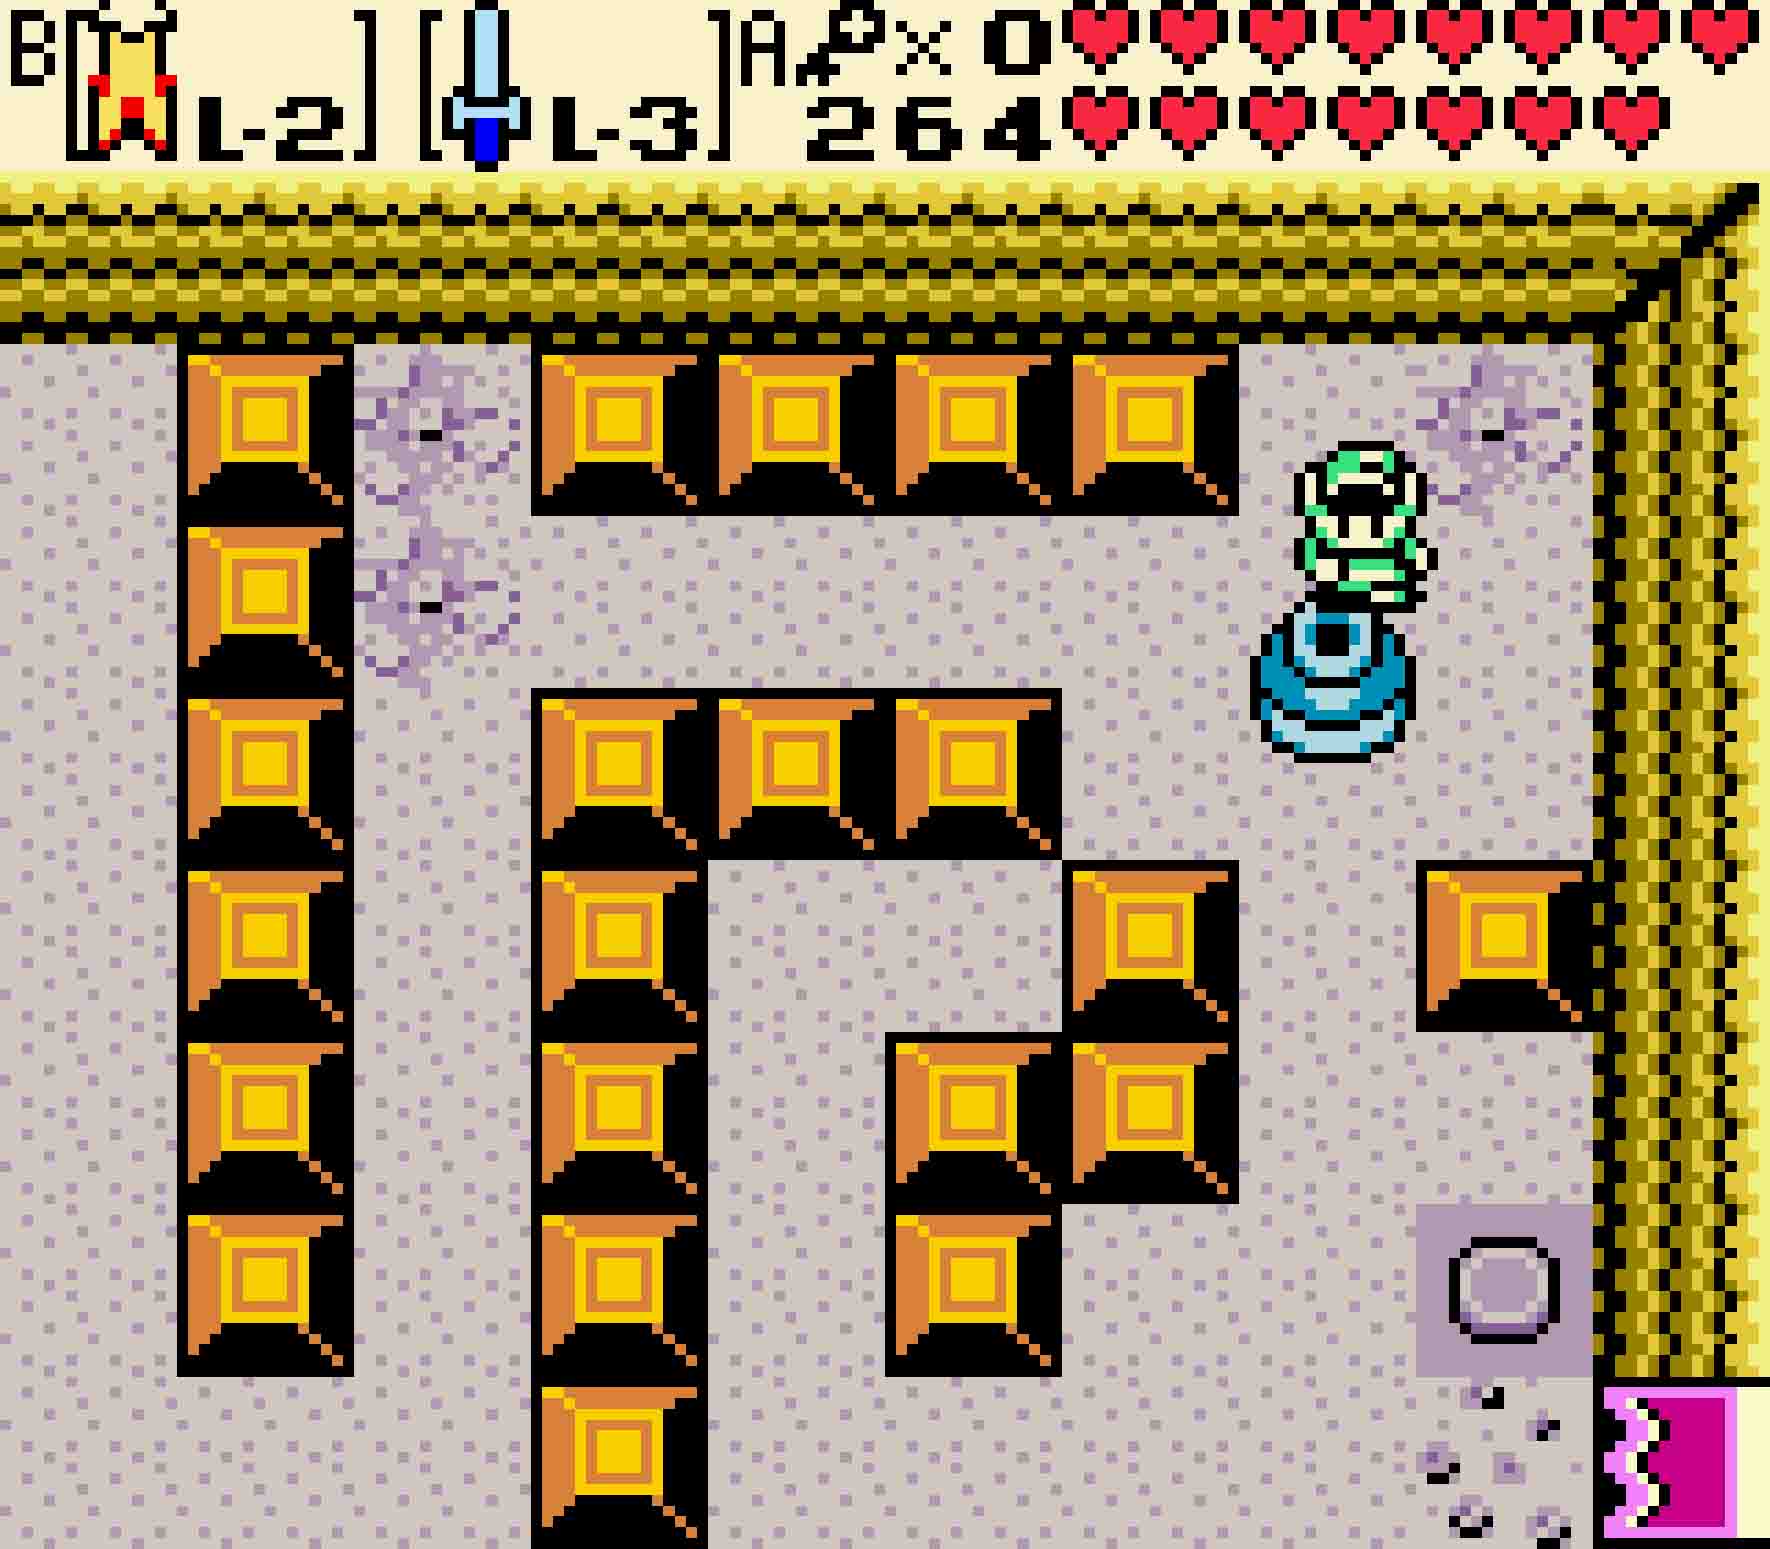
Step Nine You still need to find a way to bring that pot in the very bottom left up to the switches. Stand below the block just to the left of the pit along the southern wall. Push both it and the block two to its left up one square. This will isolate another block; push it to the left to create a corridor for the lower-left pot.

Step Ten You can now push the lower-left pot up through that corridor to the buttons.
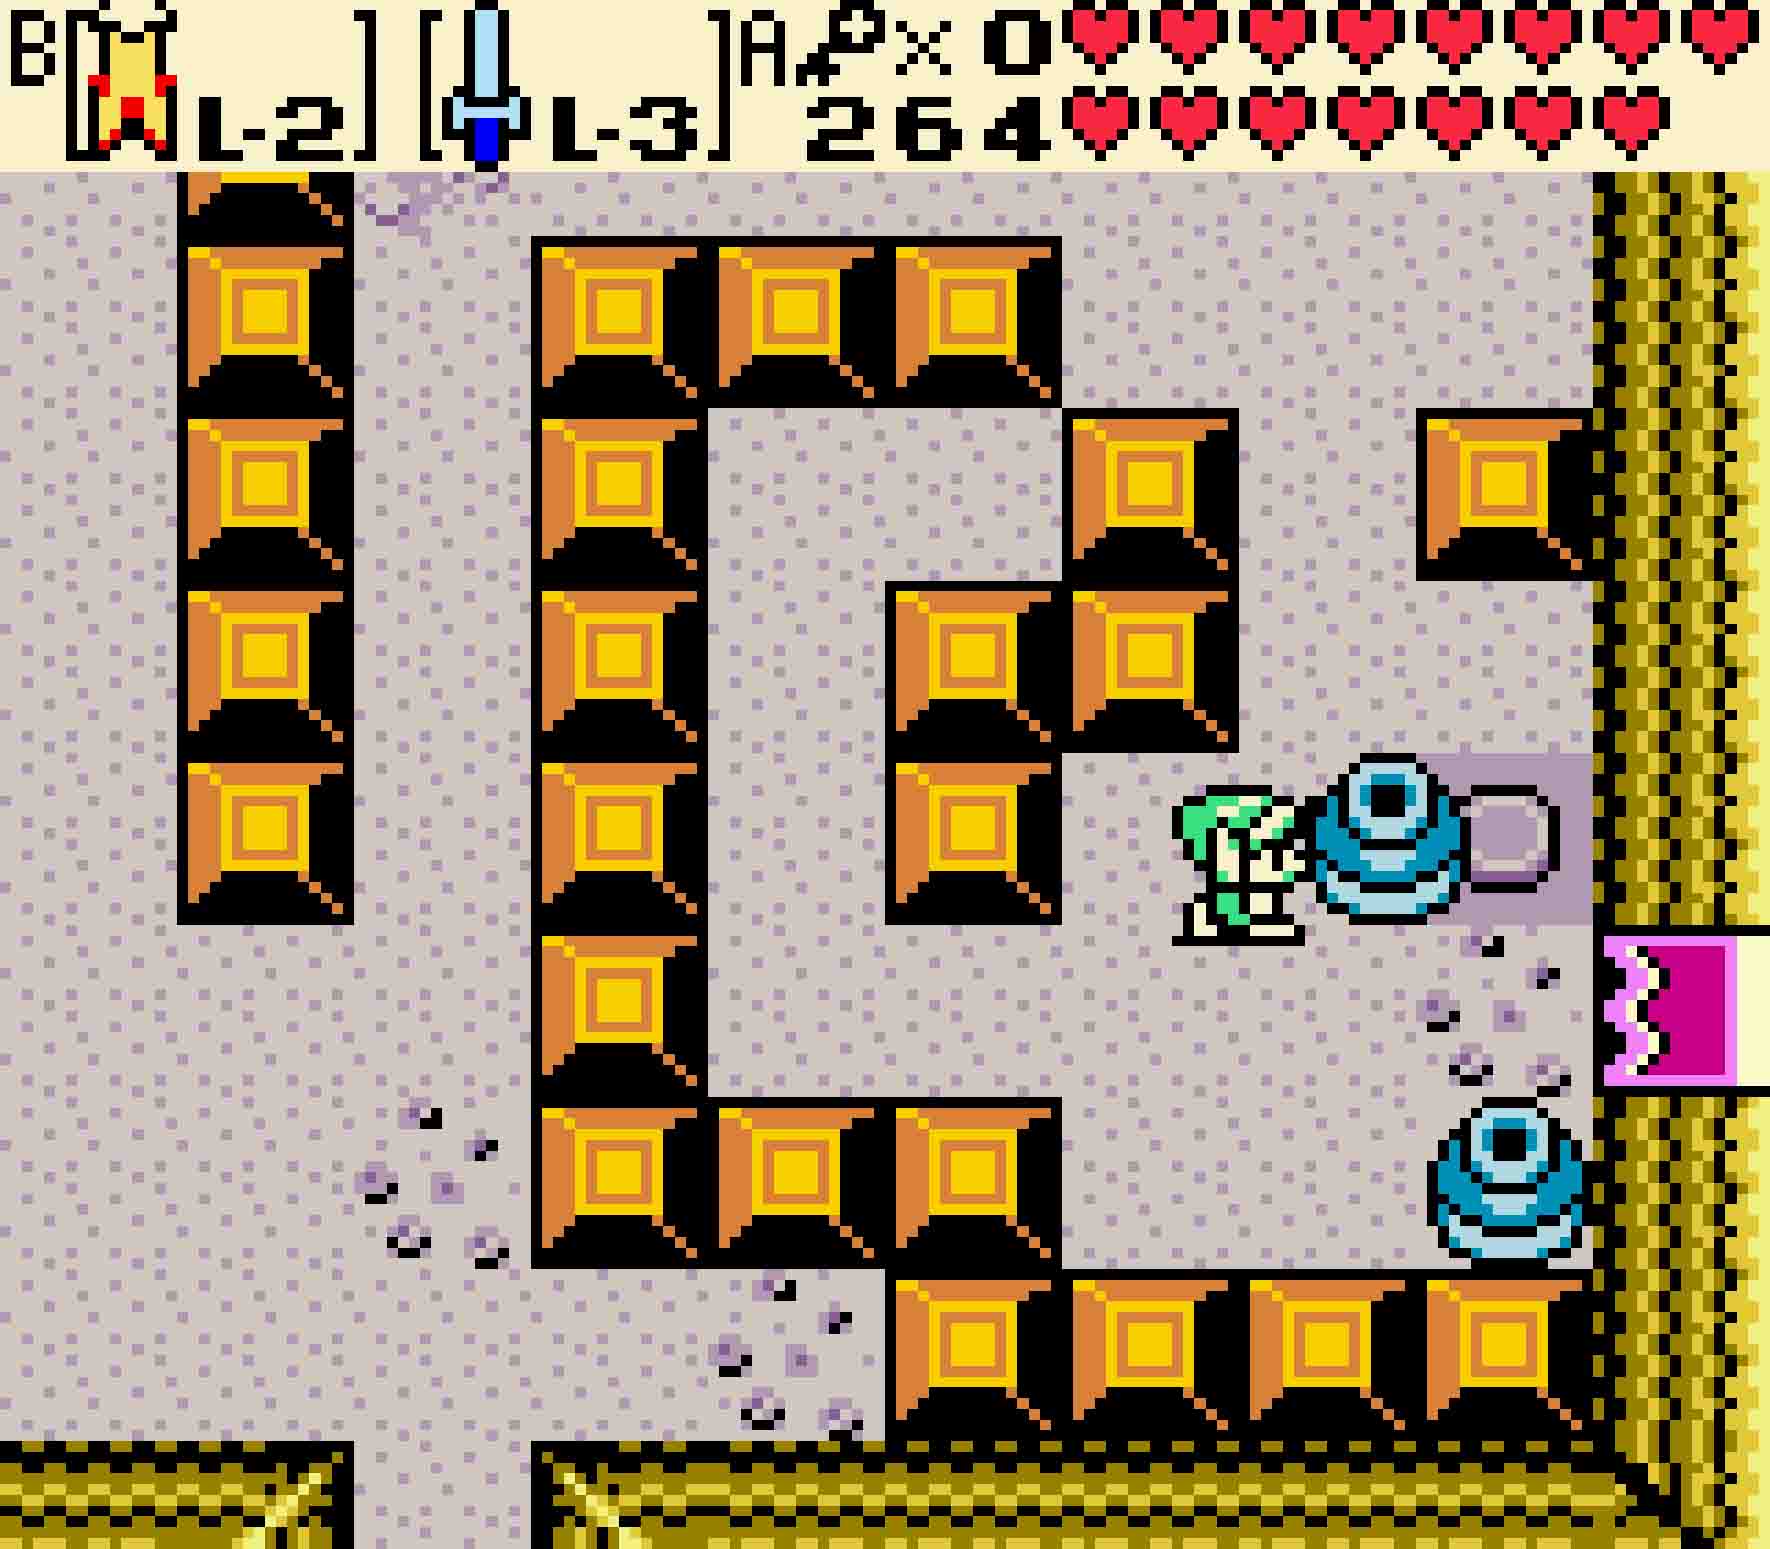
Step Eleven To access the last pot, you’ll need to tweak a jump with Zora’s Cape over the pit on the western wall. Push it one square to the right.
Step Twelve Finally, leap back over the pit, and then push it up to the buttons. Once it’s finally there, the door will open!
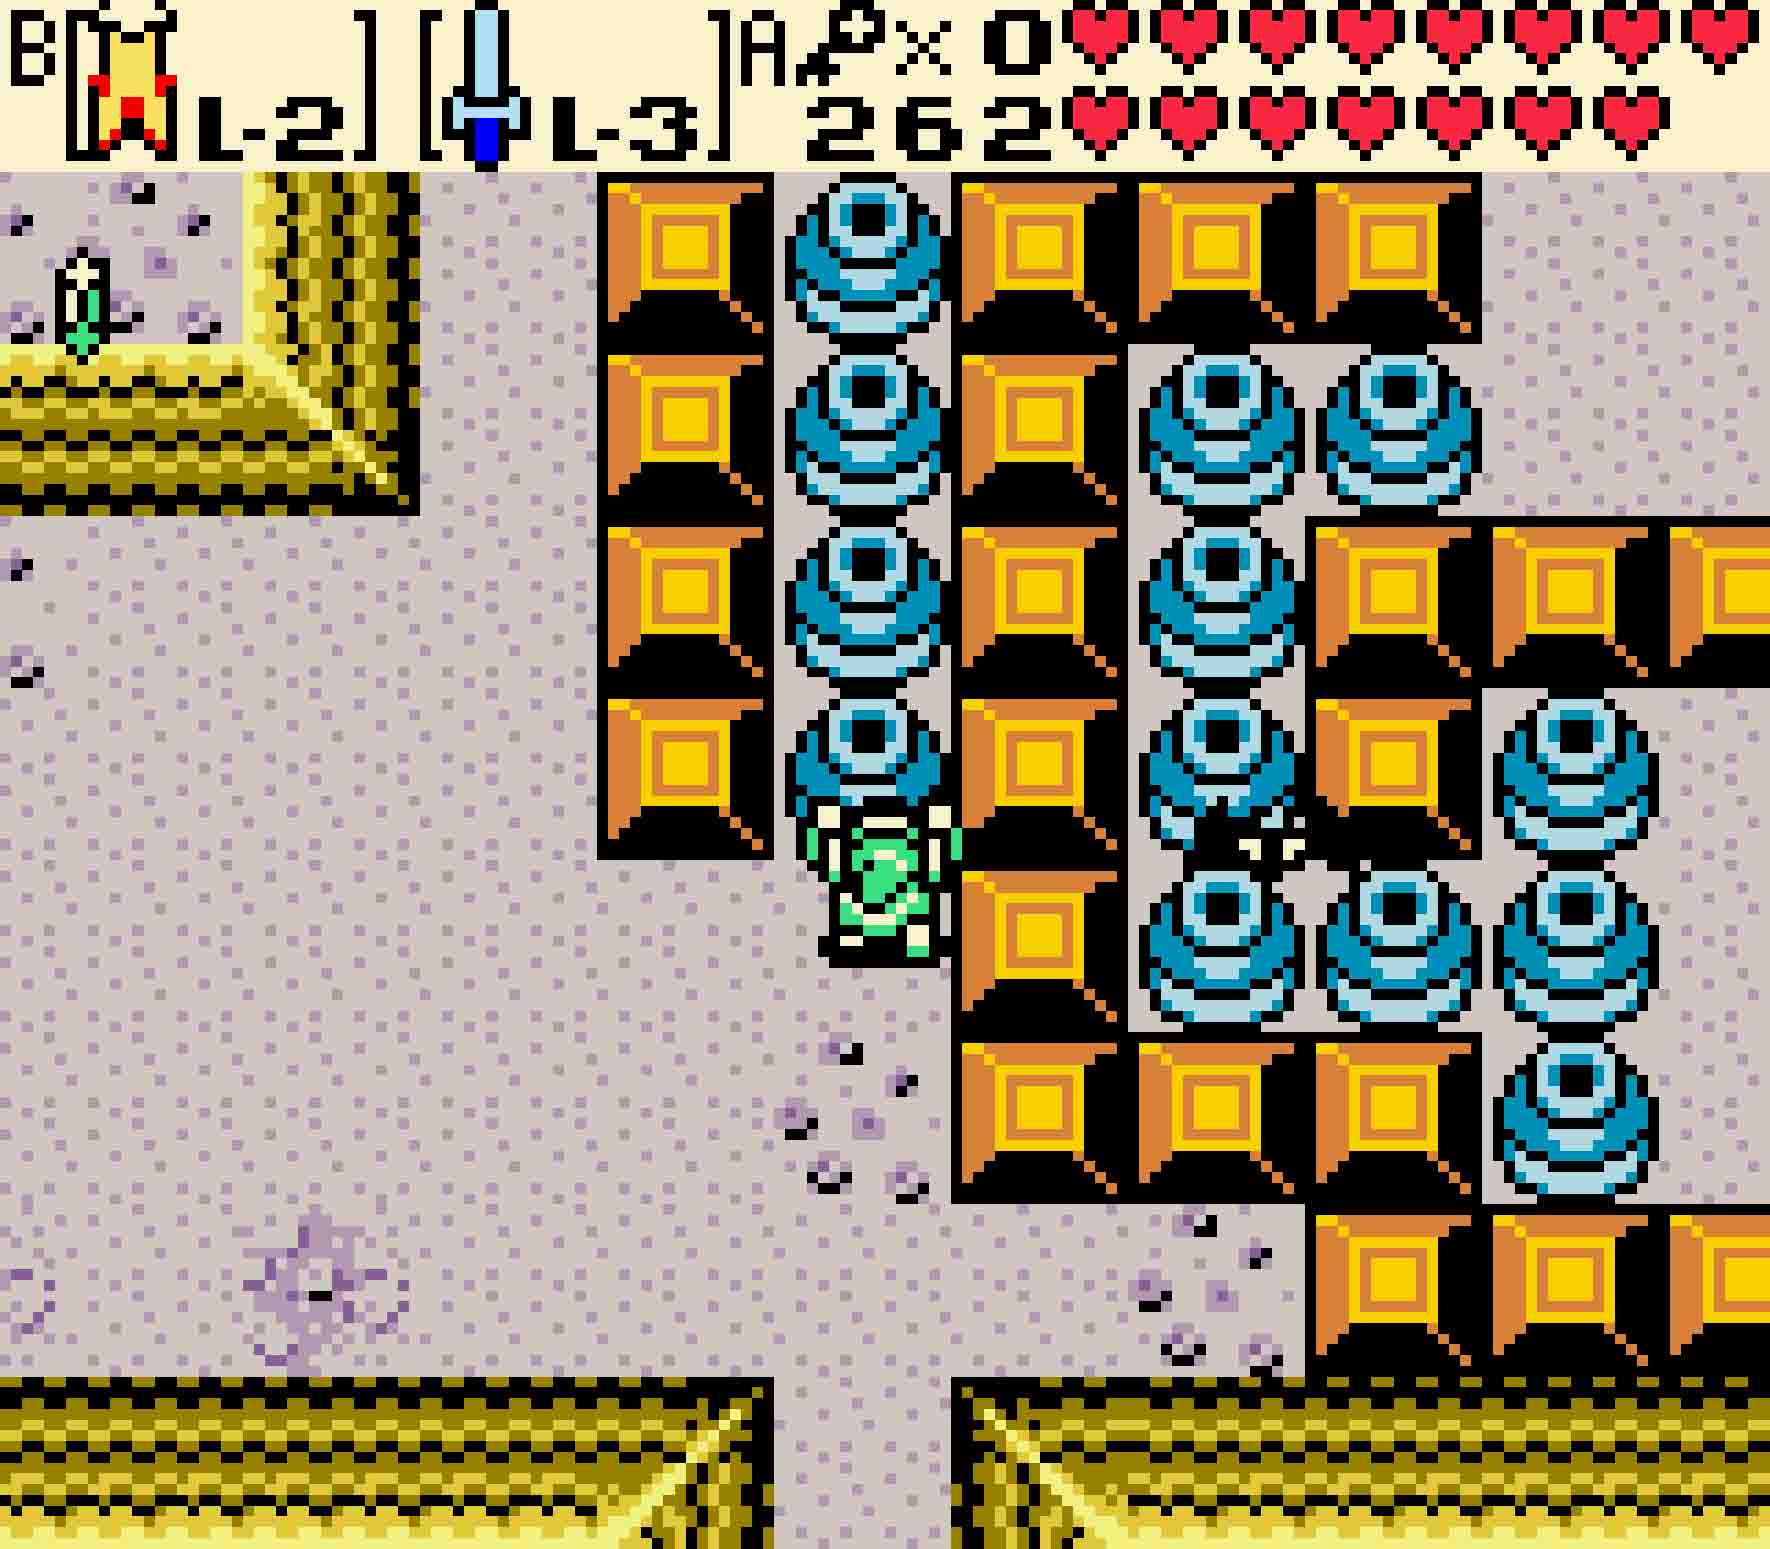
8 Survive the gauntlet
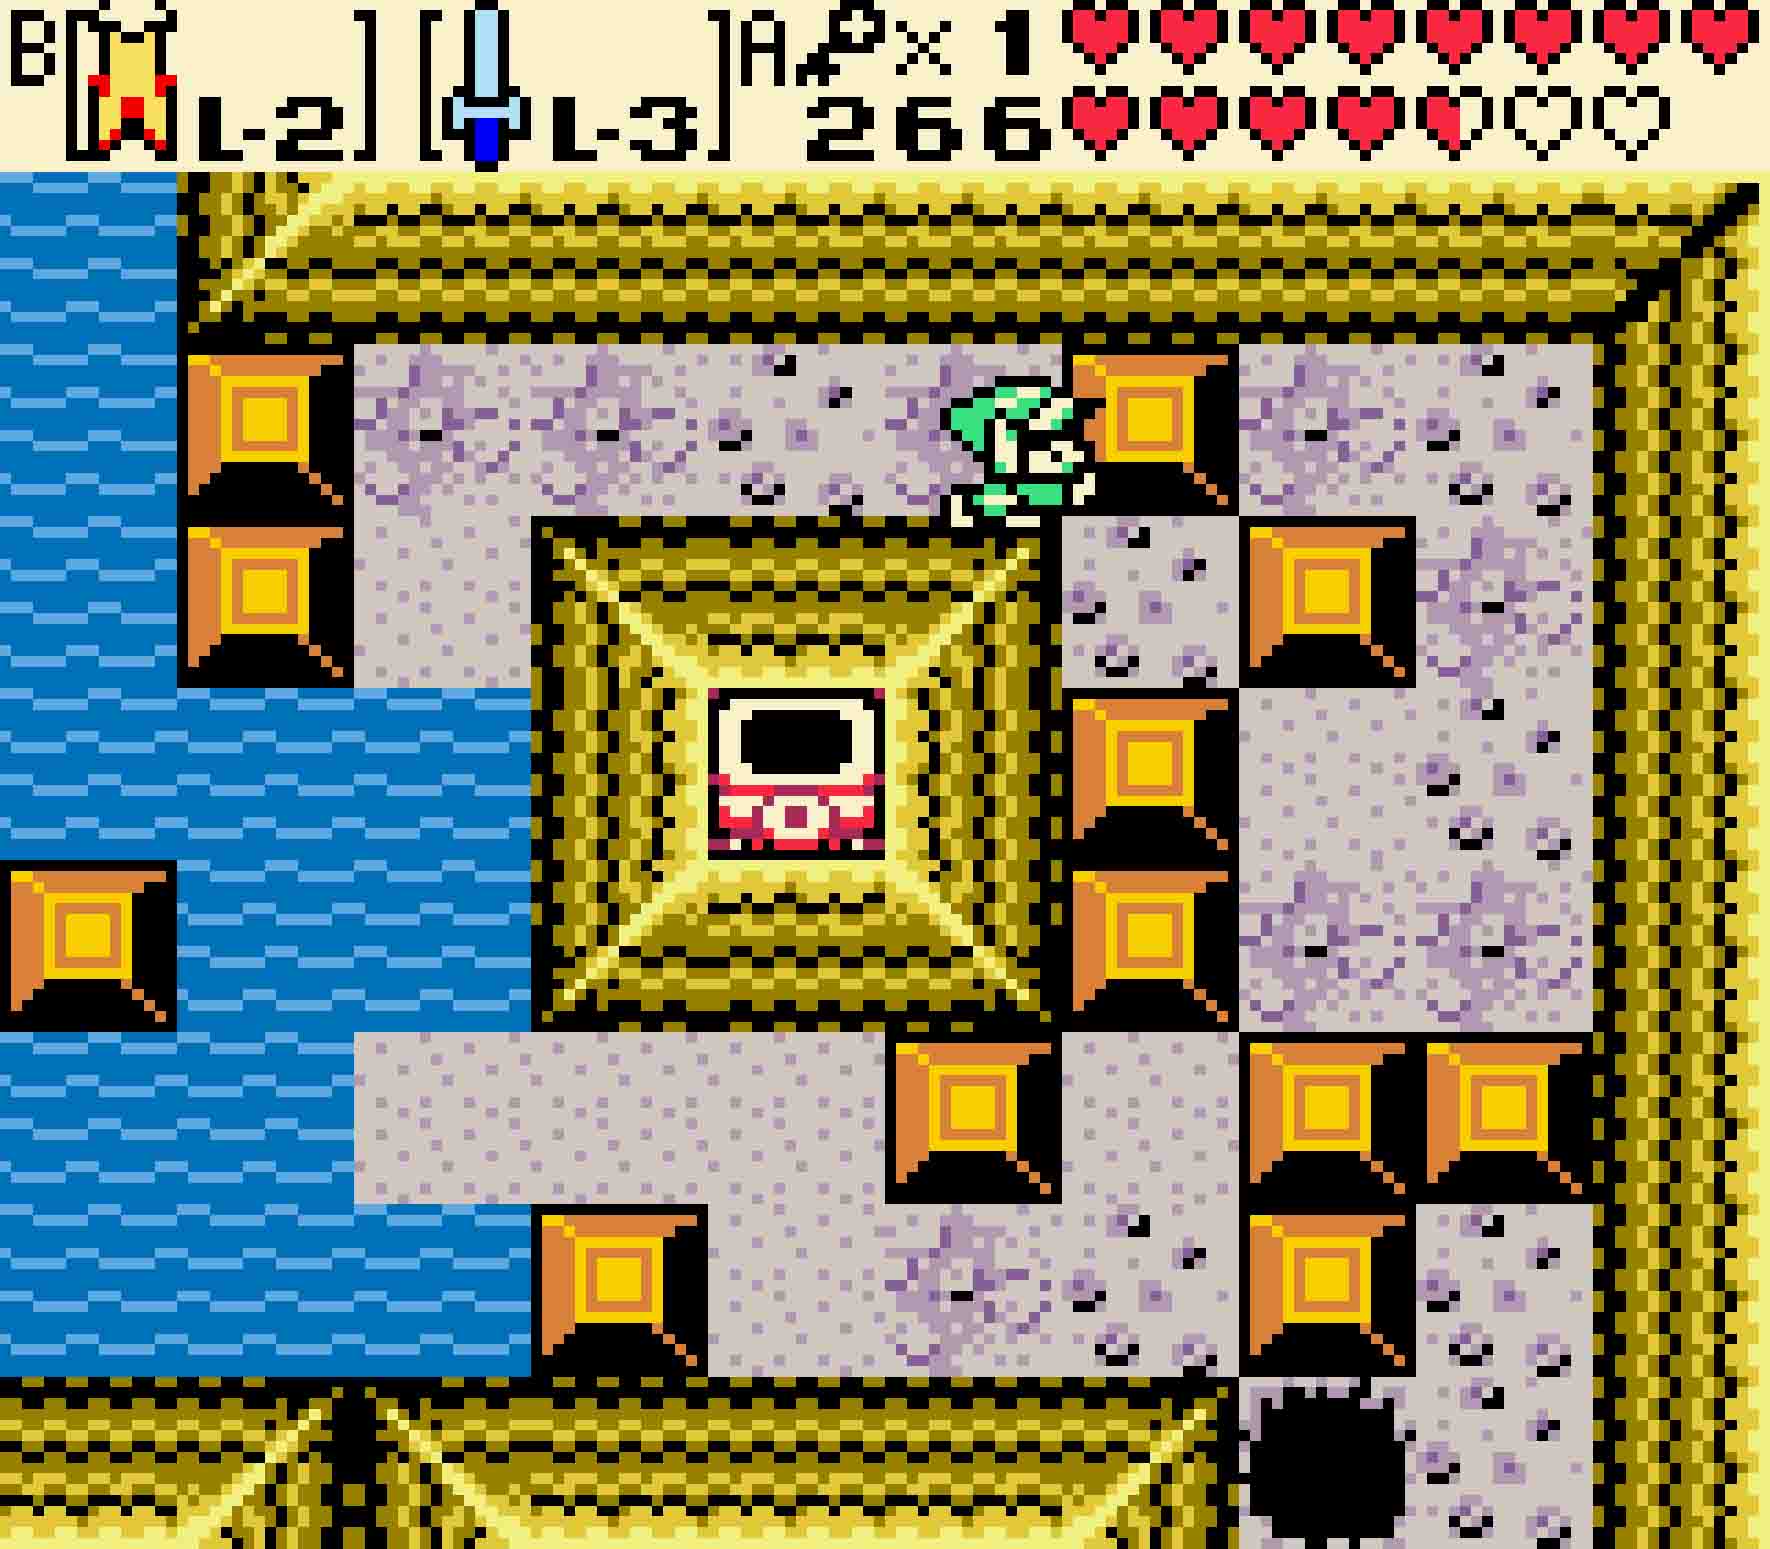
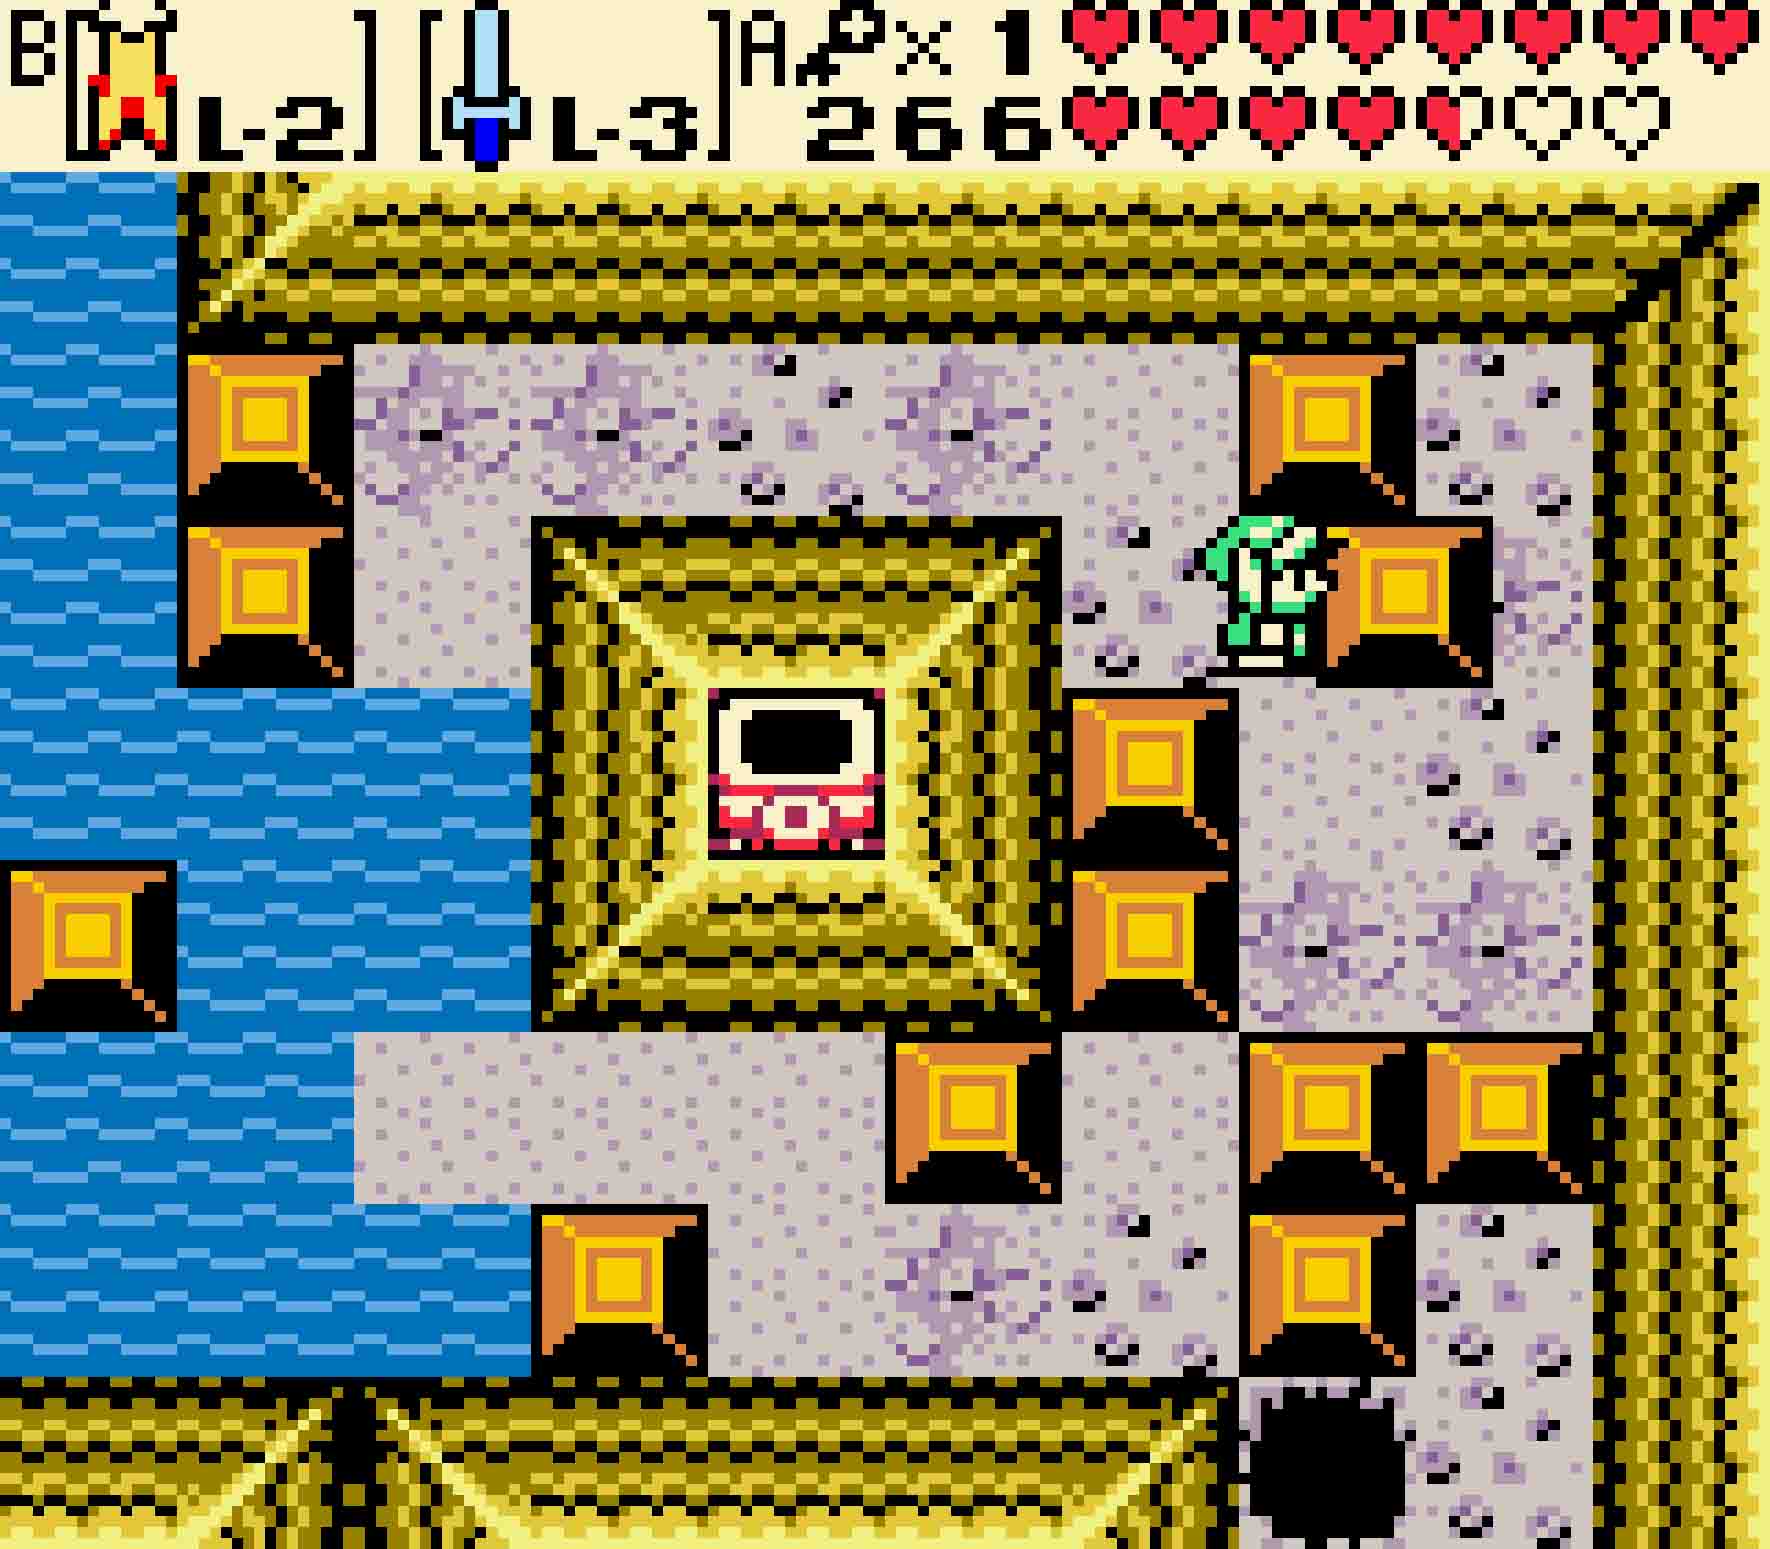
 This next room is a whopper as well, but it’s the opposite of the previous room. Here you’ll face a relentless onslaught of enemies. There are eight switches on the floor of the room. Each one of them will drop four enemies of a single type into the room. While those enemies are in the room, the rest of the buttons will deactivate until you defeat all four. Only by stepping on all eight buttons and defeating each of the sets of enemies will a key finally drop down in the center of the room to unlock the door.
Starting from the northernmost switch going clockwise, you will have to face:
- North: Four Spiked Beetles. They’re a pushover with the shield.
- Northeast: Four Gibdo. These may drop a heart or two.
- East: Four blue Darknuts. Spin attacks are useful here.
- Southeast: Four Magunesu. Though annoying, they may drop hearts.
- South: Four blue Lynels. Remember to watch out for their arrows.
- Southwest: Four Iron Masks. You can use the Magnetic Glove to steal their armor away.
- West: Four Pol’s Voices. You’ll need to attack them with Bombs.
- Northwest: Four yellow Stalfos. These are the ones that throw bones; use the Magical Boomerang to stun them.
-
- As with many of the enemies, using the right tool is essential to survive the gauntlet.
-
- The quartet of blue Lynels are perhaps the nasiest of the enemies to beat.
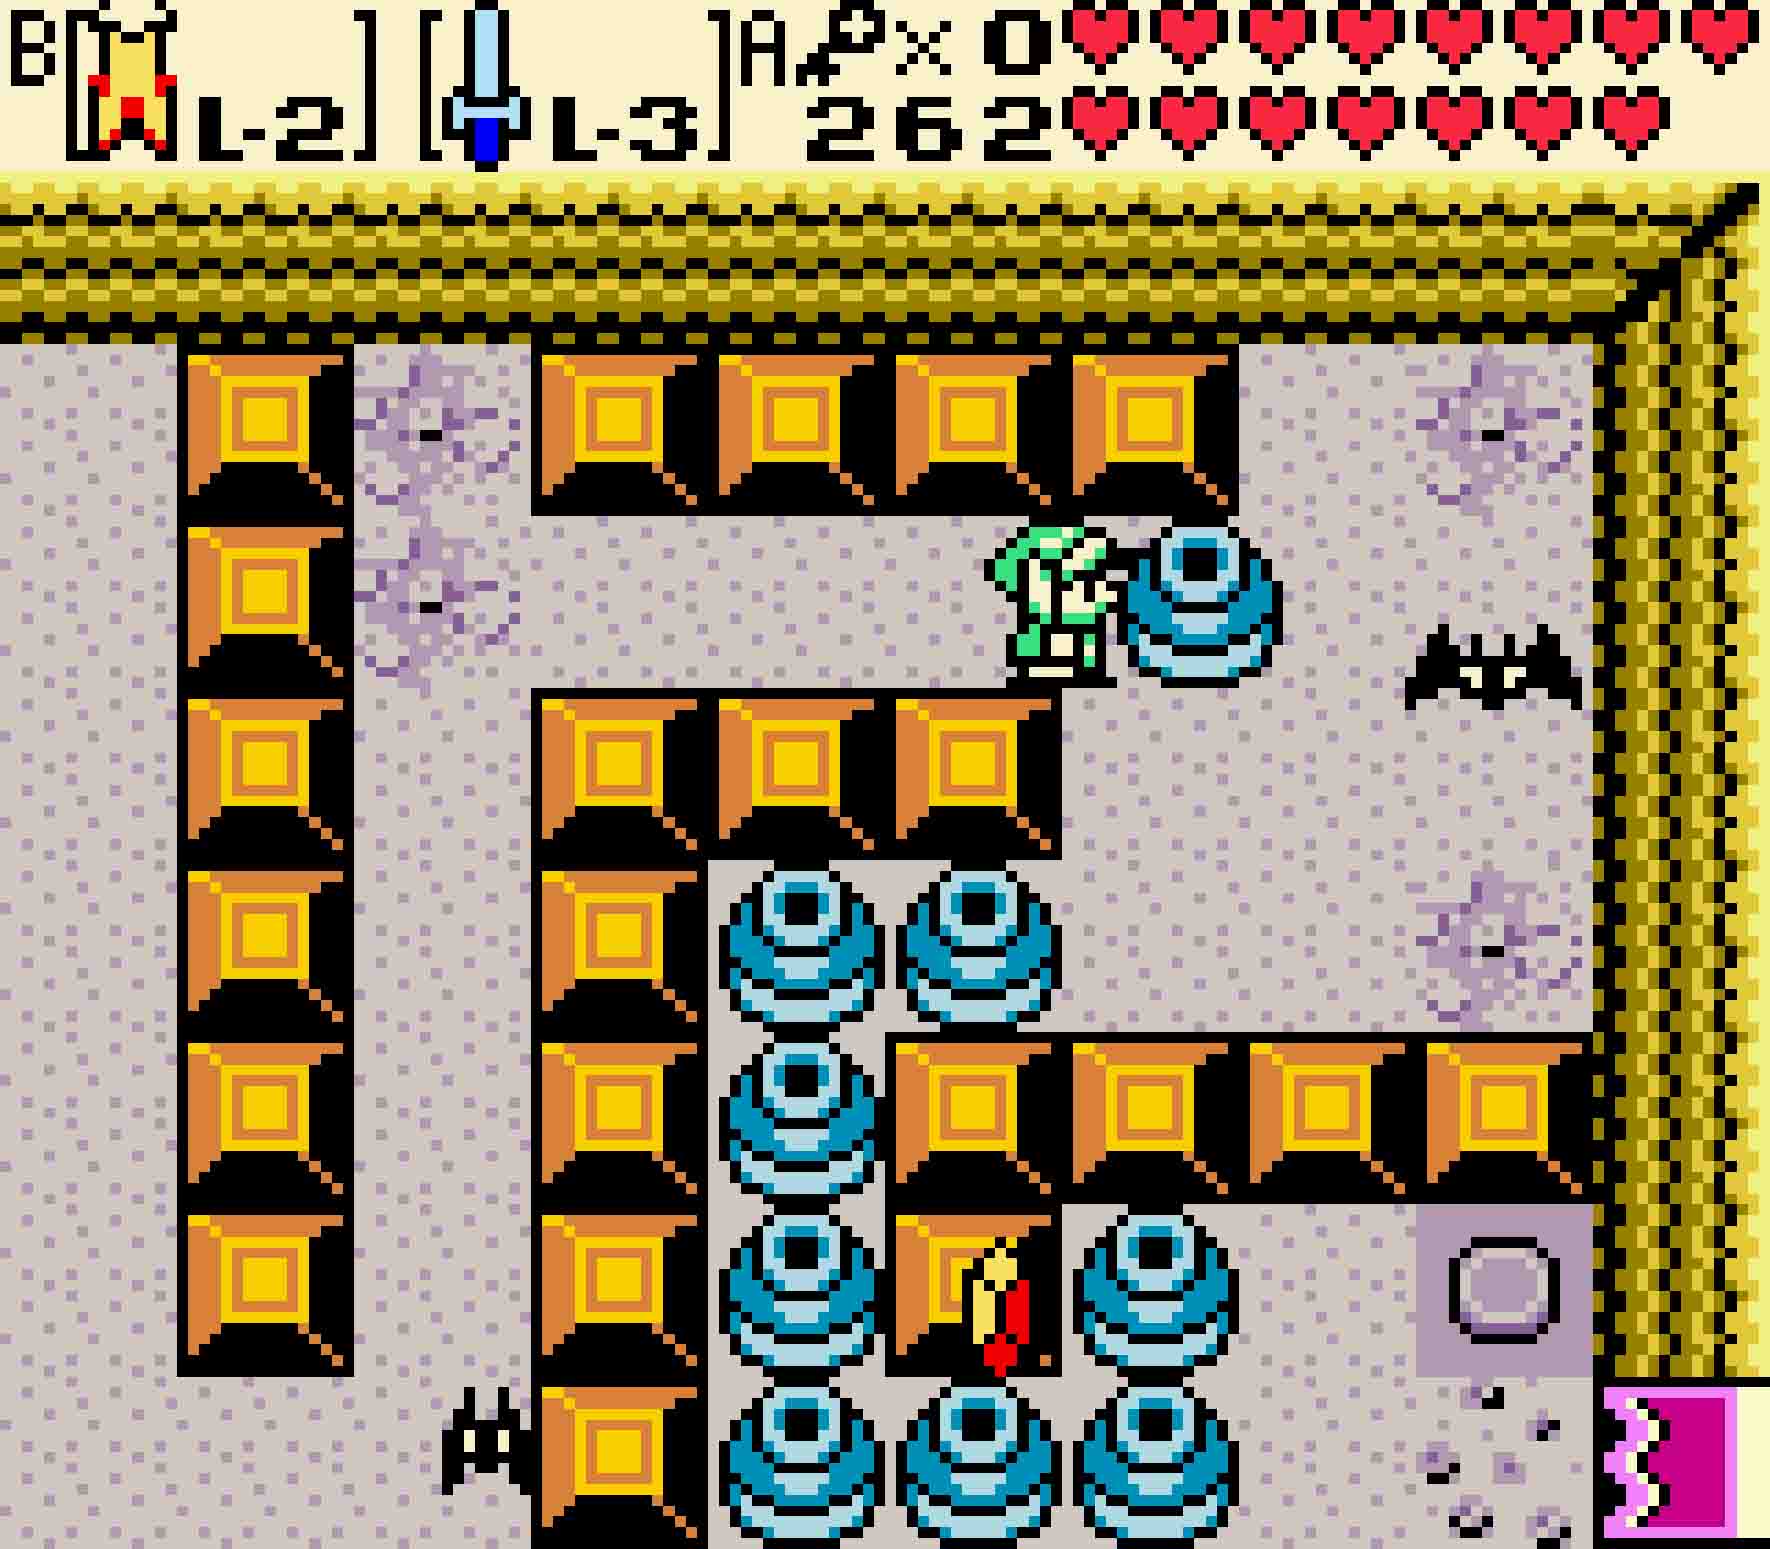
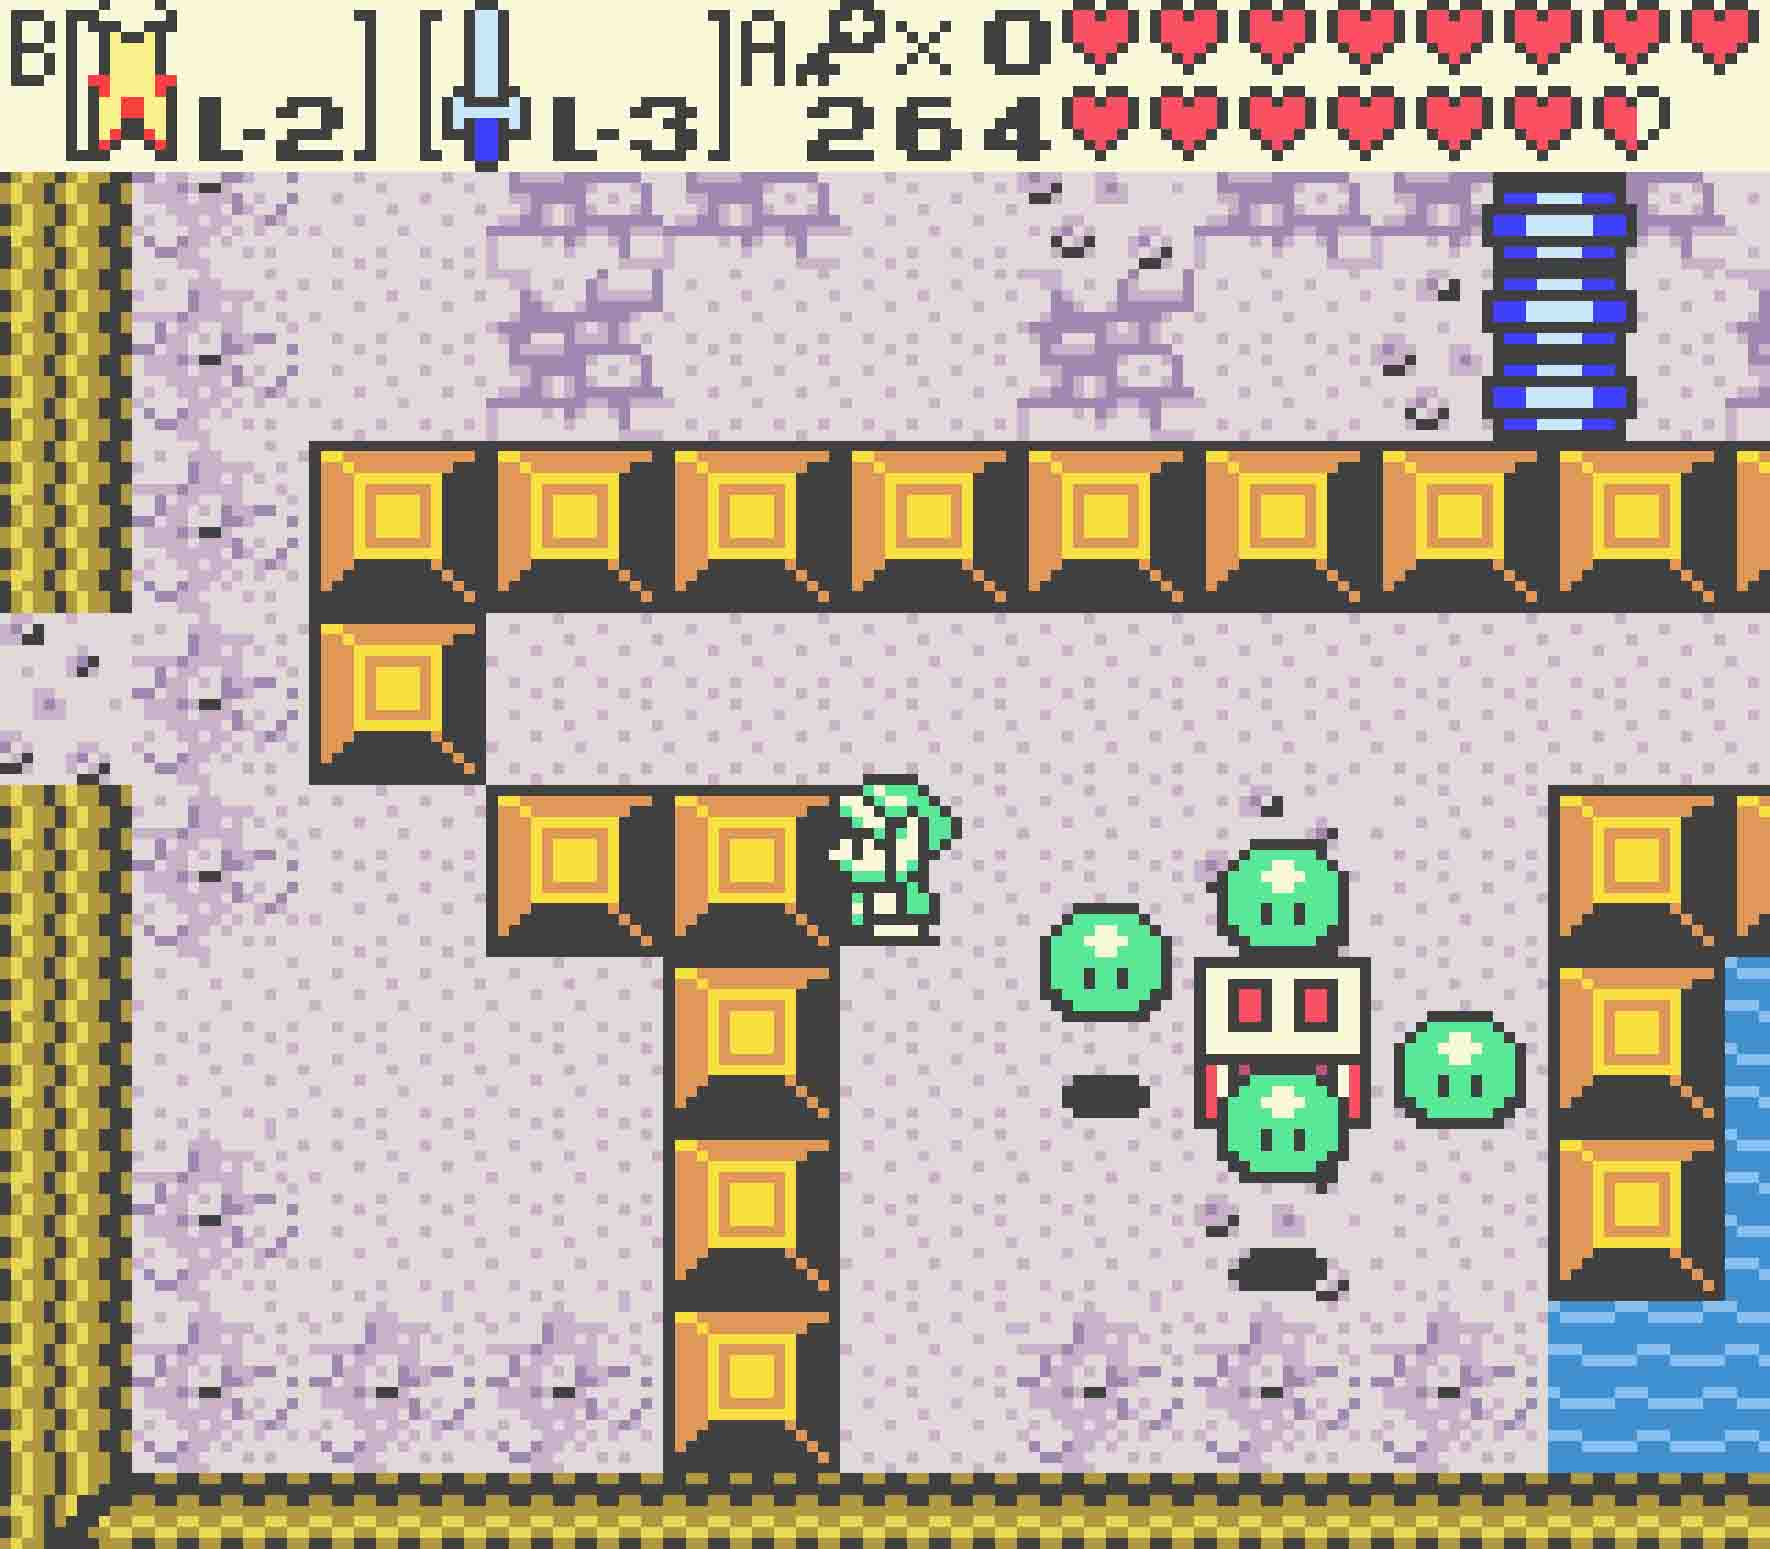
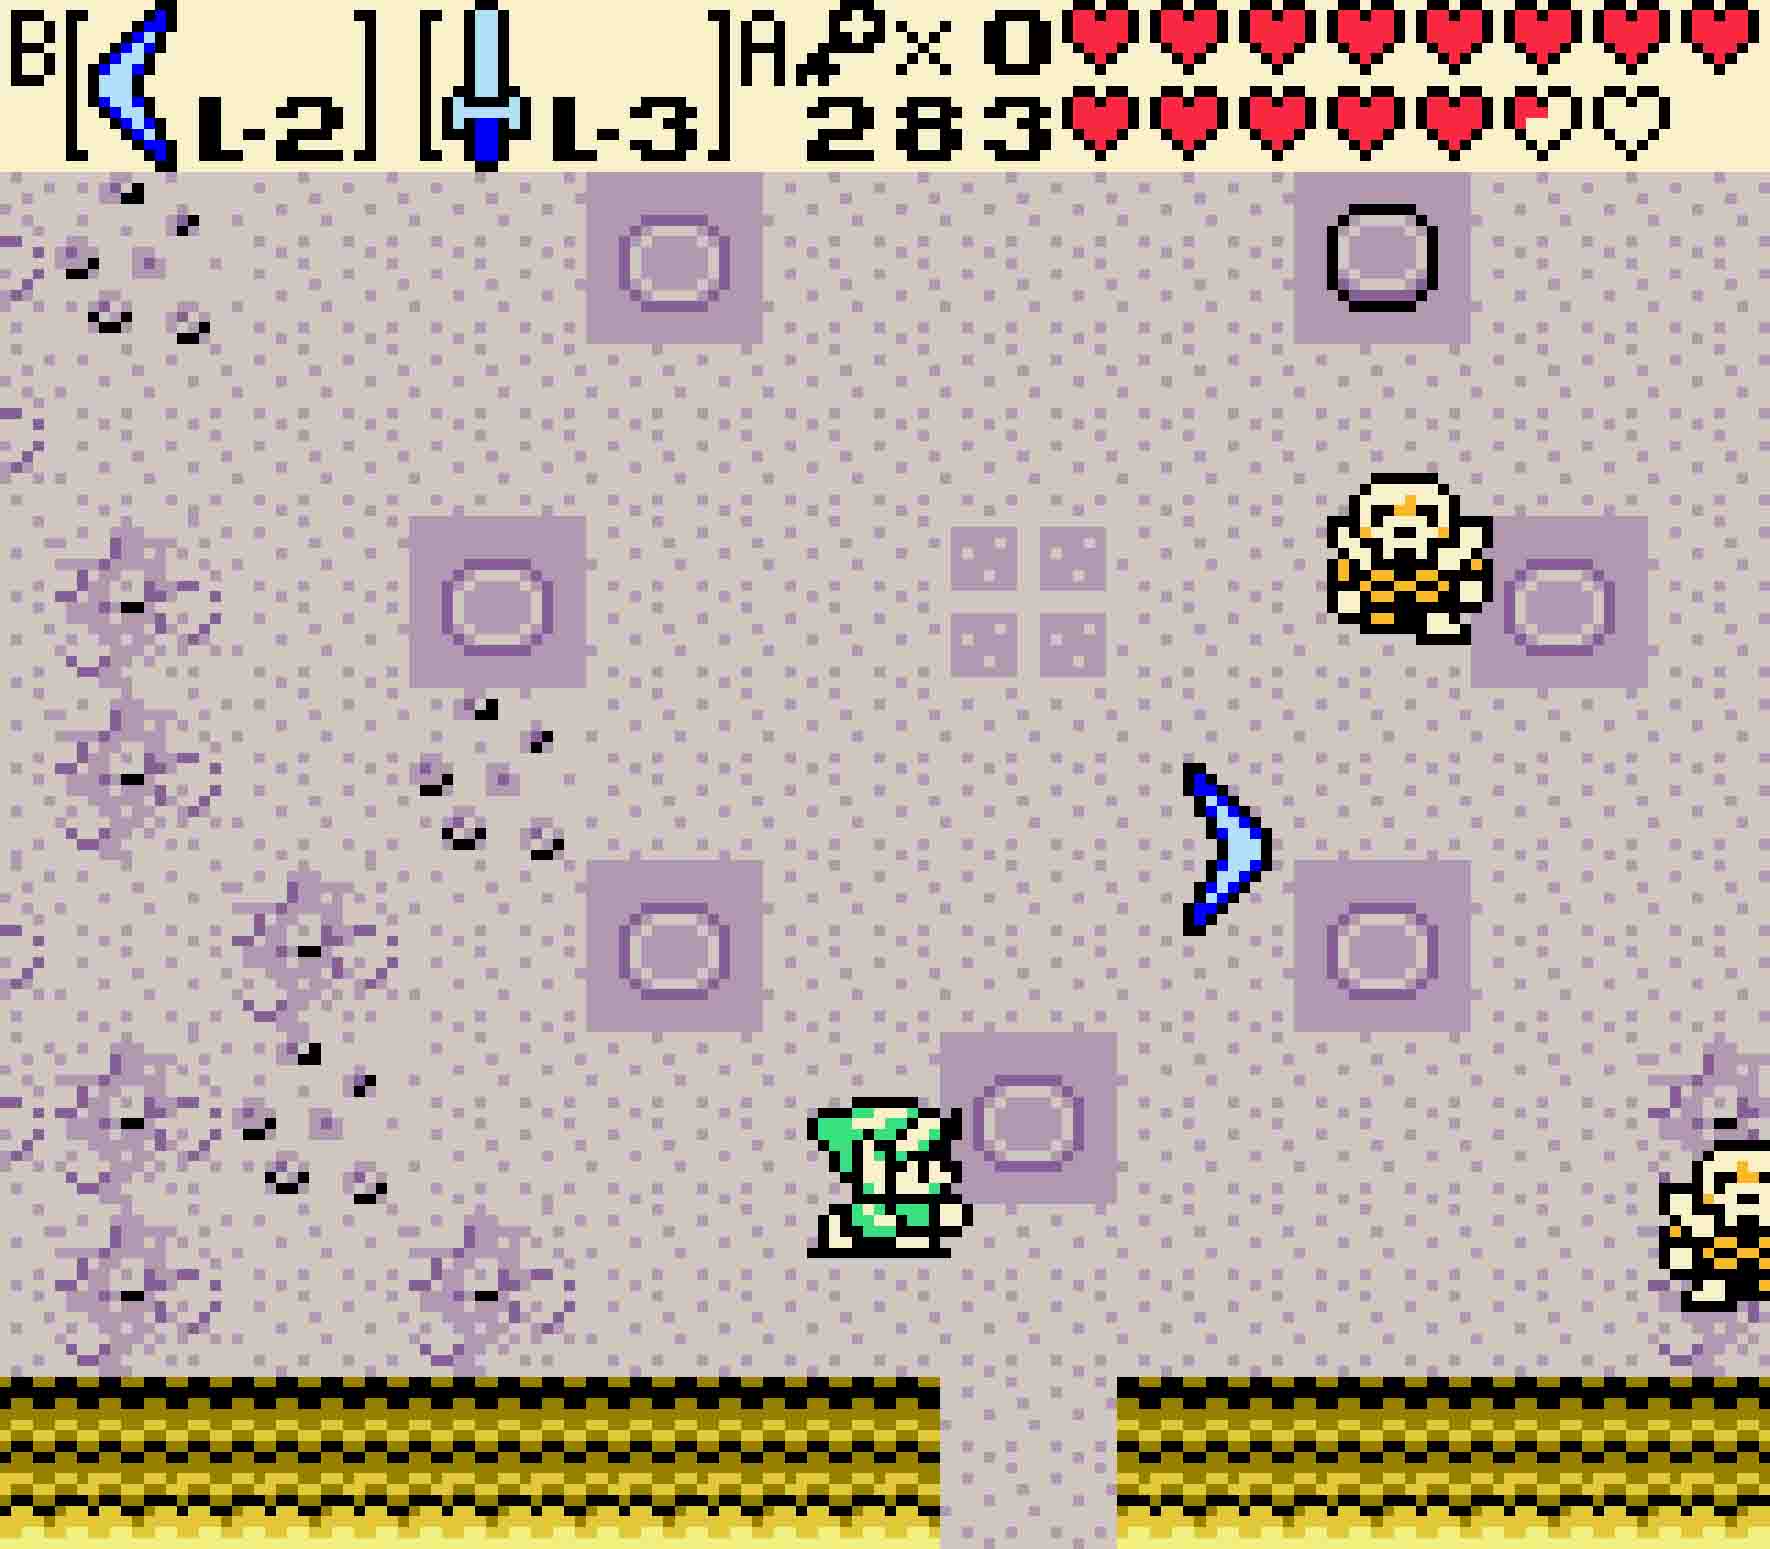
Once you head east, you’re almost through the worst of it. A slew of Fire Keese will be in the next room. Lure them out of the air so you can kill them with the sword. Once you have taken care of them, you’ve got an annoying little Crystal Switch to hit. The game clearly wants you to carefully navigate your Magical Boomerang through these tiny gaps to hit the switch at the end, but stuff that. There’s a much easier way to cruise control to awesome.
Stand in the absolute northeastern corner of the room. Equip both the Magical Boomerang and your Seed Satchel with Pegasus Seeds. Eat a Pegasus Seed, and then toss the Magical Boomerang to the west. Immediately run down right next to the bottom-rightmost block of the block maze. The Magical Boomerang will hit the wall on the west side of the room and then come streaking back to you, ignoring such pesky things as blocks being in the way. As it returns, it will fly directly over the Crystal Switch, tripping it in the process.
-
- You’re supposed to thread the needle here, but there’s a much easier way.
-

- Just toss the Boomerang left, and then run down and let it return to you via the switch.
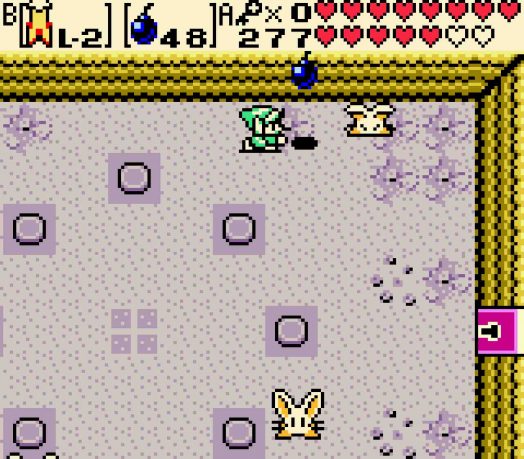
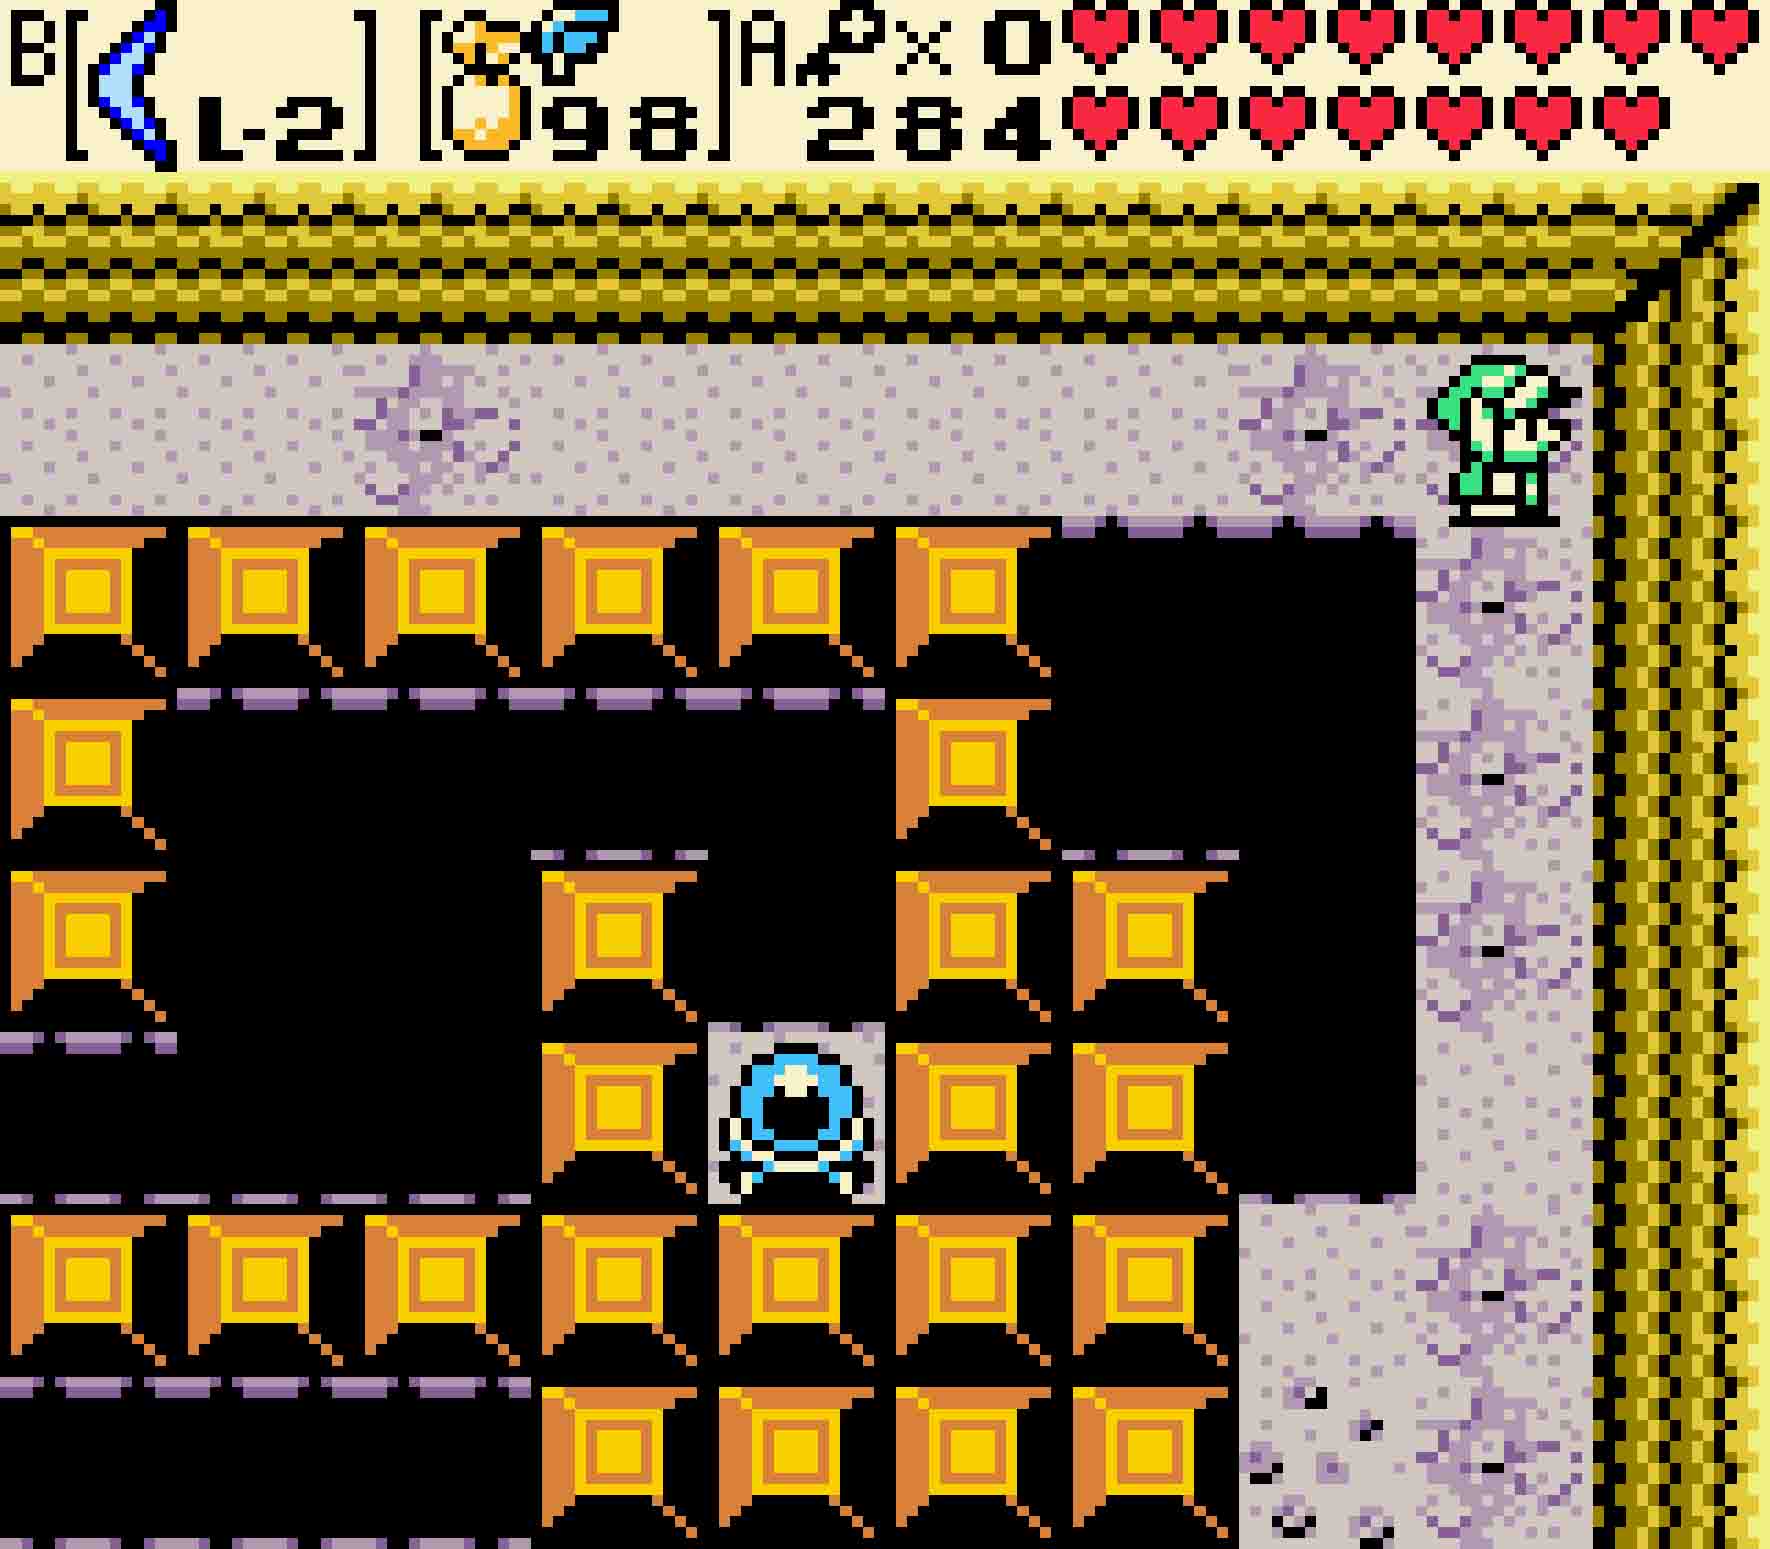
9 Solve the old man’s riddle
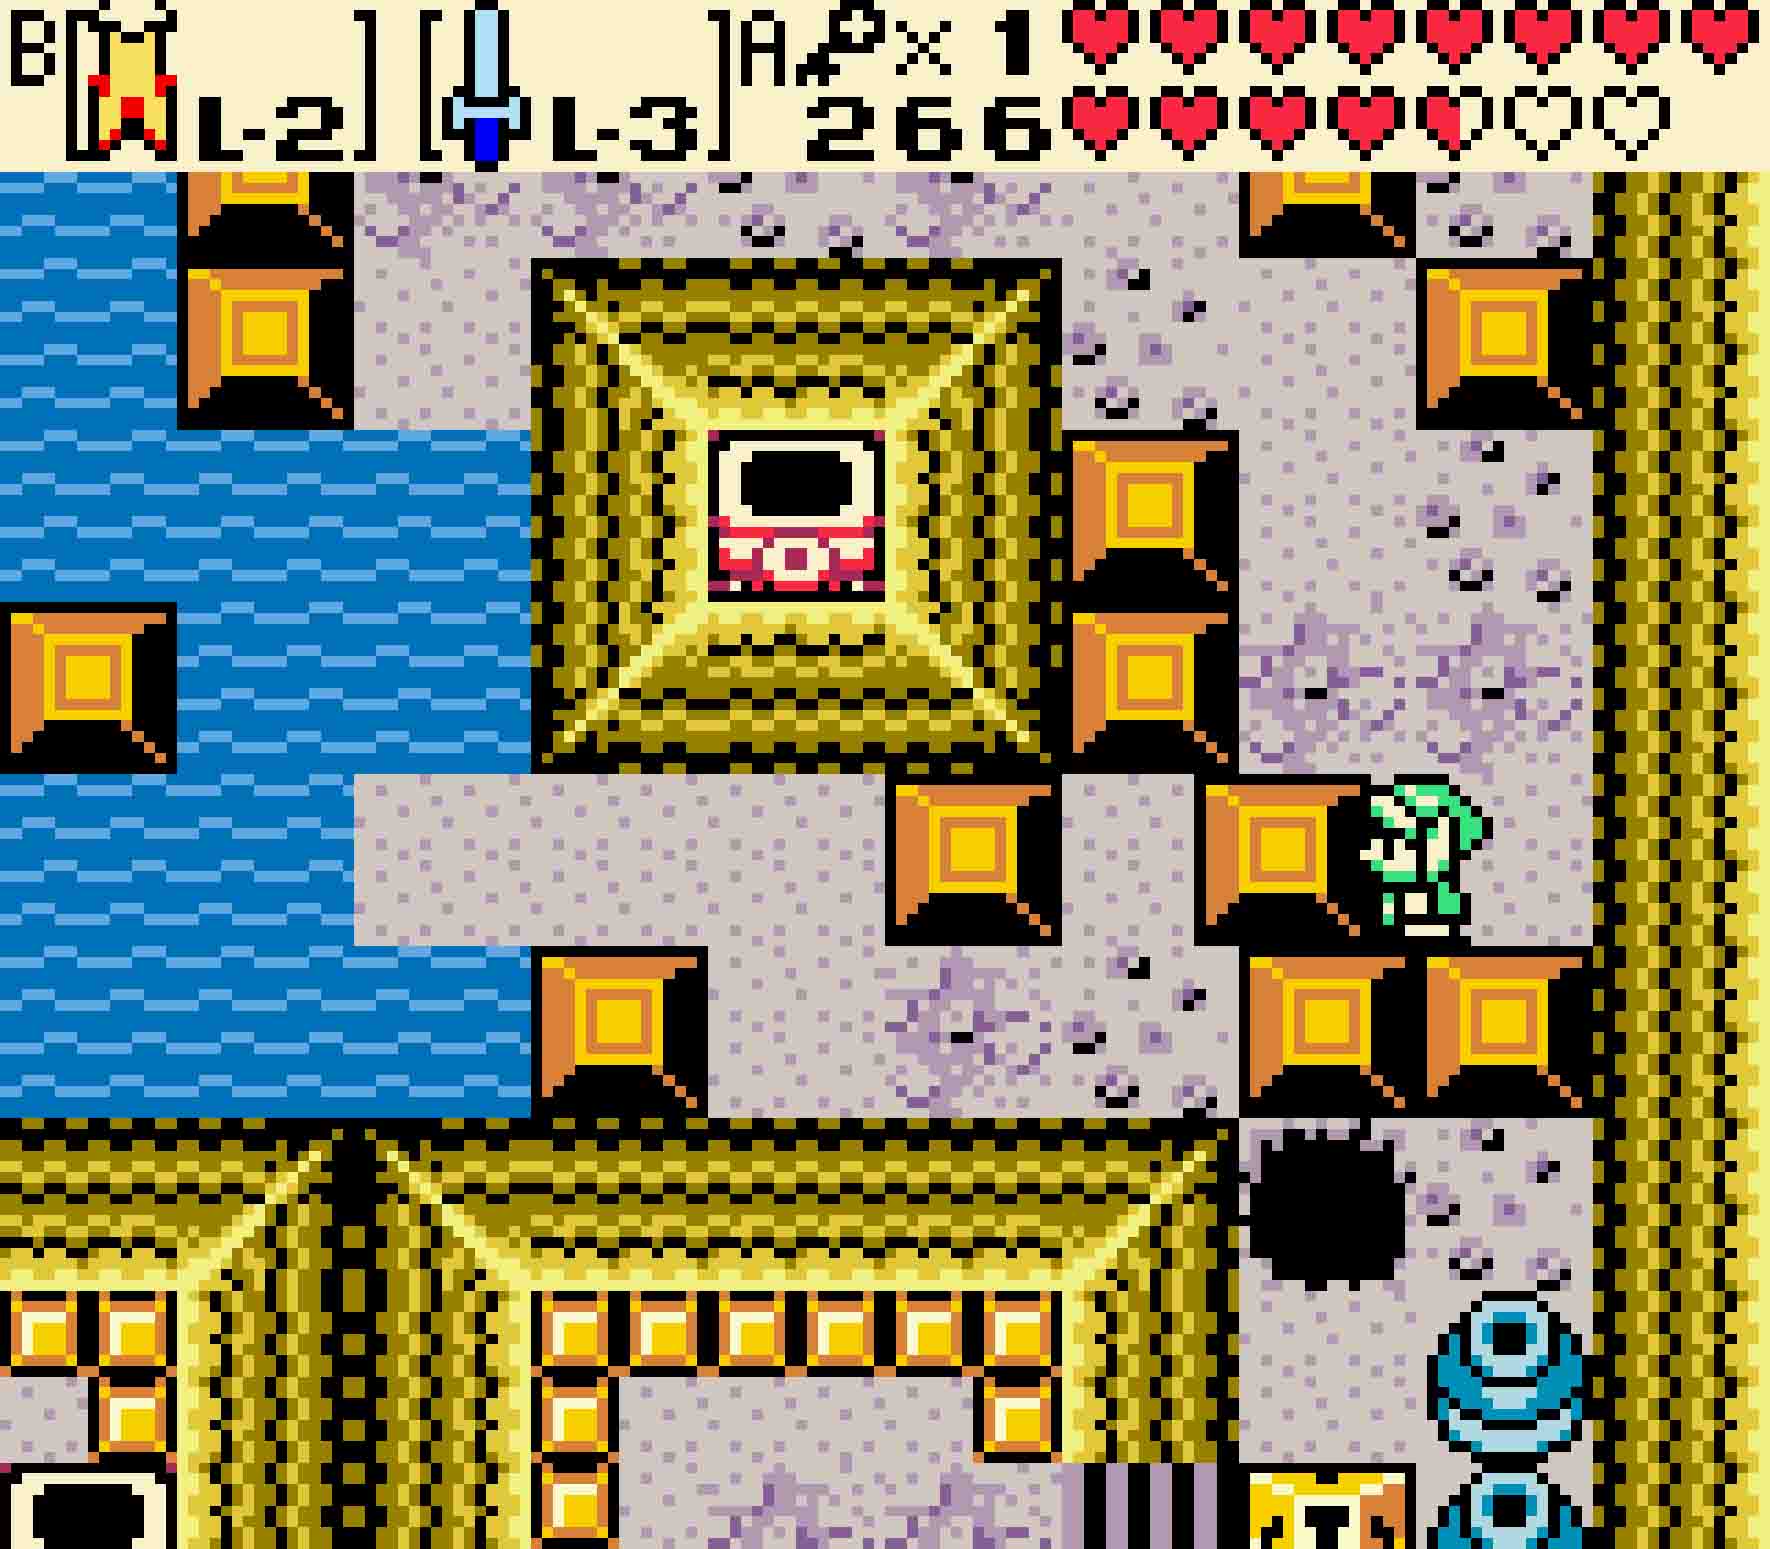
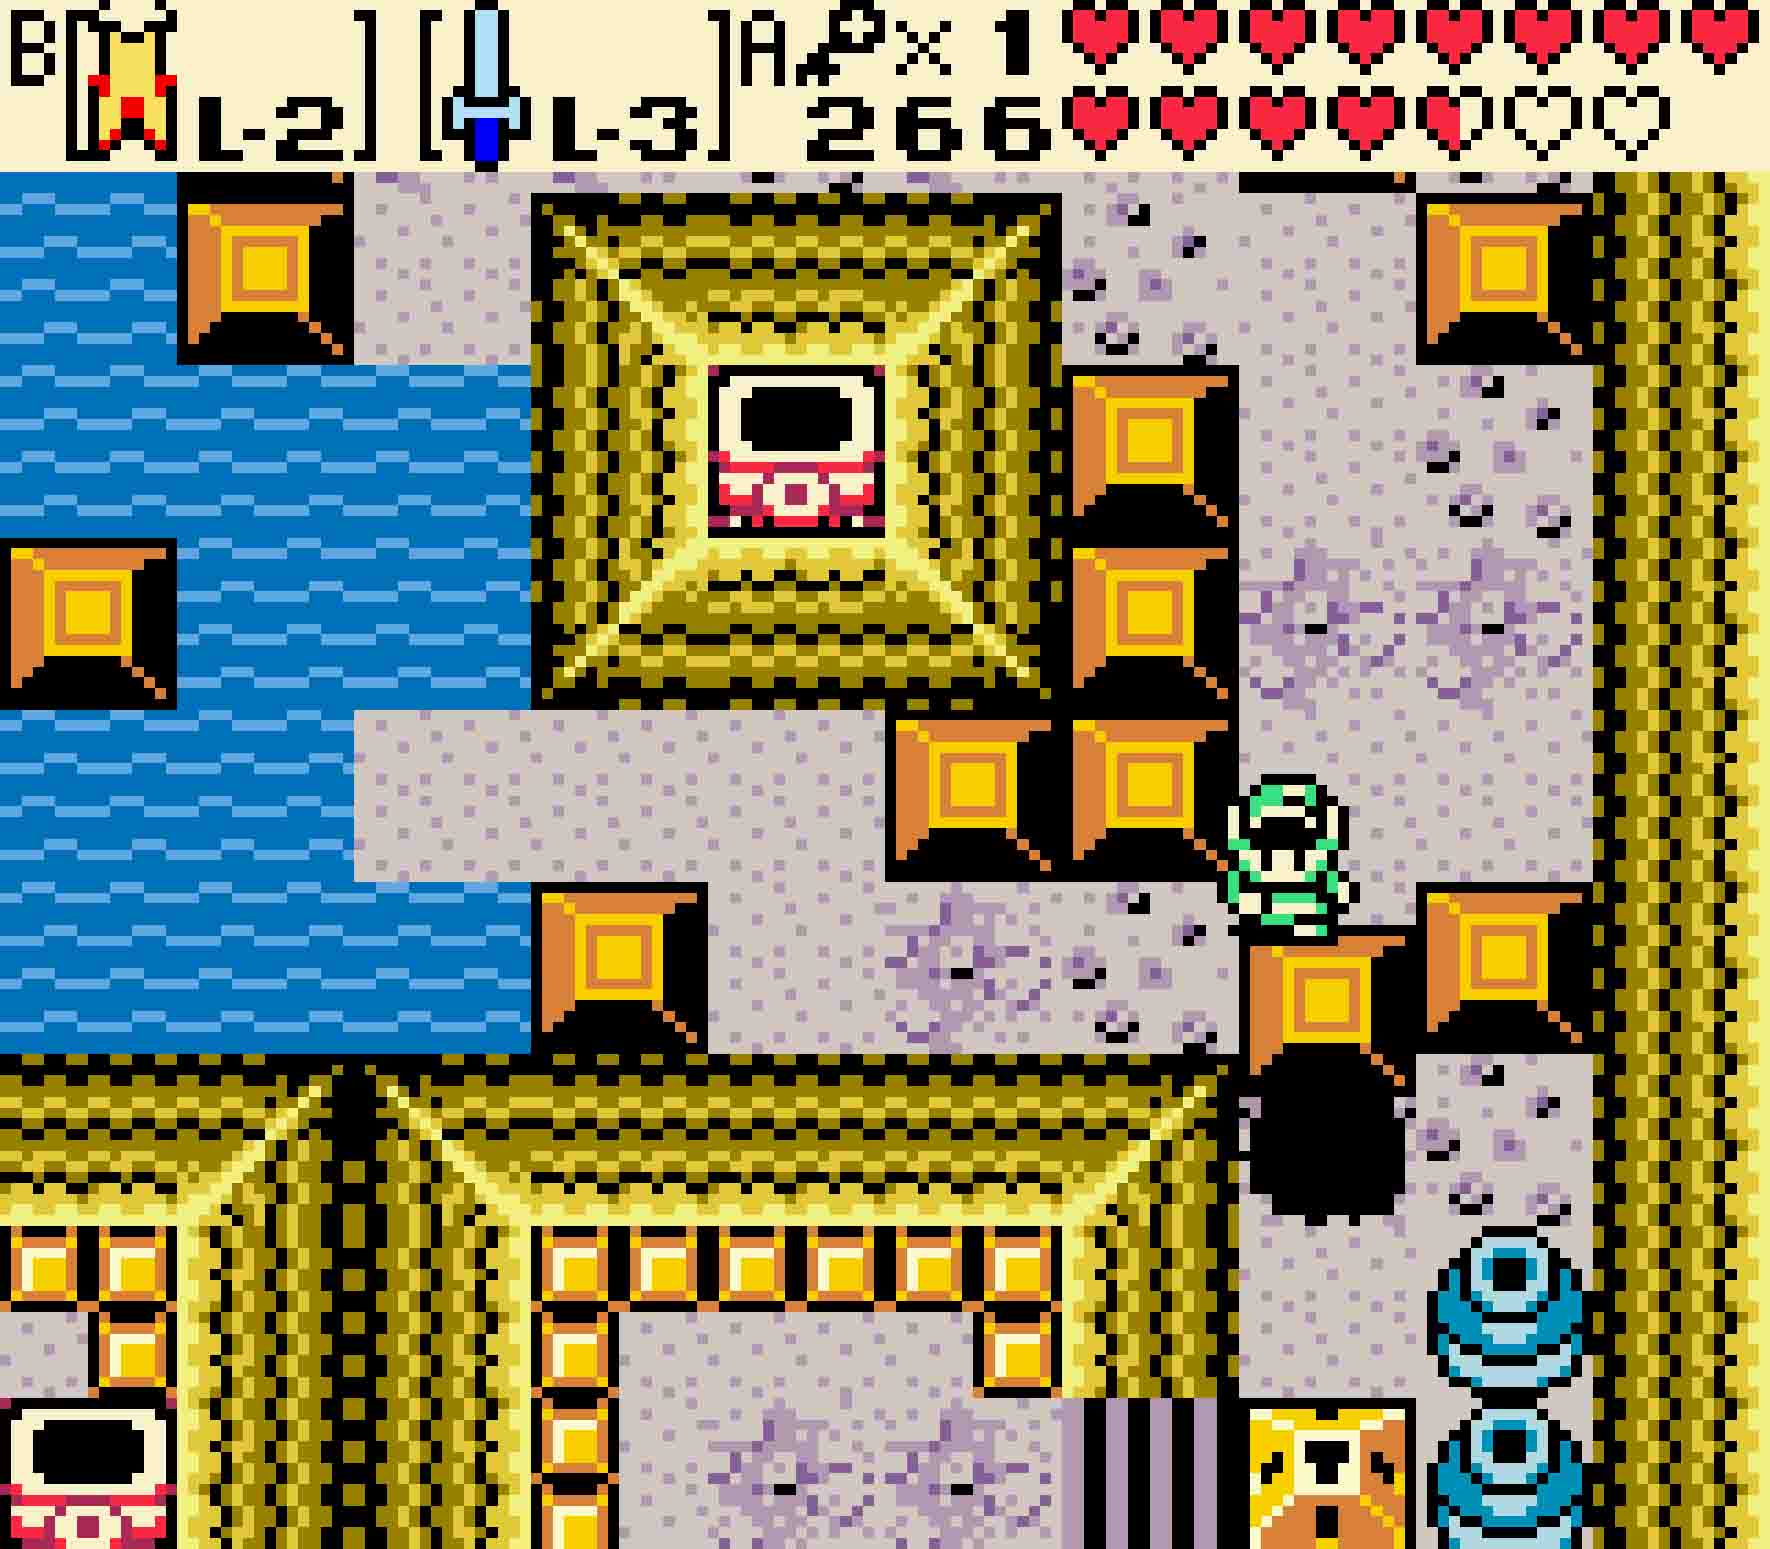
There’s only one more challenge to do, and it’s easy if you’ve been paying attention throughout the game. You’ll see the old man from the beginning of the dungeon (Or maybe it’s a different old man? Who can tell?), and he will offer you a final challenge. However, this challenge will cost you: 60 Rupees just to try. Accept his bargain, and he will cause eight chests to appear. Open them all in the correct order, and you win.
If you were guessing randomly, there would be 40,320 permutations to try. However, you can nail this the first try. If you look closely enough, this room looks like a rather primitive layout of the island of Holodrum. And those eight chests correspond to the locations of the eight dungeons of Holodrum. Even if you haven’t been to the last dungeon yet, you can guess which one that would be by knowing where the other seven are.
Opening the eight chests
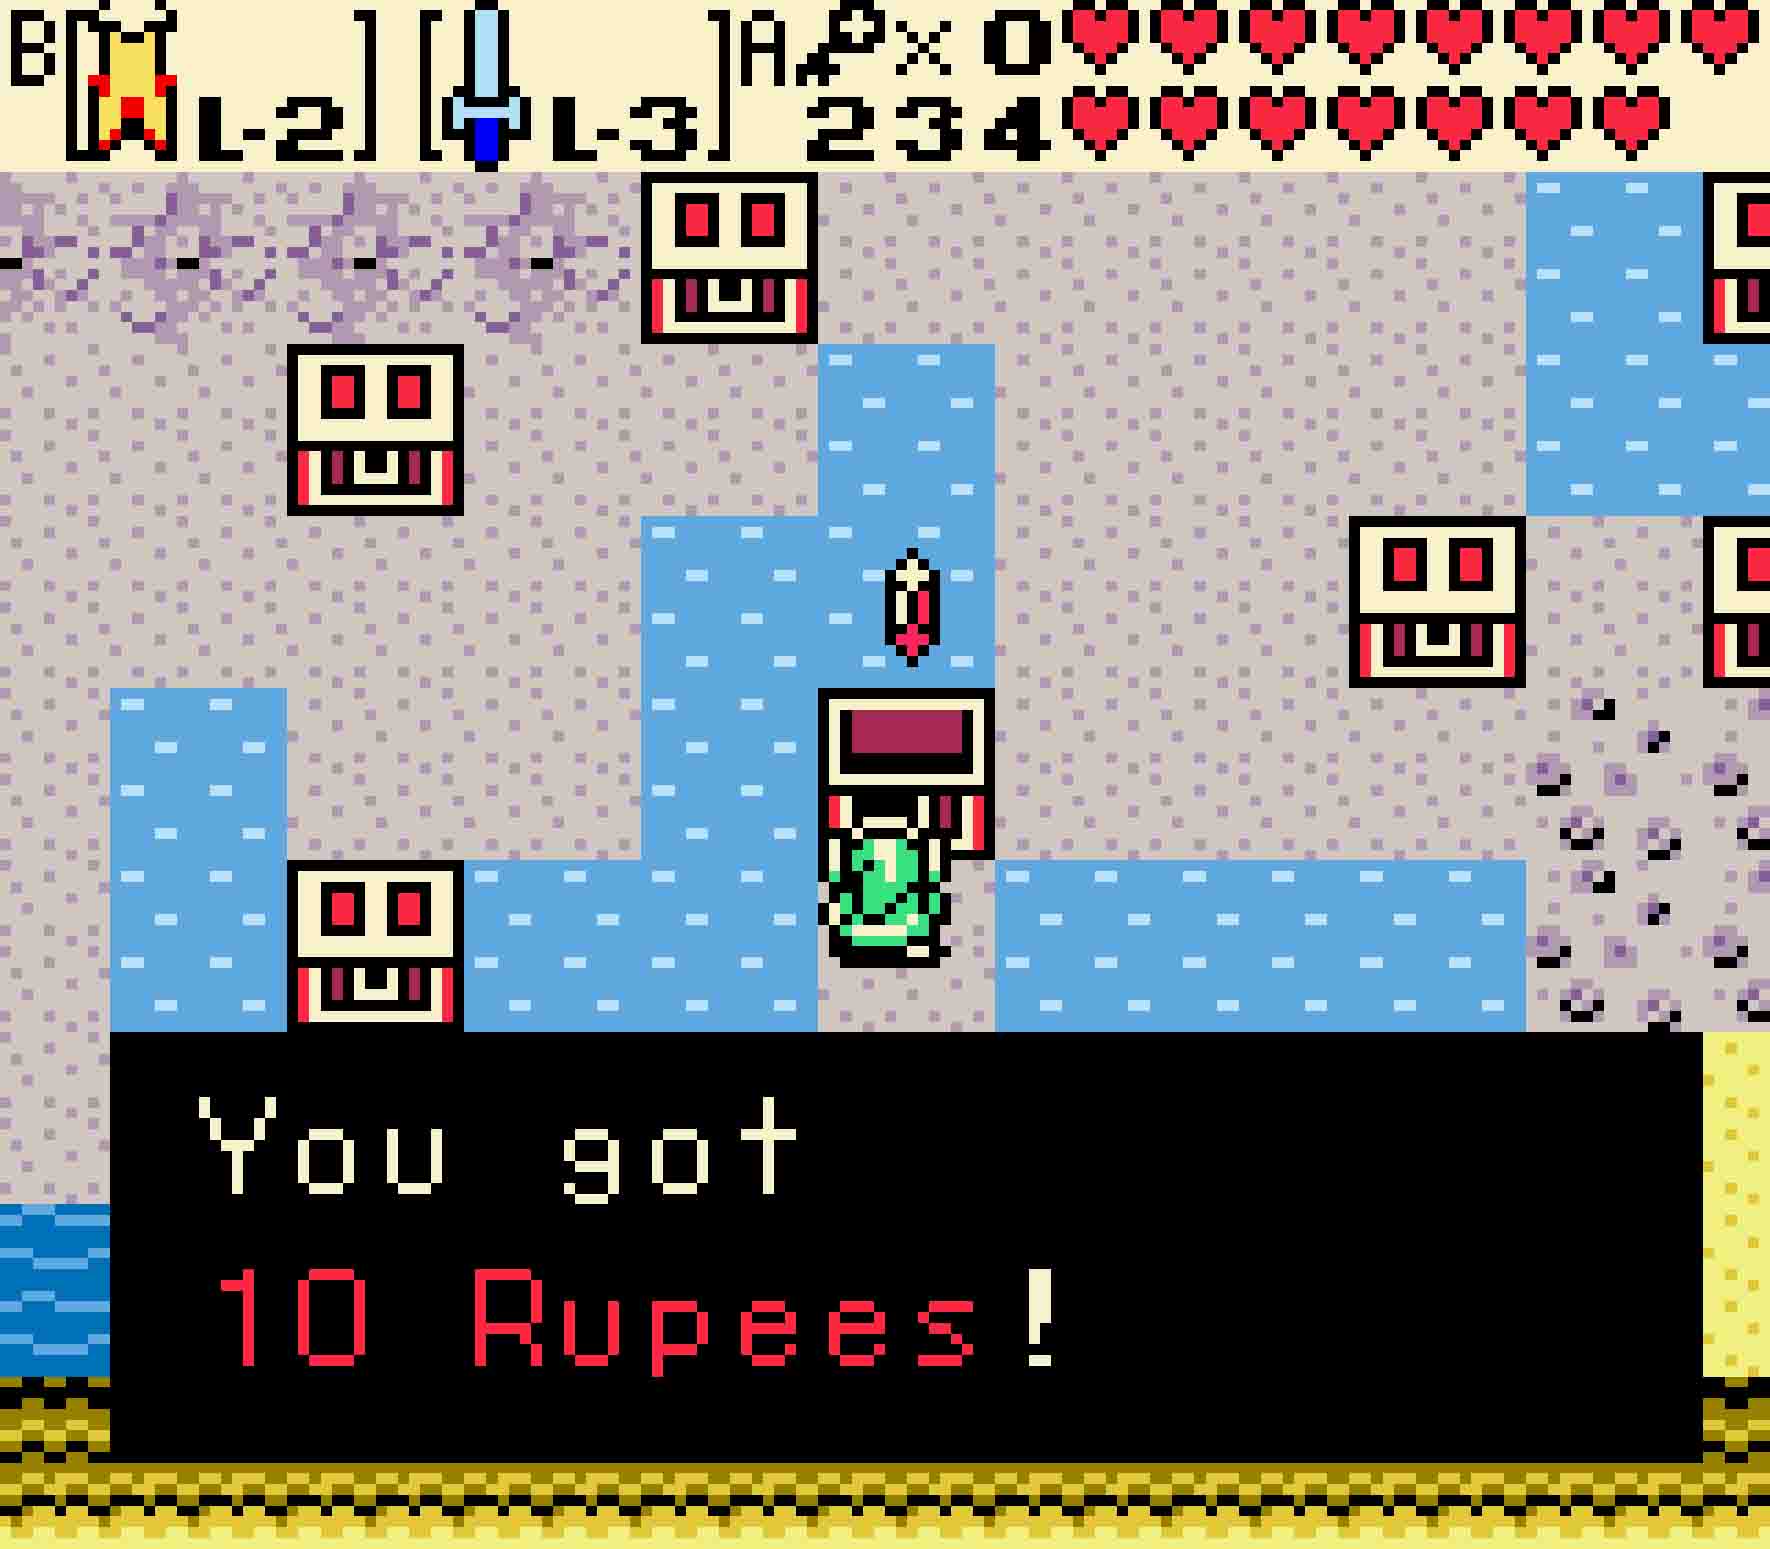
Step One Collect the chest near the middle of the room next to the water. This refers to the Gnarled Root Dungeon.

Step Two Collect the lower of the chests on the far east of the room. This refers to Snake’s Remains.
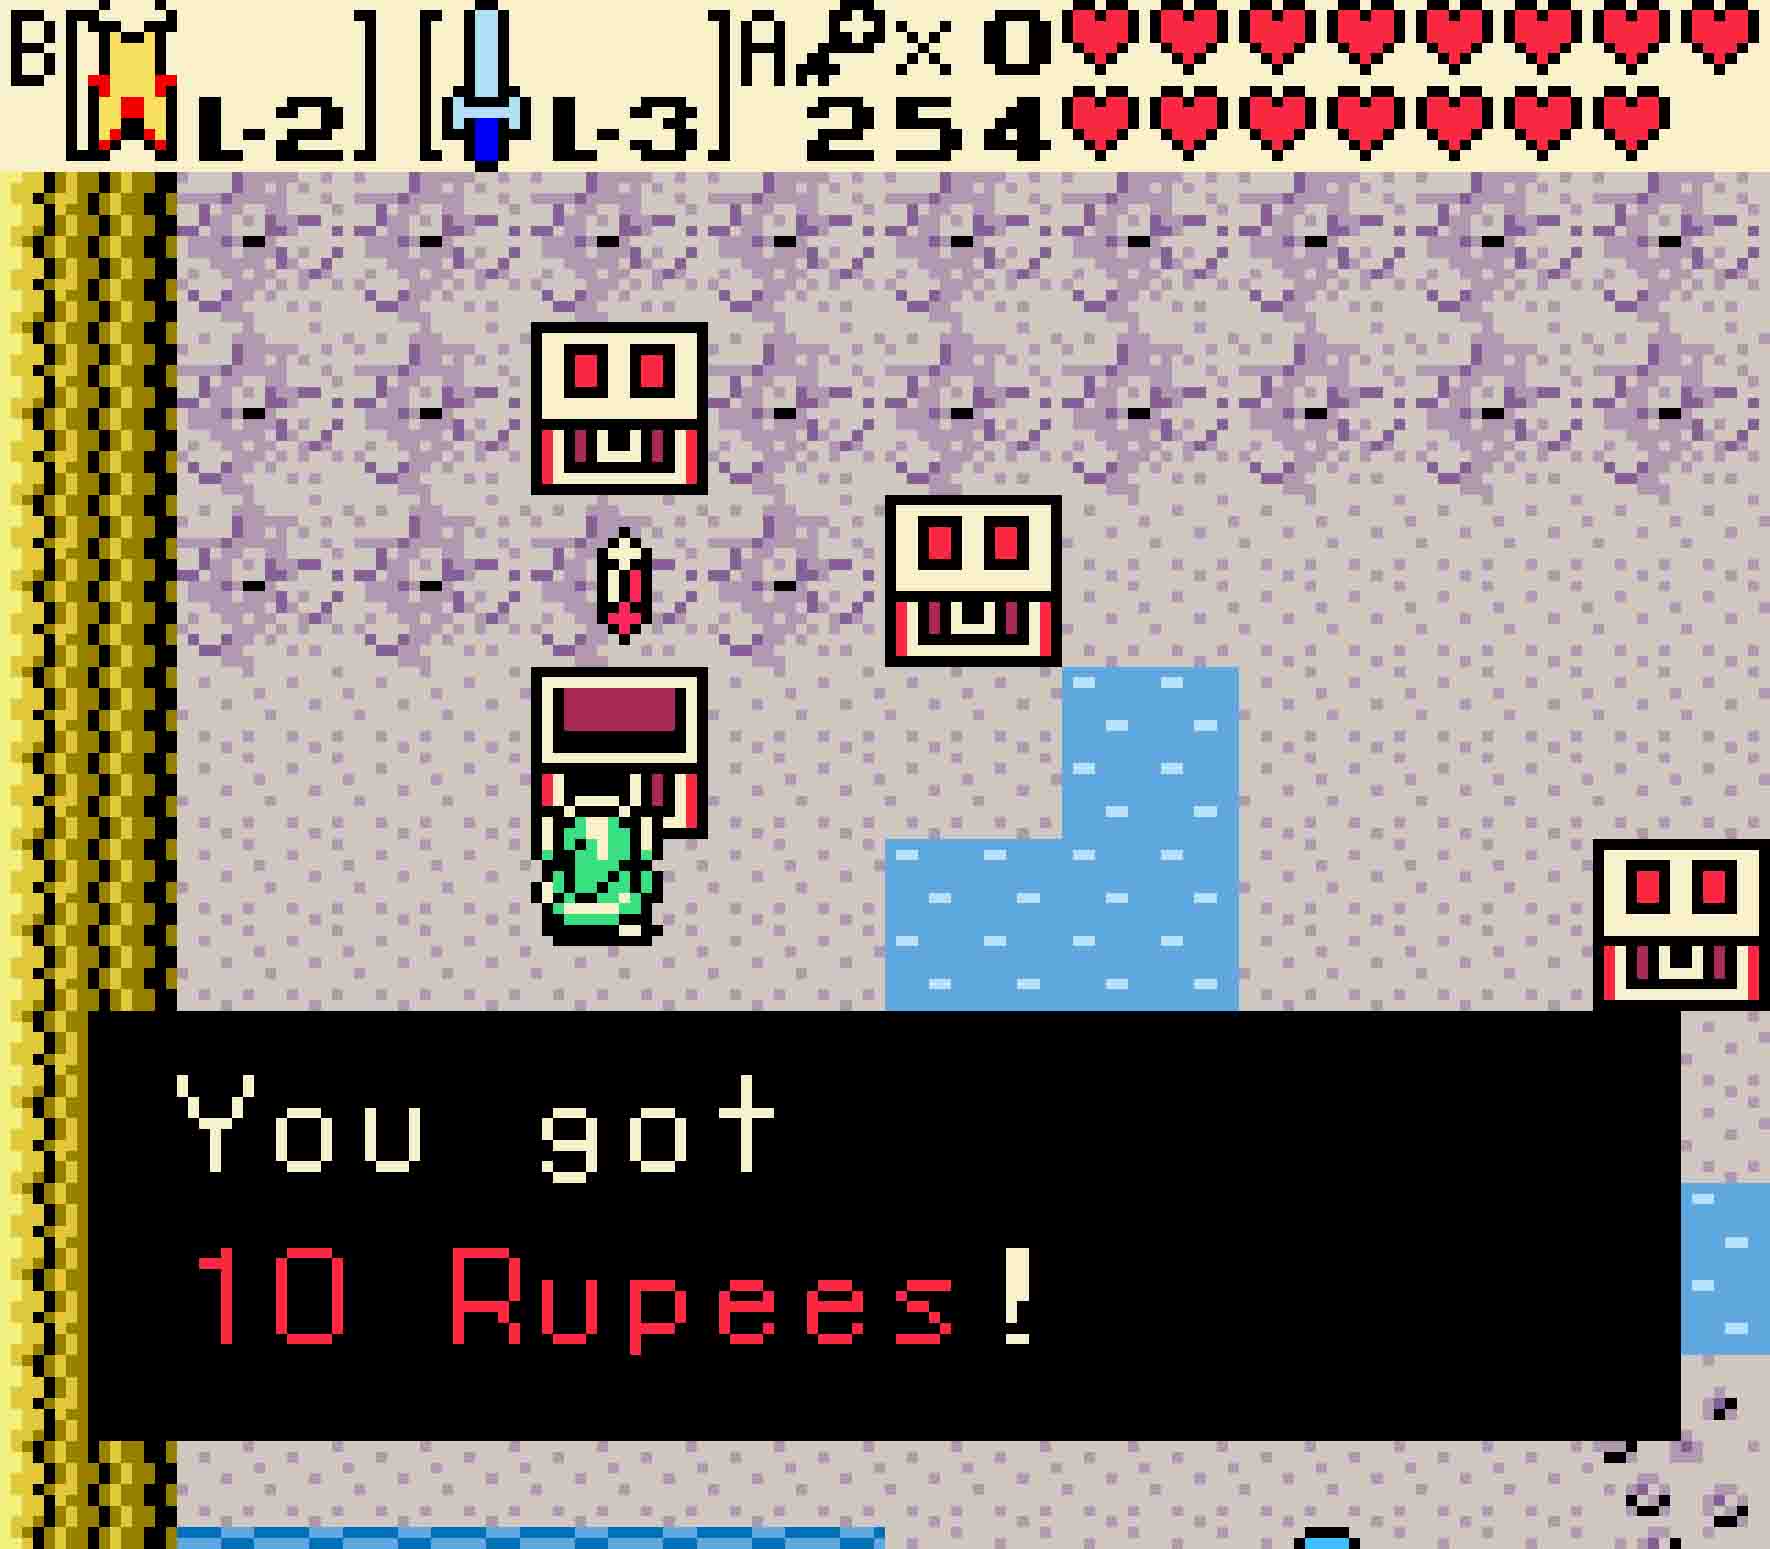
Step Three Poison Moth’s Lair is next. That’s the middle chest of the three chests in the leftmost column.

Step Four The upper-rightmost chest surrounded by water is next. That’s the Dancing Dragon Dungeon.
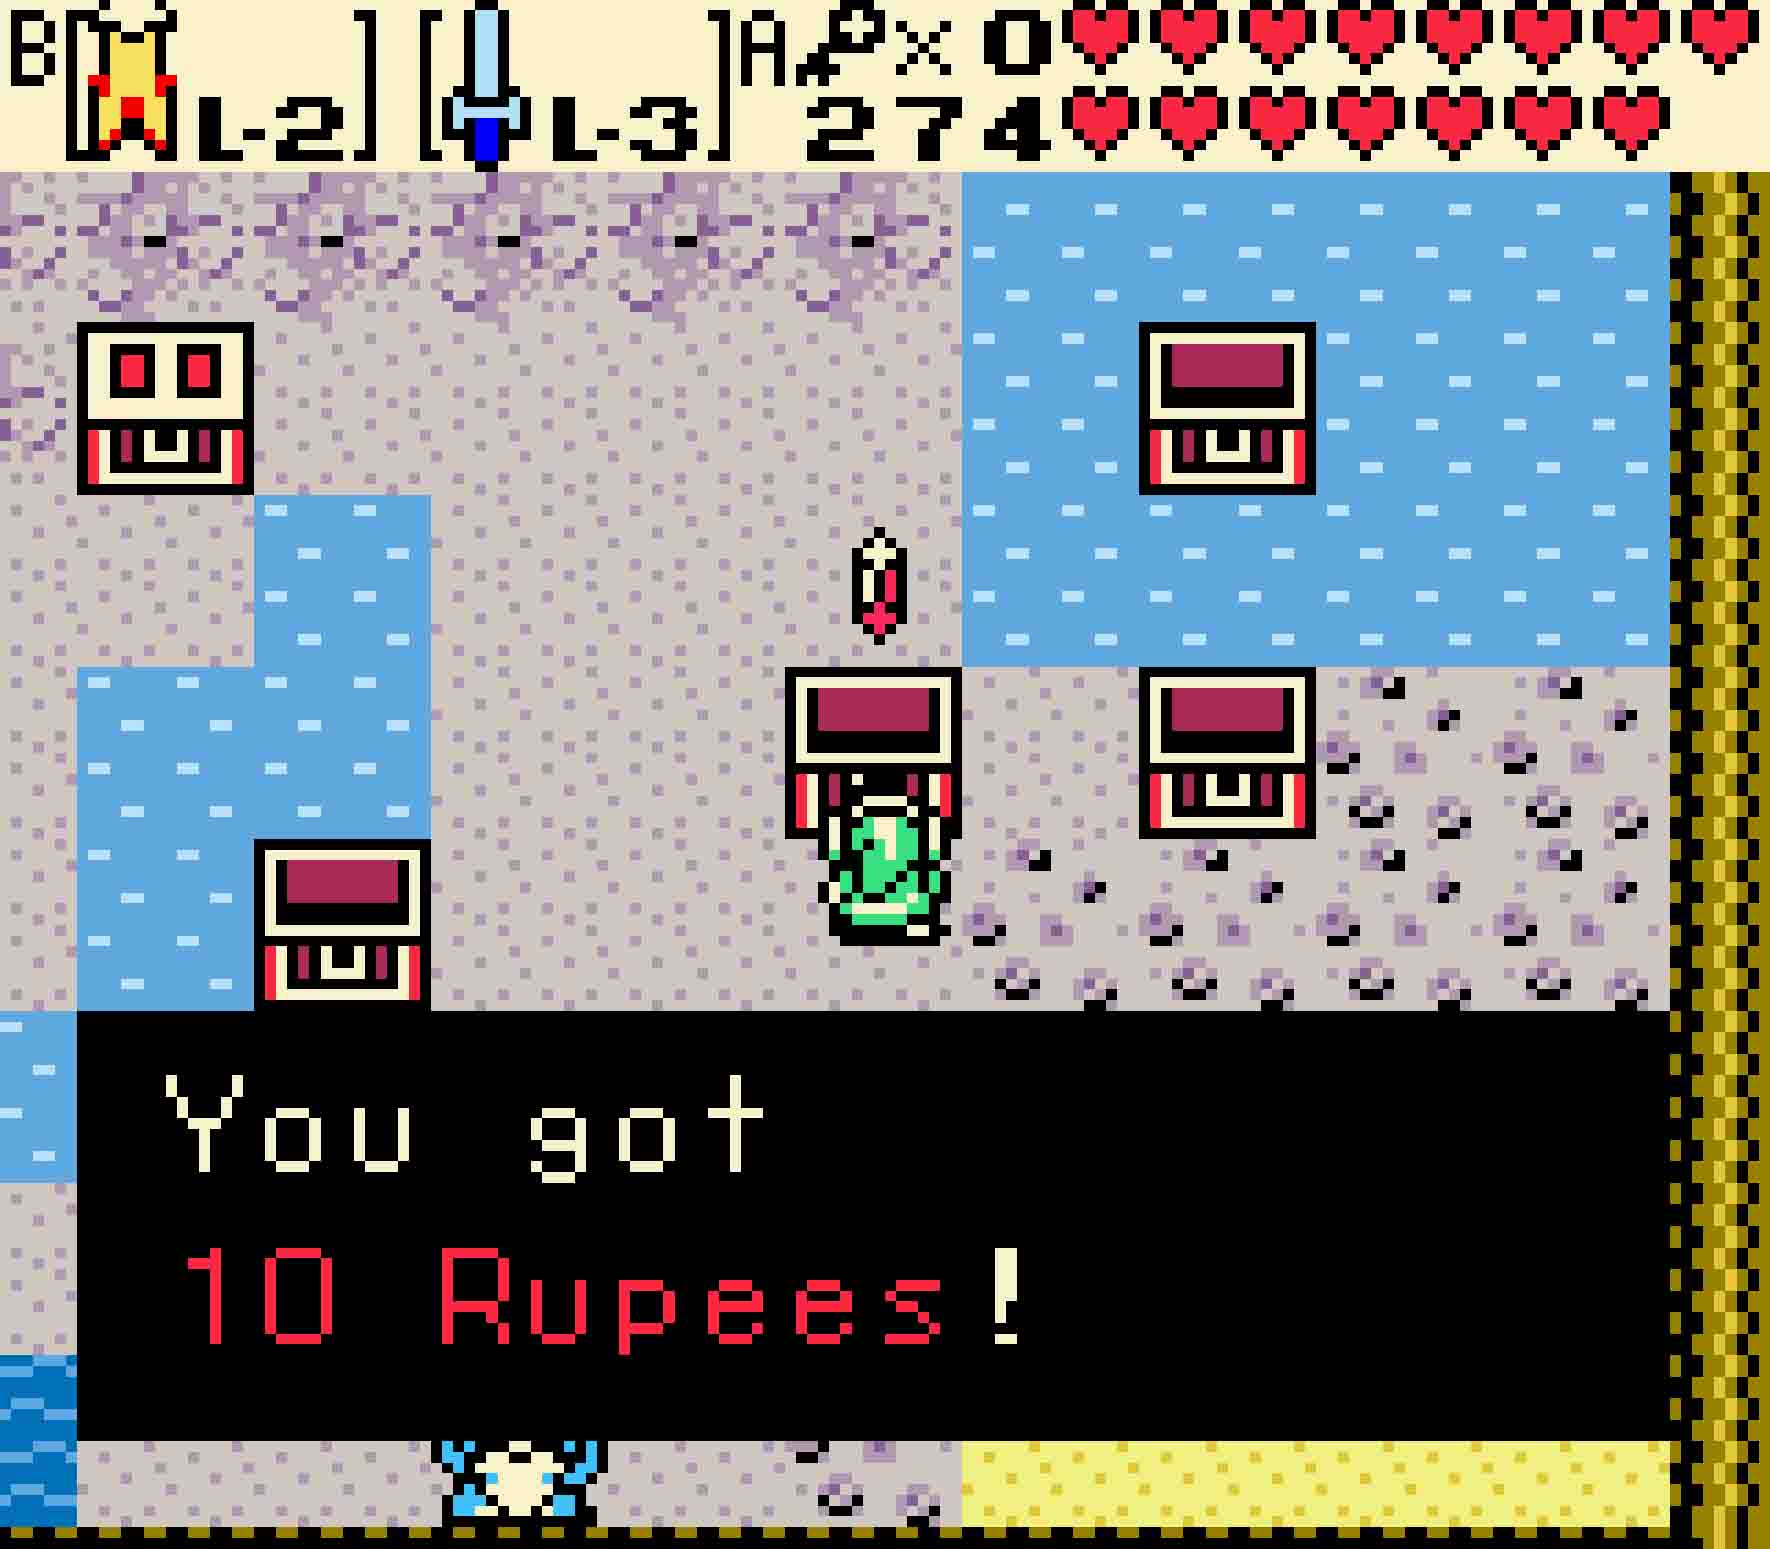
Step Five Unicorn’s Cave is number five. That one is just west of the second chest you opened.

Step Six Next it’s the Ancient Ruins. That’s in the far northwest corner.

Step Seven Next it’s the Explorer’s Crypt. That’s on the far southwest of the island.
Step Eight Guess which one is left? That’s, of course, the Sword & Shield Maze.
In so doing, not only will you make 20 Rupees in profit, but you will also receive a portal to the final room of the dungeon. It merely contains Ring #4: the Power Ring L-3. Of course, you will have to appraise it first.