12. The Moon
Table of Contents
Stopping the Moon
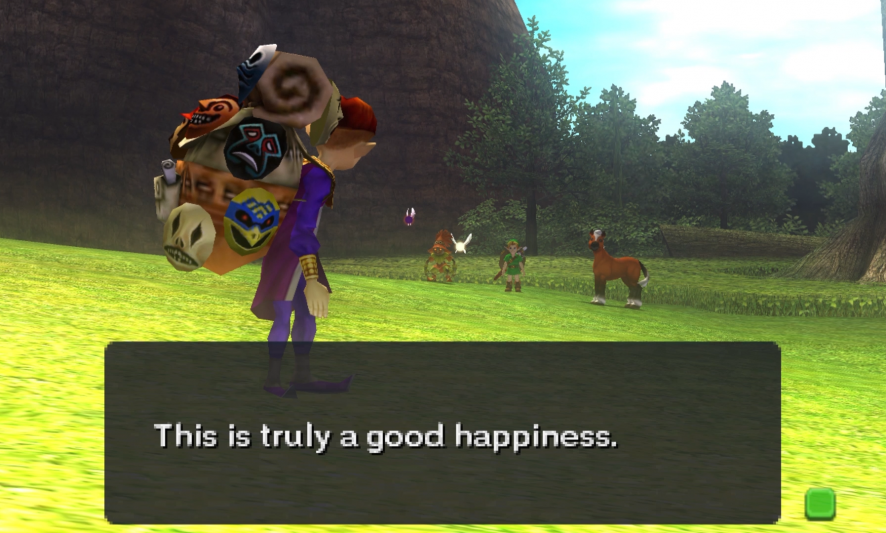
With all four of the Termina guardians freed, all that remains is to go face the Skull Kid himself. You, unfortunately, can’t face him until midnight of the Final Day, however, so you can spend the first two and a half days however you please. Do some side quests with the Bomber’s Notebook, go get some fairies and potions, whatever works. Just make sure to have arrows, lots of arrows. Once you’re ready to face Majora, head back to Clock Town and play the Song of Double Time to fast forward to Dusk of the Final Day. The last six hours (if they’re still left), you’ll just have to wait out, so make sure that time isn’t slowed with the Song of Inverted Time. Once midnight comes and the Clock Tower opens, climb the tower.


The encounter with Majora’s Mask will go largely similar to how it went the last time oh so many days ago, but the Skull Kid seems confident enough. It’s time to dash that confidence just a little bit. Once the timer starts on the moon’s descent to earth, whip out the Ocarina and play the Oath to Order. You will start to hear the four Terminian deities off in the distance, and they will slowly appear, one by one, to come and hold up the moon so that it will not fall.
And it seems like for a moment that they’ll be successful. The fairies will rejoice, but that rejoicing is far too premature because the Skull Kid—or rather, Majora’s Mask—isn’t so convinced. Suddenly the Skull Kid is raised up like a mere puppet and discarded. Neither Majora’s Mask nor the moon is defeated yet. It’s time to end this and stop it for good. So Link will dash up into the pull of the moon’s gravity in order to make everything safe once again.


The moon is… not what you’d expect. It’s a forested world with a giant tree in the center of your field of vision. You can’t go forever as there is an invisible wall around the whole place, but it’s still a nice, colorful change of pace. Your focus is the tree in the center of the clearing. As you approach, you will see a couple of children wandering around the tree. There are four of them, each of them wearing one of the masks of the four temple bosses, and there’s a fifth child seated at the tree with Majora’s Mask.
Talk to the child with Majora’s Mask. The child will ask you to play with him, and you should accept that offer. If you don’t have all of the masks, the child will tell you that you only have weak masks, but that’s okay. You can still play with him regardless. Granted, it’s much harder without the 24th mask, but it’s still possible to beat Majora without it. Play the game, and you’ll transition to Majora’s private little arena.


The four boss remains will be taken from you and plastered against the walls, and then Majora will come out. The battle for Termina has begun.
Boss: Majora’s Mask
Majora’s Mask will grow tentacle-like appendages and hover threateningly around the arena. For the most part, it will face you, though occasionally as it wanders, it may turn its back. If you wait around for a bit, it will start to spin around horizontally before coming after you, whirling about the arena until it stops and resumes its other attack pattern. While it’s spinning about, keep your shield up to protect yourself from its spiky edges. Then, while it’s just meandering through the room, you can either use Zora Link’s fin boomerangs to attack it from behind or use regular arrows to hit him in those rare moments when its back is facing you. The fin boomerangs are perhaps less wieldy because the camera will lock in place until they return, but they’re generally easier to get a shot in while Majora’s Mask is relatively stationary.


Once you manage to hit it with an arrow or the boomerangs, its eyes will turn red, and it will descend to the floor. Quickly run over to it and strike it with your sword. After a few hits, it will activate the other four masks on the walls and pull them into play. The four masks will occasionally shoot balls of energy at you, so you will need to keep moving at all times. Majora’s Mask will also gain a new capability: It will fire a laser at you that will gradually track your position in the level. You’ll want to side-hop and backflip to avoid the laser hitting you. Otherwise, the same tactics generally apply. Use arrows or the fin boomerangs to strike him.
After you hit it several times, it will finally give up on this attack plan and change into its second form.


Boss: Majora’s Incarnation
Majora’s Incarnation is just… weird. The mask will sprout legs and just start running everywhere like a chicken with its head cut off. It actually sounds something like a chicken as well. The four other masks will still be hovering around, looking to do their worst to you, so just stay on the move as their attack patterns haven’t changed. As for Majora’s Incarnation, it will continue running like a maniac, though every once in a while it will either slow down into a rather slow dance-like maneuver or it will pause completely to fire a stream of energy balls in your direction.


Do your best to actually get a target on him, and then do not let go of that target to the best of your ability because Majora’s Incarnation is extremely difficult to get a lock on. Always be moving as you never know where a strange energy beam from the other masks is going to come. Be wary for those moments where the Incarnation stops and fires its own stream of blasts, and then just side-hop repeatedly to make sure you stay out of the way. And then, when you get the chance, during Incarnation’s slower dances routines, fire a regular arrow in its direction. That will send it to the ground. Immediately after you do so, run over and swipe it with your sword. Majora’s Incarnation will jump up from that, but it will still be momentarily stunned before it goes back to running with fervor, so you can hit it at least once if not twice more before it resumes its attack pattern.
Eventually, after enough hits, Majora’s Incarnation will go down, but there’s still one more phase to go.


Boss: Majora’s Wrath
This is it, Majora’s final form. If you can beat this, you’ve beaten the game. Majora’s Wrath this time will also grow tentacle arms in addition to its feet. Again, the four other masks will remain in play, always a perpetual nuisance, unless you defeated them already. Majora’s Wrath’s reach with its tentacle arms practically reaches from one end of the arena to the other, so nowhere is truly safe. You will literally have to be cautious at all times from this battle. For the most part, Majora’s Wrath has two main attacks. First, it will attempt to hurl its long tentacle arms at you. Secondly, it will spin about in place, tentacle arms flailing about it rapidly, as it spins either towards you or away from you.


Get a target lock on Majora’s Wrath, and don’t give it up. It’s easier to get a lock on him than, say, Majora’s Incarnation, but the four floating masks in the arena make it especially tough to make it a guaranteed first hit. And then, for the opening part, be aggressively defensive. Always have your shield up, and always be moving. Eventually, you will find that Majora’s Wrath won’t be attacking all the time and will occasionally have moments where he’s resting his arms on the ground. Use this moment to fire an arrow at him. This will stun him for a few moments; take that moment to start an approach while maintaining a target lock on him. Depending upon how far away you are from Majora’s Wrath, fire another mid-approach because a normal arrow will not keep him stunned for long. If you have the capability to do so, Light Arrows are even better as they will keep him stunned for about twice as long. Once you approach, you should have the wherewithal to get two sword strikes off on him before he jumps away from you.
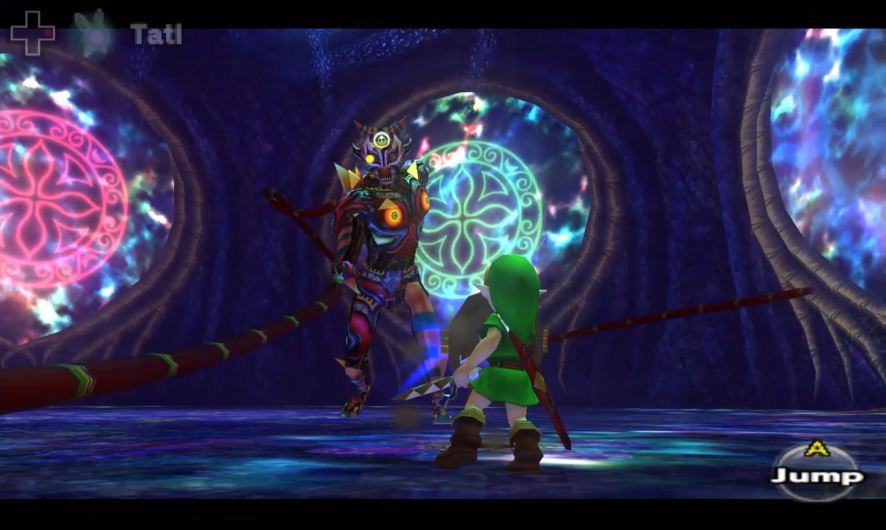

As Majora’s Wrath takes damage, he will start adding additional obstacles between you and him in the form of spiky gyroscopes. These will constantly spin and just generally get in your way. He will use his tentacle arms to keep them spinning and annoy you. He will also occasionally grab you by his arms and hurl you across the room. Neither of these is terribly damaging so much as they’re annoying. But continue the onslaught, using Light Arrows whenever you can. The more damage you can do when you finally manage to stun-lock him, the faster the fight will be over.


And really, he’s not exactly the toughest thing ever. It only takes a handful of approaches—six or so—to do all the damage it takes to defeat him.
And once you do, you’ll be off to the Dawn of a New Day and the finale.