


Secret Seashells
Table of Contents
What are Seashells good for?

No matter which version of Link’s Awakening you play, you will find these mysterious Secret Seashells hidden all over Koholint Isle. Later in the game, as you explore Ukuku Prairie as you try to enter the third dungeon, you’ll find the equally mysterious Seashell Mansion, just outside of Kanalet Castle. The Seashell Mansion is important because it is here where you will redeem your Seashells for fabulous prizes.
The most important prize that can be won from Seashell Mansion is the Koholint Sword, a much more powerful version of your starting sword that deals twice as much damage, thereby making your hero’s life much easier.
In the new Nintendo Switch version of Link’s Awakening, there are a total of 50 Secret Seashells to be found. The prizes awarded for your collection are as follows:
- 5 Seashells: A Piece of Heart
- 15 Seashells: The Seashell Sensor, which will alert you when a Seashell is near
- 30 Seashells: A Chamber Stone for Dampé’s Chamber Dungeons
- 40 Seashells: The Koholint Sword
- 50 Seashells: Another Chamber Stone which grants the +Rupees Effect
In the original Game Boy release and the colorized DX release, there are 26 Secret Seashells in all. In order to obtain the Koholint Sword (then merely called the Level-2 Sword), you need to find 20 of the Secret Seashells. In addition, you can also earn extra Seashells (as noted below in the full list) if you visit the Mansion when you have exactly five and 10 Seashells.

Mabe Village
In the bushy field
Sword required
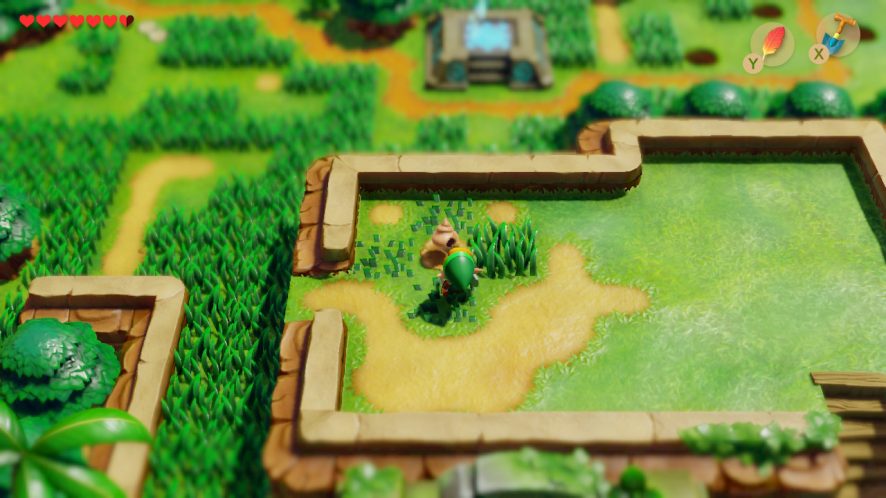
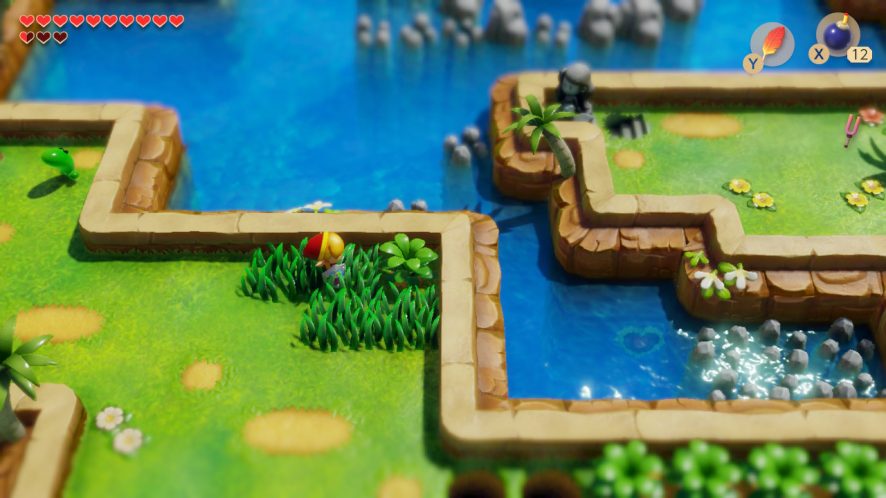
North of the Trendy Game and south of the Mabe store, along the east side of Mabe Village, you will find an overgrown field of grass. If you do the town a favor and mow the lawn for them, you’ll find a Secret Seashell lying in the midst.
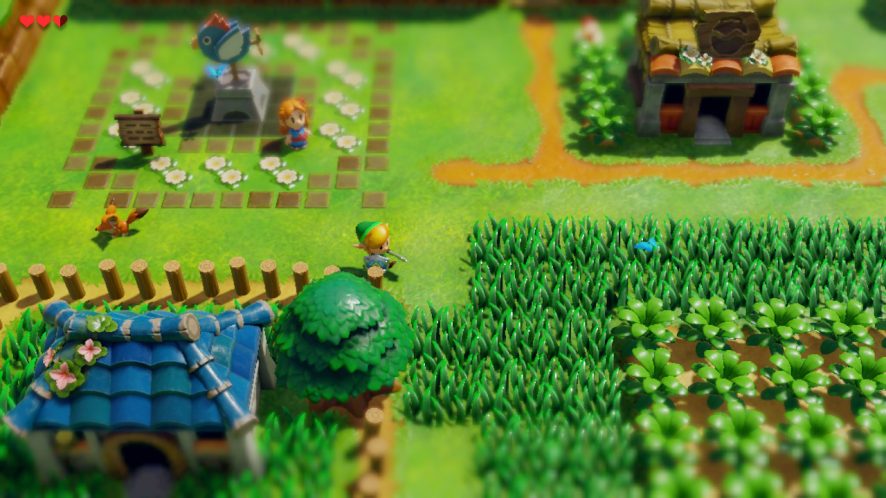
You’ll find the field on the east side of town. 
Mow the tall grasses in order to find a Seashell.
Trendy Game: Getting you hooked
Switch remake exclusive
Sword required
The southeast corner of Mabe Village, you can find the Trendy Game, the trendiest mini-game in Mabe Village. Really, it’s a a game where you try to pick up an item with a crane. At the beginning of the game, after you’ve already won the first Piece of Heart from this game, the Secret Seashell will appear in its place.
The Seashells in the crane game can be rather frustrating to obtain as they will frequently fall out of the crane as it tries to bring it back to the conveyor belt. As a result, you’ll want to make sure you come in with at least 40 or so Rupees to win your reward.
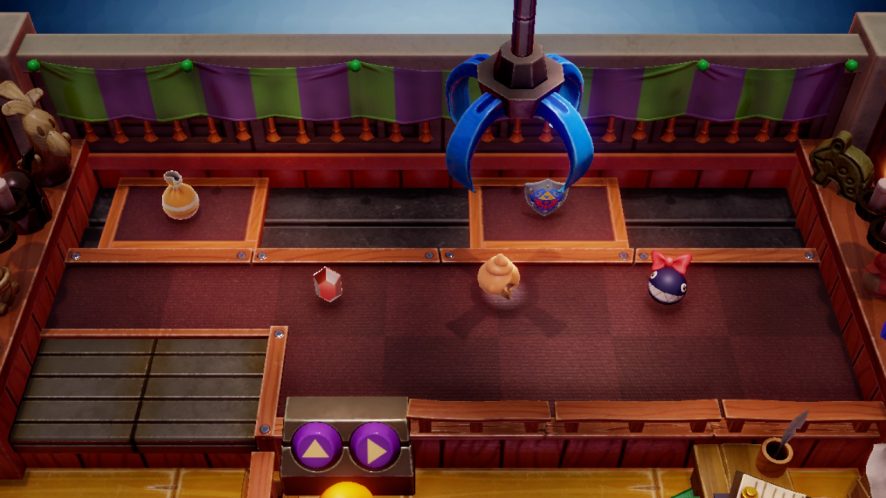
You can find this once you’ve obtained the first Piece of Heart. 
Seashells are slippery, so you likely won’t get this your first try.
Trendy Game: Becoming a regular
Switch remake exclusive
Angler’s Tunnel completion required

The Trendy Game regrettably finds a second Secret Seashell later in the game, and that means you’ll have to deal with another slippery prize to win. This time, instead of being a stationary prize, the owner puts it on the back-left moving platform. The easy way to time this prize is to move the crane as far up as it will go. Then, when the moving platform with the Seashell starts moving to the left, tap the crane right, but immediately release. It should drop right on top of the Seashell.
Once again, this Seashell won’t come easily, so you’ll probably need to give it several tries to bring it home.
Buried in the doghouse
Shovel required

Once you manage to save up to buy the Shovel for 200 Rupees, you should head to Madame MeowMeow’s. More accurately, you’ll need to enter the right entrance of her cottage, which actually heads to a small doghouse where one of her beloved BowWow pups resides. There, buried within the sands of the pup’s den, you will find a hidden Seashell.
Fishing: Reeling in the flying fish
Switch remake exclusive
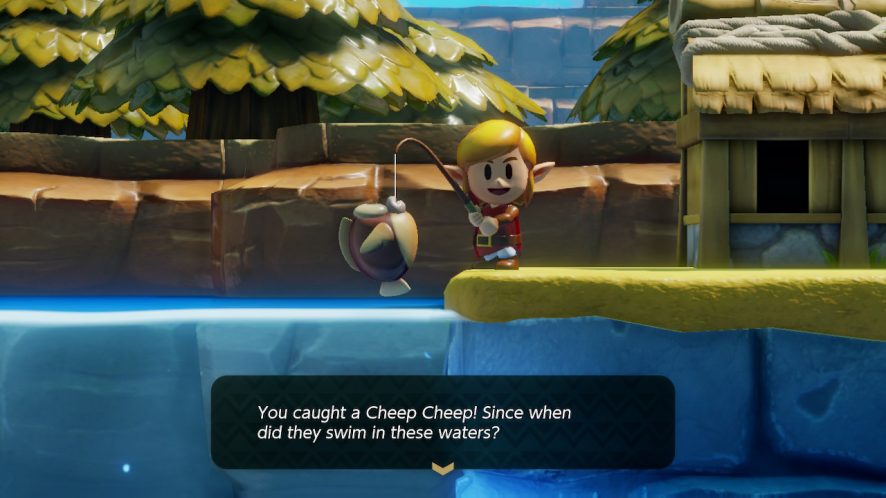
After you get the hang of catching fish in the fishing mini-game in the northwest corner of Mabe Village, you’ll start to see fish of varying sorts invade the fishing hole. In order to get the first Seashell from the fishing game, you’ll need to catch a Cheep Cheep.
Once hooked, Cheep Cheeps like to jump into the air. When they’re about to do so, keep your line slack. However, once they actually leap, pull back on your rod; otherwise, once they splash down, you’ll lose them. Reel your first one in to win a shell.
Fishing: Ink-redible fishing
Switch remake exclusive

Once you start catching Cheep Cheeps, you’ll find a new target within the fishing lake: the Blooper. It’s not enough that you catch any old Blooper though; it at least needs to be one of a certain size, so certainly look out for the bigger ones. If you manage to snag it, the fisherman will give you his second Seashell.
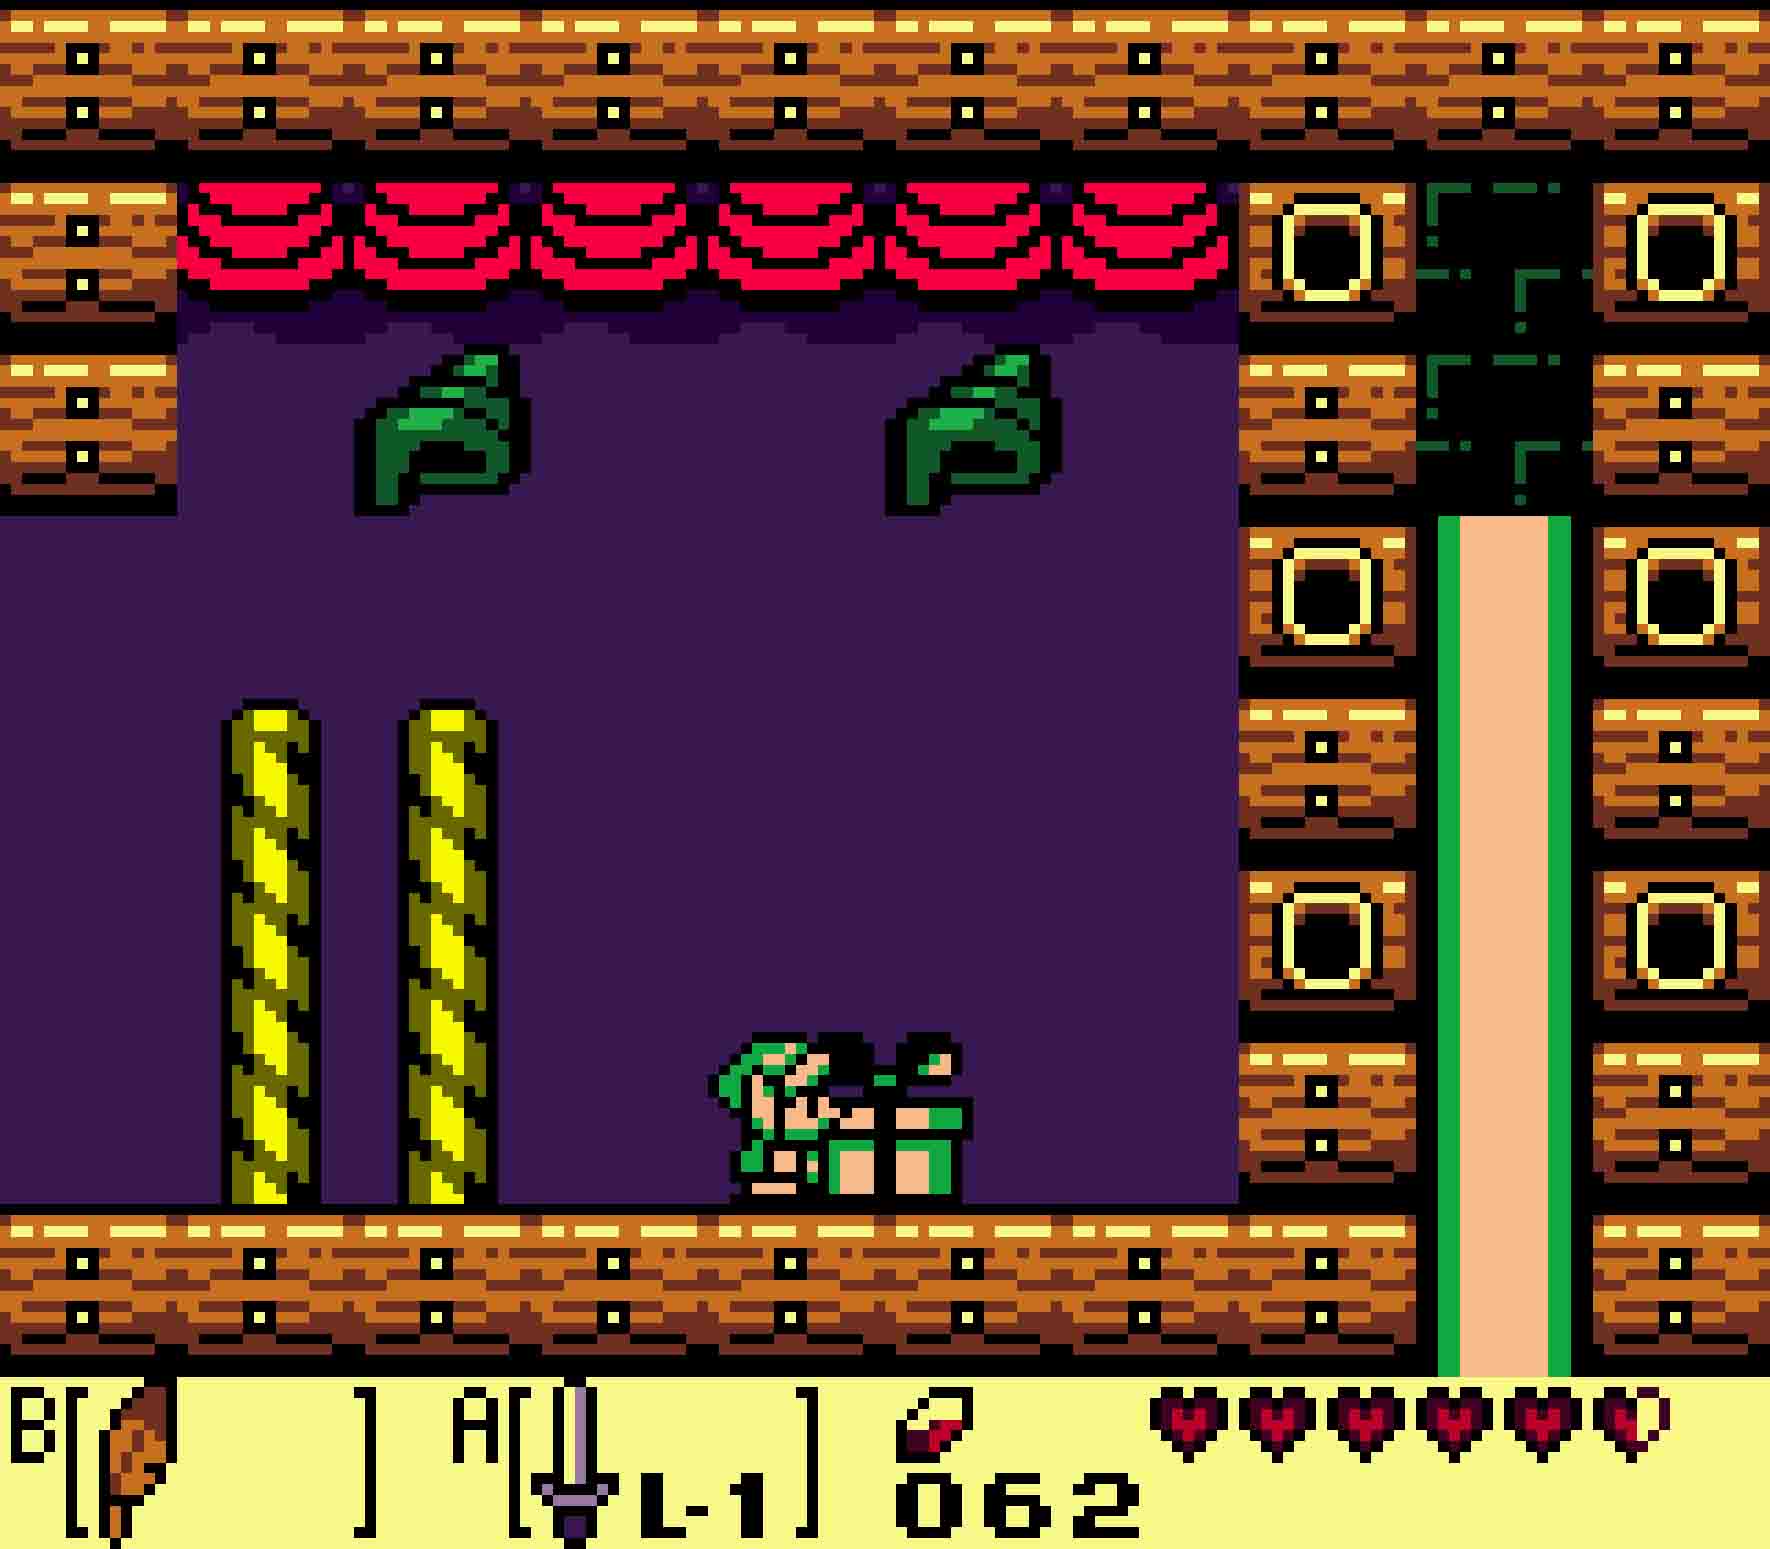
Tail Cave
Tail Cave’s secret room
Bombs required
When you first visit Tail Cave, you won’t have access to Bombs. You’ll need to buy them in Mabe first, and the shopkeeper won’t sell them to you until later.
Once you do have Bombs, head back in. You might notice on the Map a single room you haven’t been to. From the entrance, head up, left, and then up again. You’ll see several statues and a Mini-
The lonely tree by the dungeon
Pegasus Boots required
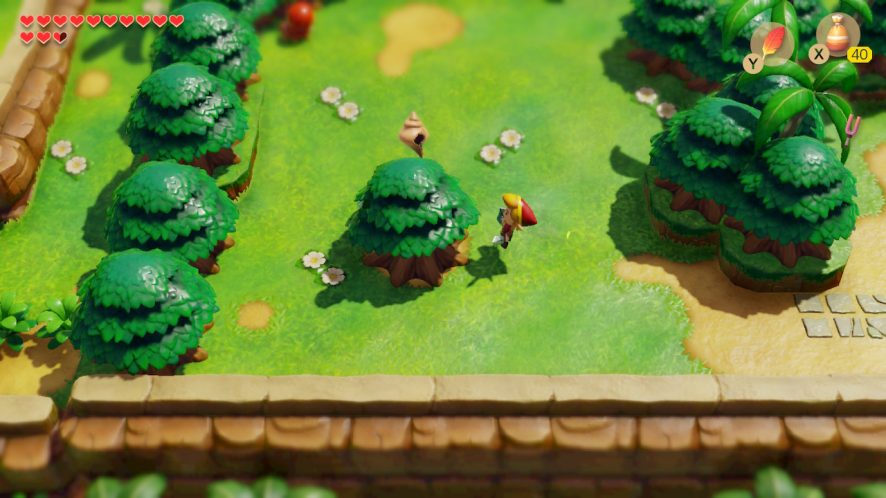
After you’ve bested Key Cavern and returned with the Boots, head back to Tail Cave, but don’t head in. Just to the west of the actual dungeon, you’ll find a solitary tree in the midst of the forest. Use the Boots to dash into the tree. If you do, a Secret Seashell will pop out of the tree and plonk onto the ground.
Toronbo Shores
Barking up the right tree
Switch remake exclusive
Pegasus Boots required
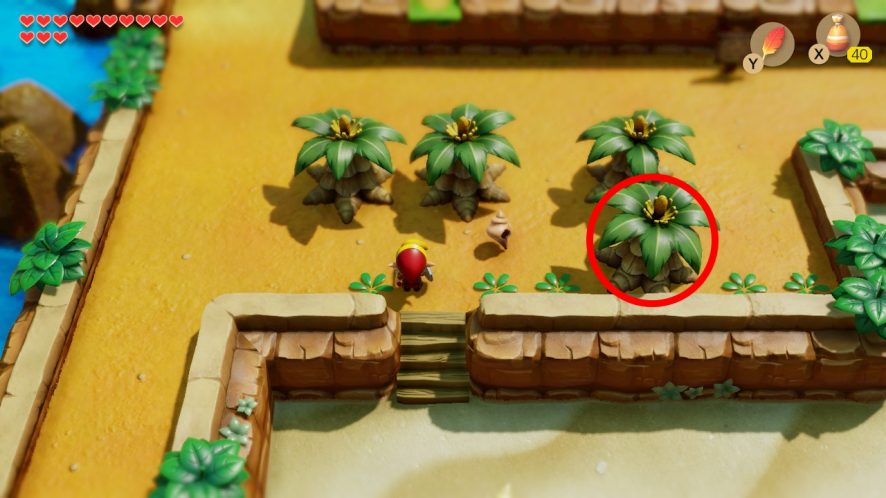
Usually Seashells that are hidden in trees can be identified by single trees standing by their lonesome. Not this time. This one is part of a bunch.
In the northwest corner of Toronbo Shores, you’ll find four trees, two aligned horizontally just to the left of two aligned vertically. Of this group of four trees, use the Boots to ram into the bottom-right most of them. When you do so, a Secret Seashell will fall out to add to your collection.
Buried at Marin’s favorite spot
Switch remake exclusive
Shovel required
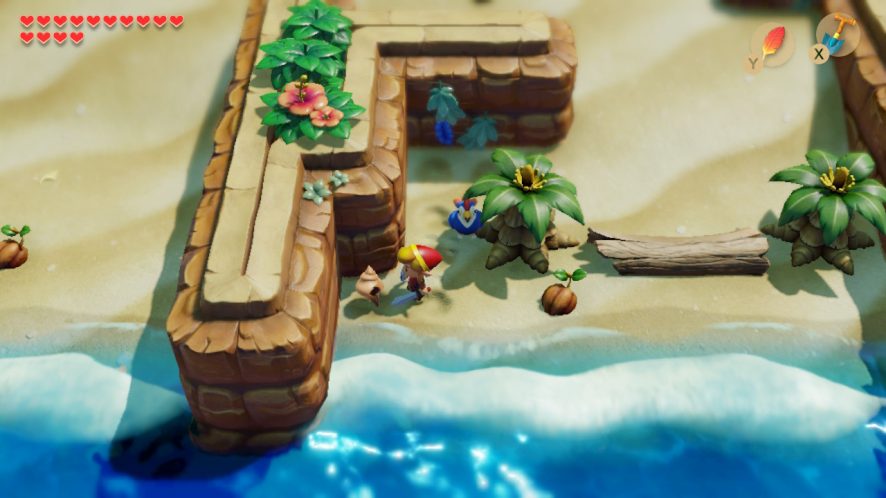
The most noteworthy landmark on Toronbo Shores is the private beachhead where a certain someone loves to spend a fond moment or two. While we’ll never tell if it was Marin herself who buried this shell on the beach or if it was just washed ashore alongside Link, we can say that this Seashell’s hiding spot isn’t too hard to find if you know where to look.
Mysterious Woods
The private glade in the forest
Power Bracelet required

You’ll likely see this chest when you make your first foray into the Mysterious Woods, but unfortunately the Zol on the other side doesn’t feel much like sharing its stash with you willingly. Once you beat the second dungeon, you’ll need to come back through the woods to return your borrowed BowWow to his worried owner, so why not use your newfound Power Bracelet to pick up the rock and smash it into the greedy Zol? And if you’ve gone that far, why not also steal the Secret Seashell it had been faithfully guarding as well?
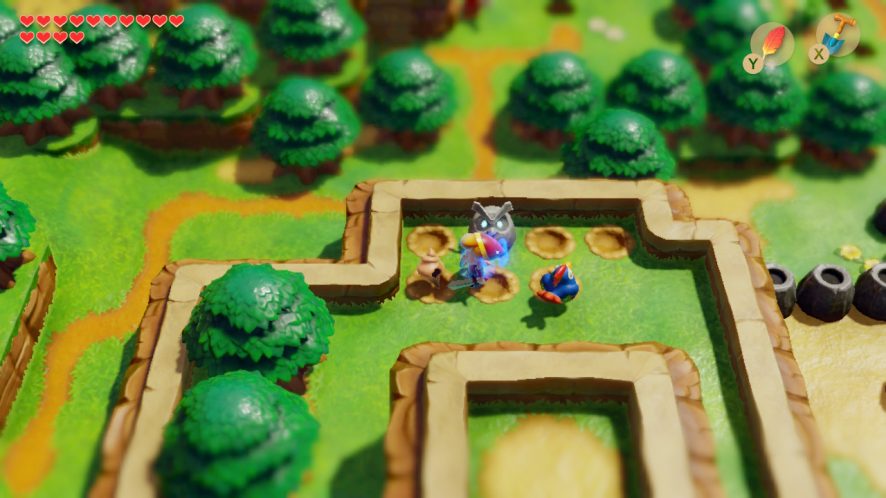
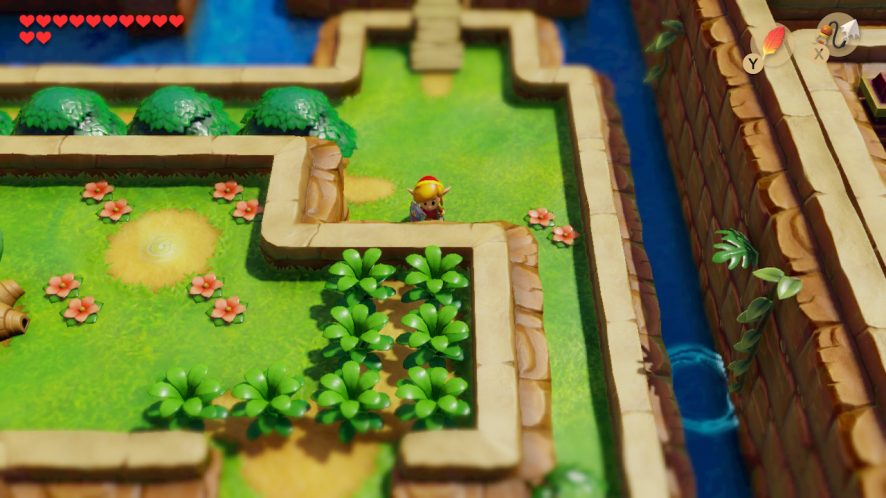
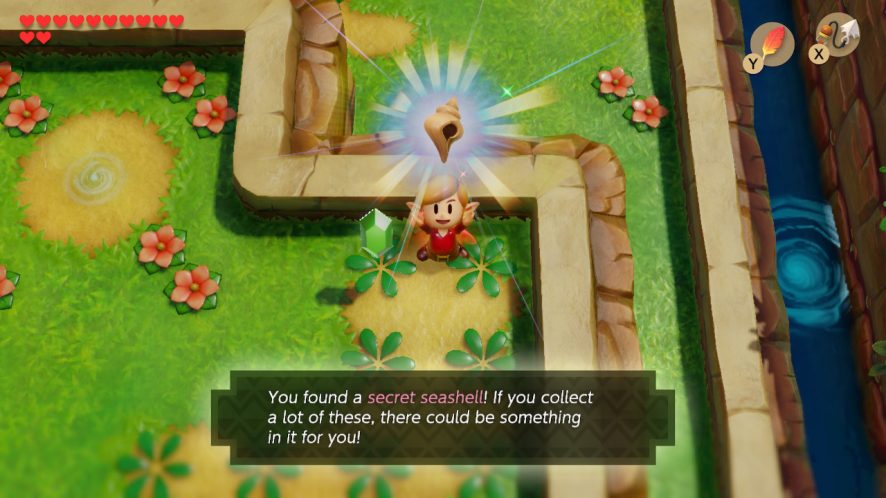
A thorn between eight flowers
Switch remake exclusive
Shovel required
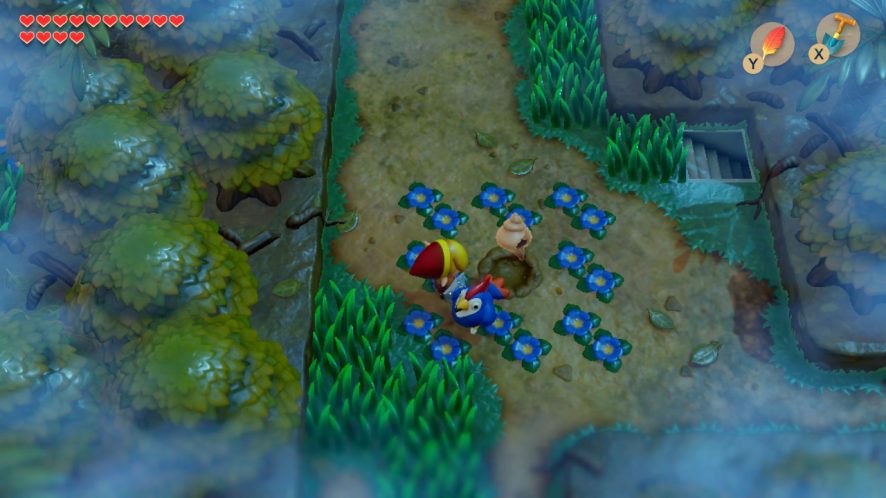
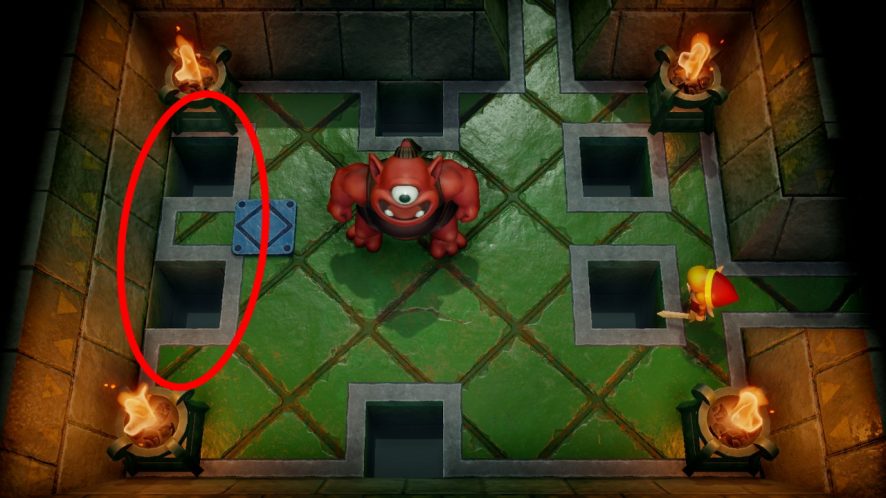
If someone wants to get all of the Seashells on Koholint Isle, one needs to pay attention to his or her surroundings. Here in the middle of the forest, right outside the secret lair where the Li’l Devil (or the Mad Batter in the original) will curse you with oodles of items, you’ll find this curious pattern of flowers arranged in a boxlike pattern, the center of which is curiously empty. Hmm, I wonder if there’s a secret here?
Turns out there is! Just use your Shovel to dig in the center of the box. Out will pop your Secret Seashell.
At the forest’s border
Switch remake exclusive
Shovel required
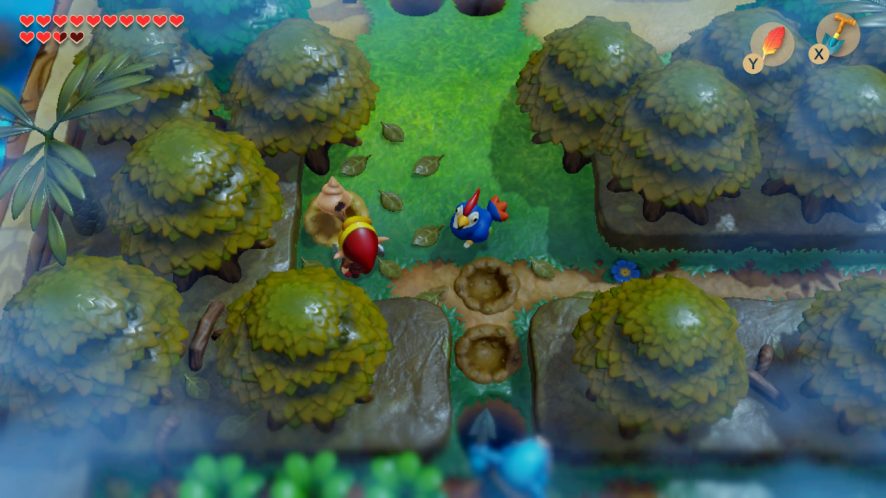
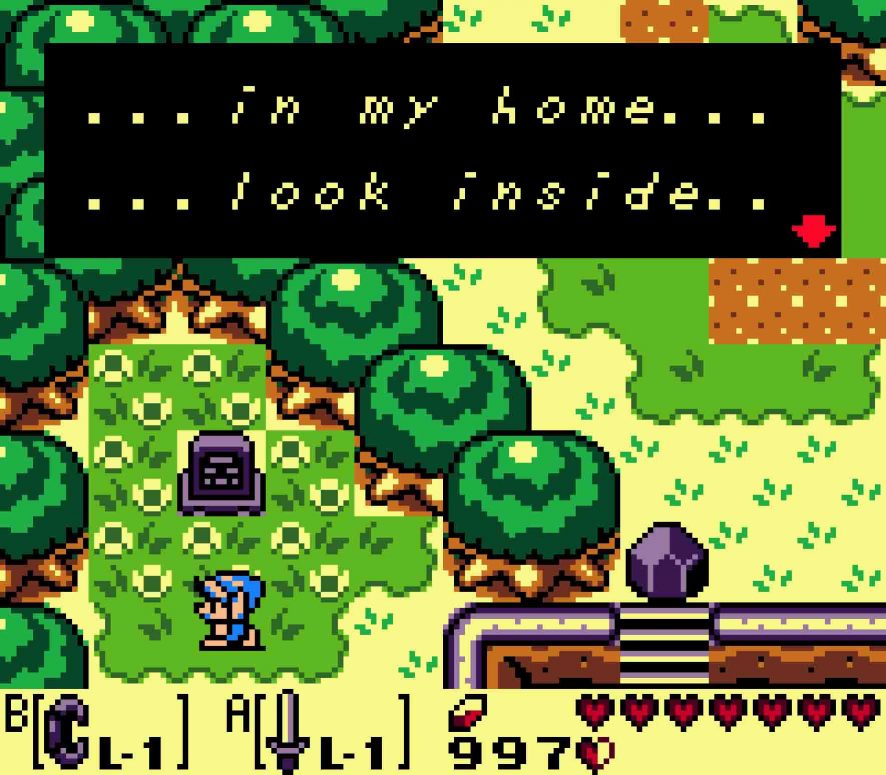
Just south of Mr. Write’s house and north of where the Mushrooms grow, cross back into the Mysterious Woods. At this transition point, you’ll find a pattern of leaves on the ground. There’s one square not covered with leaves just along the treeline. Use your Shovel there, and you’ll uncover a Secret Seashell.
Goponga Swamp
Buried in an inconspicuous spot
Switch remake exclusive
Shovel required

There aren’t many places in Goponga Swamp to hide a Seashell. Technically speaking, this hiding spot is just to the west of the Swamp. If you head around the small hill to the west and jump over the potholes, you’ll arrive in a region just south of and down the mountain from Turtle Rock. You’ll find a grassy patch just near the hill. In the center of this inconspicuous, tall grass, you’ll find a Seashell buried.
Koholint Prairie
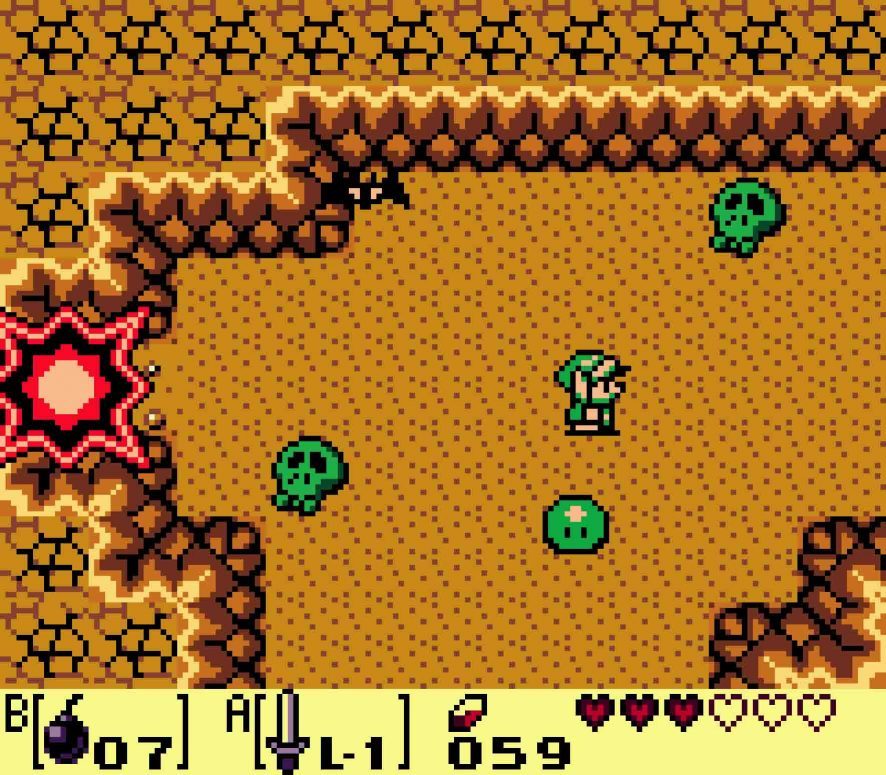
Surrounded by zombies
Shovel required
Just south of both the Witch’s hut and the Ghost’s solitary grave, you’ll find this small rock pit dug out of the earth. If you descend the steps into it, these creatures will crawl up out of the dusty earth to swarm you. However, there’s a small bit of grass in the center of this otherwise uninteresting pit. Why not use the shovel to dig in the center of the grass? I’m sure you won’t inadvertently dig up another zombie but instead find a Seashell!
Tabahl Wasteland
Buried in the wastes
Switch remake exclusive
Shovel required
Tabahl Wasteland is a rather dull and uninteresting place, but it does have a few surprises that aren’t aggressive crows. Along the eastern treeline, just south of the visible Piece of Heart, you’ll find a Secret Seashell buried in the dirt.
Ukuku Prairie
On Key Cavern’s roof
Shovel required
The Shovel is certainly doing a fair bit of overtime in finding Seashells, huh? It will be used again for this one in Ukuku Prairie. When you head to the third dungeon Key Cavern, you’ll find a staircase up onto a hill from which Key Cavern has been carved into. Here you’ll find a rather interesting diamond-shaped pattern of grasses. That should be your clue to once again dig into the earth. You’ll find a Seashell in that soft center.
Near the pay phone
Pegasus Boots required

There are two telephone booths in Ukuku Prairie. For this one, we’re talking about the western one, just outside of Mabe Village’s eastern exit. As you head towards Signpost Maze, you’ll see a solitary tree just to the right of the telephone booth. Use your Pegasus Boots to hurl your body into the gigantic tree. Your body may smart a bit afterwards, but at least you’ll have another Secret Seashell.
In Richard’s private cellar
Golden Leaves required
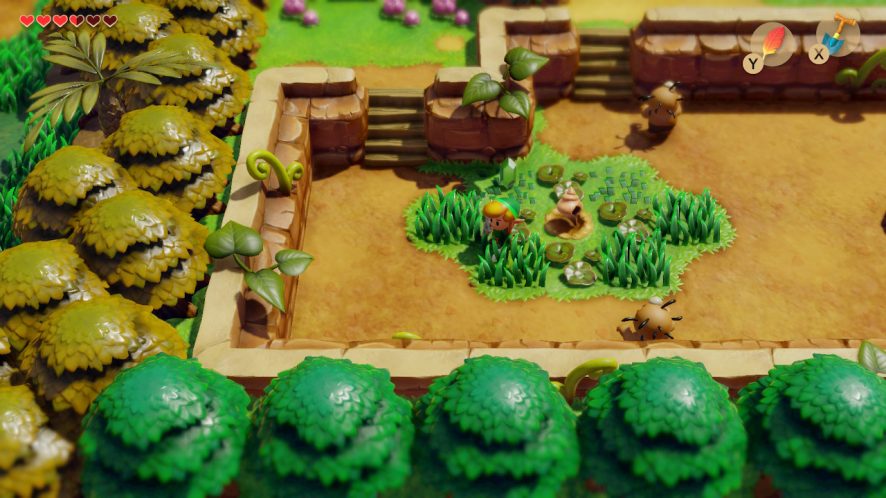
Richard, the Kanalet prince in exile, has more treasures to his name than just the Slime Key in his field of potholes. Once you have obtained all five Golden Leaves from Kanalet Castle, bring them back to Richard. He will graciously open up his downstairs basement for your perusal. It sounds more exciting than it is, unless you think a few Zols is excitement.
Anyway, within this cellar is a treasure chest. Defeat the Zols that are in your way, then head over to the rock. Push the rock into the pit above it, and then use Roc’s Feather to hop over the pit to the treasure chest to claim your Seashell.
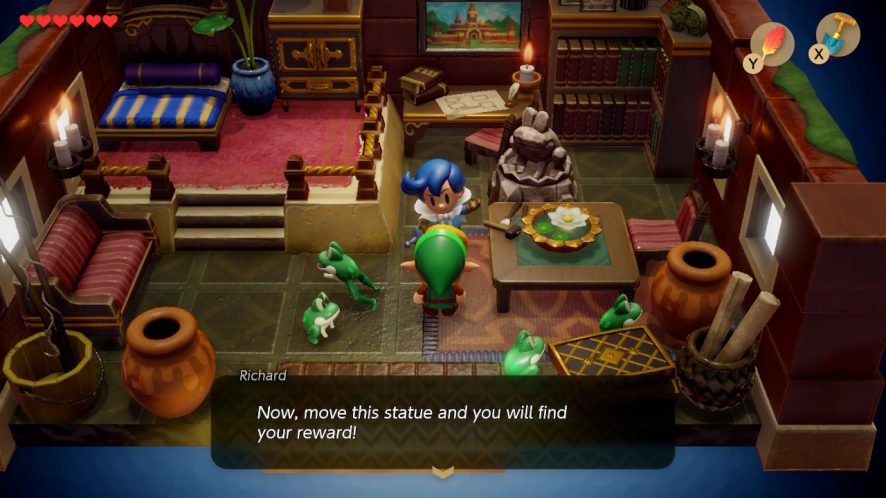
You’ll need Richard’s Leaves to access his cellar. 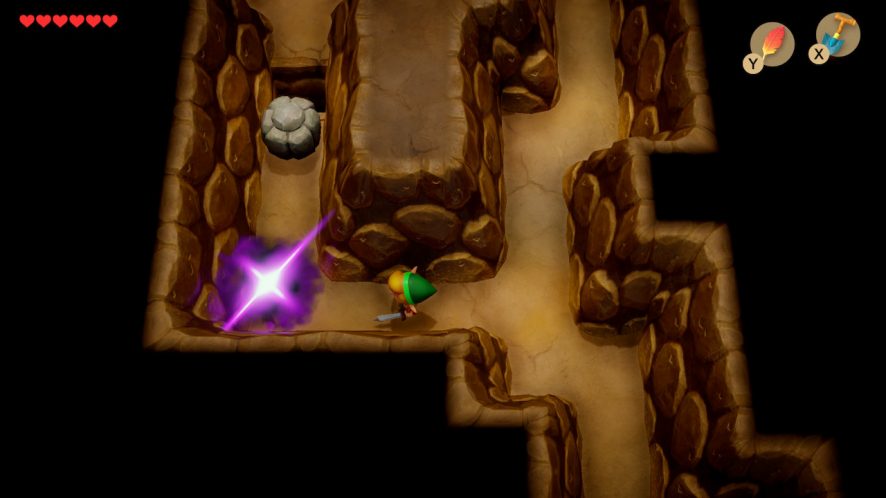
Once inside, push the rock into the pit to reach the chest.
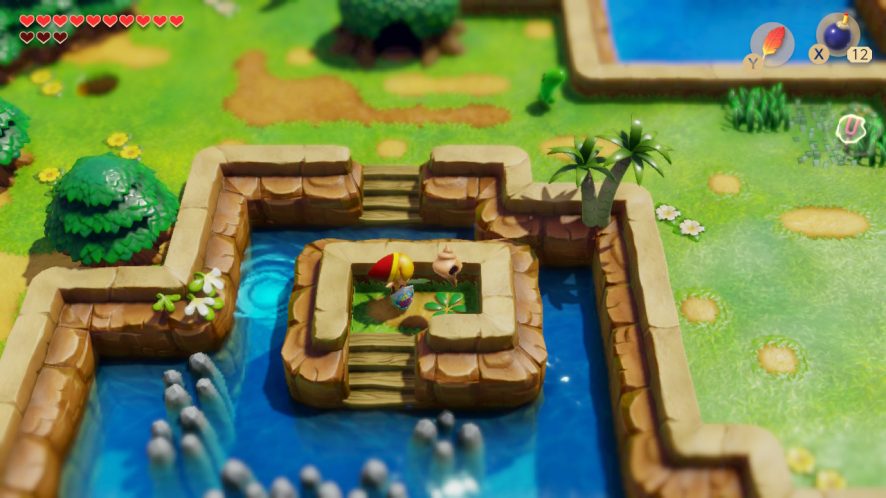
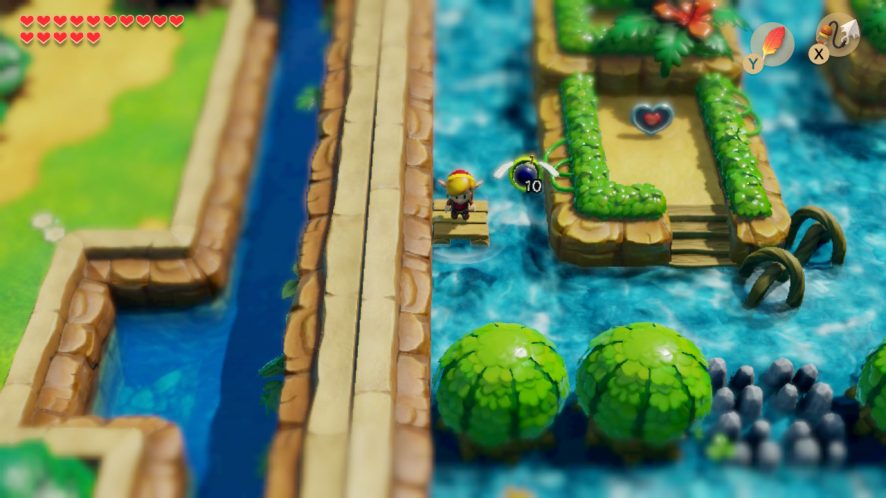
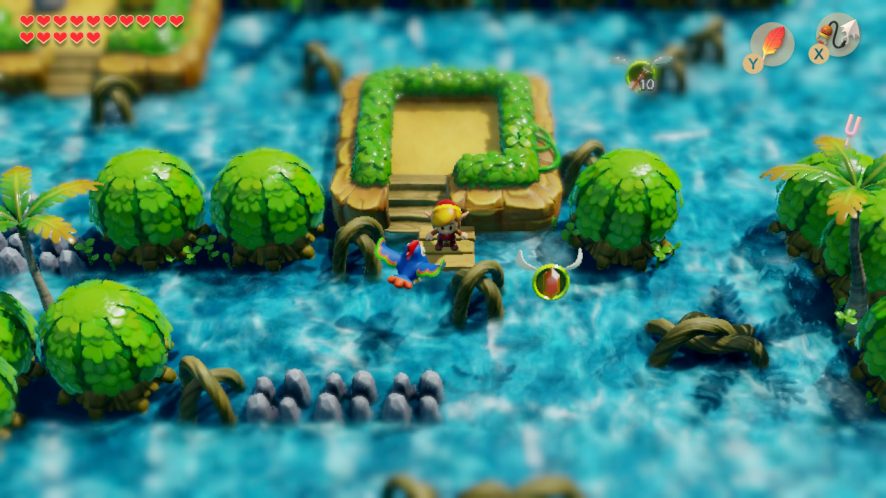
Resting atop the island in the lake
Flippers required

You’ll find this Secret Seashell near Key Cavern, but once again you won’t be able to claim this on your first visit here. Instead, wait until you’ve finished Angler’s Tunnel, and only then come back.
This time, you won’t need to use Roc’s Feather to island hop your way to the third dungeon. Instead, just dive right in with the Flippers. In the northwest part of the lake, you’ll find this island you couldn’t reach before. Use your sword to cut down the bush here to find your Seashell.
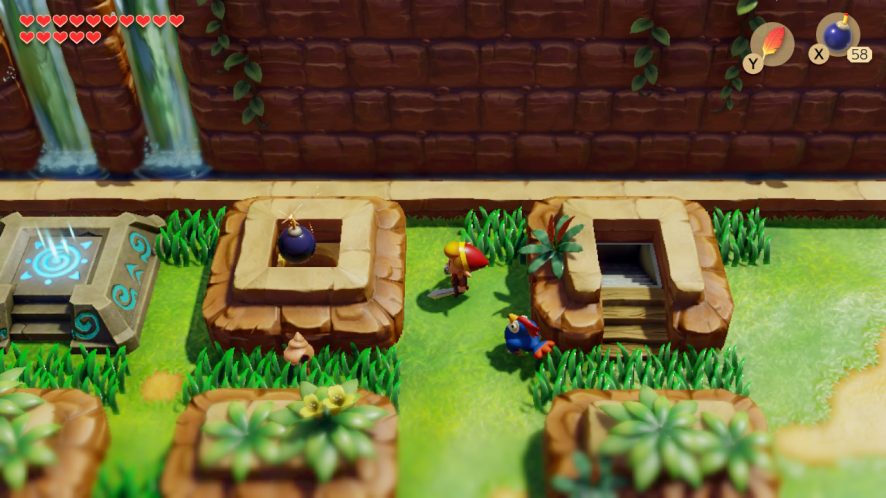
Beneath the Moblin’s petrified skull
Switch remake exclusive
Bombs and Shovel required
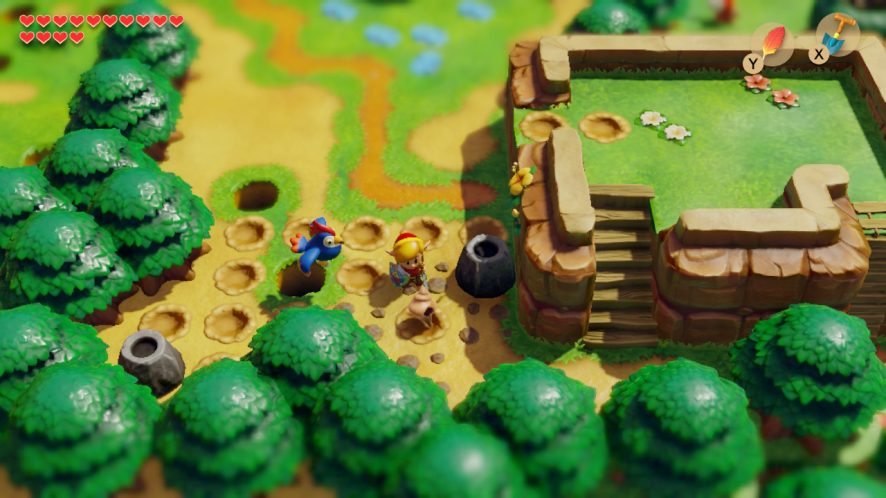
Along the eastward route from Mabe Village to Kanalet Castle, you’ll find a large rock that’s in the shape of a Moblin skull. Once you blow this up with Bombs, use your Shovel to dig in the center of the rubble beneath the skull. There you’ll find the Seashell you seek.
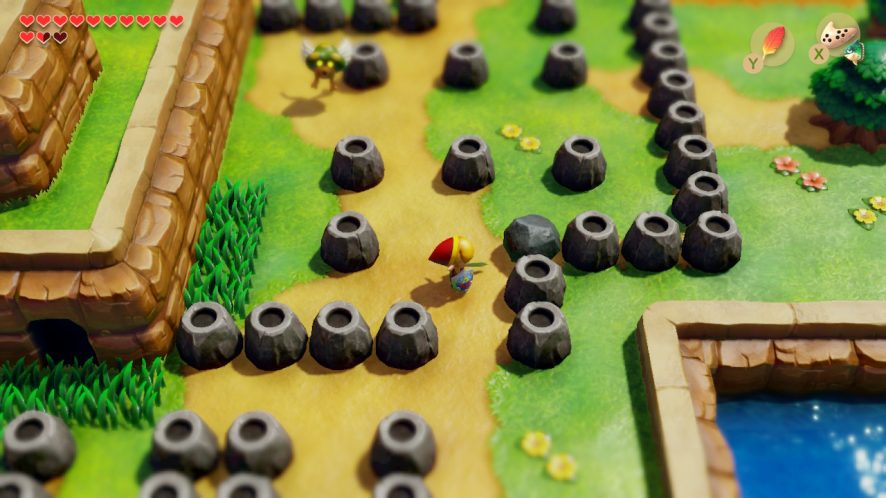
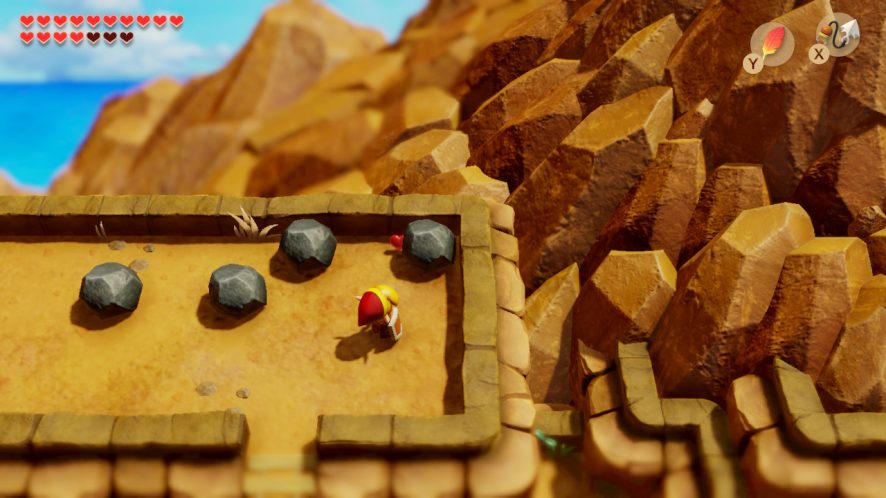
One of these rocks is not like the other
Power Bracelet required
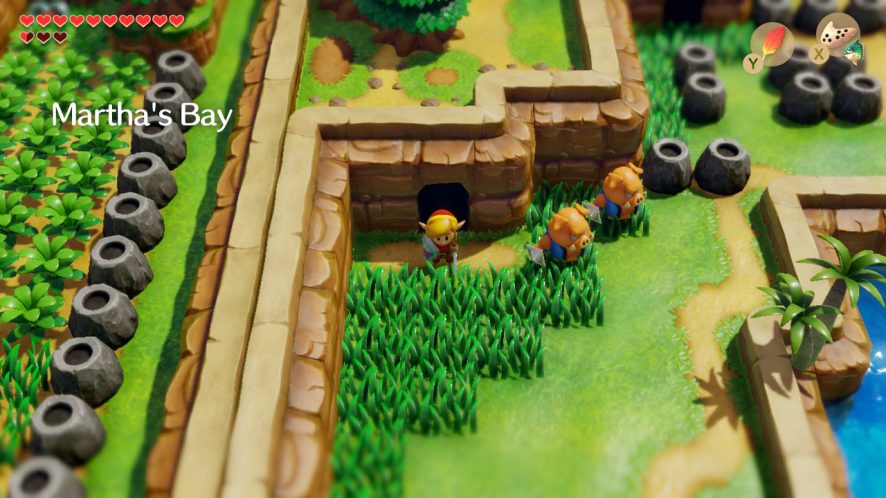
South of Kanalet Castle, you’ll find this field of rocks just offshore from Martha’s Bay. Once you clear our the Moblins that are guarding this field, you can take the time to appreciate that one of these rocks doesn’t look like its brethren. Suspicious! Lift it up off the ground to reveal the Seashell that’s been getting squashed by being under it.
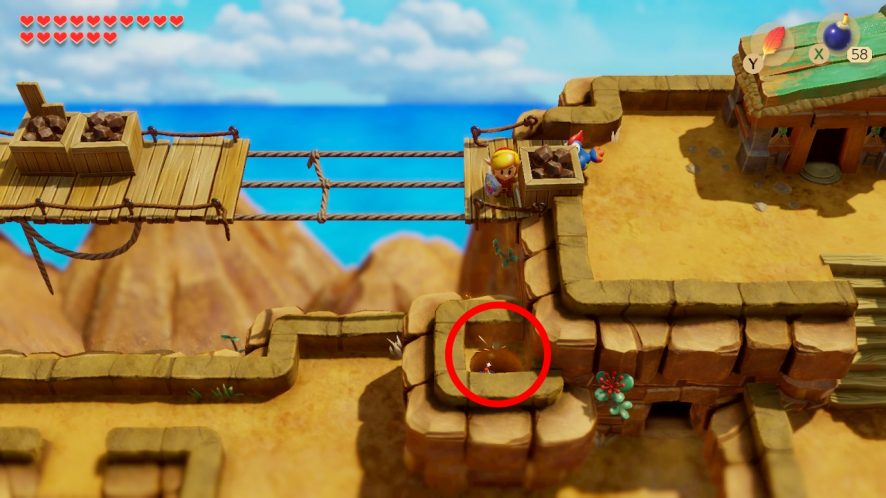
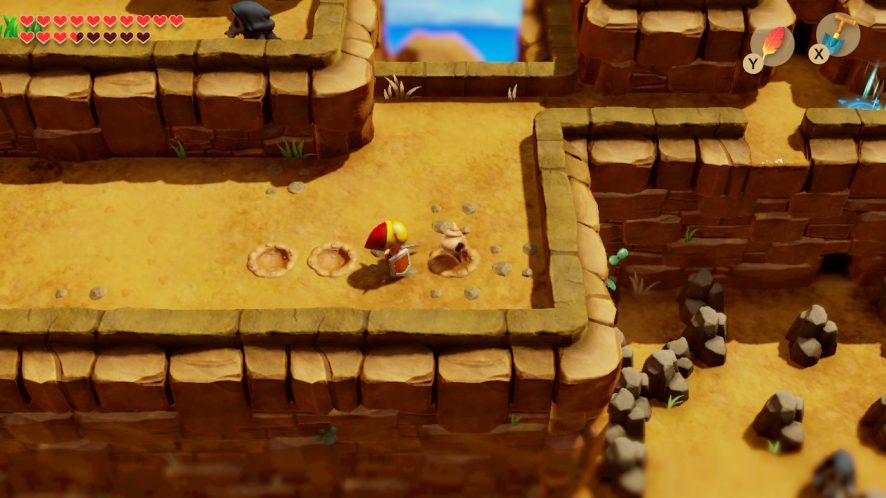
The rock field overlook
Bombs and Shovel required
This is the first Seashell that actually requires a little bit of trickery and searching. You’ll find this prize just within the caverns by the Seashell in the above section.
First, enter the caverns (from either side) of the rock field in Ukuku Prairie.
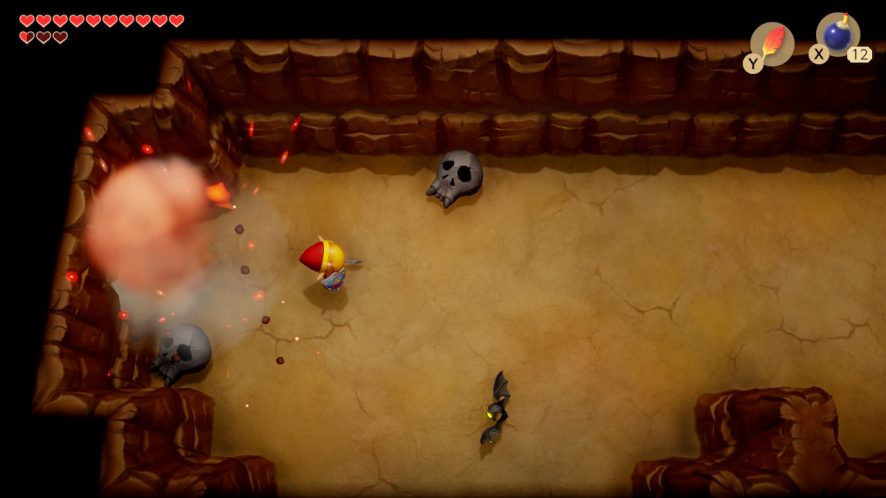
In the center section of the cavern, you’ll find a cracked wall that you can blow up. Use a Bomb to do that.
Watch out for the Zol that will attack you in the narrow corridor, then push the rock into the pit.
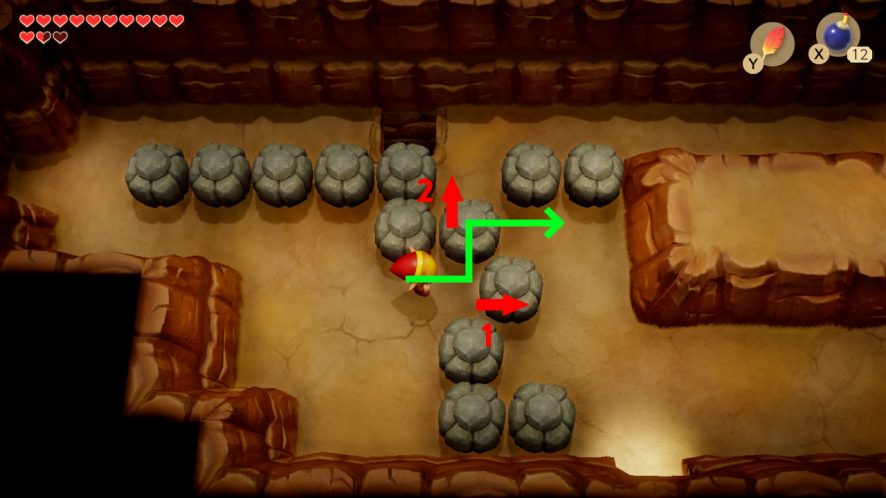
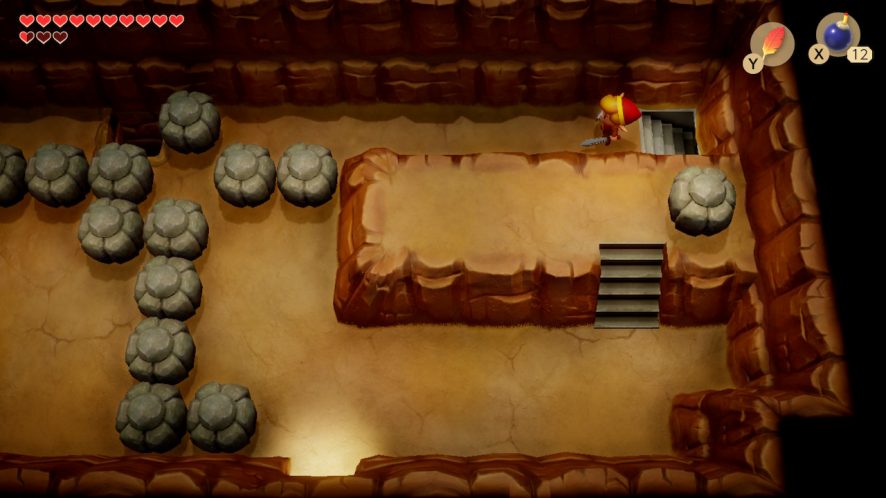
Jump and go around the rocks. Then push the topmost boulder in the vertical row you can reach right before moving the boulder above it up to sneak through the gap that creates.
Exit the cave. Once outside, head to the northmost point and use the Shovel to find the Seashell.
Game Boy Only: No cracked wall
In the Game Boy versions of Link’s Awakening, there’s no telltale cracks in this wall within the cave to indicate where you need to place the Bomb. However, that indentation in the cavern that leads towards the left edge of the screen is your indication of where to set your incendiary device.
Kanalet Castle
Seashell Mansion: High five
Game Boy exclusive
In the Game Boy and Game Boy Color versions of Link’s Awakening, the Seashell Mansion doesn’t give out the standard of prizes that is found in the Switch re-release. But it doesn’t just give out the Level-2 Sword. It will give out minor prizes… provided you time your trip right.
If you head to the Seashell Mansion when you have exactly five Seashells — no more, no less — the Mansion will favor you with your sixth Seashell.
Seashell Mansion is just southeast of Kanalet Castle’s gates. 
Come here with exactly five Seashells to get your sixth one.
Time-sensitive Seashell
This Seashell can be missed if you don’t make your way to this spot when the time is right. Once you grab your sixth Secret Seashell in the game, this Seashell will be lost to you. This is fine since there are six extra Seashells in the game, but missing this freebie is a missed opportunity.
Seashell Mansion: Hang ten
Game Boy exclusive
Once again, there’s a second reward to be found at the Seashell Mansion. Of course, this assumes that you have the magic number of Seashells in your inventory.
This time, that magic number is 10. If you visit with the exact number, you’ll be rewarded with another bonus Seashell to take you further along the way to the upgraded sword.
Time-sensitive Seashell
Once again, this Seashell at the Mansion is a limited-time affair. Once you pick up your 11th Seashell on Koholint, the Mansion won’t give you this reward.
The lazy Seashell
Some of the island’s Secret Seashells traveled far and wide across Koholint. But this Seashell didn’t fall far from the Mansion from whence it came. Just east of Seashell Mansion, you’ll find a small patch of grass atop the small hill. Mow down that patch of grass in order to find this lazy shell.
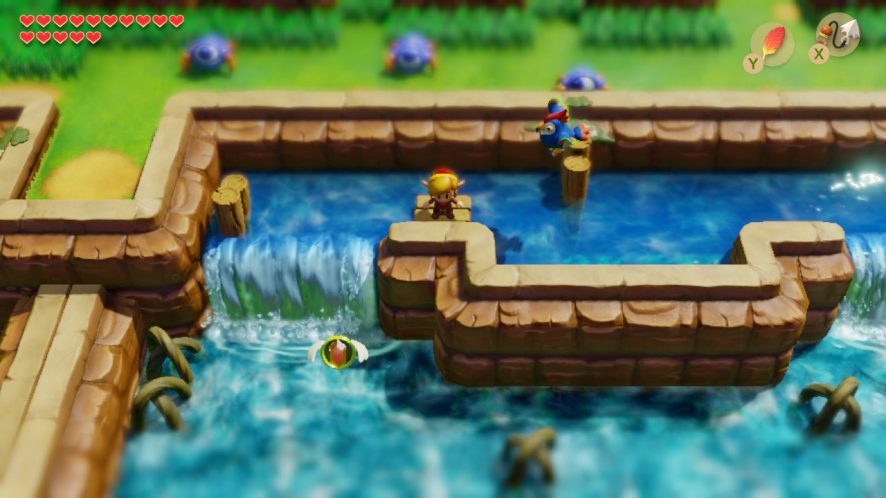
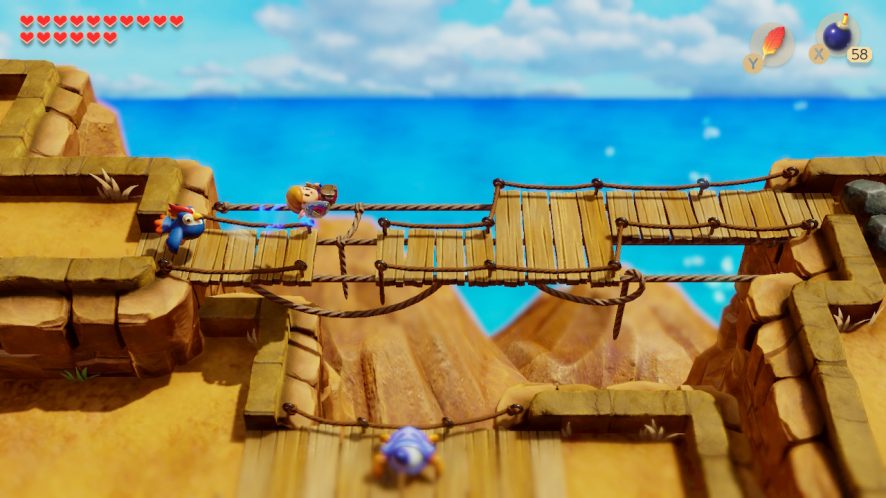
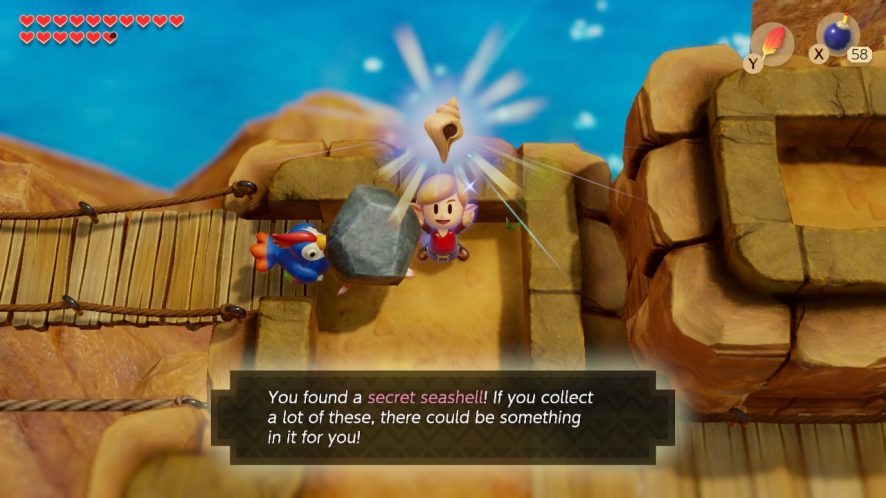
Alongside the moat
Hookshot required (Switch)
Flying Rooster required (Game Boy)
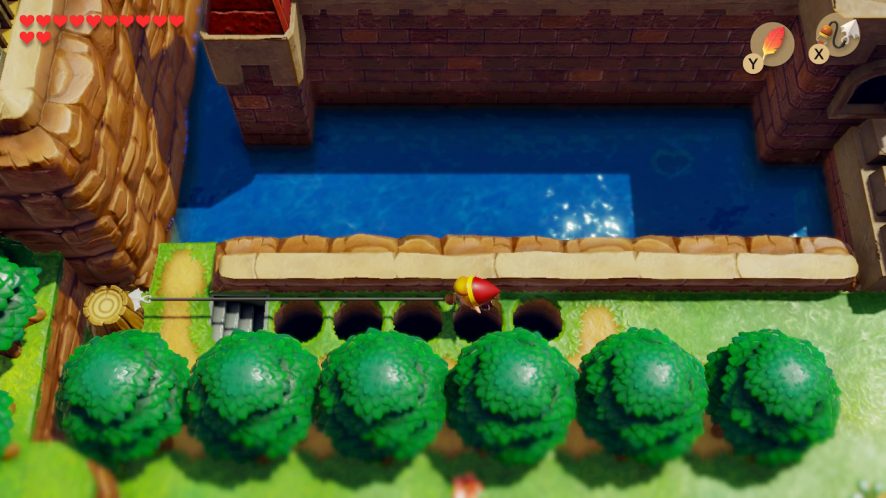
Link’s Awakening loves to make you revisit places after you’ve first been to them. In this case, you won’t have the Hookshot when you first visit Kanalet Castle. Instead, you’ll have to come back after you’ve finished Catfish’s Maw to snag this Seashell.
From Kanalet Castle’s gate, head just to the left. There’s a long row of potholes that you can’t leap across no matter how you try. But the Hookshot will zip you straight across them as well as a set of stairs down into a small cave. Therein you’ll find a treasure chest containing the Seashell.
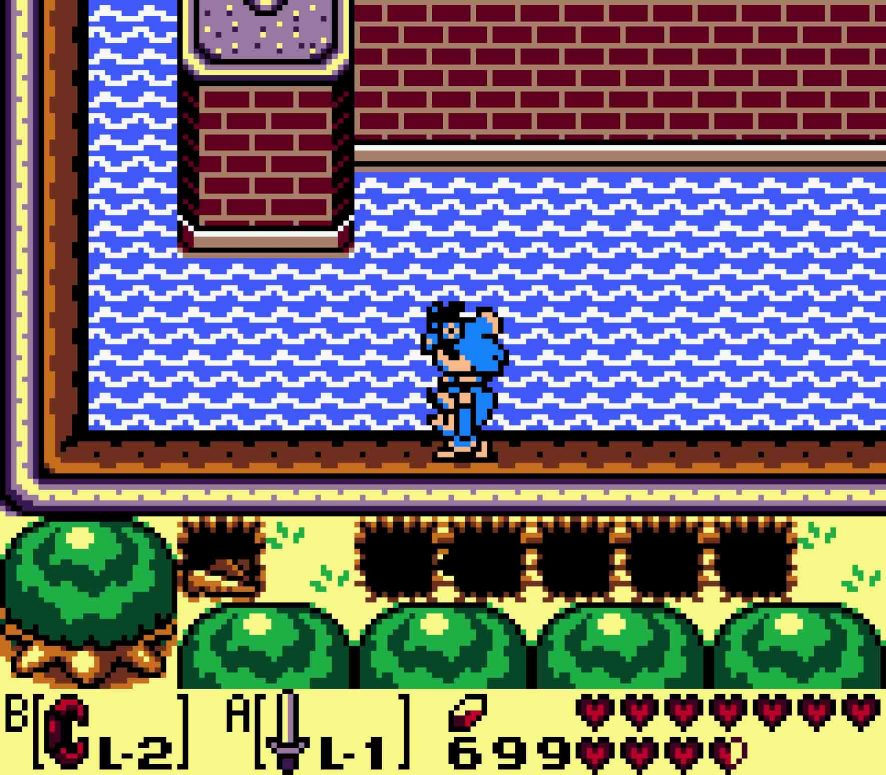
Game Boy: Take flight for this missable Seashell
In the original versions of the game, even the Hookshot isn’t enough to reach this stairwell. Instead, you have to rely upon the Flying Rooster to carry you across. Unfortunately, your friendship with the Rooster is limited. Once you complete Eagle’s Tower, the Rooster will find an even better friend, leaving you for good. And in so doing, this Seashell will leave you for good as well.
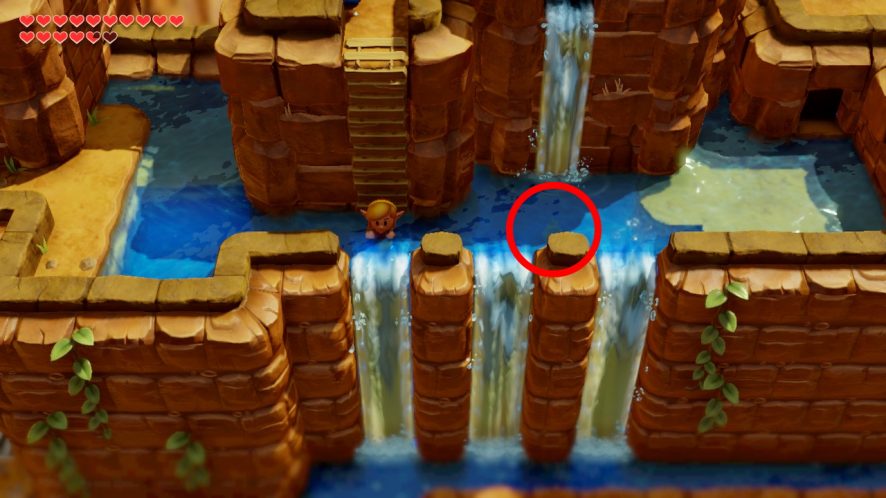
Where the waterfall meets the moat
Switch remake exclusive
Flippers required

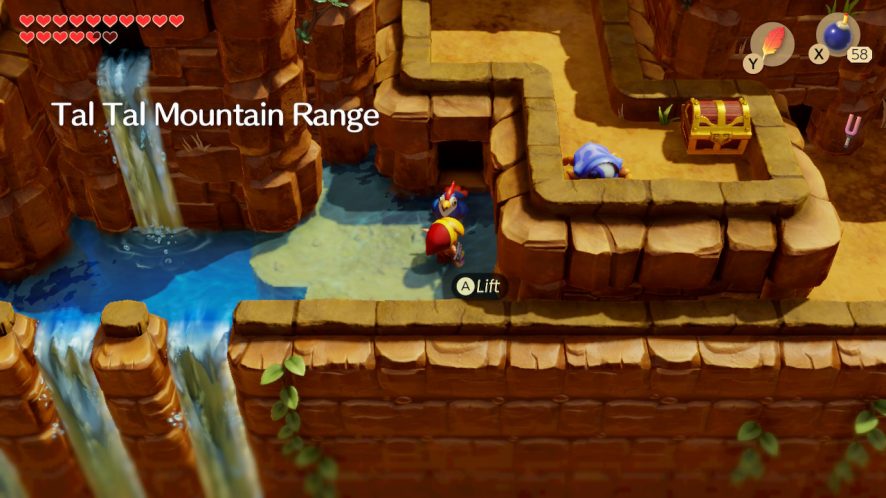
Once you obtain the Flippers, you should take a nice dip into the moat surrounding Kanalet Castle. If you head to the northwest corner of the moat, you’ll find a waterfall from Tal Tal Heights flowing into it. At the base of it, you’ll find a Seashell underwater that you can dive for.
Martha’s Bay
Opposite the mermaid statue
Along the western shore near the southwest corner of Martha’s Bay, you’ll eventually come to an outcropping that has a beautiful view of Schule Donavitch’s famous mermaid statue. While that sight is quite remarkable, even more remarkable is the sight of a Seashell nearby. Cut down the tall grass here to discover the Seashell hidden beneath.
On the island in Martha’s Bay
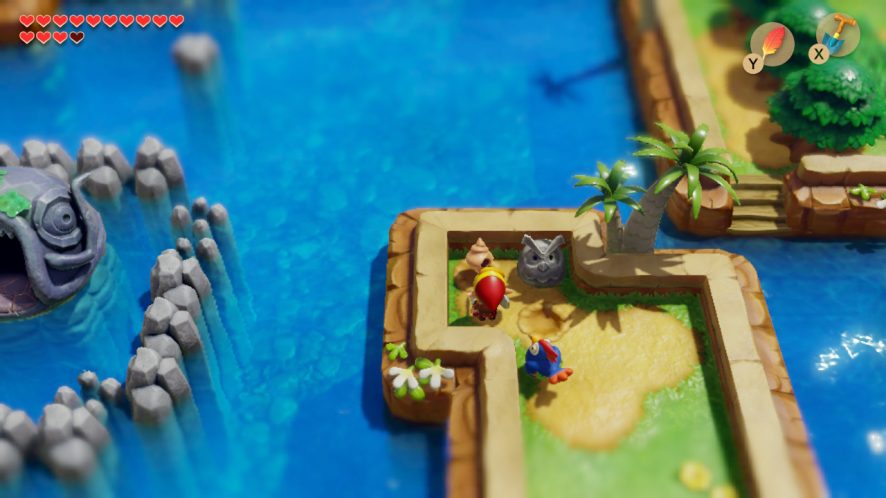
The owl figurines on Koholint Island are quite the source of mystery. They provide cryptic messages that seem to mean nothing at all. But that doesn’t mean they don’t have their secrets. Take this owl hanging out just east of Catfish’s Maw. If you dig just to the owl’s left, you’ll find that he’s been keeping a Seashell warm for you.
On the small, offshore island
Flippers required
At the southeastern corner of the western half of Koholint, you’ll find this tiny island just off the coast that’s protected by a rocky reef. While you can’t actually swim out to the sea, you can swim onto this island and investigate the small bush growing upon it. Cut down the bush to find the Seashell upon it. Just watch out for the fire-spitting Zora as you do so!
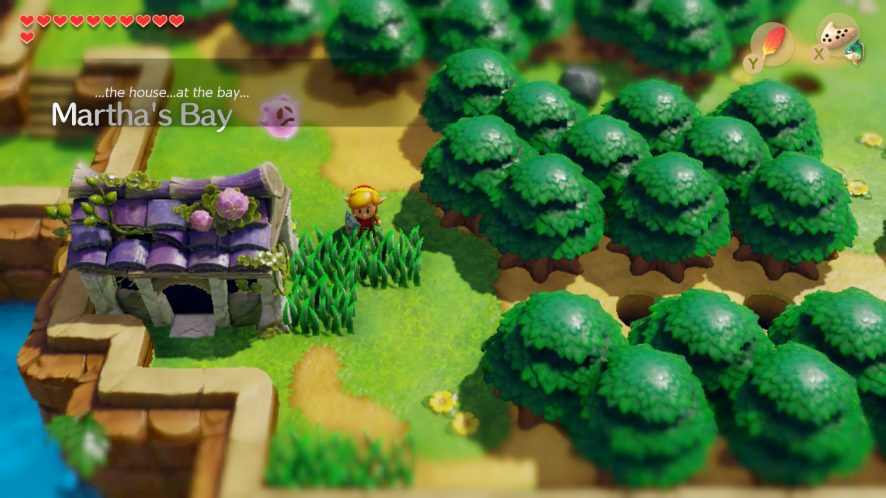
The ghost’s reward
Angler’s Tunnel completion required
After you complete the fourth dungeon, you’ll be haunted by a ghost. That spiritual companion will eventually ask you to take it back to the home of its youth, which you can find on the south shore of the island, just southwest of Martha’s Bay. While the ghost investigates its old digs, you can check out the house for yourself. In the pot in the lower-right corner of the house, you’ll find the ghost’s old Seashell collection. The ghost only ever collected one, but that’s still better than none!

Game Boy: You need the ghost’s friendship first
In the Game Boy versions of the game, this Seashell won’t show up immediately. Instead, you actually have to complete this particular sidequest first before this Seashell will appear. As such, you’ll have to bring the ghost to its grave near the Witch’s hut first and only then return back to this house to find the shell.
Animal Village
The hidden Zora
Switch remake exclusive
Magnifying Glass required

I’m not going to try to explain the physics behind how this Zora cannot be seen without the Magnifying Glass. It’s not like its super tiny or anything. That is how Magnifying Glasses work, right? Anyway, without it, this Zora will be invisible, and you cannot talk to it. But with the trading sequence completed, come back to the upper-right house in Animal Village to talk to this Zora. In happiness for having someone to converse with, it will give you a Seashell.
Goating all the way
Switch remake exclusive
Broom (or later) required
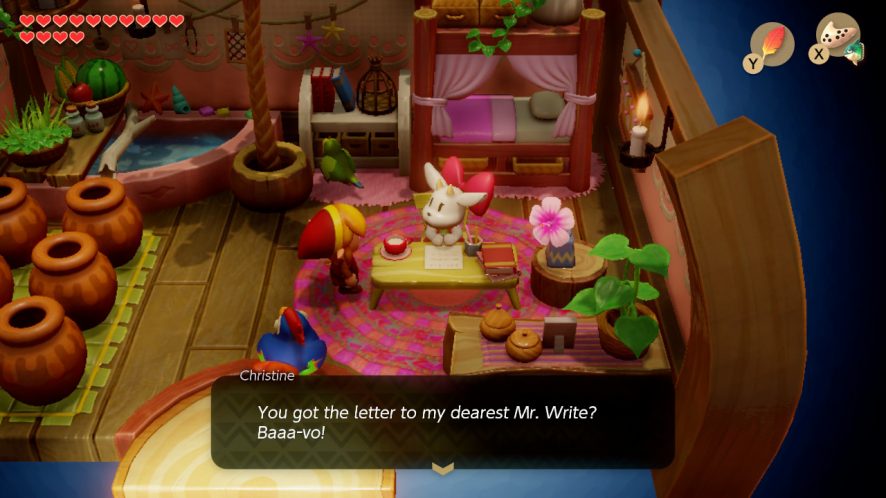
As part of the game’s trading sequence, one of the many errands you’ll have to run is, once you trade your Hibiscus for this goat’s Letter to her beloved, you’ll have to head to the northwest corner of the island to do your part in catfishing (goatfishing?) Mr. Write. Once you’ve successfully delivered Christine the Goat’s letter to her pen pal, return to the goat in Animal Village. With her X-ray vision, she’ll see you no longer have her letter and thank you for your kindness. Your reward will be a Secret Seashell and a bad pun. How bovine!
Imitating Marin for fun and profit
Switch remake exclusive
Ocarina and “Ballad of the Wind Fish” required
One of the trickiest Seashells in the game is this nondescript border between Animal Village and Yarna Desert. If you have the Seashell Sensor, you can dig to your heart’s content and never find it. But the secret to finding this one is to remember what used to be here and how you dealt with it before.
In the original Game Boy version, you could play the “Ballad of the Wind Fish” here, and the walrus would — one time only — pop back above the waves, thinking that Marin had returned. (Afterwards, he’s onto your game.) However, in the Switch remake, he’ll do the same thing but also give you a much treasured Secret Seashell.

Yarna Desert
The southeastern overlook
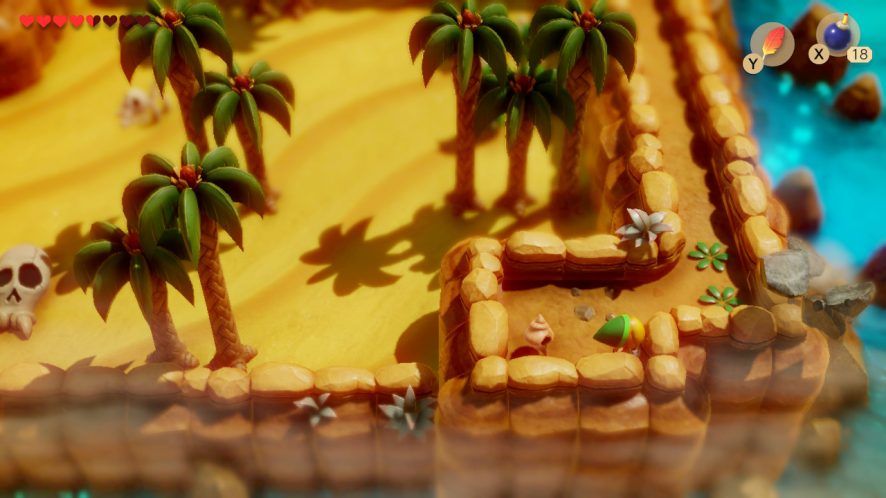
Yarna Desert has significantly more vegetation growing in it than one might suspect a desert ought. Maybe it’s time to remove some of it! If you head to the far southeastern corner of the desert (and indeed, the corner of the entire island!), you’ll find this Secret Seashell under some bushes.
A seashell between two thorns
Switch remake exclusive
Shovel required
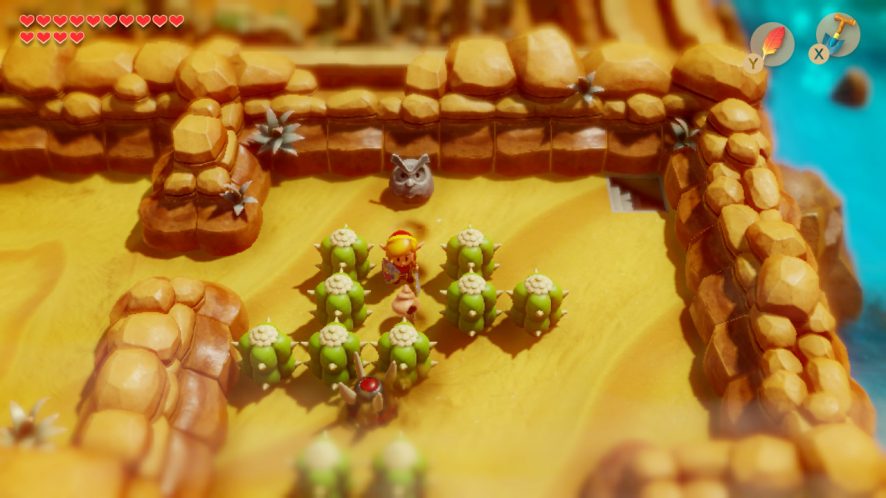
Just to the east of the pit of quicksand where you find Lanmola, you’ll find quite a number of cacti growing together. Whip out your shovel and dig into the sand between all these cacti to be rewarded with a Seashell.
Tal Tal Heights
The reward in the pothole
Switch remake exclusive
Bombs required
In Tal Tal Heights, you can find all these strange squarish hills all around the warp point. Between the warp point and the tunnel to Angler’s Tunnel, there a curious little pothole you can’t reach at the top of the hill. If you pick up one of your Bombs and basket it in the pothole, a Seashell will fly out once the Bomb explodes.
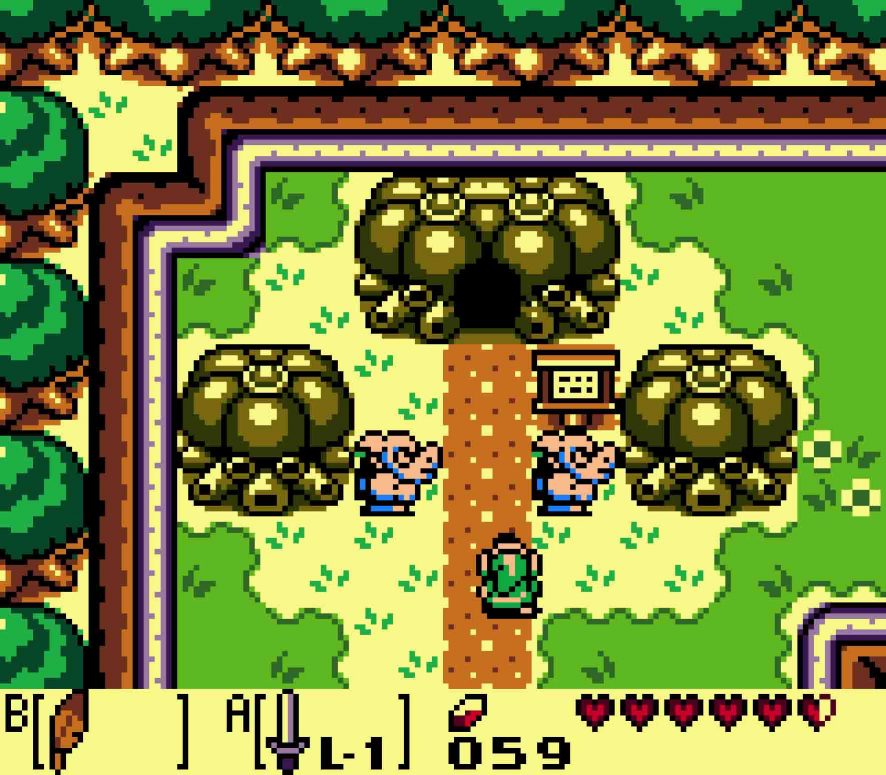
The signpost ‘neath the Egg
Switch remake exclusive
Power Bracelet required

Halfway between Bottle Grotto and Dampé’s Shack, you’ll find this helpful signpost which gives you directions to some of the nearby attractions. It’s surrounded by boulders on both the left and the right. Beneath the boulder on the right, you can find a Seashell that the signpost most rudely doesn’t point out.
Rapids Ride
Rapids Raid: Atop a small island
Switch remake exclusive
Shovel required
The River Rapids salesman has two ways to play his lovely mini-game. You can technically find this Seashell regardless of which one you play; however, it’s definitely recommended to get this Seashell while you’re playing the Rapids Raid so you don’t feel the pressure to beat the clock. Pay the requisite 100 Rupees to play the game, and then get on your raft.
You have the choice of descending two different waterfalls to start the game. You should definitely be going down the leftmost one.
As you fall down the waterfall, do everything you can to stick along the leftmost wall of the River Rapids area. Once you reach the island with the Piece of Heart, you’ll start heading eastward.
The island holding the Secret Seashell is just to the east of the Piece of Heart. Make sure you remain as far north as you can, and don’t let the rapids carry you away.

Once you disembark, use your Shovel to uncover the Raid’s Secret Seashell.
Rapids Race: Beat the clock!
Switch remake exclusive
Hookshot required
The second Seashell in the Rapids Ride can only be acquired during the Rapids Race, and this one is much more unforgiving until you get the hang of the flow of the rapids. You’ll need to make your way to the bottom of the rapids ride in under 30 seconds in order to get the Seashell. It’s a rather ambitious time to achieve, but practice makes perfect!
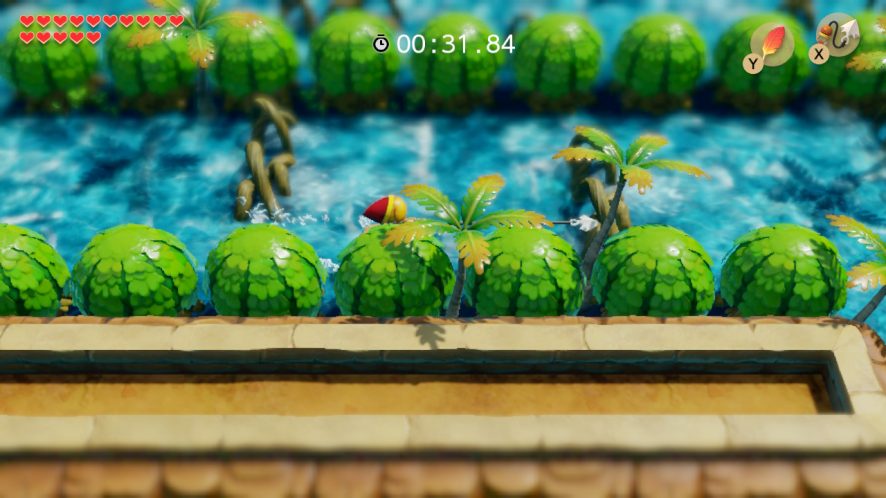
The secret to winning is A.B.H.: Always Be Hookshotting. 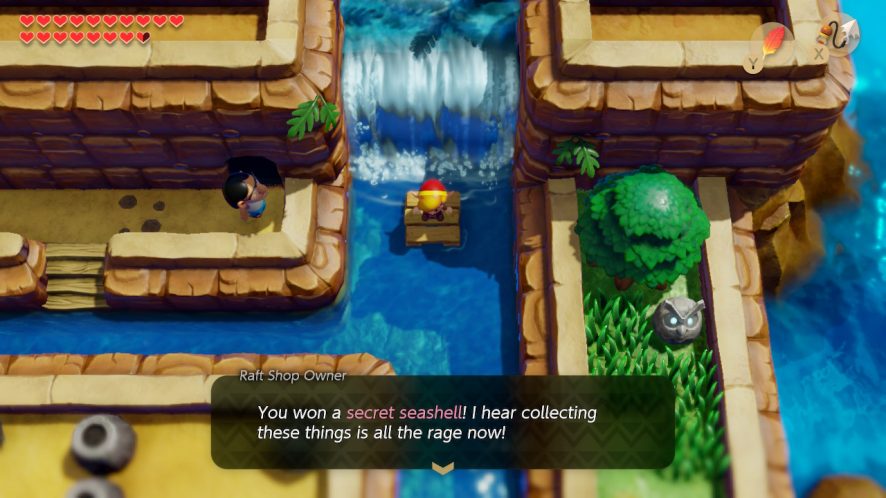
The time to beat is 30 seconds, which is a hard time to beat!
Ancient Ruins
Hidden in Armos’ cave
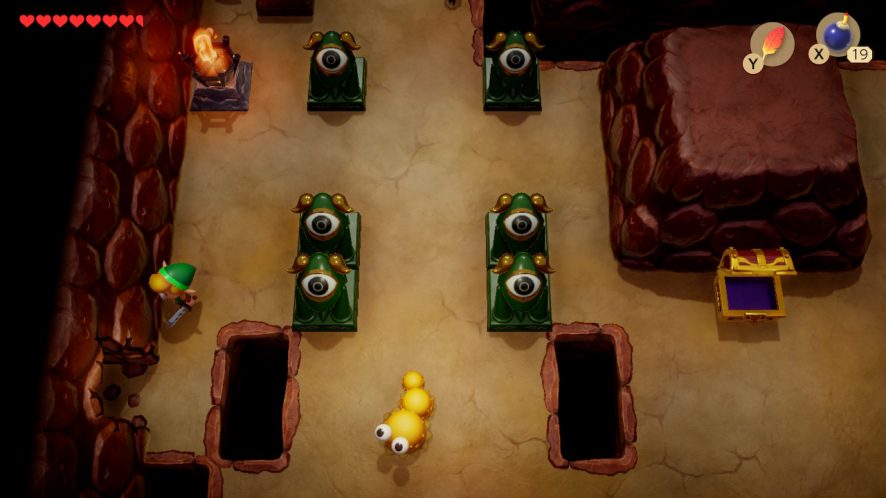
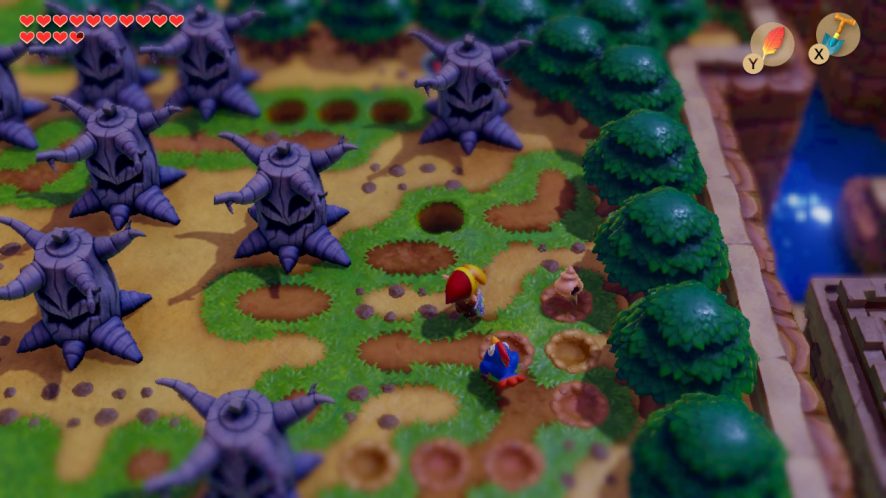
As you make your way to the southern shrine in the area, you’ll find yourself confronted by a large number of immobile Armos statues, though naturally those statues will awakening if you dare to reach out and touch them. However, in order to reach this Seashell, you’re going to need a few Armos out of the way.
When the path splits into two directions, take the right fork. Get the Armos to get out of the way. You’ll then find four Armos situated in a square-like pattern. Get the bottom-right Armos to move out of the way, and it will then uncover some stairs down into the earth. Inside, you’ll find your Secret Seashell.

Take the right fork when offered the chance. 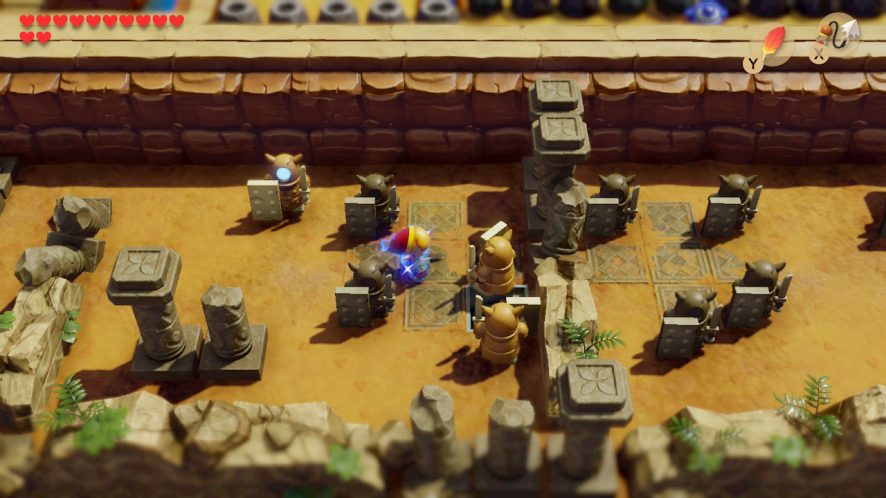
Get the lower-right Armos out of the way to reach the stairs.
Within the rocky field
Switch remake exclusive
Power Bracelet required

Just north of the Armos ruins, you’ll find this labyrinth of stones, boulders, and shrubs. In the upper-right corner of this little area overlooking the river, you’ll find a lone rock. Pick it up to find a Seashell beneath it.
Face Shrine
Dungeon interstitial
Powerful Bracelet required
In the upper-leftmost room of the sixth dungeon, you’ll notice a curious pair of chess knights lying upon the ground as well as a staircase that heads upwards. Ignore the chess knights for now, and make sure that the Crystal Switch is set so that the orange blocks are down. You can pick up the chest along the way — 100 Rupees, not bad — and then proceed up the staircase. You’ll suddenly find yourself outside on an isolated island in the Rapids Ride. On your island is a treasure chest that contains the very secret Secret Seashell.
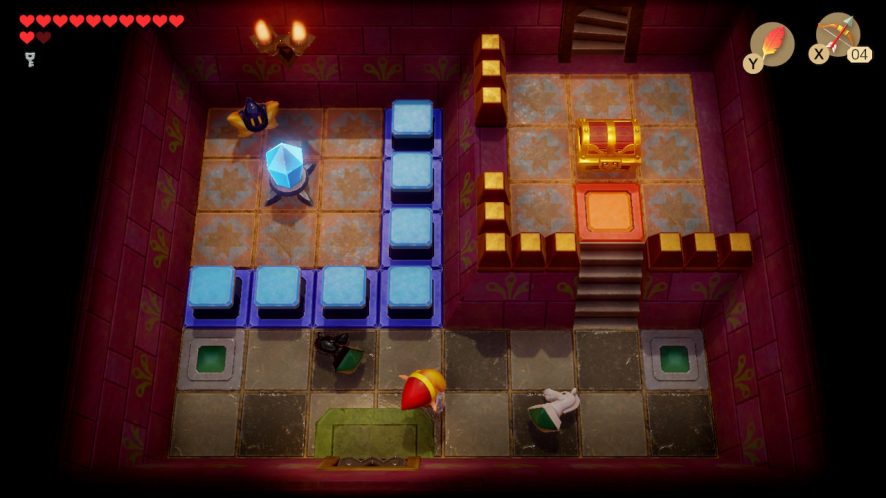
Ignore the chess knights in this room and proceed to the stairs. 
You’ll end up in the Rapids Ride, able to get an isolated chest.
East Tal Tal Mountain Range
Submerged in the mountain pool
Switch remake exclusive
Flippers required
Just east of the point at where you’d drop down to visit Angler’s Tunnel, there’s a section of deep water with a ladder leading out of it. If your eyes are keen enough to spot it, there’s a Seashell that’s submerged beneath the waters flowing down from the mountain waterfall. Simply dive down to collect it.
Between bridges east of the coop
Flippers and Power Bracelet required
Starting at the pool of deep water submerging the previous Seashell, follow the ladder that heads upwards toward the mountain Cucco coop. From there, you’ll find wooden bridges (in serious states of disrepair!) heading west and east. Head east and cross over the first bridge, using Roc’s Feather to leap over the gap. There you’ll find several boulders before you reach the second bridge. One of those boulders is hiding an enemy, but another one is hiding a Secret Seashell.
Placing a bomb into the pit
Switch remake exclusive
Flippers and Bombs required
Slightly closer to the Henhouse at the top of Tal Tal Mountain Range, you’ll find a rather suspicious little pothole in the mountainside. This pothole, thankfully, is much more noticeable than the one you might have found in Tal Tal Heights, but it’s just the same deal. Chuck a Bomb into it and wait for it to explode. Your reward will be a Seashell soaring over to the nearby plateau.
At the end of the hidden cavern
Flippers and Bombs required
Along the way to Eagle’s Tower, you’ll need to do quite a bit of spelunking to reach your destination. There’s one chest that you can see whilst outside, but how to get to it?
This treasure chest just beyond the deep water is inviting enough. Enter the cave just before it to find the secret path.
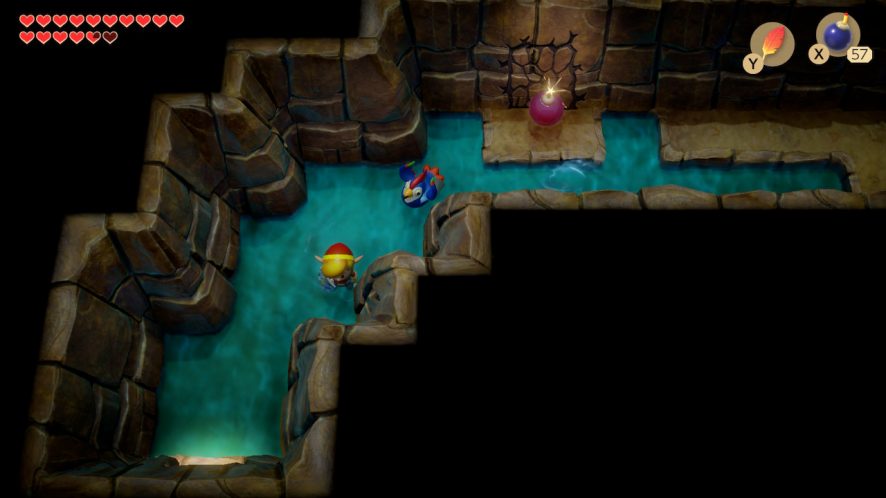
If you’re attentive, you’ll notice some telltale cracks along the northern wall. Place a Bomb there to blast it open.
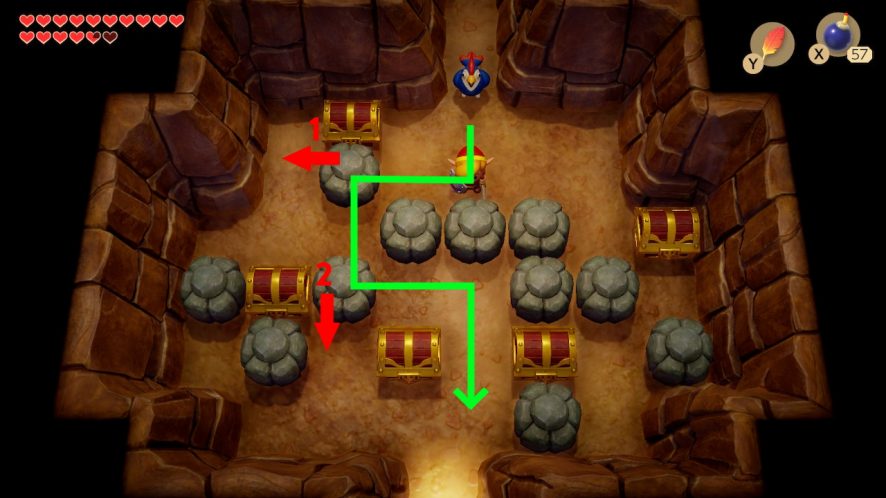
Follow the path up the stairs and into the next room. When you get here, it’s a simple matter of pushing boulders out of the way. Push the topmost boulder left, and then the one right below it down to exit the cave.

Once outside, you’ll be upon the promontory where you saw that tempting chest. Inside is a Seashell.
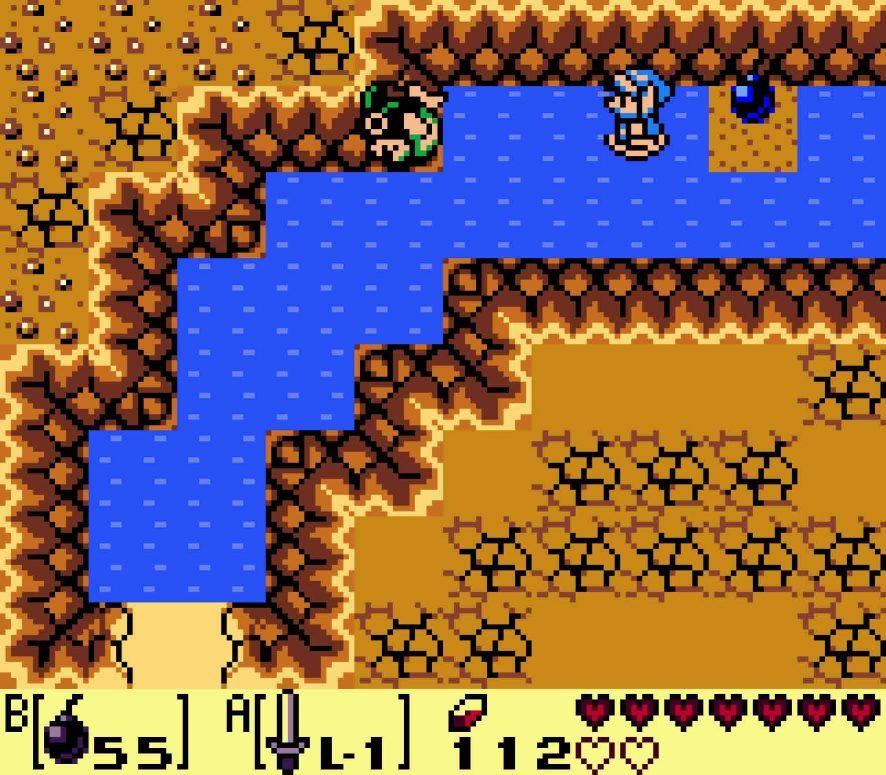
Game Boy only: No cracked walls again
In the Game Boy versions of this game, the developers didn’t any crack marks on the wall of the cave to mark the Bomb point. You could trial and error it; however, they did in their infinite wisdom place a single tile of dry ground in the cave. That special marker is exactly where you should place your Bomb.
Eagle’s Tower
High on a dungeon ledge
Eagle’s Tower is one of the most complicated dungeons in the game, and so getting to the chest with the Seashell is rather unintuitive. In order to reach the chest on 1F, you actually need to head up to the second floor and fall down to it. You can either do so by falling down either of these leftmost pits in the room with the Hinox or any of the leftmost pits in the Flying Tiles room two rooms north of here. Once you do, you’ll fall down onto the one-tile ledge surrounding the first floor. Simply head north to the chest. Just be careful of the Anti-Kirby below you lest he suck you down from your perch!
Fall down to 1F by jumping into either of the leftmost pits. 
Head north to the chest, and watch out for the Anti-Kirby!
West Tal Tal Mountain Range
Atop the plateau
Switch remake exclusive
Hookshot required
Once you traverse the cavern from the eastern half of Tal Tal Mountain Range to the west, boulders will start raining down on you. Quickly ascend the switchbacks until you reach the top. Once you get here, you’ll find several boulders. Lift up the upper-rightmost boulder to uncover the Secret Shell.
Buried between a warp and a hard place
Switch remake exclusive
Mirror Shield required
After you survive the tunnel with the perpetual flamethrower, you’ll be just outside of Turtle Rock. Activate the warp point here, and then head to the left. You’ll find a small pattern of four rocks on the ground in a diamond configuration. That’s once again your sign to dig into the earth to uncover this buried Seashell.
Chamber Dungeons
Fill up your hearts
Switch remake exclusive
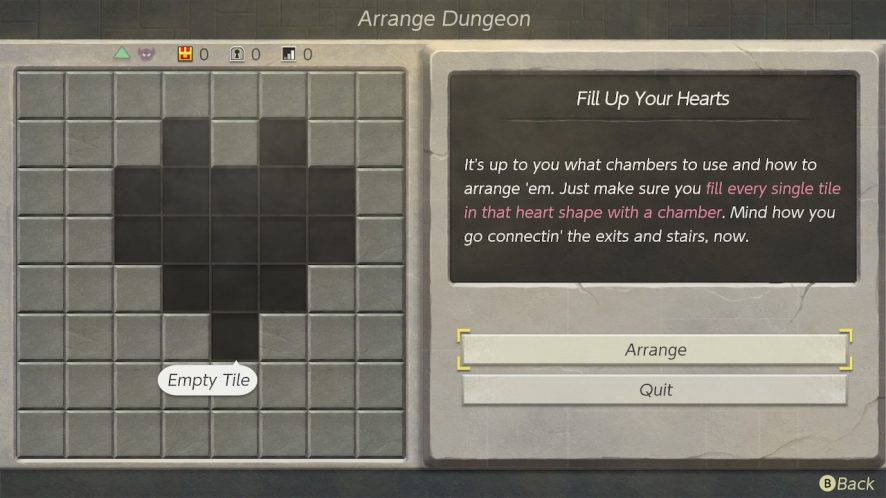
Dampé also has managed to find a Secret Seashell of his very own, and he’s willing to trade it to you if you impress him. And what better way to impress him than by beating some Chamber Dungeons. If you manage to make it through Dampé’s fourth challenge, entitled “Fill Up Your Hearts,” he will give you two prizes, one of which is his very own Seashell.