


1.1. The Battle of Hyrule Field
Table of Contents
Approach one of the gates
When the battle begins, run forward to fight the hordes of Bokoblins. You can use this time to familiarize yourself with the basic controls, and explore the central field area.
When you are ready to proceed, run toward any of the large gates that are marked on your map by red rectangles at the edges of the central field.

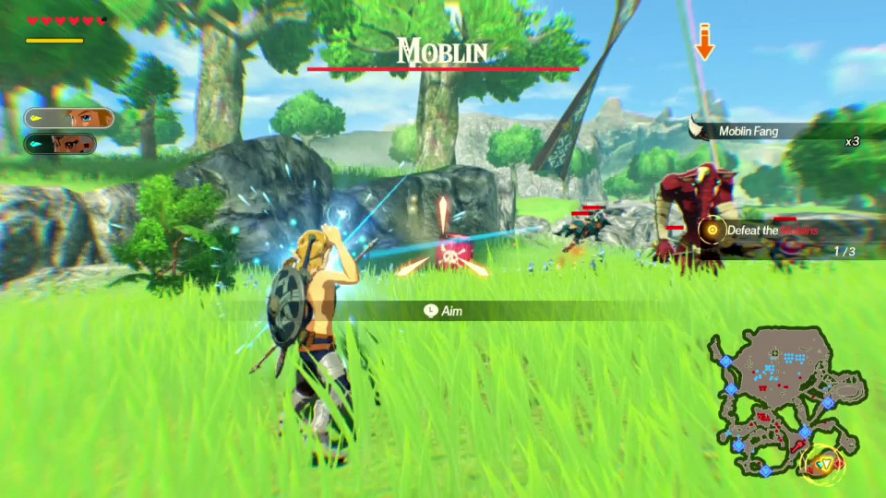
Defeat the Moblin
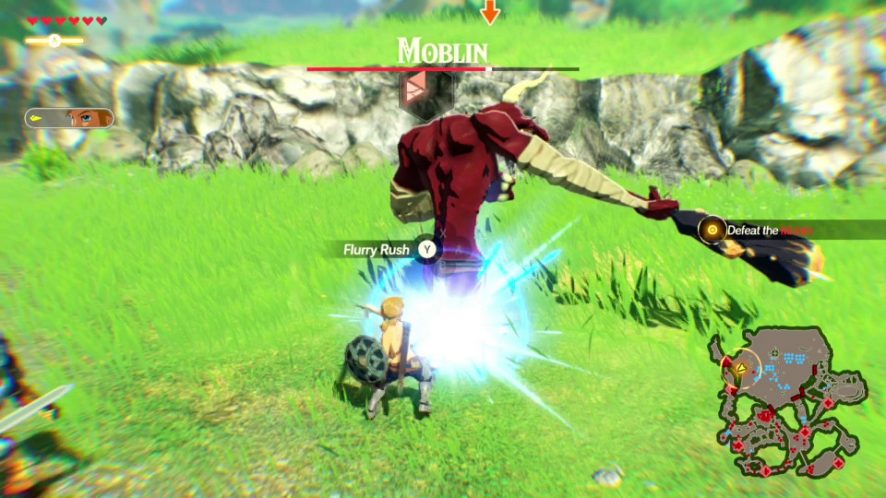
After the gates are closed, run toward the northwest gate to fight a Moblin.
The key to defeating large enemies, like the Moblin, is to deplete the Weak-Point Gauge. The Weak-Point Gauge is a hexagonal symbol that appears beside enemies during battle. At certain moments during the battle, the Weak-Point Gauge will appear, usually, after the enemy completes a large attack. You can force the Weak-Point Gauge to appear by using a Perfect Dodge to initiate a Flurry Rush. When the Weak-Point Gauge is depleted, you can initiate a Weak-Point Smash by pressing the X-Button.
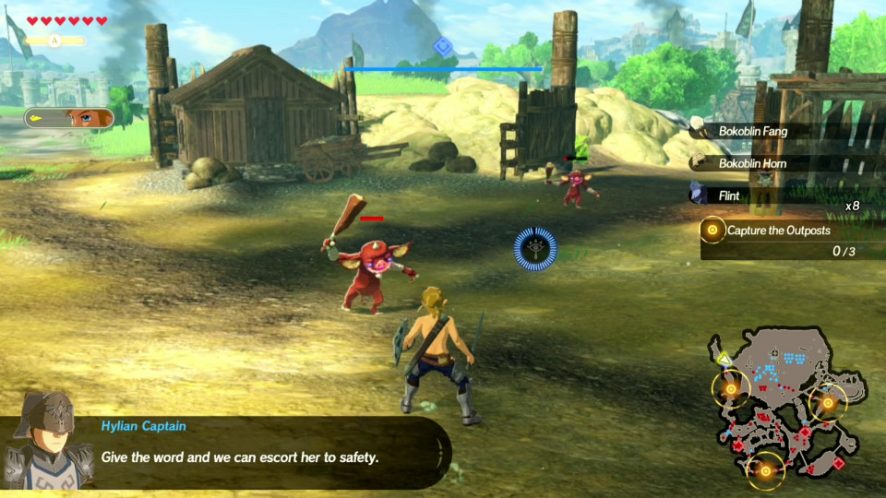
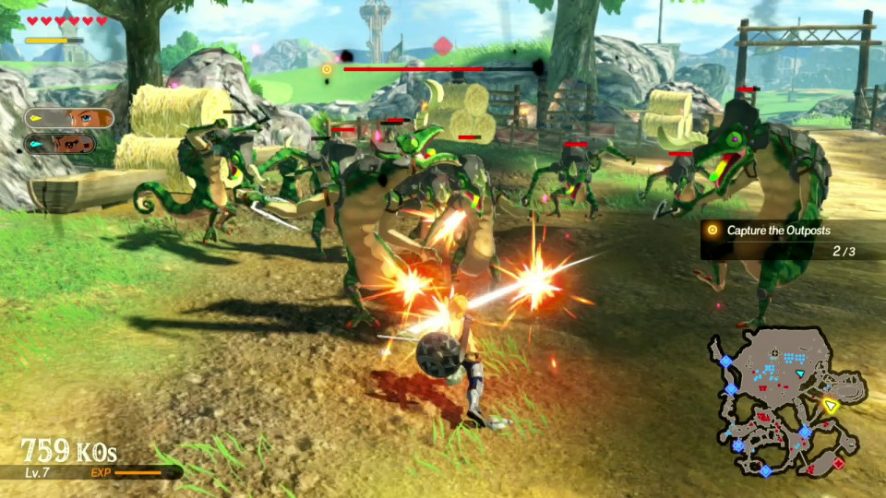
When the Moblin is defeated, run west and capture the nearby Outpost. You can capture an Outpost by defeating enemies inside it until a powerful enemy appears. Defeat the powerful enemy to capture the Outpost.

When the Outpost is captured, run northwest toward the edges of the map to find a box in the middle of the road. Break the box opened to find a Korok and receive your first Korok Seed!
Capture three Outposts
Your next mission is to capture three Outposts that are labeled on the map. The closest outpost is directly south of the first Korok. You will encounter very few enemies on the way.
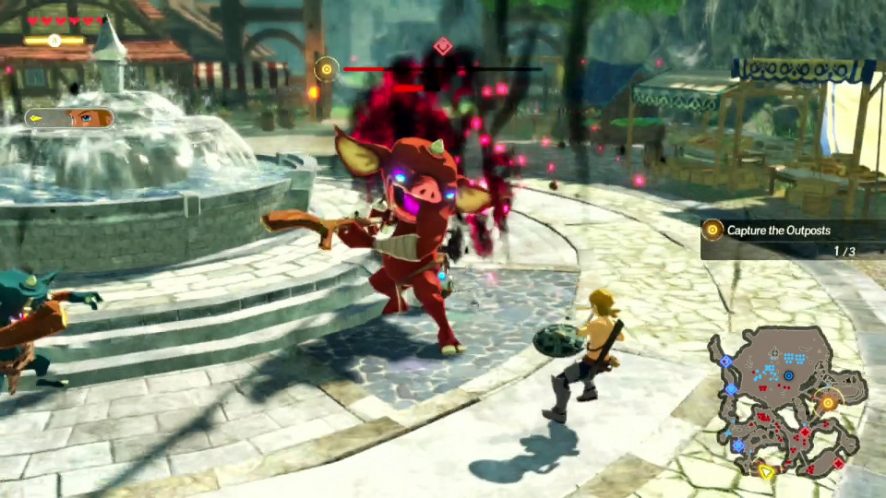
Capture the Outpost, which is the westernmost Outpost labeled on the map, to trigger a story scene. This will unlock both the Remote Bombs and Cryonis Rune abilities.
When the story scene ends immediately turn-around and run back toward the Outpost you just captured. Before reentering the Outpost, turn left to find a yellow flower between two trees. Press the Y-Button while standing beside the flower to find another Korok and receive another Korok Seed.
Continue following the path south along the western side of the map to reach another Outpost. You are not required to capture this Outpost for the objective, but it is always a good idea to capture Outposts to collect more resources and treasure chests.
Continue following the path south until it ends, then turn east to continue toward the second required Outpost. When you the southern Outpost, capture it to activate a new objective.
Defeat the Fire Wizzrobe
A Fire Wizzrobe will appear in the central field, which is a long distance away from the southernmost Outpost. At this time, the game will prompt you to switch your playable character to Impa.
Impa is already near the Fire Wizzrobe, so you won’t have to run the whole distance. Switch to Impa and fight the Fire Wizzrobe.
The Fire Wizzrobe’s Weak-Point Gauge appears after dodging his fireballs. You can also throw Remote Bombs at the Fire Wizzrobe while it is using a stronger attack that makes meteors fall from the sky to deplete the Weak-Point Gauge.
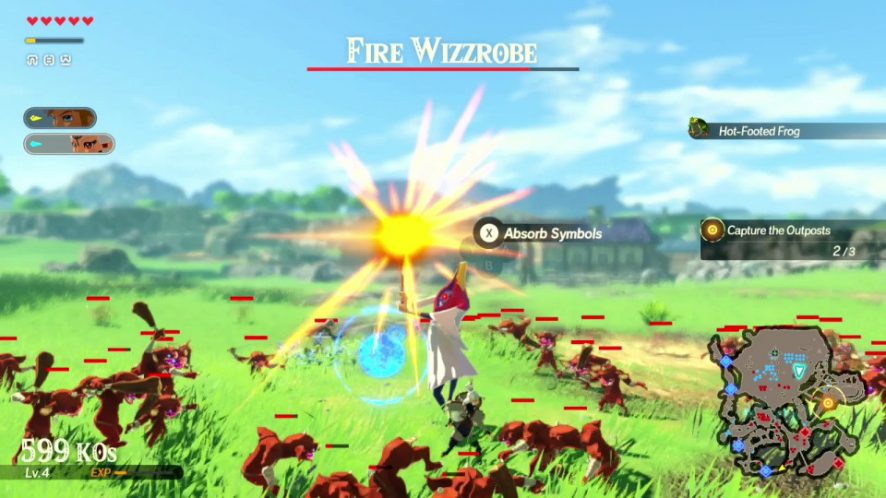
When the Fire Wizzrobe is defeated, pick up the Fire Rod that was left behind. You can use the Fire Rod in every mission from now on as another secondary attack.
After defeating the Fire Wizzrobe, run to the southeast and pass through a large gate. After passing through the gate, immediately look to the right to find a tree stump with a leaf on it. Stand on the tree stump and press the Y-Button to find another Korok and receive another Korok Seed.
After collecting the Korok Seed, switch back to play as Link again.
Capture the third Outpost
Link should still be in the southernmost path on the map. Continue east until you reach an open area.
Travel north and follow the path along the stone wall. When the path narrows again, look to your left to find a yellow flower. Interact with the flower to receive another Korok Seed.
Next, travel northeast toward the final required Outpost. Along the way, you can capture an optional Outpost. Capture the third required Outpost to complete the objective.
After capturing the Outpost, continue northeast to enter a ranch. There is a floating balloon is the center of the ranch. Pop the balloon to receive a Korok Seed. If you have trouble attacking the balloon with your sword, use Link’s Bow and Arrow to pop it.
Defeat the group of three Moblins
The final objective of this mission is to defeat a group of three Moblins in the southeast field area. Run to the southwest and you will encounter another Fire Wizzrobe. You are not required to defeat this Wizzrobe, but you may want to for the experience points.
Cross the bridge on the south end of the map to reach the field area where the Moblins are attacking. There is a pinwheel in the center of the bridge. Interact with the pinwheel to receive another Korok Seed.
The three Moblins you need to defeat will frequently charge toward you. When they charge, use Cryonis to stun them and then attack their Weak-Point Gauge.
There are also explosive barrels in the area. If you destroy a barrel while a Moblin is nearby, it will temporarily stun the Moblin and make the Weak-Point Gauge deplete quicker when you attack.
When the Moblins are defeated, the mission will end.