


Pieces of Heart
- 1 Kakariko well
- 2 Thieves’ hideout
- 3 The 15-second game
- 4 The Lost Woods thieves’ den
- 5 The Swamp Ruins
- 6 Aginah’s cave
- 7 The grove by Sanctuary
- 8 Desert Palace interstitial
- 9 Death Mountain cave network
- 10 Atop Spectacle Rock
- 11 Pyramid of Power
- 12 The woodsmen’s tree
- 13 The Zora Falls forest
- 14 The iced lake
- 15 The treasure field
- 16 The treasure chest game
- 17 The cemetery overlook
- 18 The haunted grove
- 19 The field of stakes
- 20 The cave near Skull Woods
- 21 Misery Mire’s outbuilding
- 22 The Desert of Mystery cliffs
- 23 Death Mountain’s floating island
- 24 Turtle Rock interstitial
1
Kakariko well
First Chapter Available: Chapter 2
Items Required: Bombs (though you can find some here)
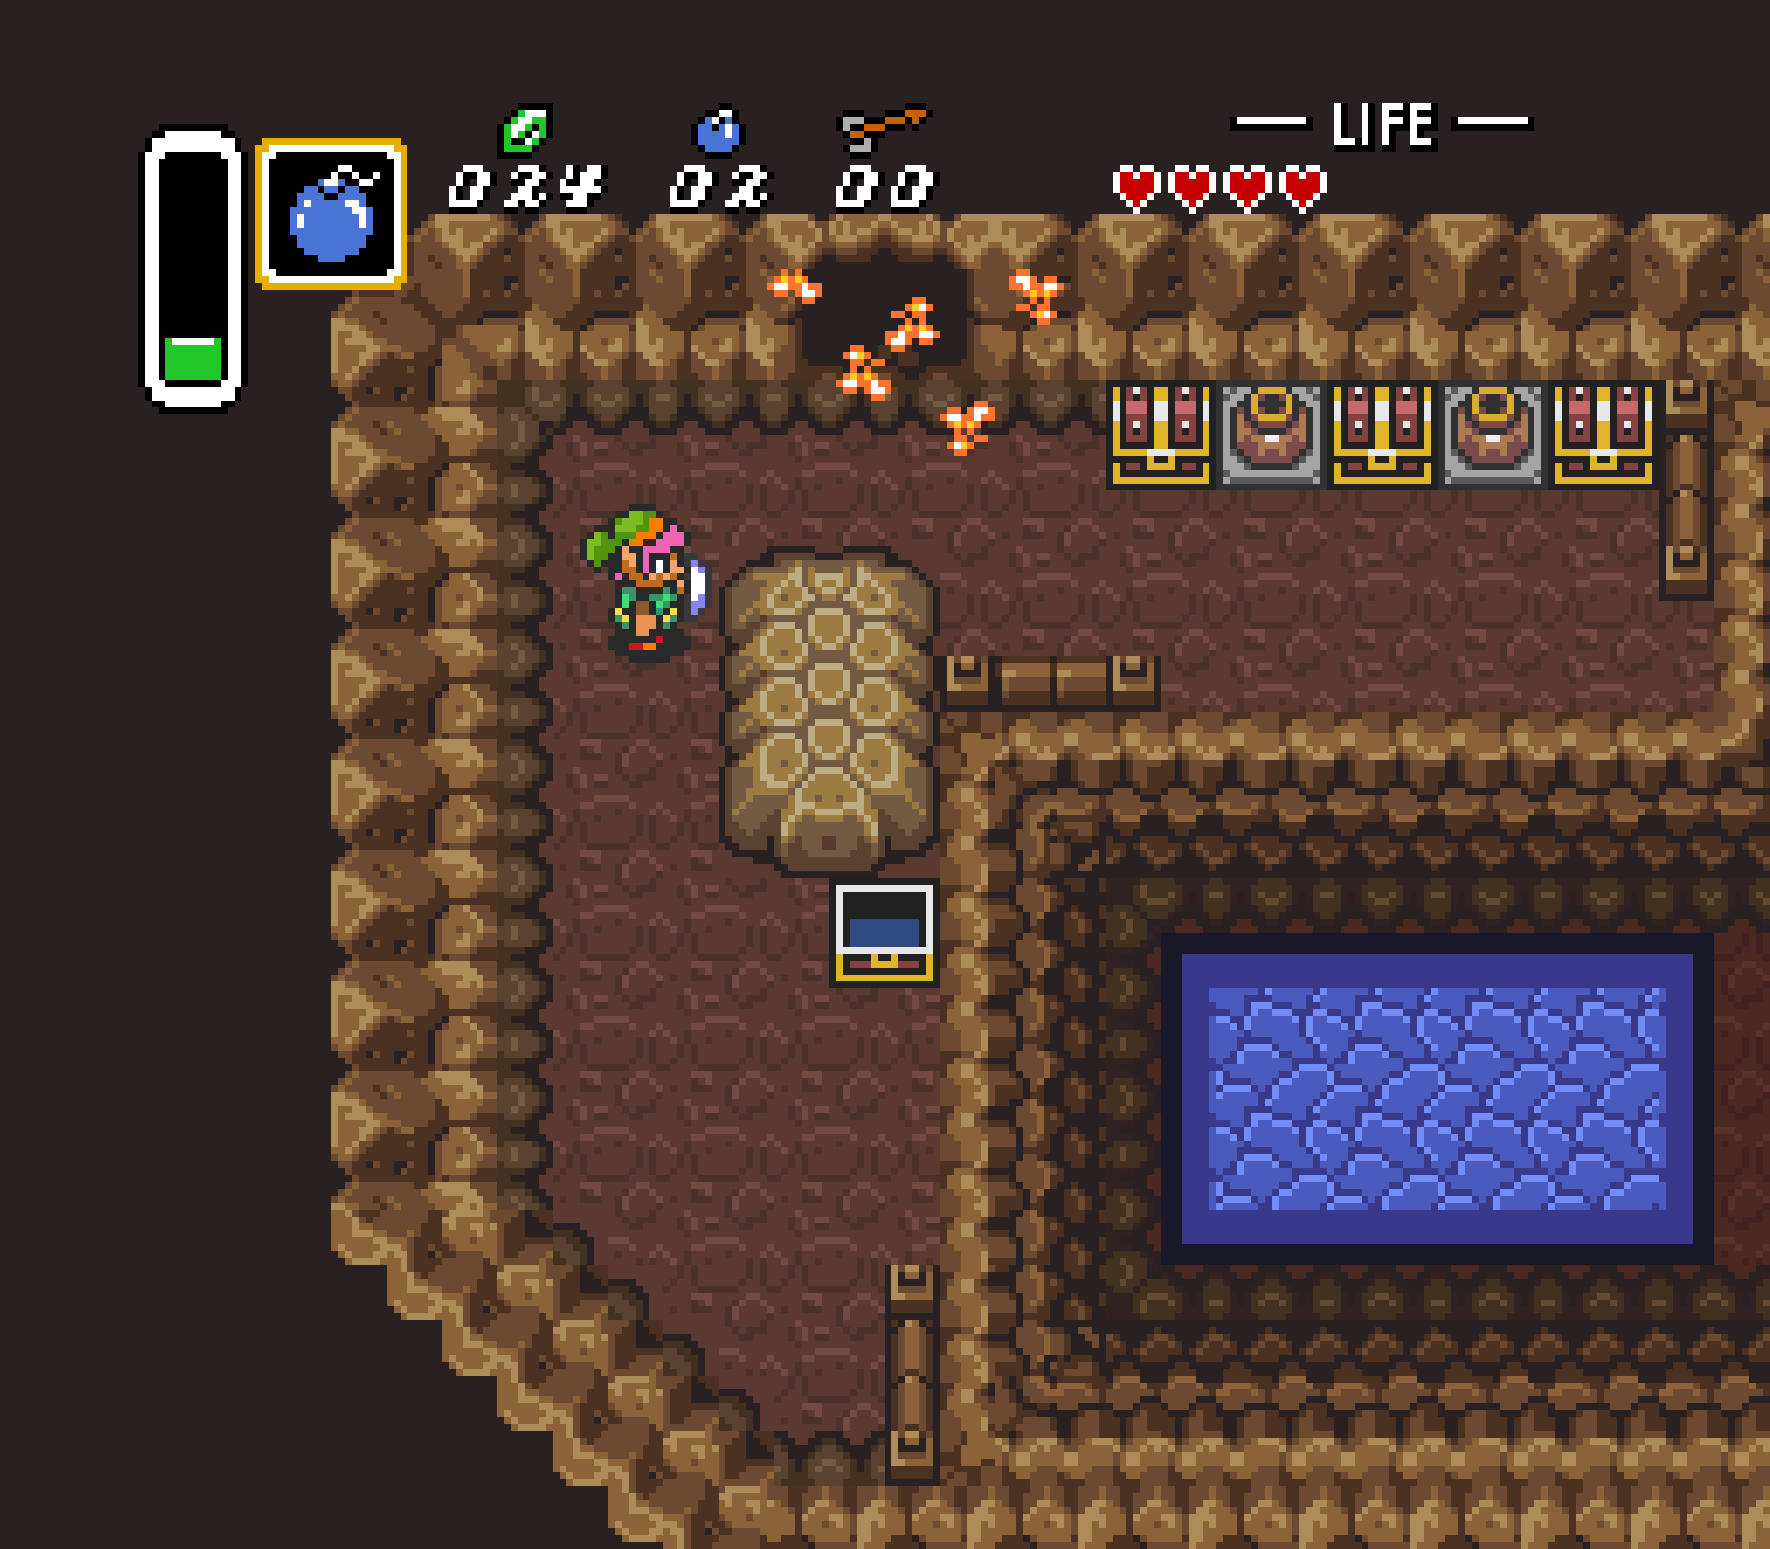
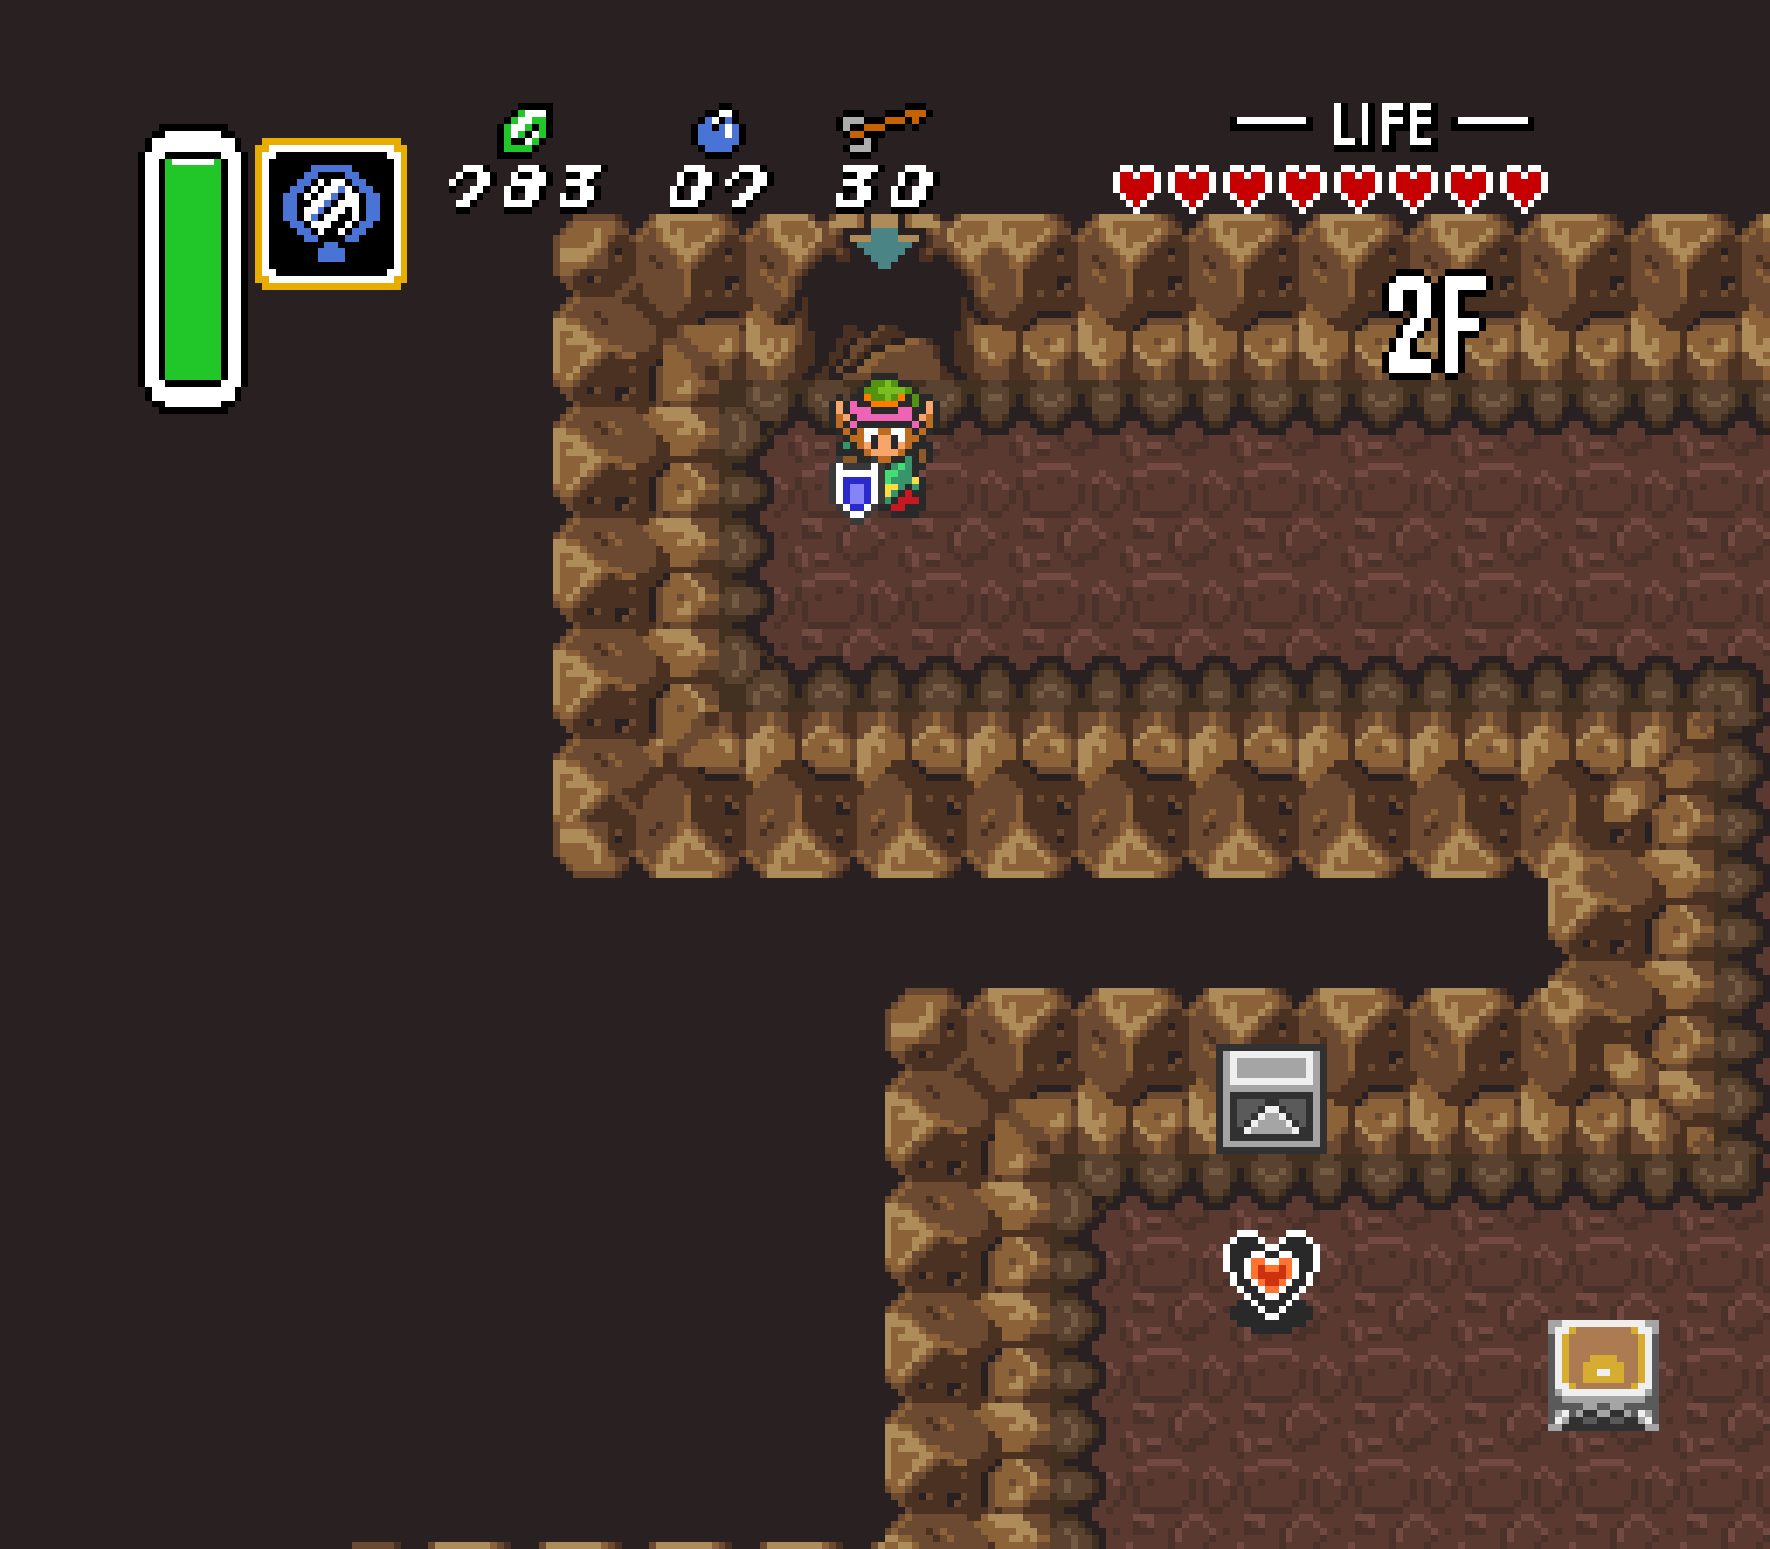
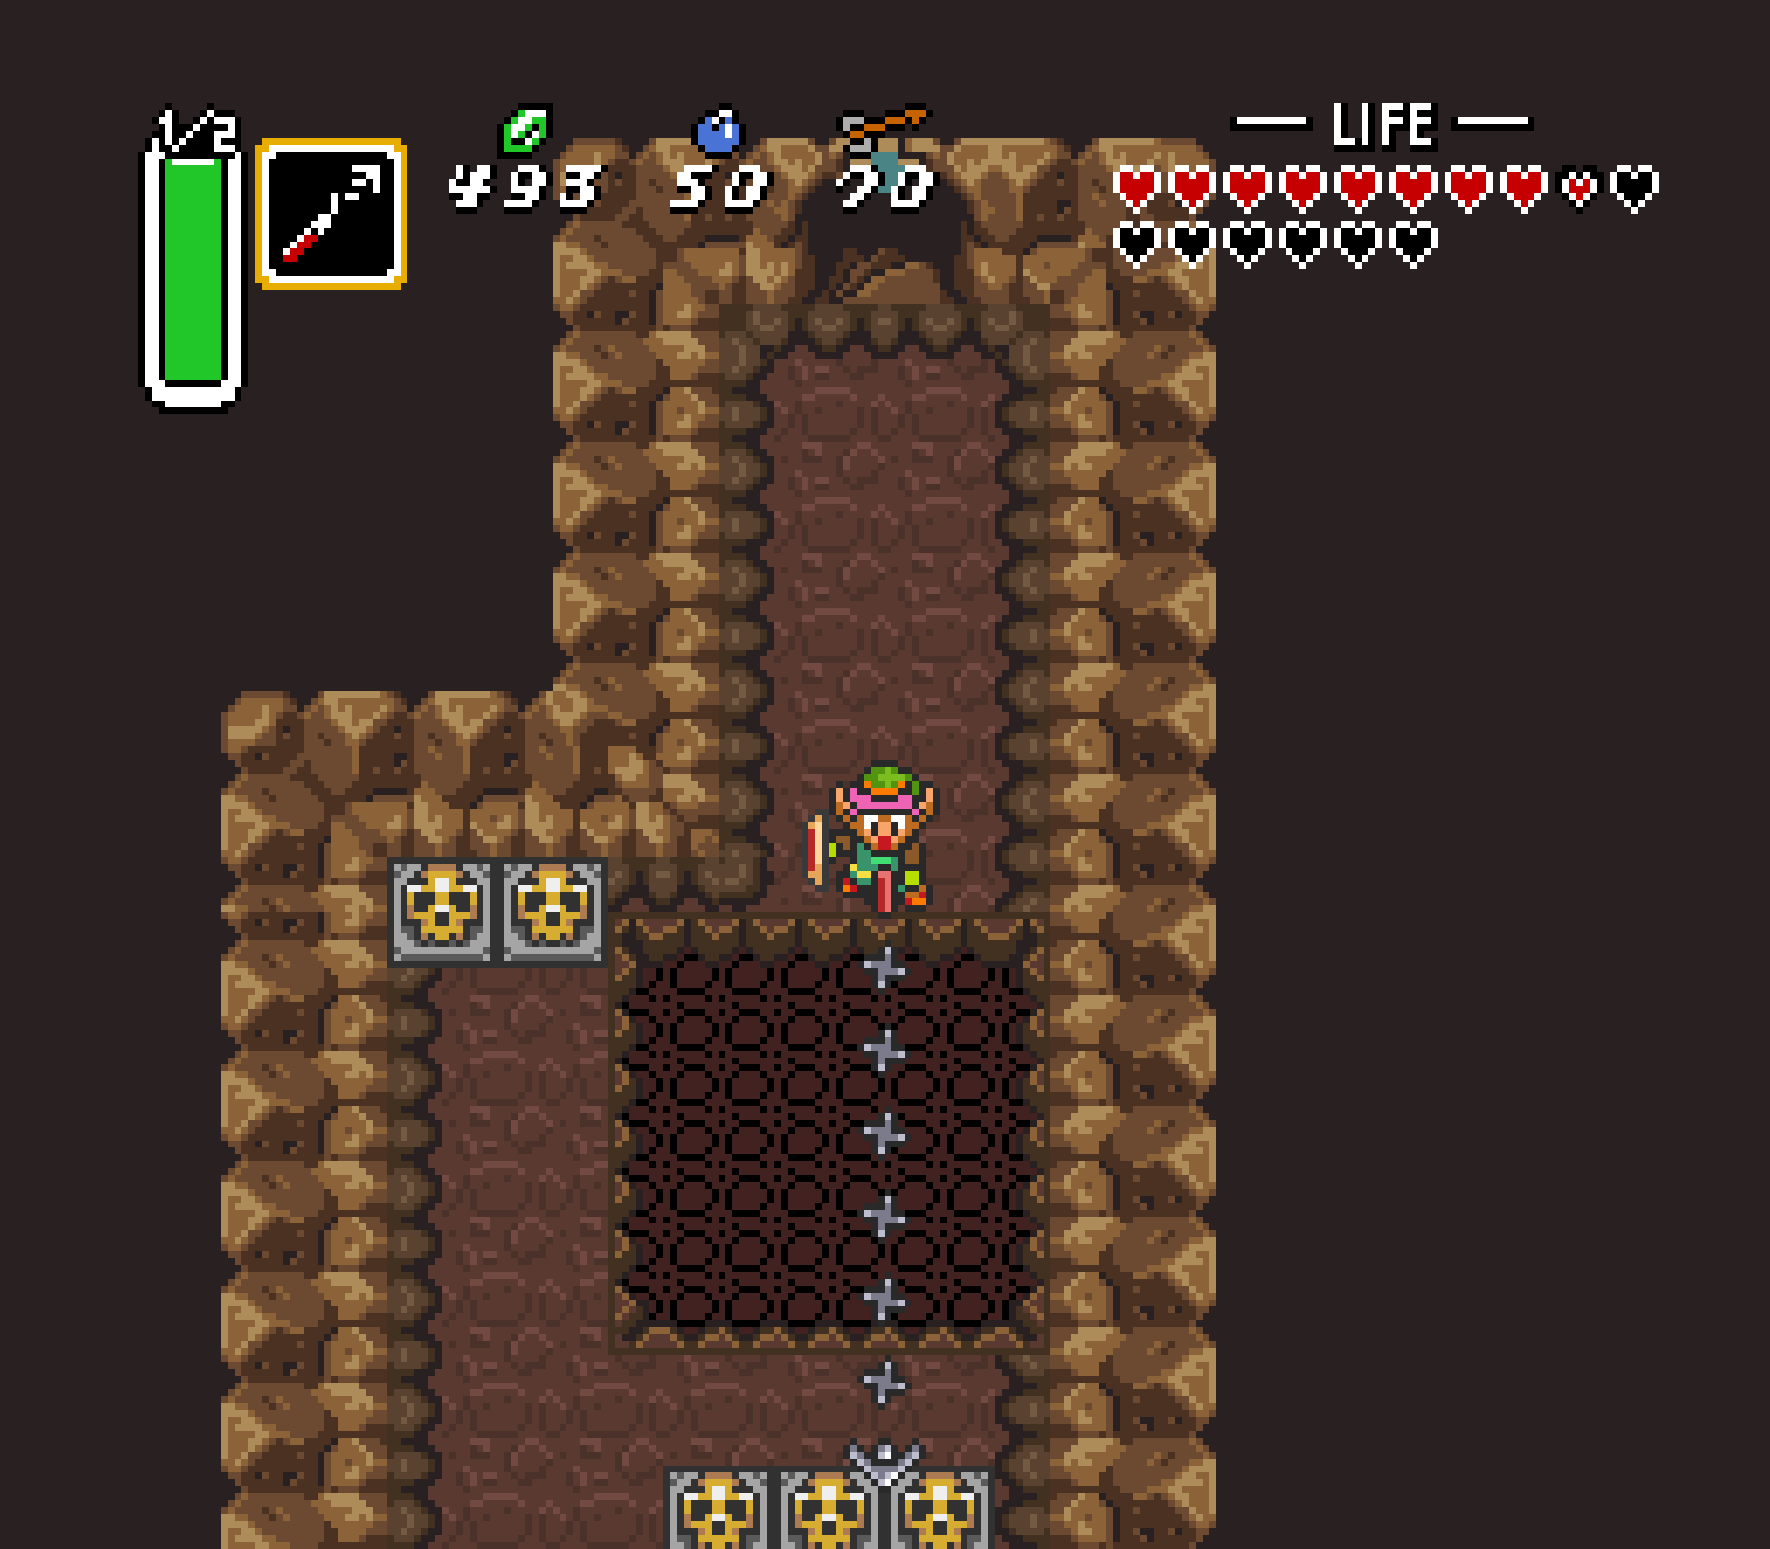
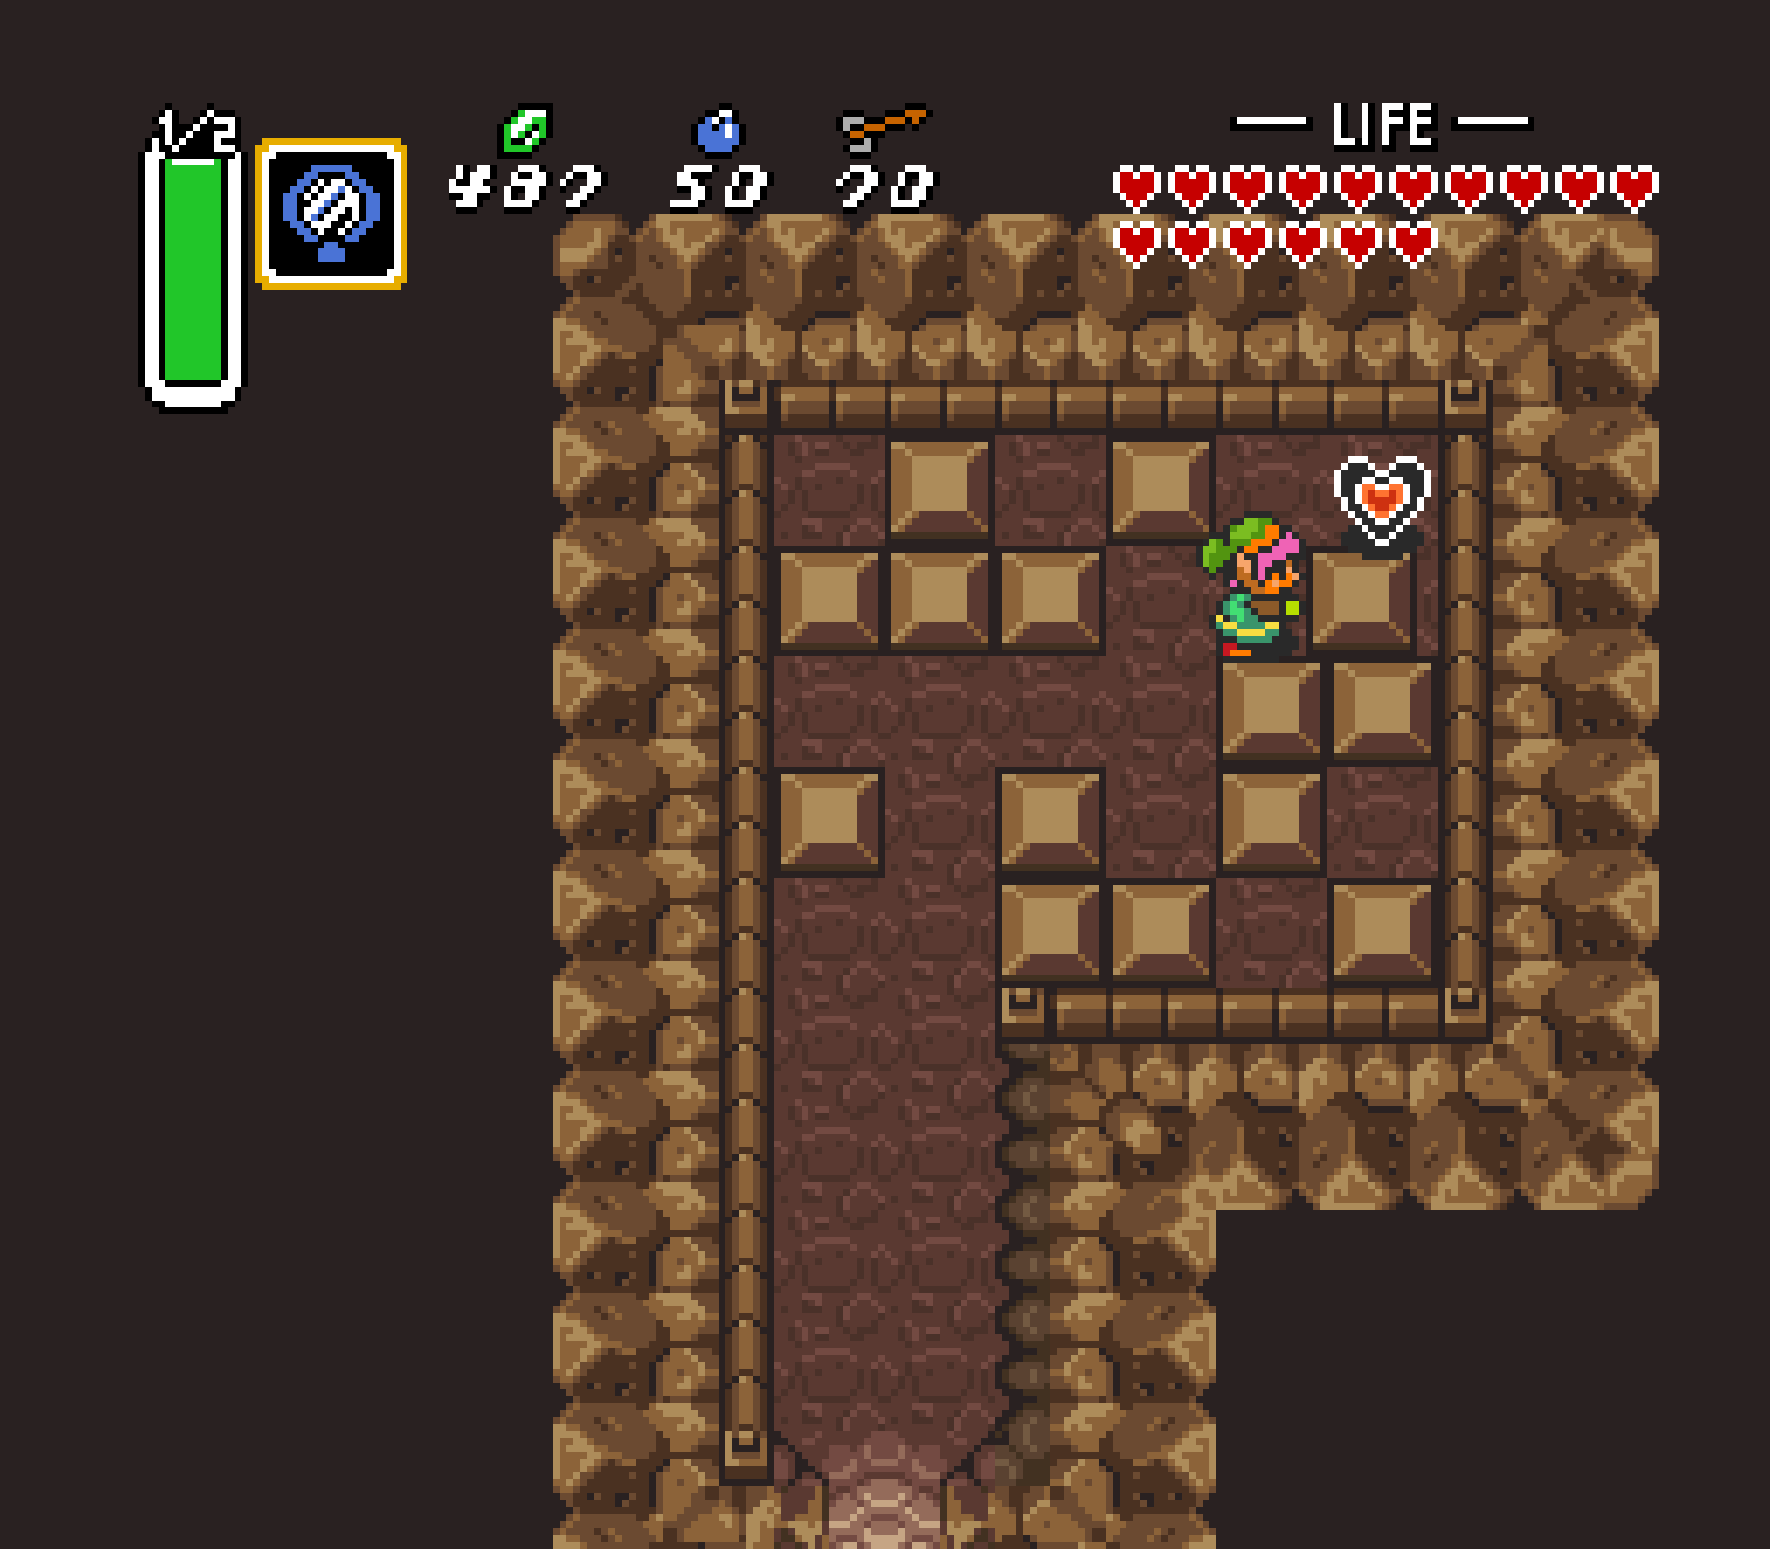
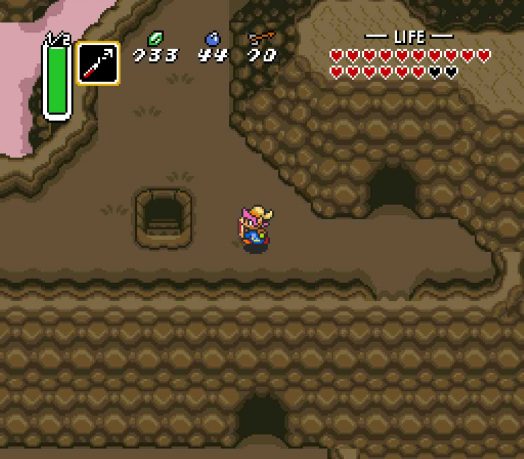
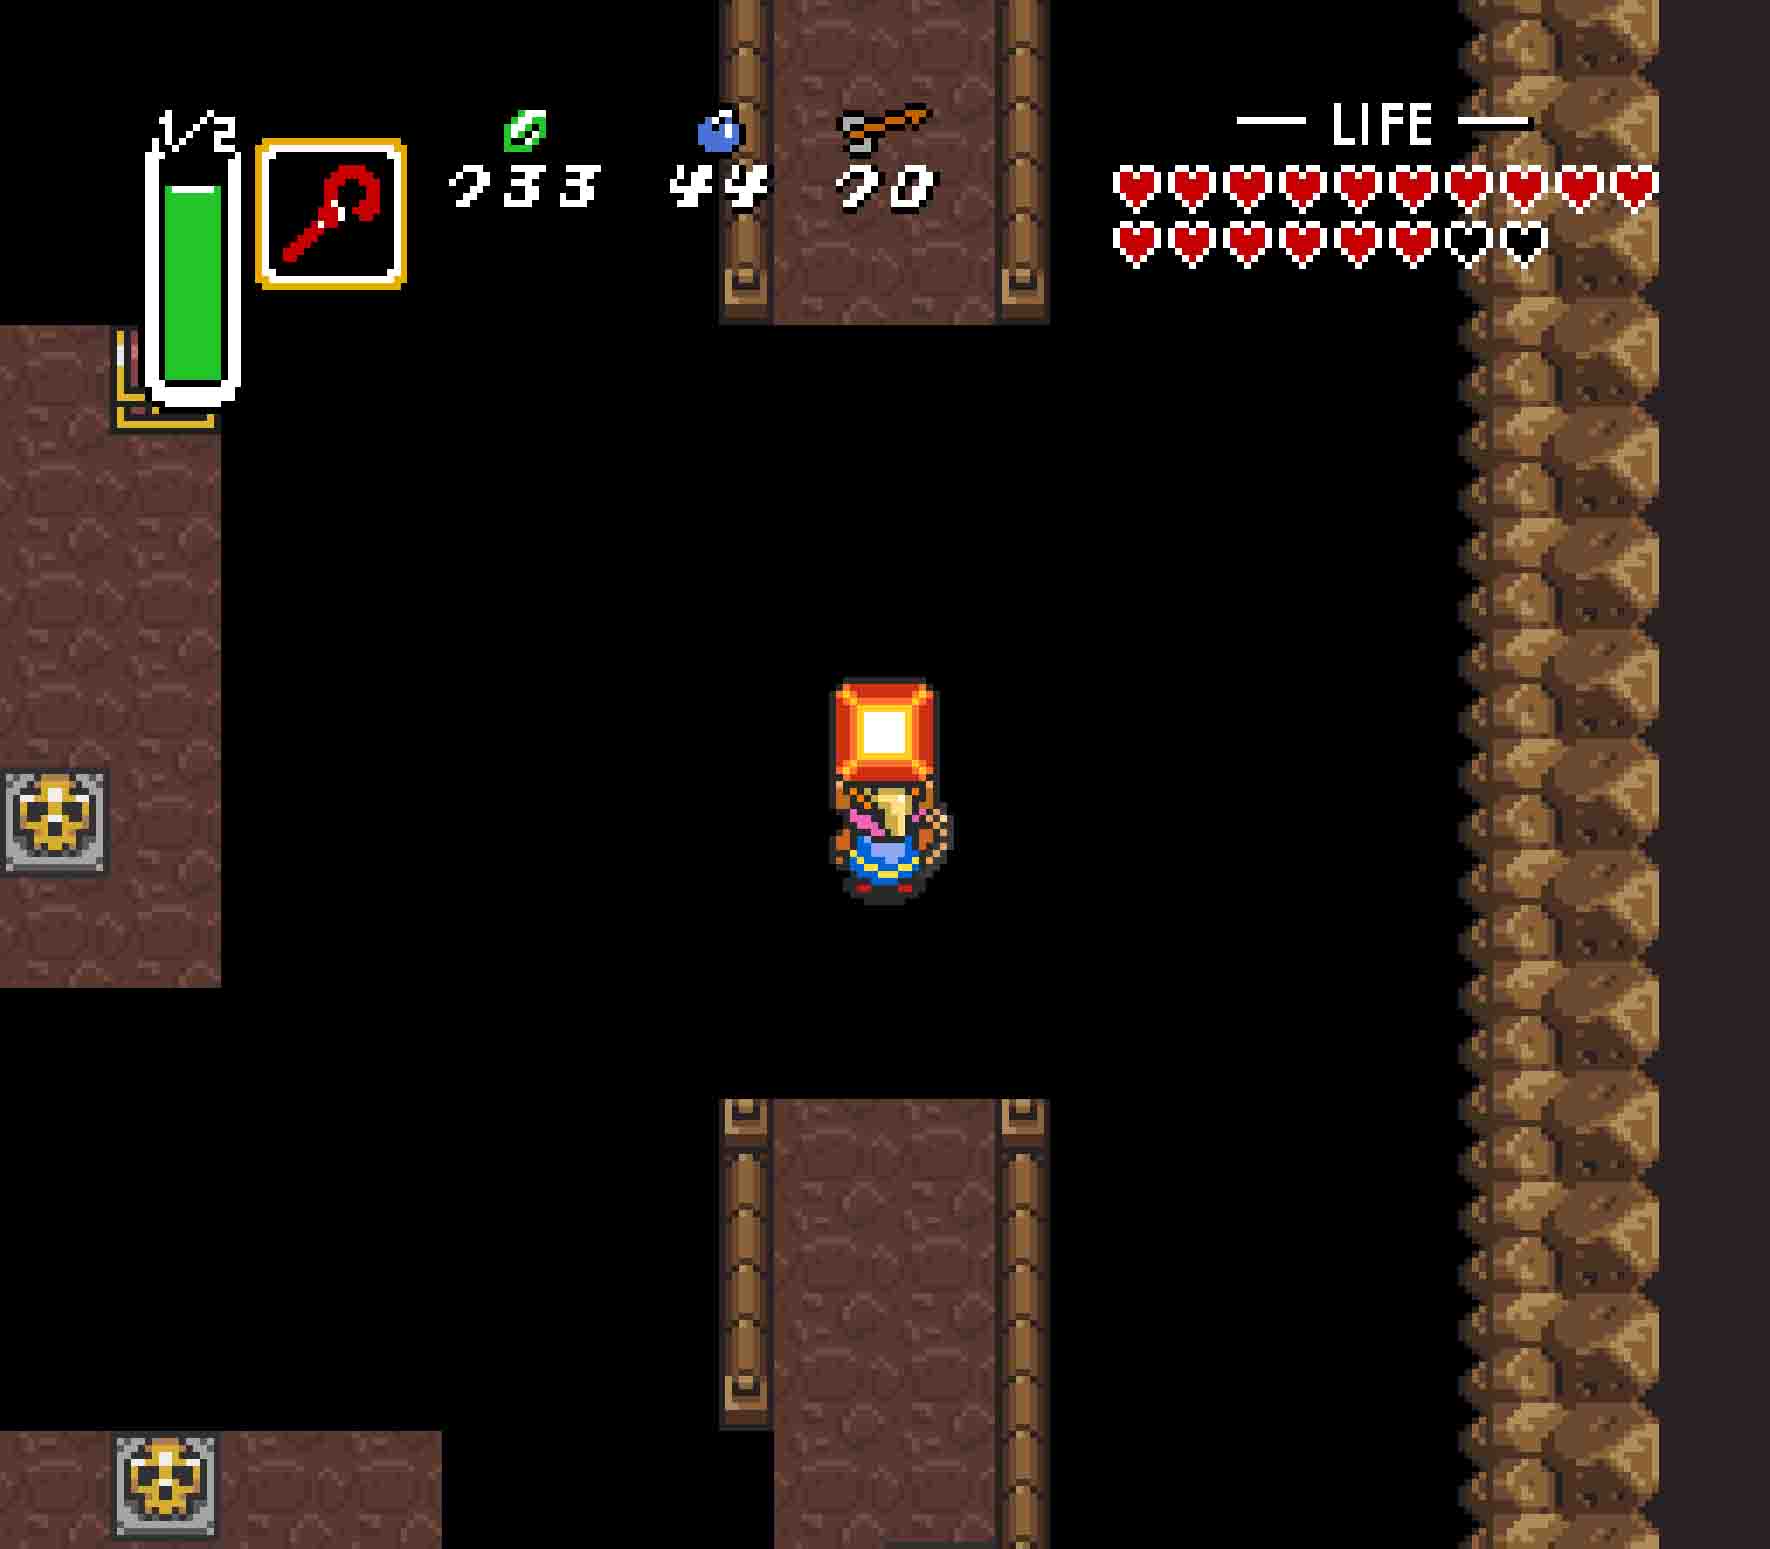
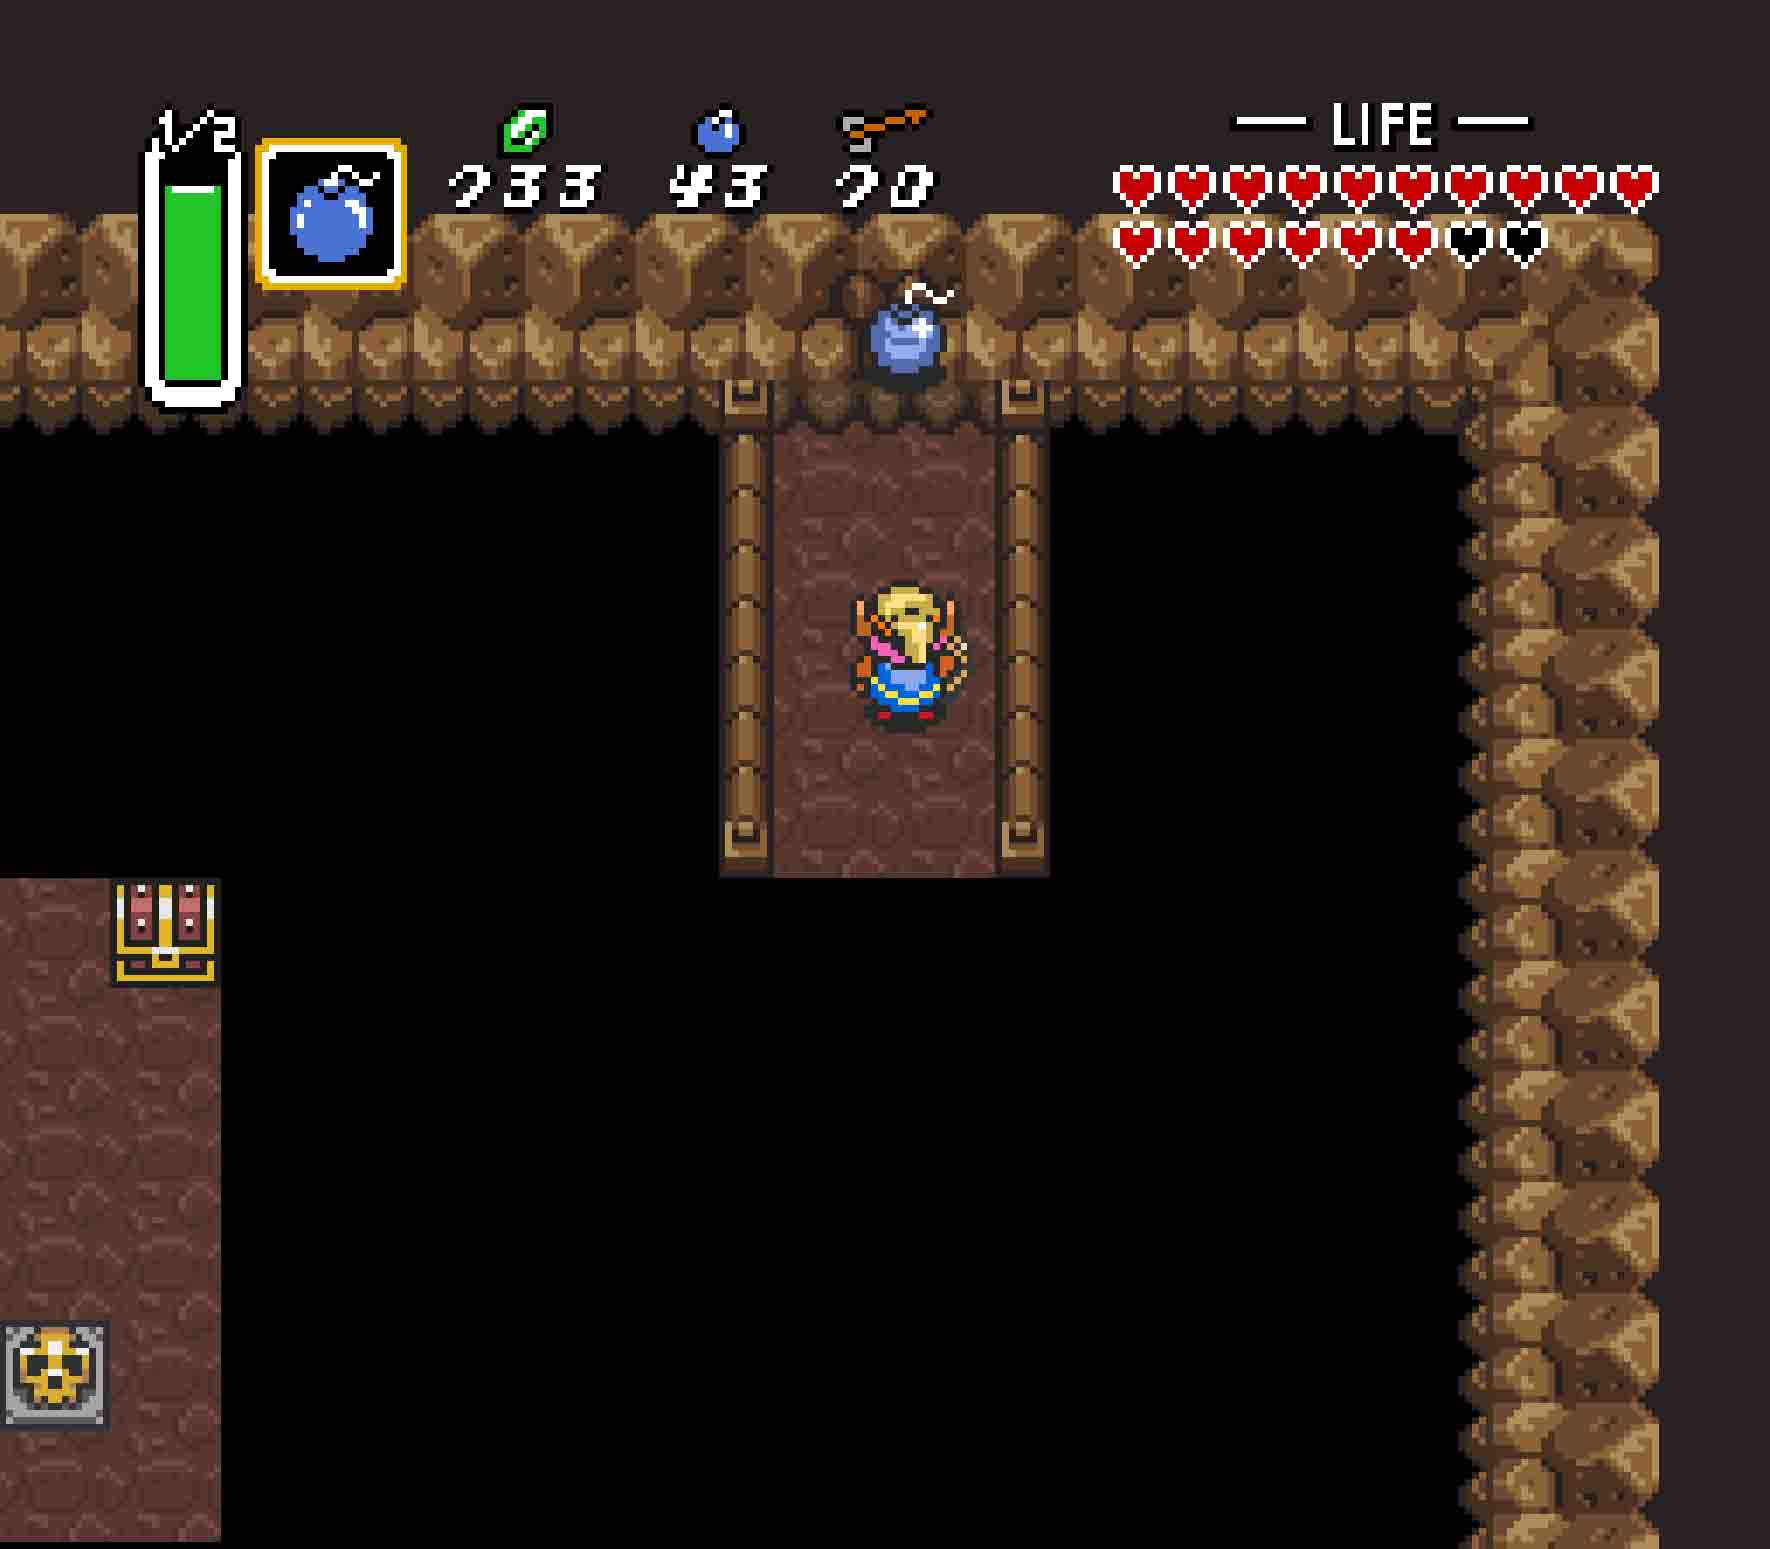
In the northwest corner of Kakariko Village, near the border of the Lost Woods, to the west of the Old Woman’s house, you can find an entrance to a cave. Trying to get to the Piece of Heart from this cave entrance will only end with futility, but you can find a small well opening that you can reach from the cliff above it. Jump off the small opening on the ledge and fall down into the well. This will land you on the upper platform of the cave. There are several treasure chests there which will provide both Rupees and much-needed Bombs. You can find a crack on the wall just to the left of the upper treasure chests. Bomb the wall, and inside you’ll find the Piece of Heart.

2
Thieves’ hideout
First Chapter Available: Chapter 2
Items Required: Bombs
In northern Kakariko Villiage, just next to the Old Woman’s house, is a green building that used to function as a thieves’ hideout. Head on inside and talk to the man there if you want to learn the history, but there’s treasure greater than knowledge hidden inside. Head downstairs and look for the tell-tale crack in the northern wall. Drop a Bomb against it, and once you clear a path you’ll be rewarded with some Rupees and a Piece of Heart.
-

- This old thieves’ hideout holds some of their best kept secrets.
-

- Not only are there 80 rupees here, but a Piece of Heart as well.
3
The 15-second game
First Chapter Available: Chapter 2
Items Required: Bombs
In the southern outskirts of Kakariko Village, there is a long house that extends westward off screen. It’s the home of two twin brothers who have had quite a quarrel, so much so that one has sealed the other brother away from not only himself but the entire village! Break down the barrier, not just because you’re a good Samaritan but also because there’s treasure on the other side. Once you leave the western half of the house, you’ll be challenged to get to the other side of a fence maze in 15 seconds. There’s a sneaky shortcut that you can take near the signpost where you can jump over the fence. Talk to the man on the other side, and if you managed to do it in time, you’ll be rewarded with a Piece of Heart.


-
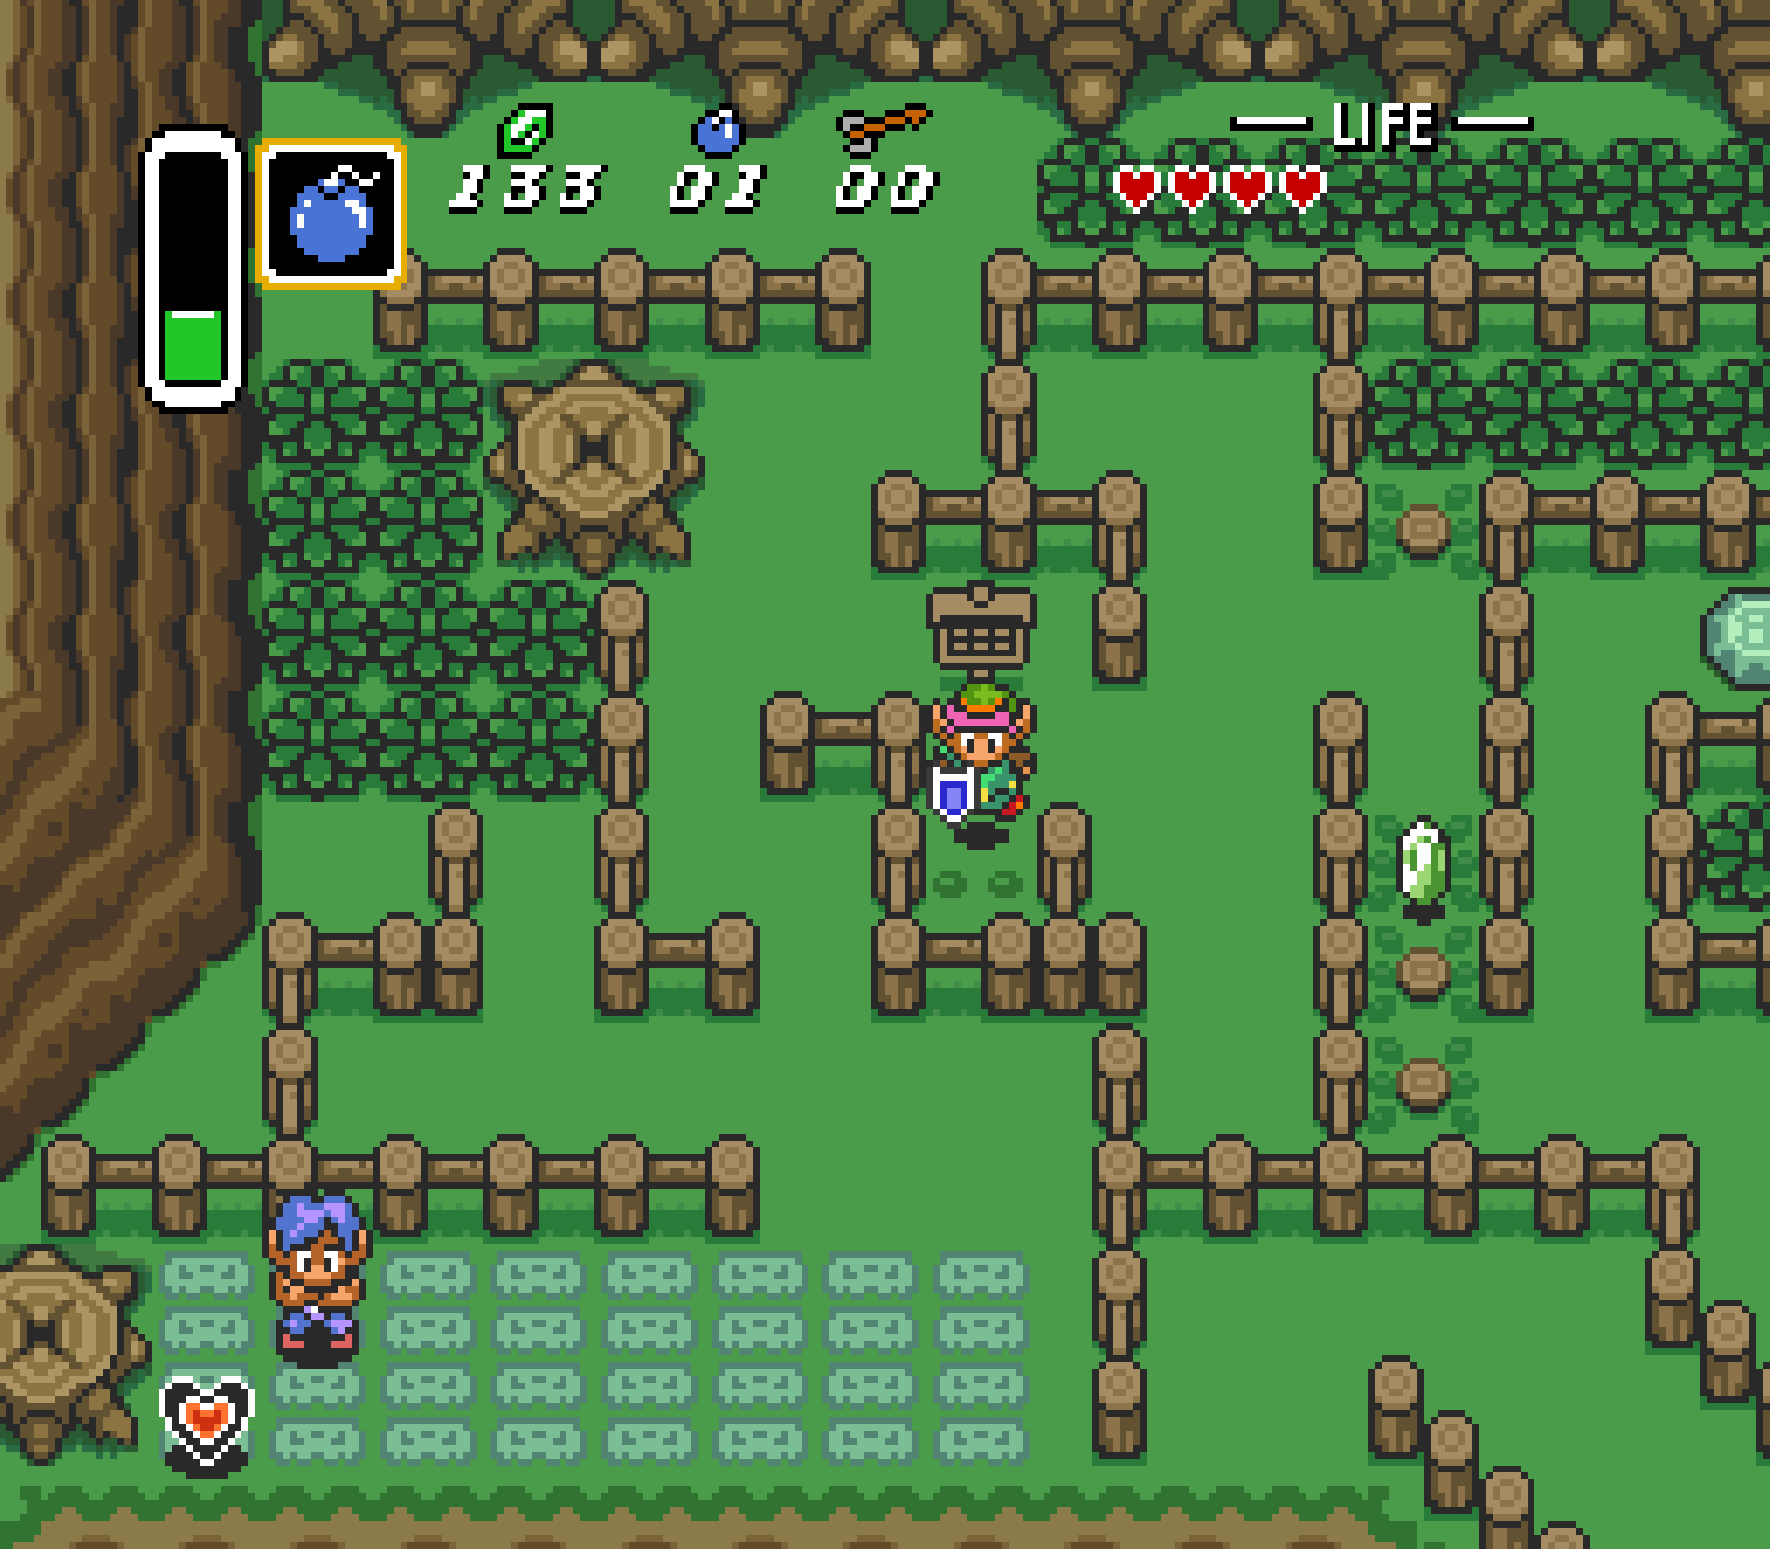
- After reuniting the two brothers, make sure to take this shortcut through the maze.
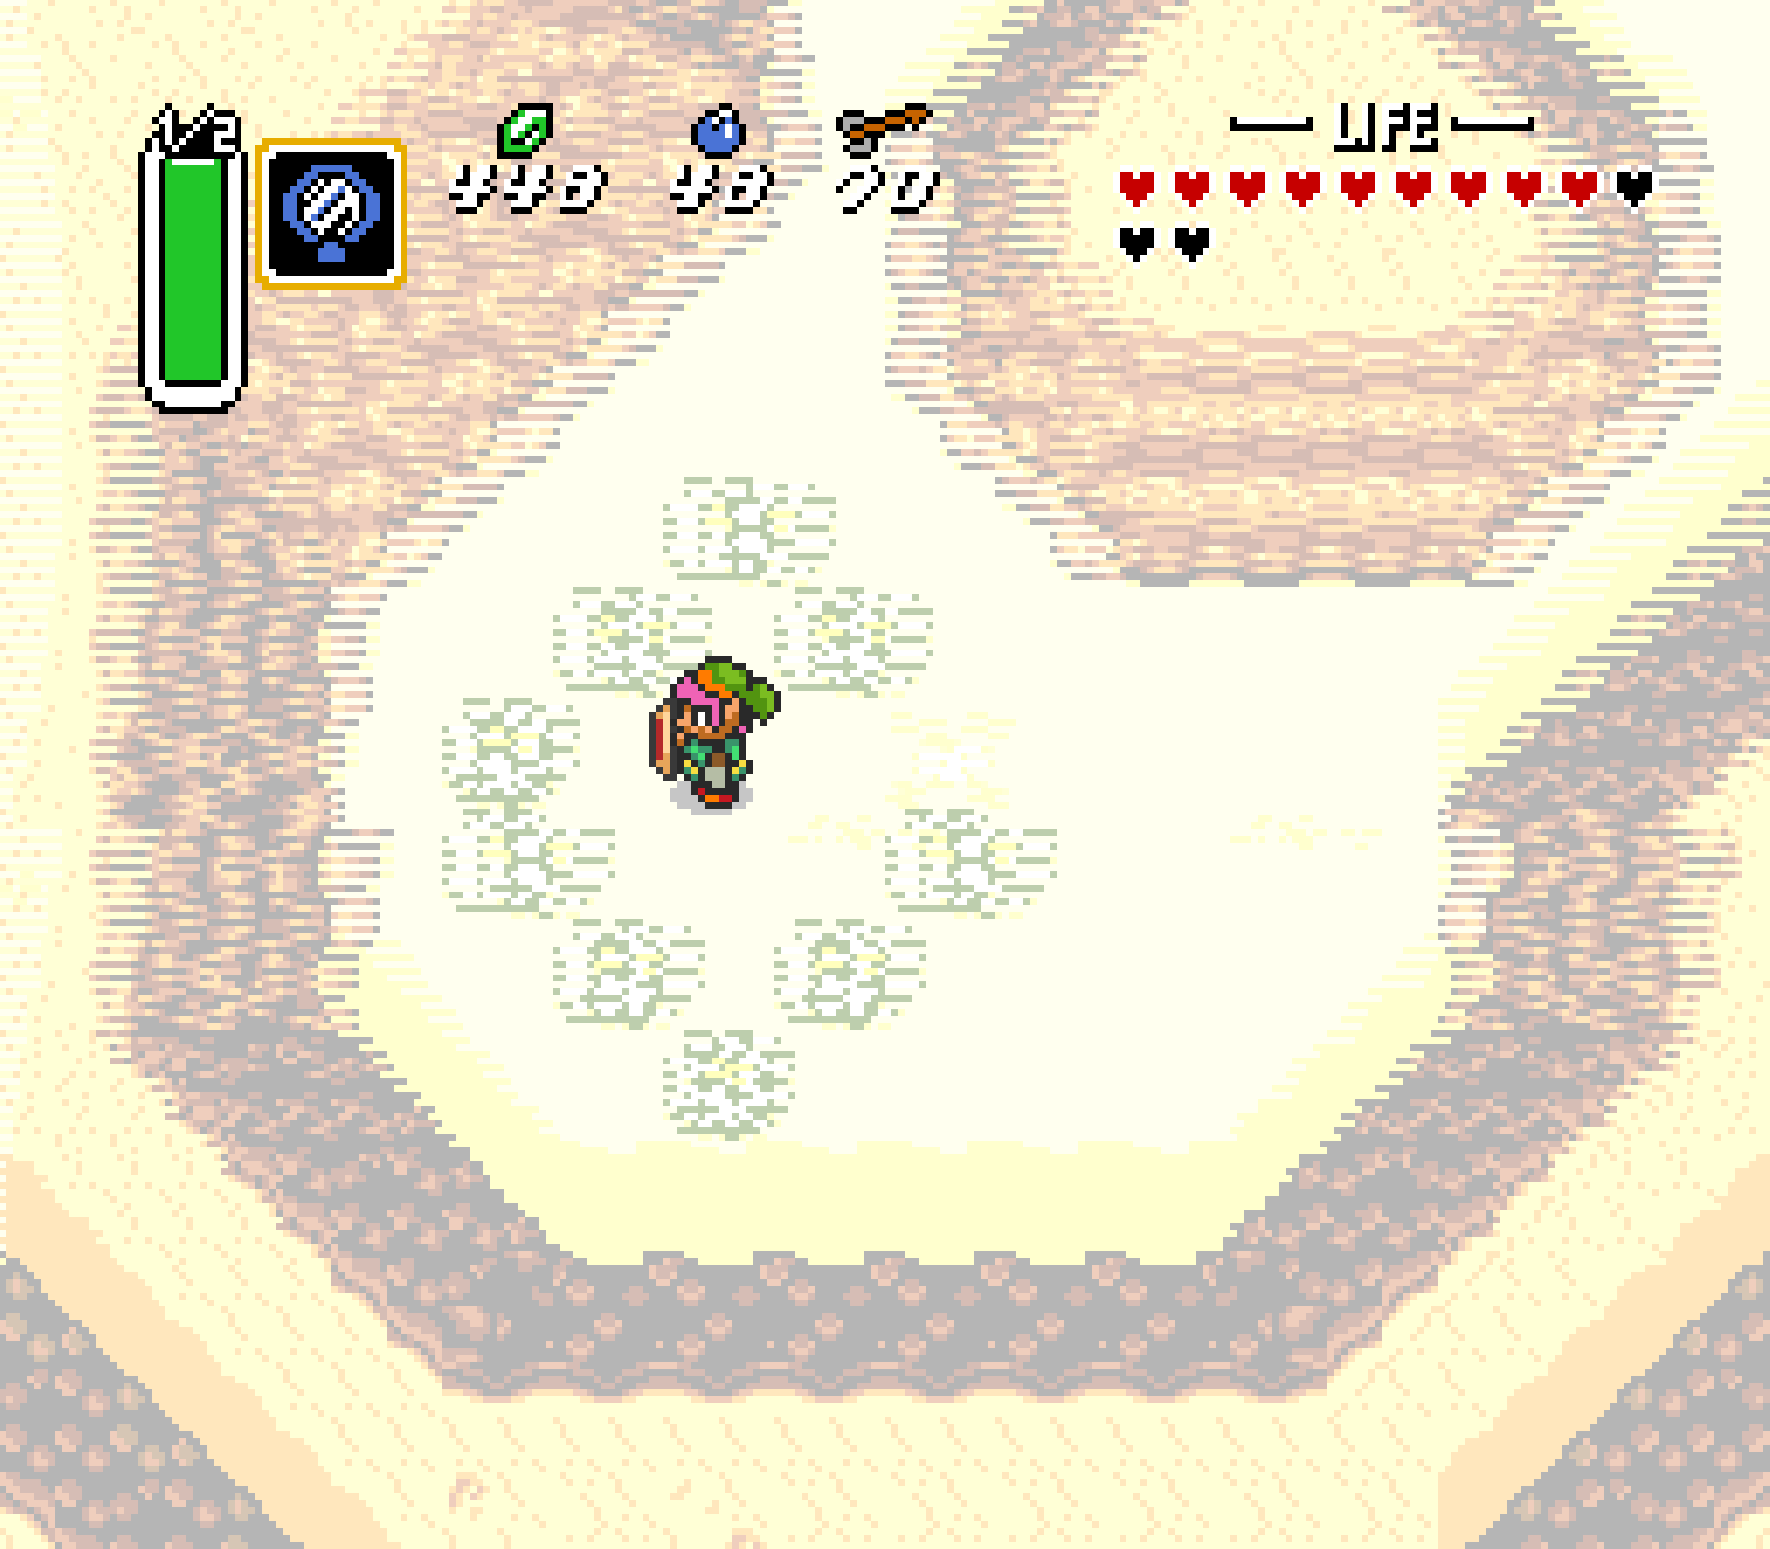
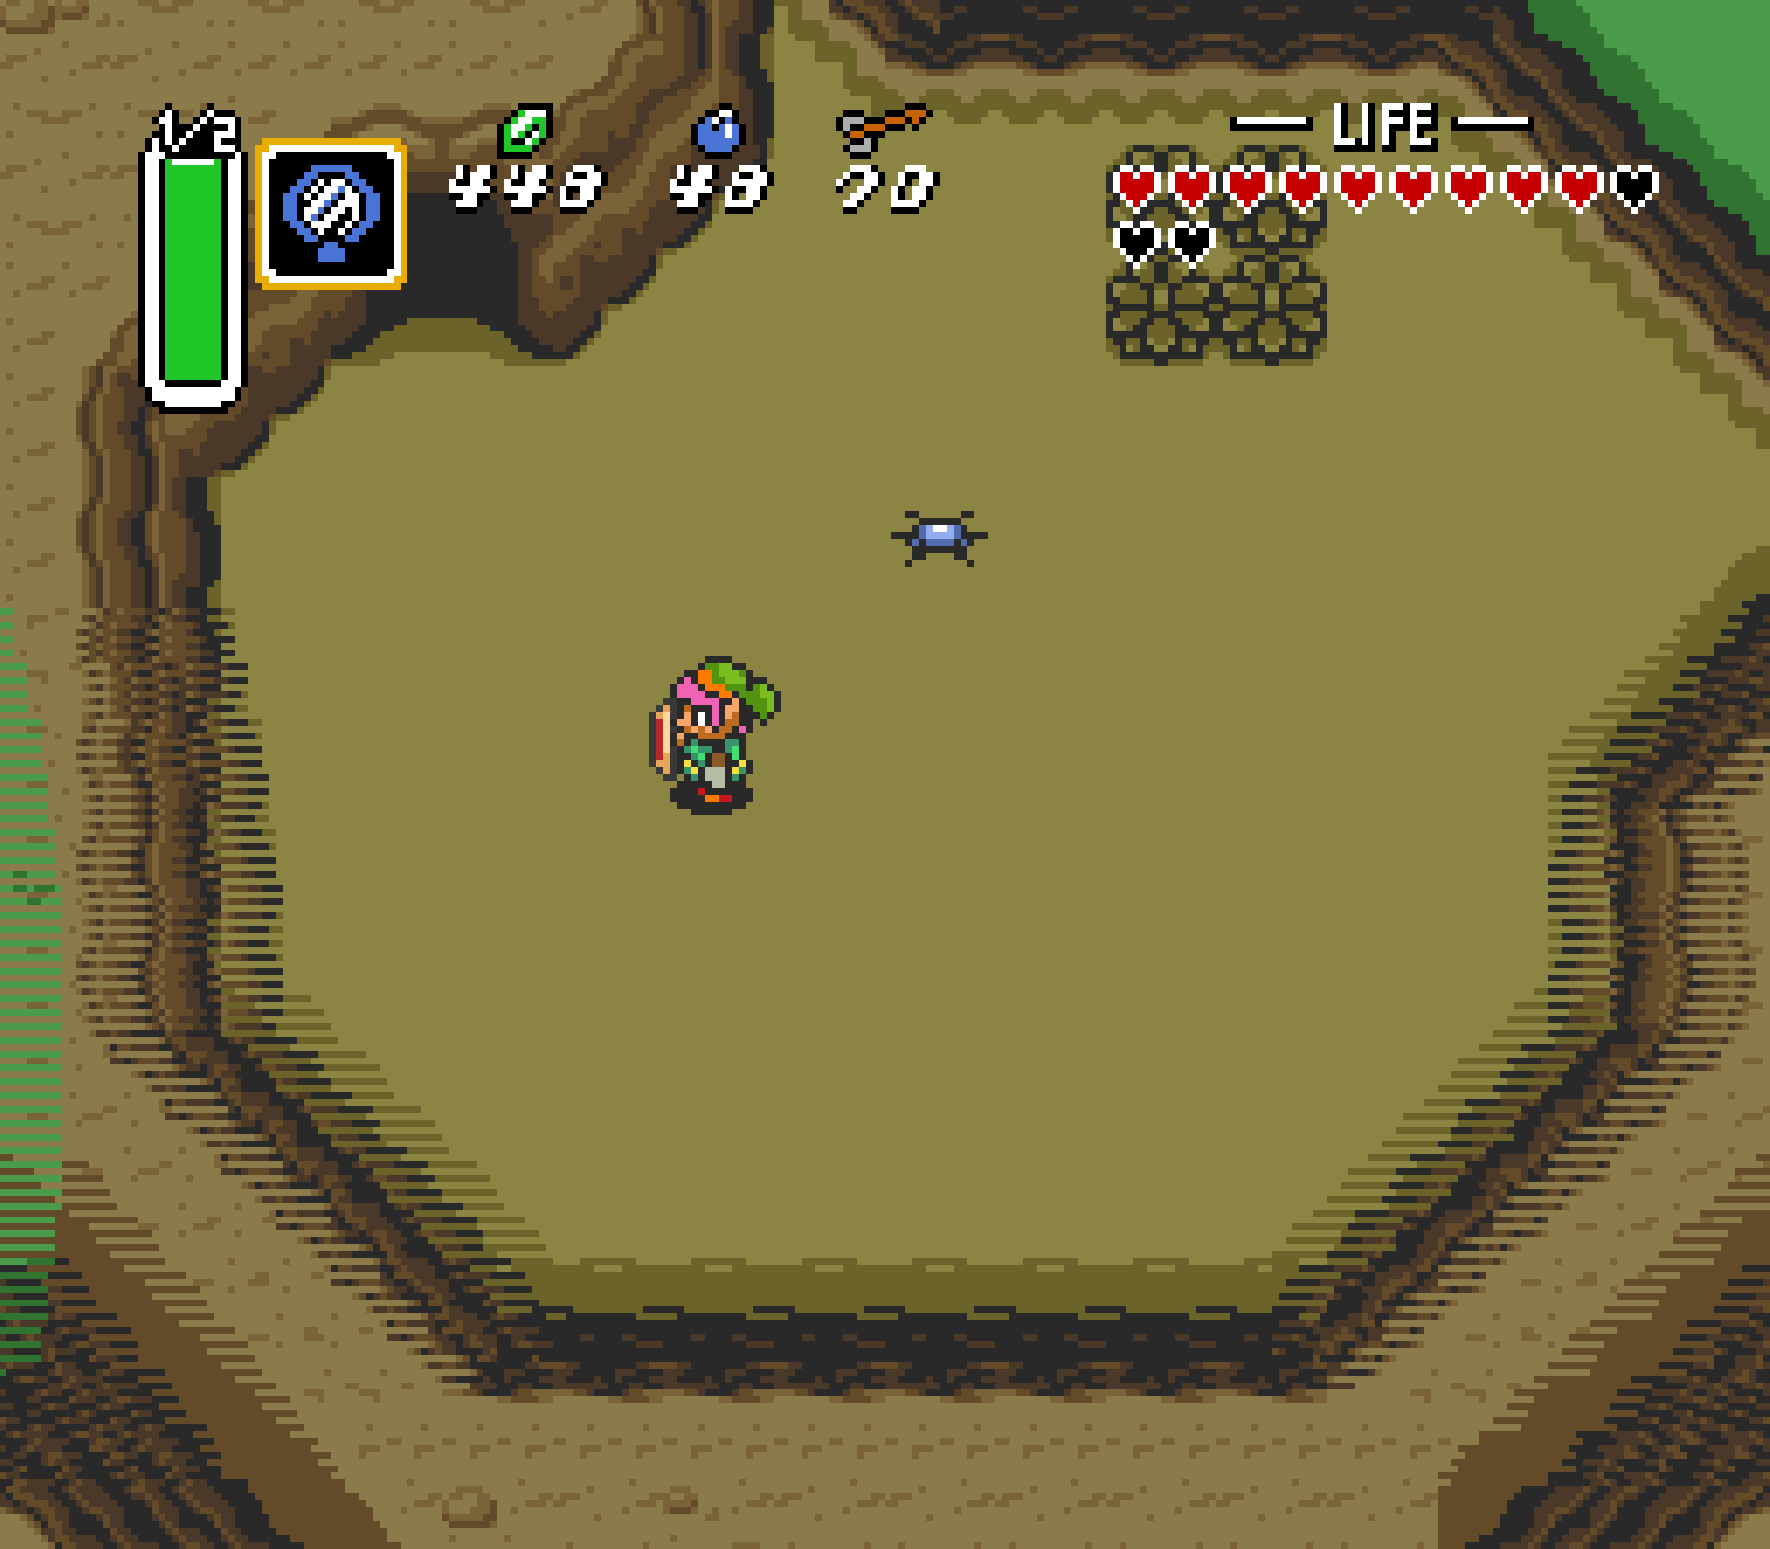
4
The Lost Woods thieves’ den

Of course the forest thieves have a secret entrance into their “secret” base.
First Chapter Available: Chapter 2
Items Required: Nothing
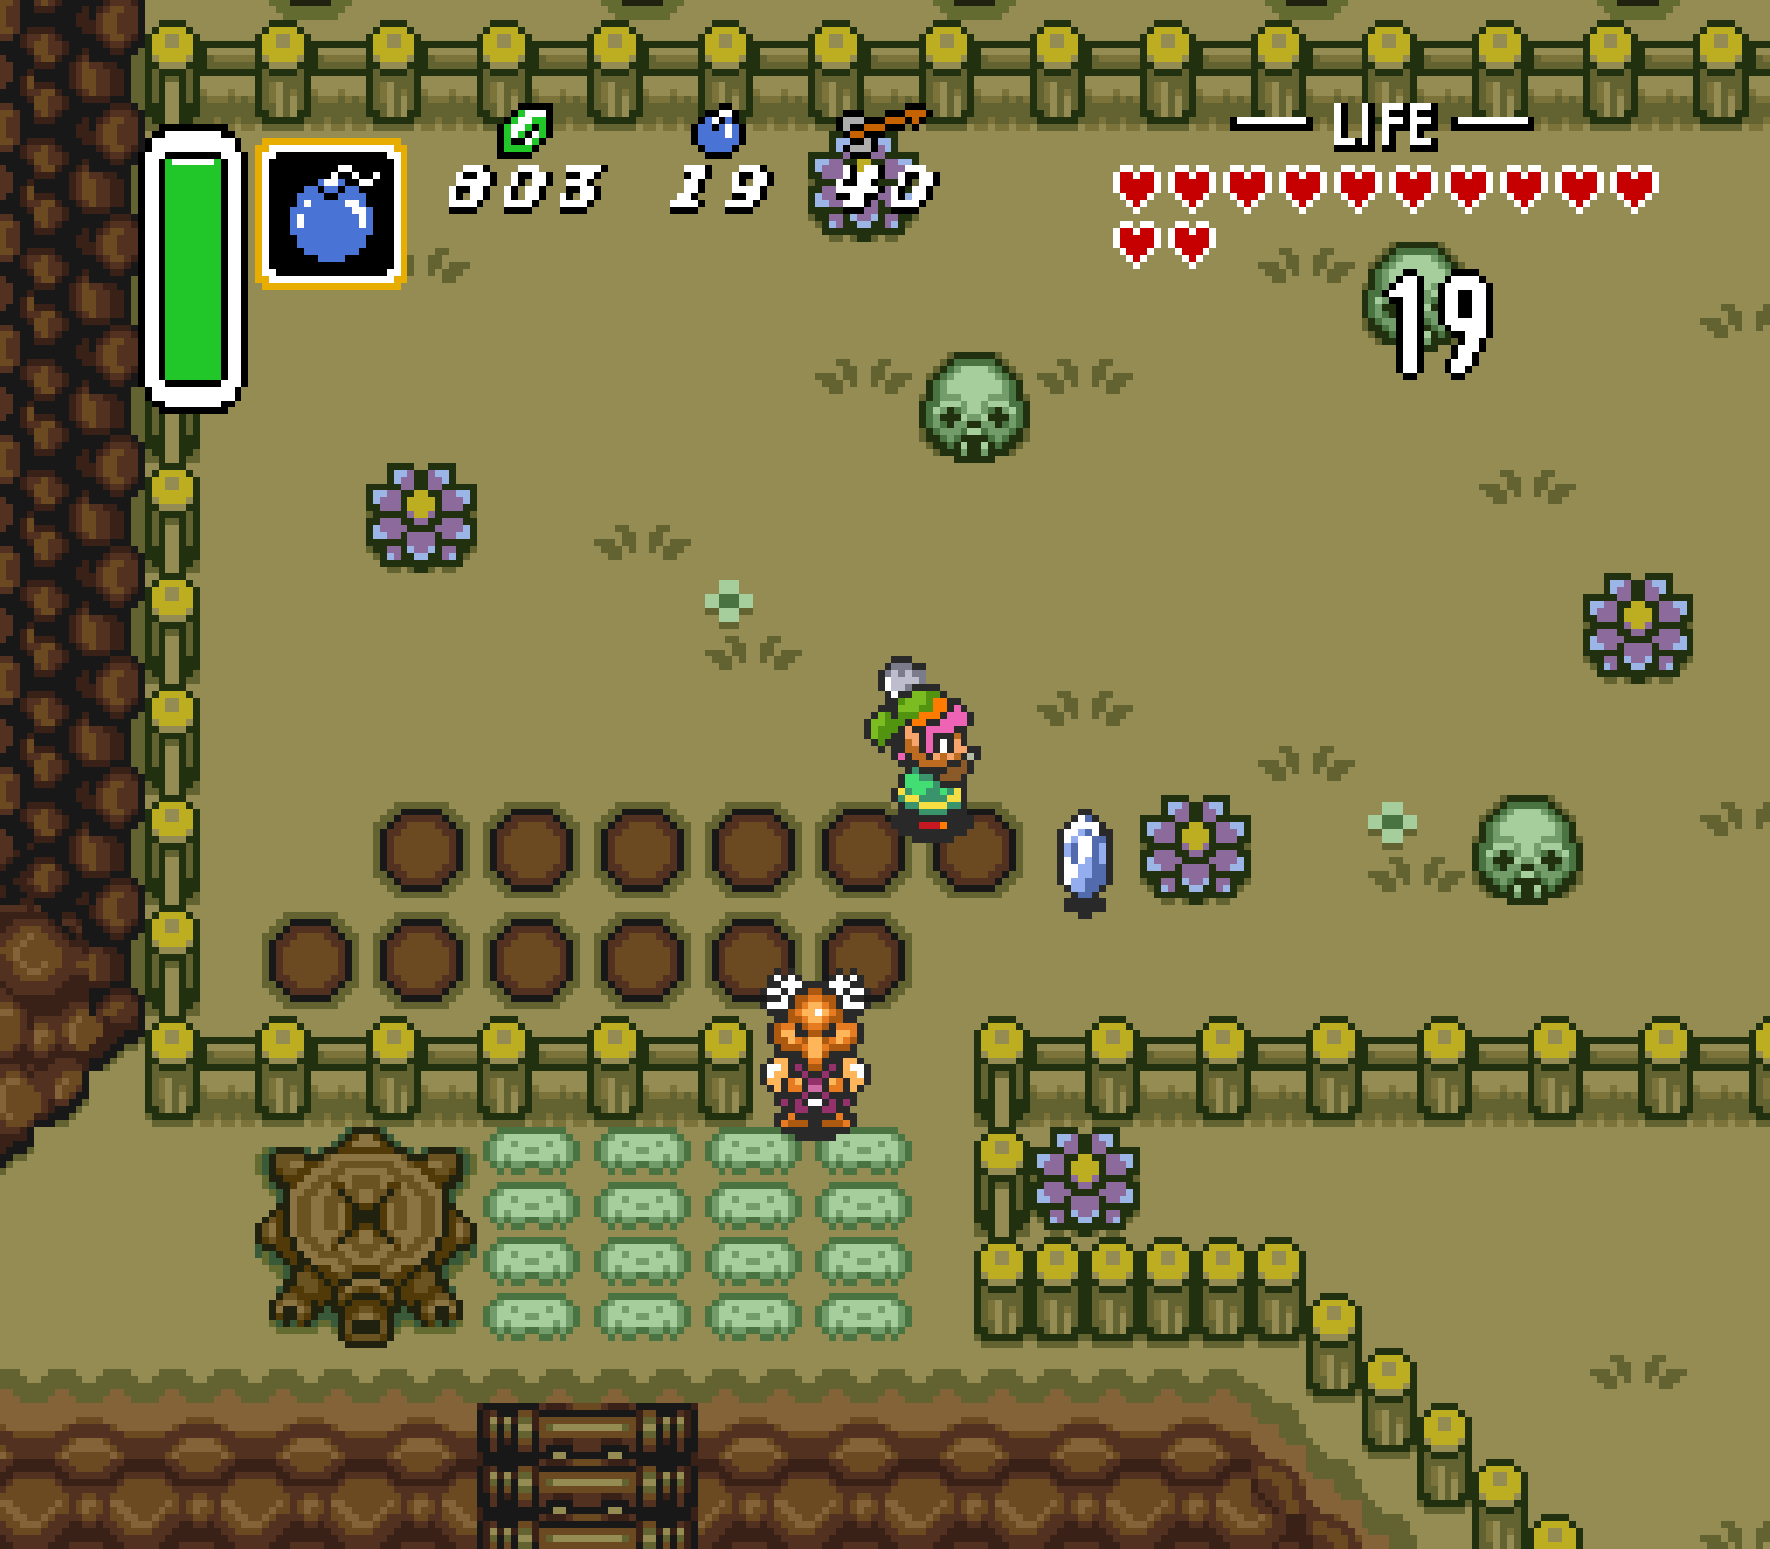
Deep within the Lost Woods, towards the northeast end, you can find a 3×3 square of bushes just above a tree stump that has a hole in it. There’s a thief in the stump that will tell you to get lost, but you don’t have to take that sort of attitude from him. Head to the square of bushes and do some lawn mowing with your sword. In the center is a hole that will take you to the thieves’ den’s storeroom. You’ll find a Piece of Heart there stashed away from pesky adventurers like you.
5
The Swamp Ruins
First Chapter Available: Chapter 2
Items Required: Nothing
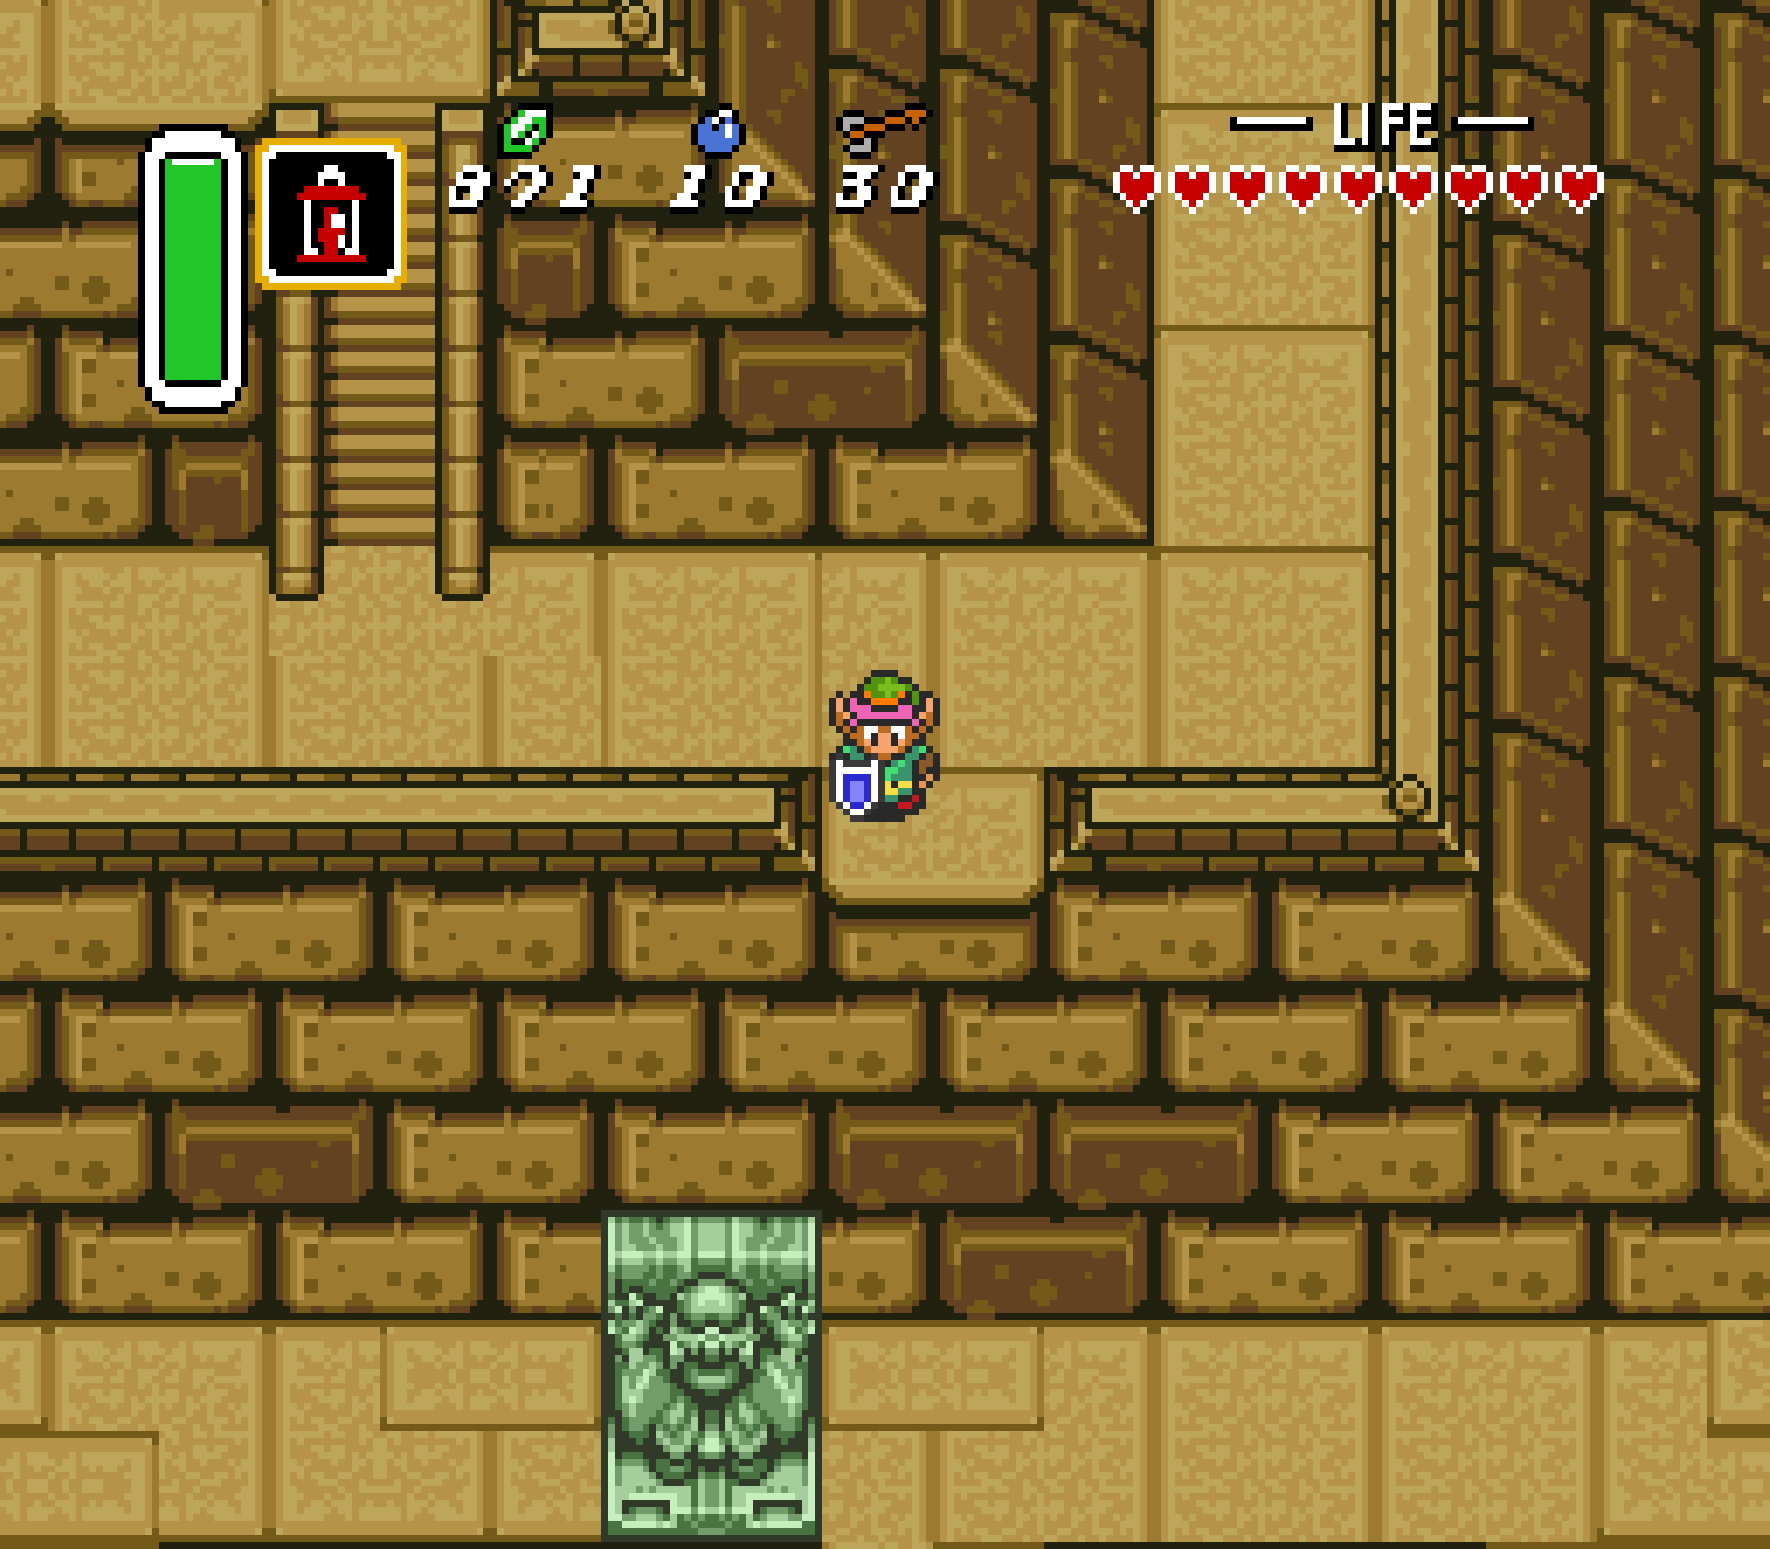
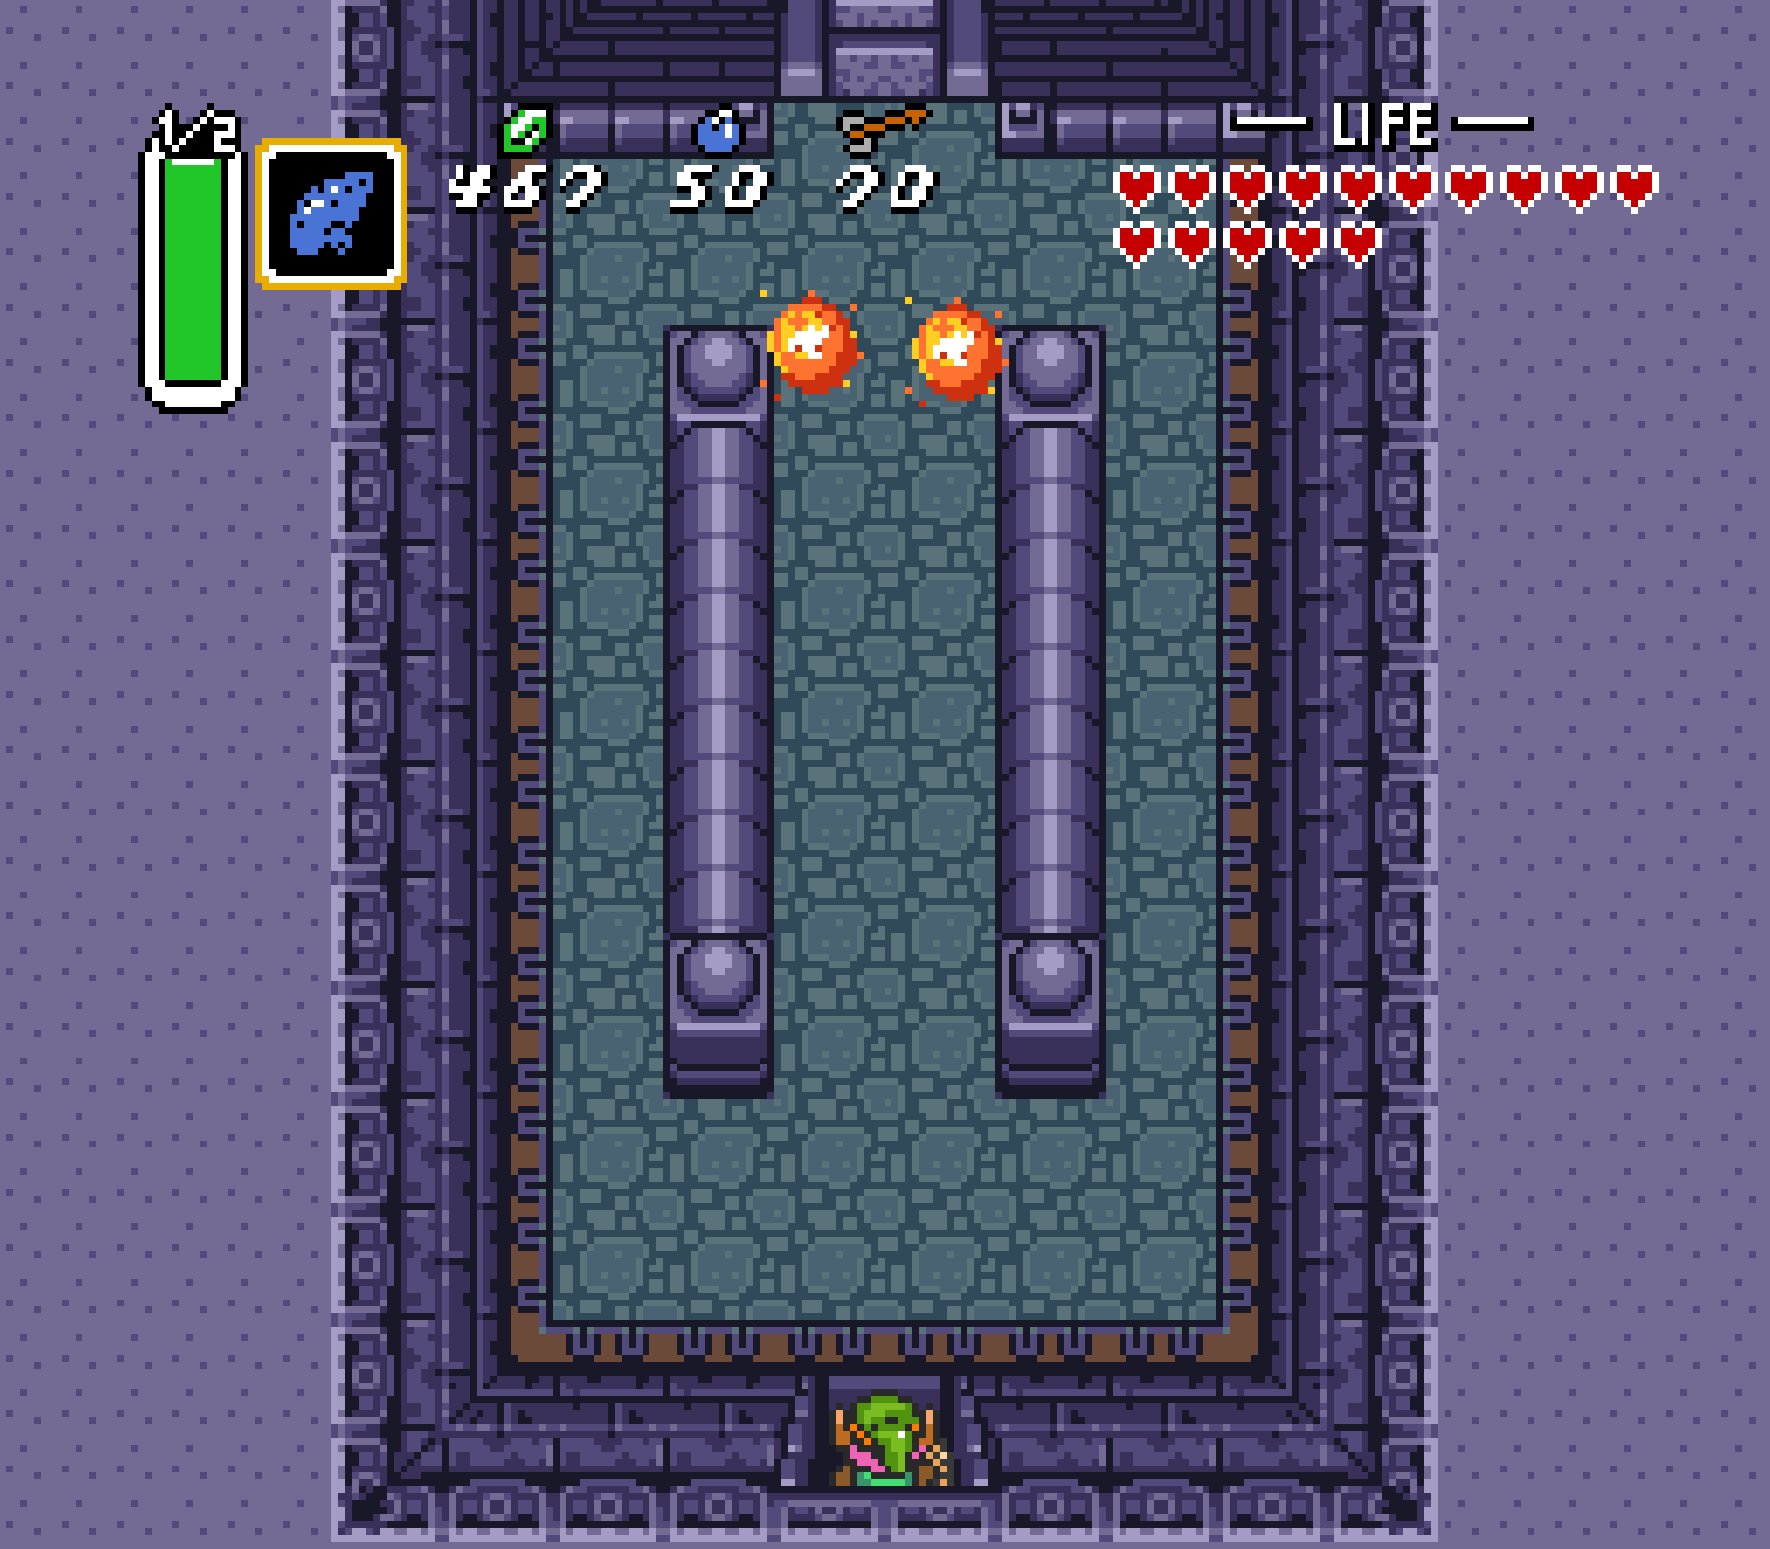
In the Great Swamp in the south of Hyrule, there’s a large green building that surrounds a small pond. There’s a Piece of Heart hidden deep within the deep water of the pond, but you can’t dive down to get it. You need to drain the water. Head inside. You’ll find three blocks blocking the way to the door beyond. Push the center block forward and either of the side blocks to the side; this will block the treasure chest, but you can always reset the puzzle later. Once inside, give a tug on the right Pull Lever to open the floodgates, draining water on the outside to the inside. Once you leave, you’ll see the revealed Piece of Heart.

-
- You’ll have to drain the water from outside to find this Piece of Heart.
6
Aginah’s cave
First Chapter Available: Chapter 2
Items Required: Bombs
Aginah is one of the Seven Wise Men that you can actually find in the game. He’s hidden himself away from all society deep within the Desert of Mystery. Head to the northeast corner of the desert. You’ll see an inordinate number of cacti as you approach the entrance to his cave. Head in, up the stairs, and into the room to the right. Once you find Aginah, place a bomb against the dark rocks to the south. Inside will be a Piece of Heart.
-
- Aginah’s cave is in the furthest corner of the Desert of Mystery.
-
- He’s keeping this Piece of Heart tucked away in wait for the Hero.
7
The grove by Sanctuary
 First Chapter Available: Chapter 3
Items Required: Pegasus Boots
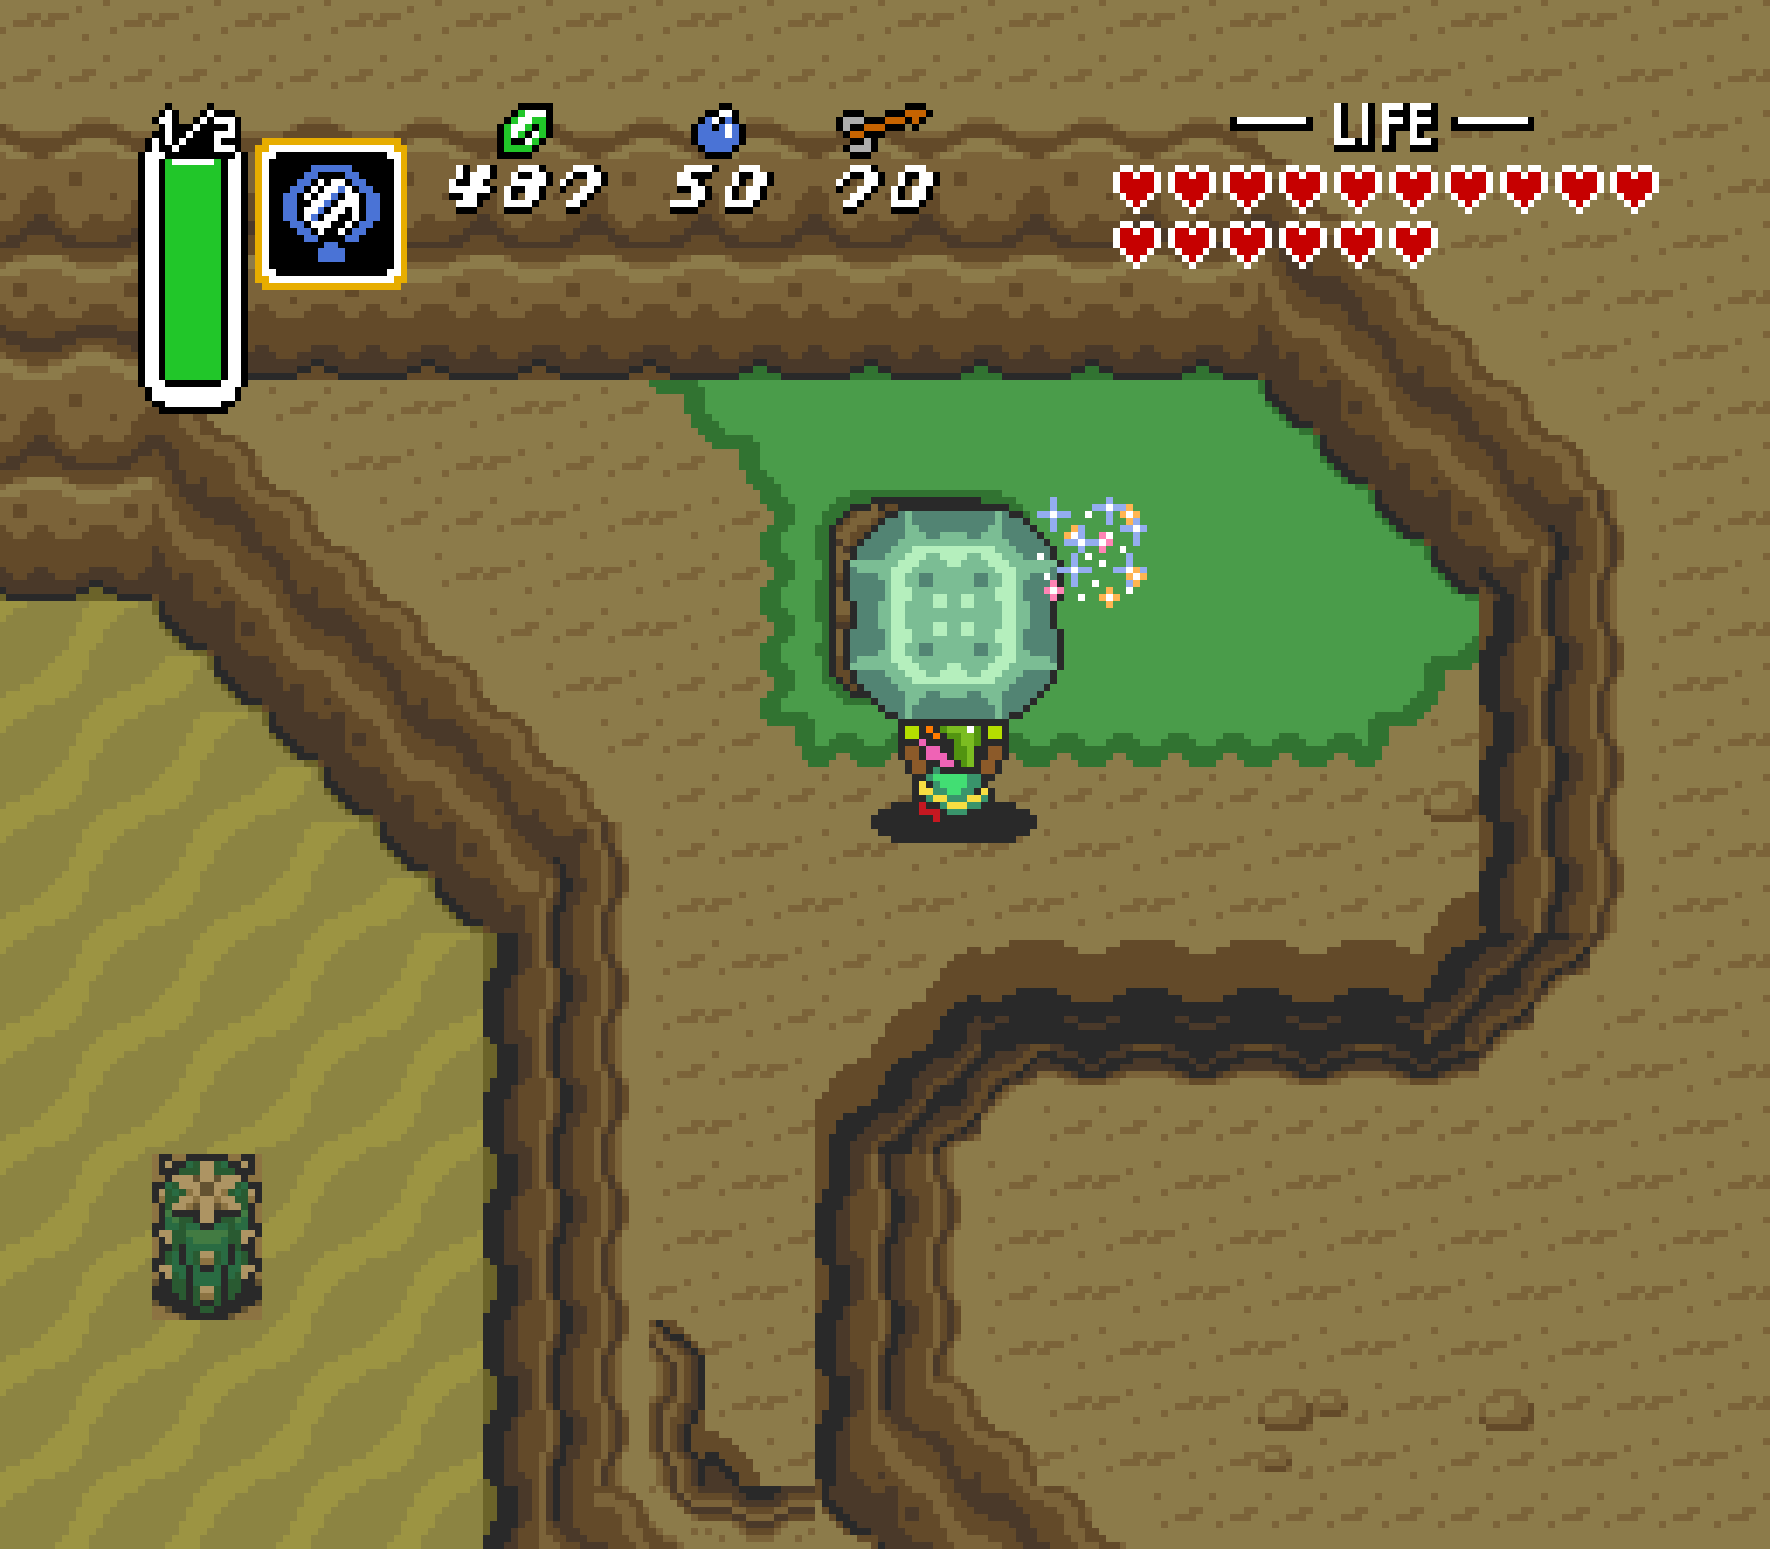
Once you have the Pegasus Boots, head back to northern Hyrule to where Sanctuary is. Continue west and trace the cliffside until you can find a way up to the top of the hill just west of Sanctuary. You’ll find a few stumps, a lone tree, and a pile of bushes upon the ground. Even though you can’t see it, those bushes are obscuring a big secret. Use the Pegasus Boots to dash into the bushes, and they’ll break apart in glorious fashion, revealing a staircase leading to a cave underground. Therein, you’ll find a treasure chest containing a Piece of Heart.
8
Desert Palace interstitial
First Chapter Available: Chapter 3
Items Required: Book of Mudora
You can get a Piece of Heart halfway into the Desert Palace while trying to get the Pendant of Power. You’ll naturally leave this exit once you have the Power Glove in order to reach the upper floors to defeat the Lanmolas, but you don’t technically need the Power Gloves to reach this Piece of Heart. Just exit out of the left exit from Desert Palace’s B1. Head south along the hillside and you’ll eventually find a Piece of Heart guarded by a Vulture. Claim your Piece of Heart, and then you can finish up the dungeon.
-
- Once you leave the basement of the Desert Palace, take a stroll southward.
-

- At least the Vulture standing guard by the Piece of Heart isn’t that dangerous.
9
Death Mountain cave network
First Chapter Available: Chapter 4
Items Required: Power Glove
Atop Death Mountain, there’s a Piece of Heart you can get right in front of Spectacle Rock. There’s a series of caves that connect through the cave right in the cliff of Spectacle Rock, but you won’t be able to reach the Piece of Heart from that cavern entrance. Instead, leap off the cliff just to the left of the cliff guard right in front of Spectacle Rock’s cave so that you land at the cave entrance at the bottom of the screen. Enter into that cave and head north. You’ll see a staircase leading up, and just as you exit the stairs you’ll find that there’s a clear path to the Piece of Heart.
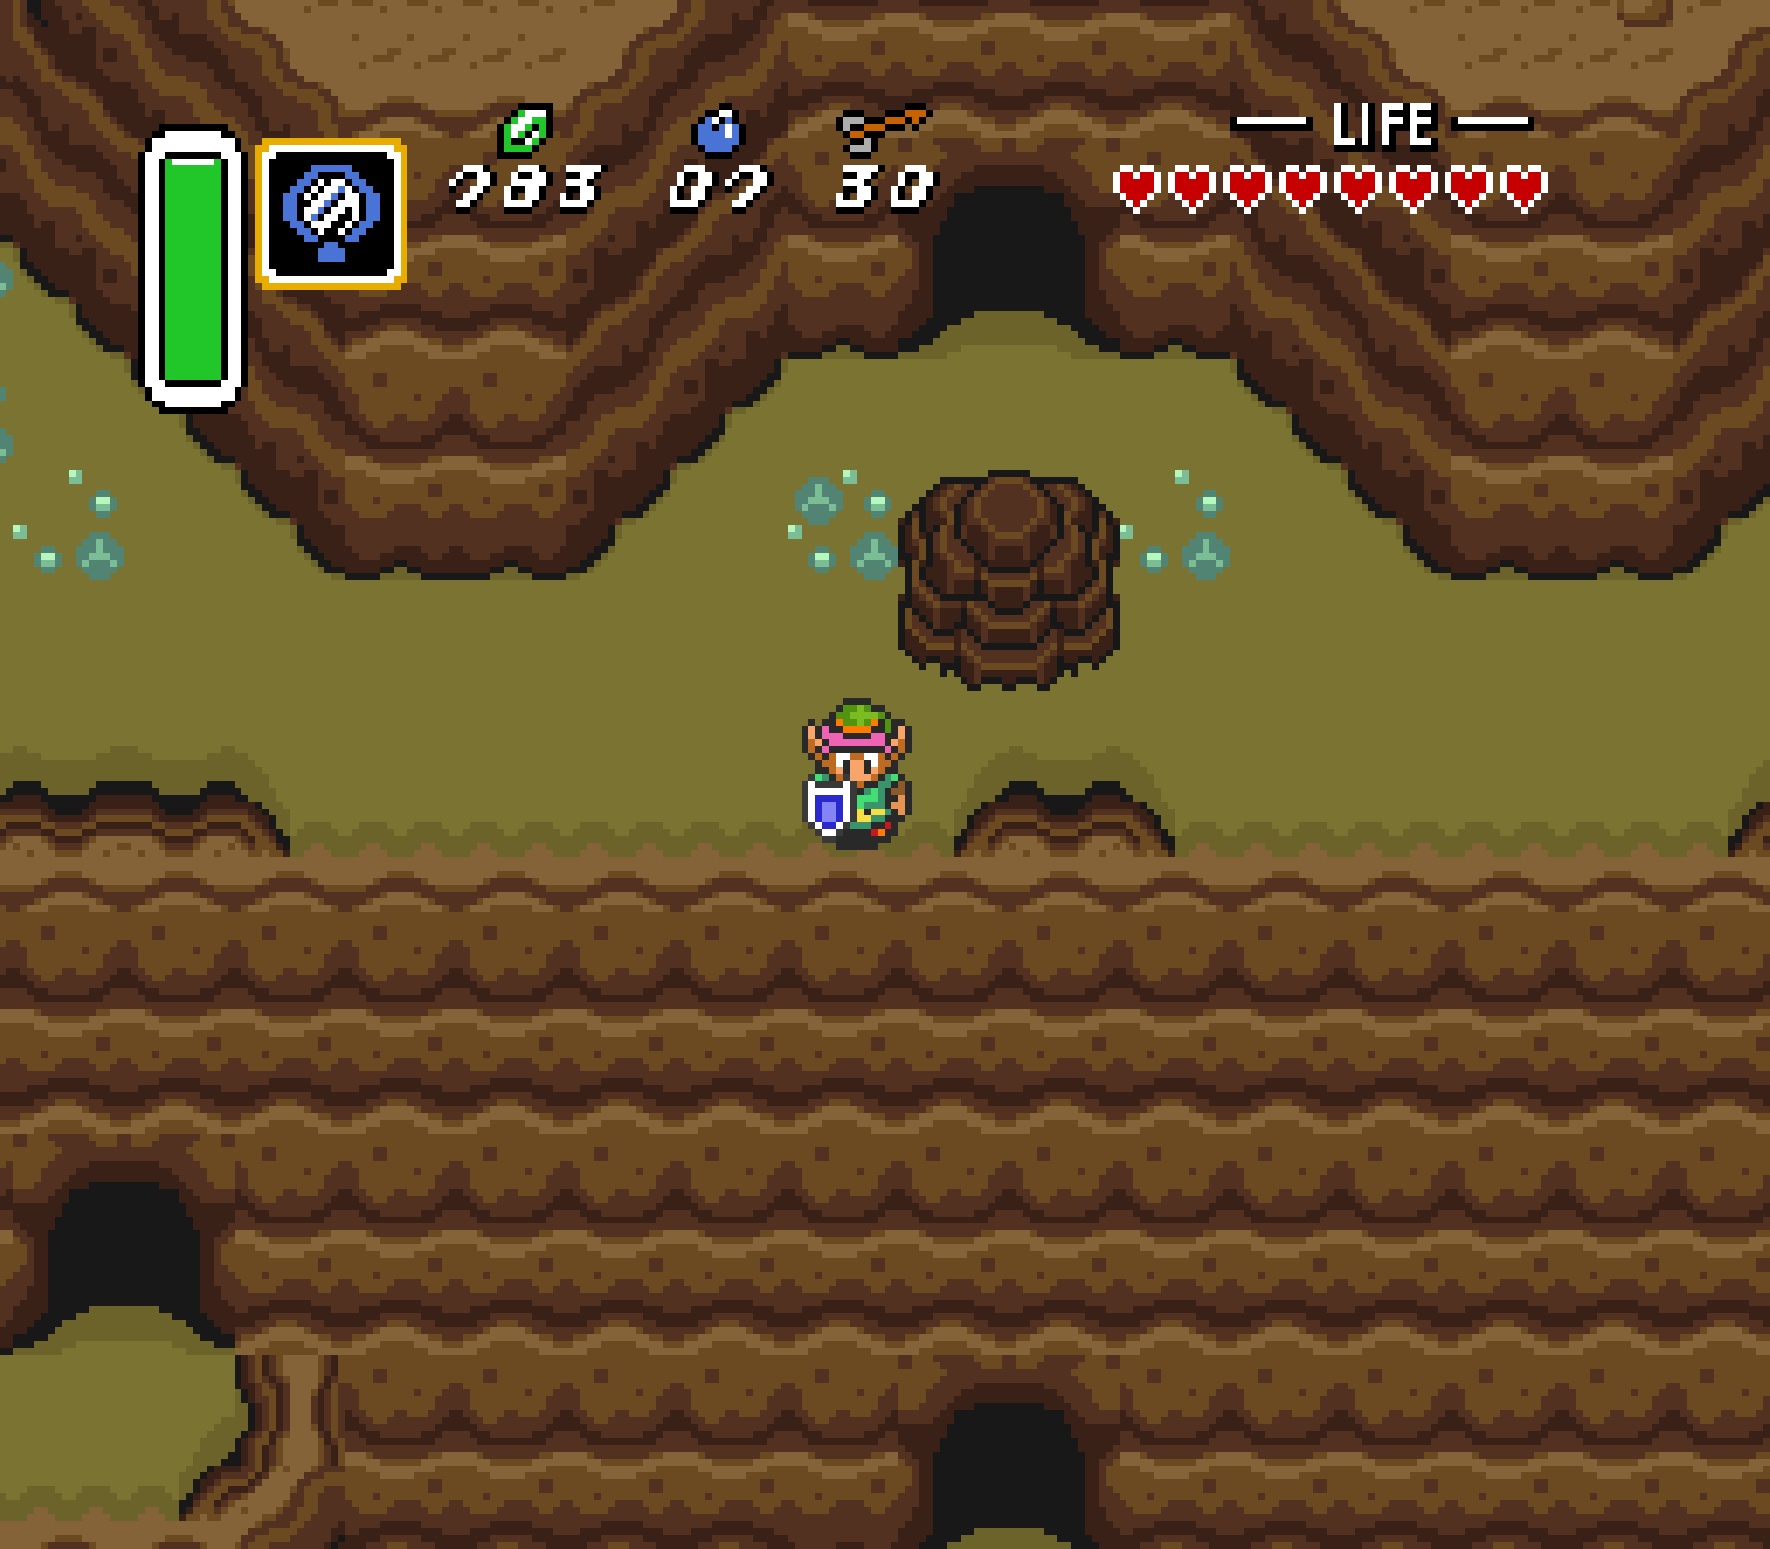

-
- The Death Mountain cave network can feel complicated, but all it takes is going through the correct entrance.
10Atop Spectacle Rock

You absolutely can’t miss this Piece of Heart.
First Chapter Available: Chapter 4
Items Required: Power Glove, Magic Mirror
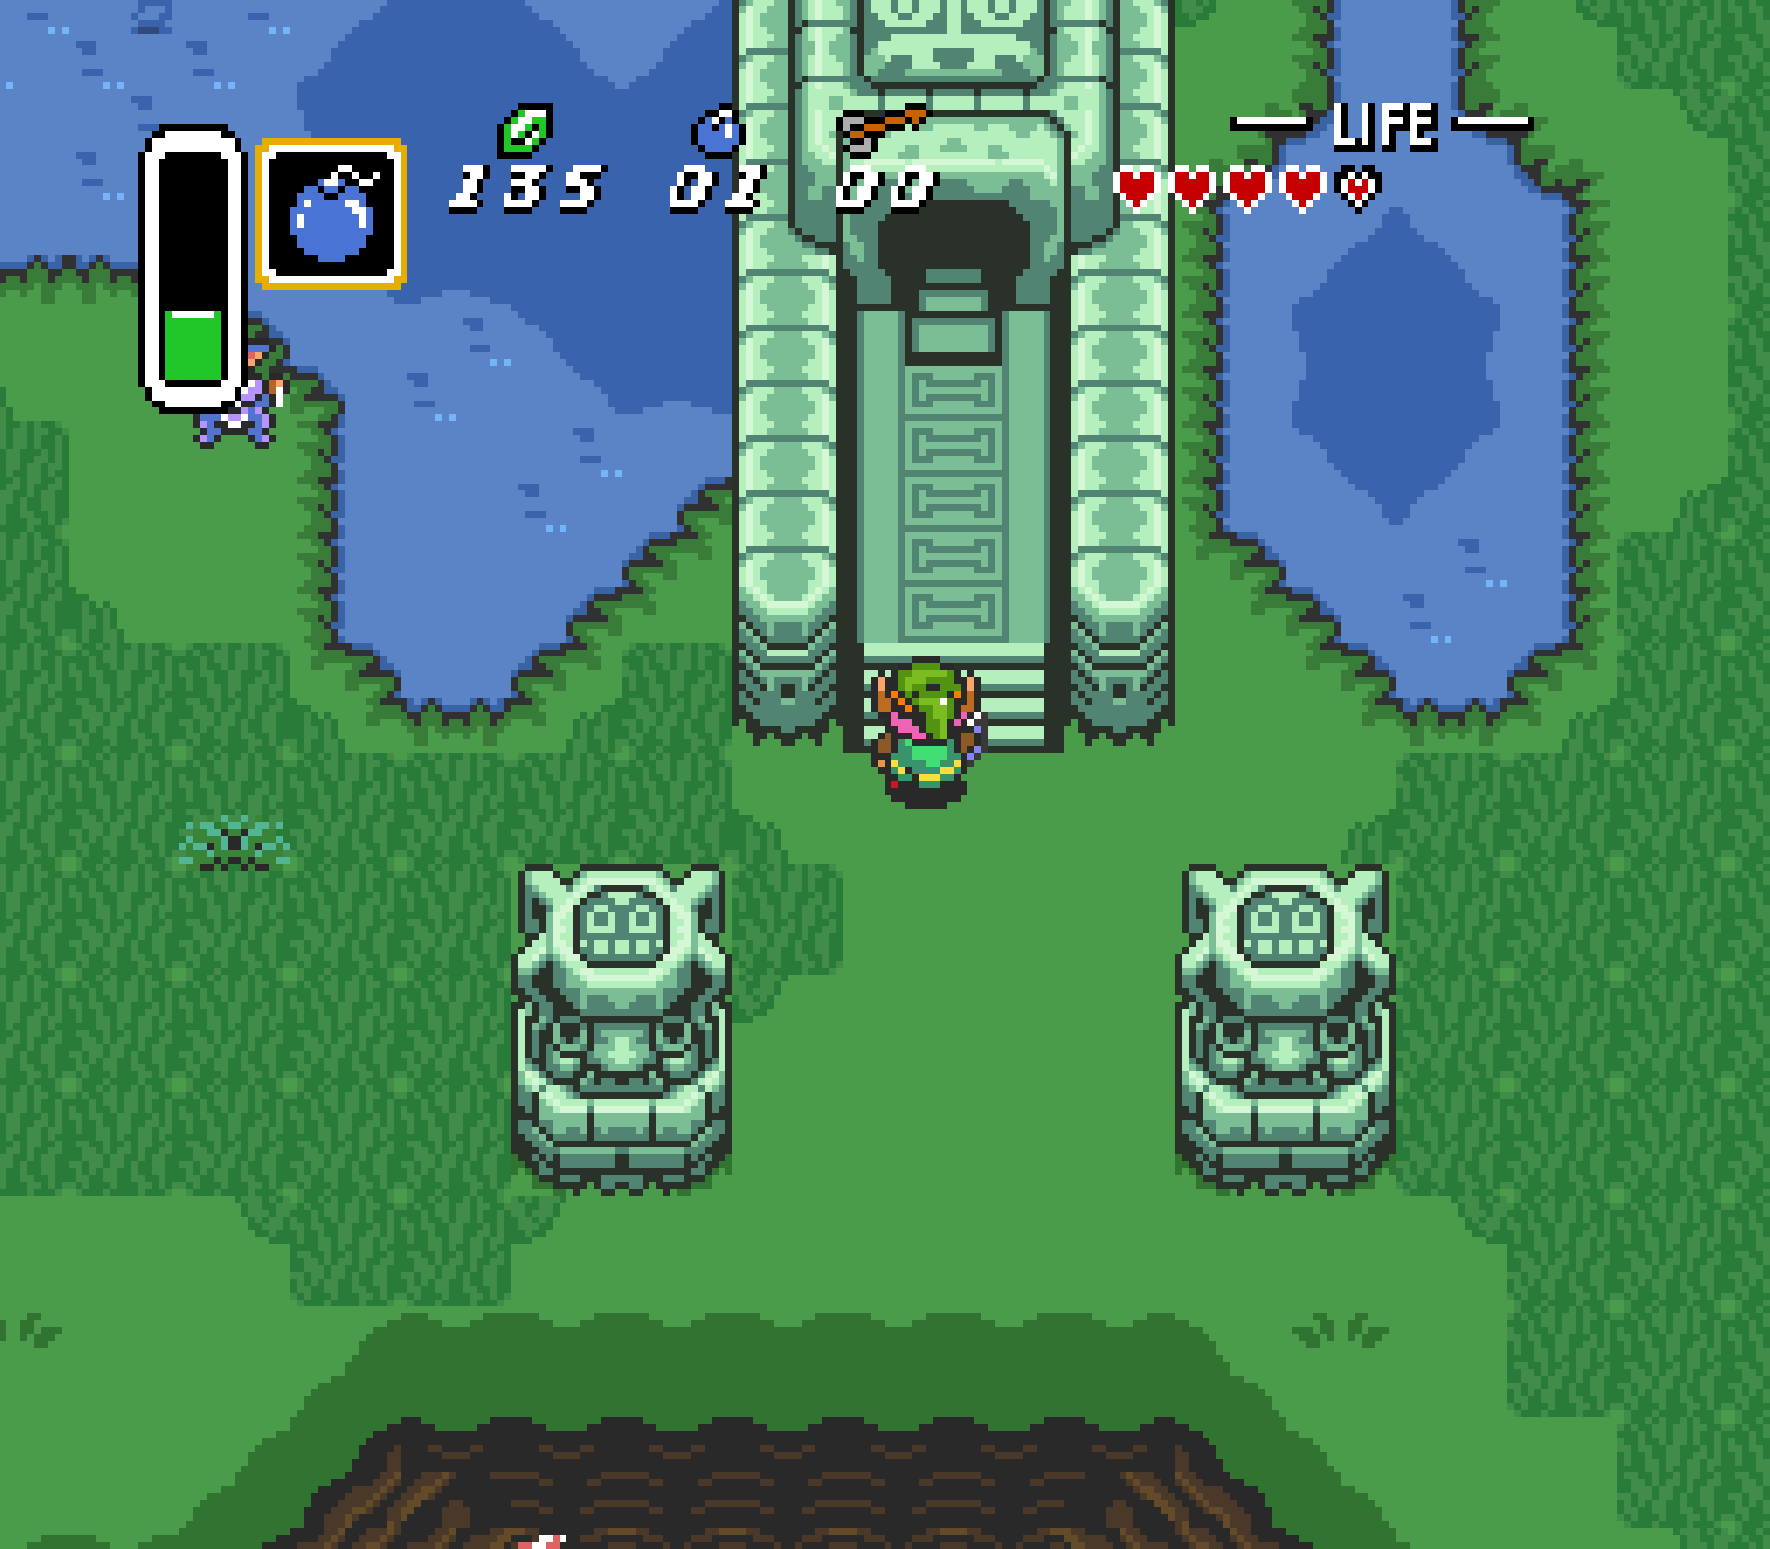
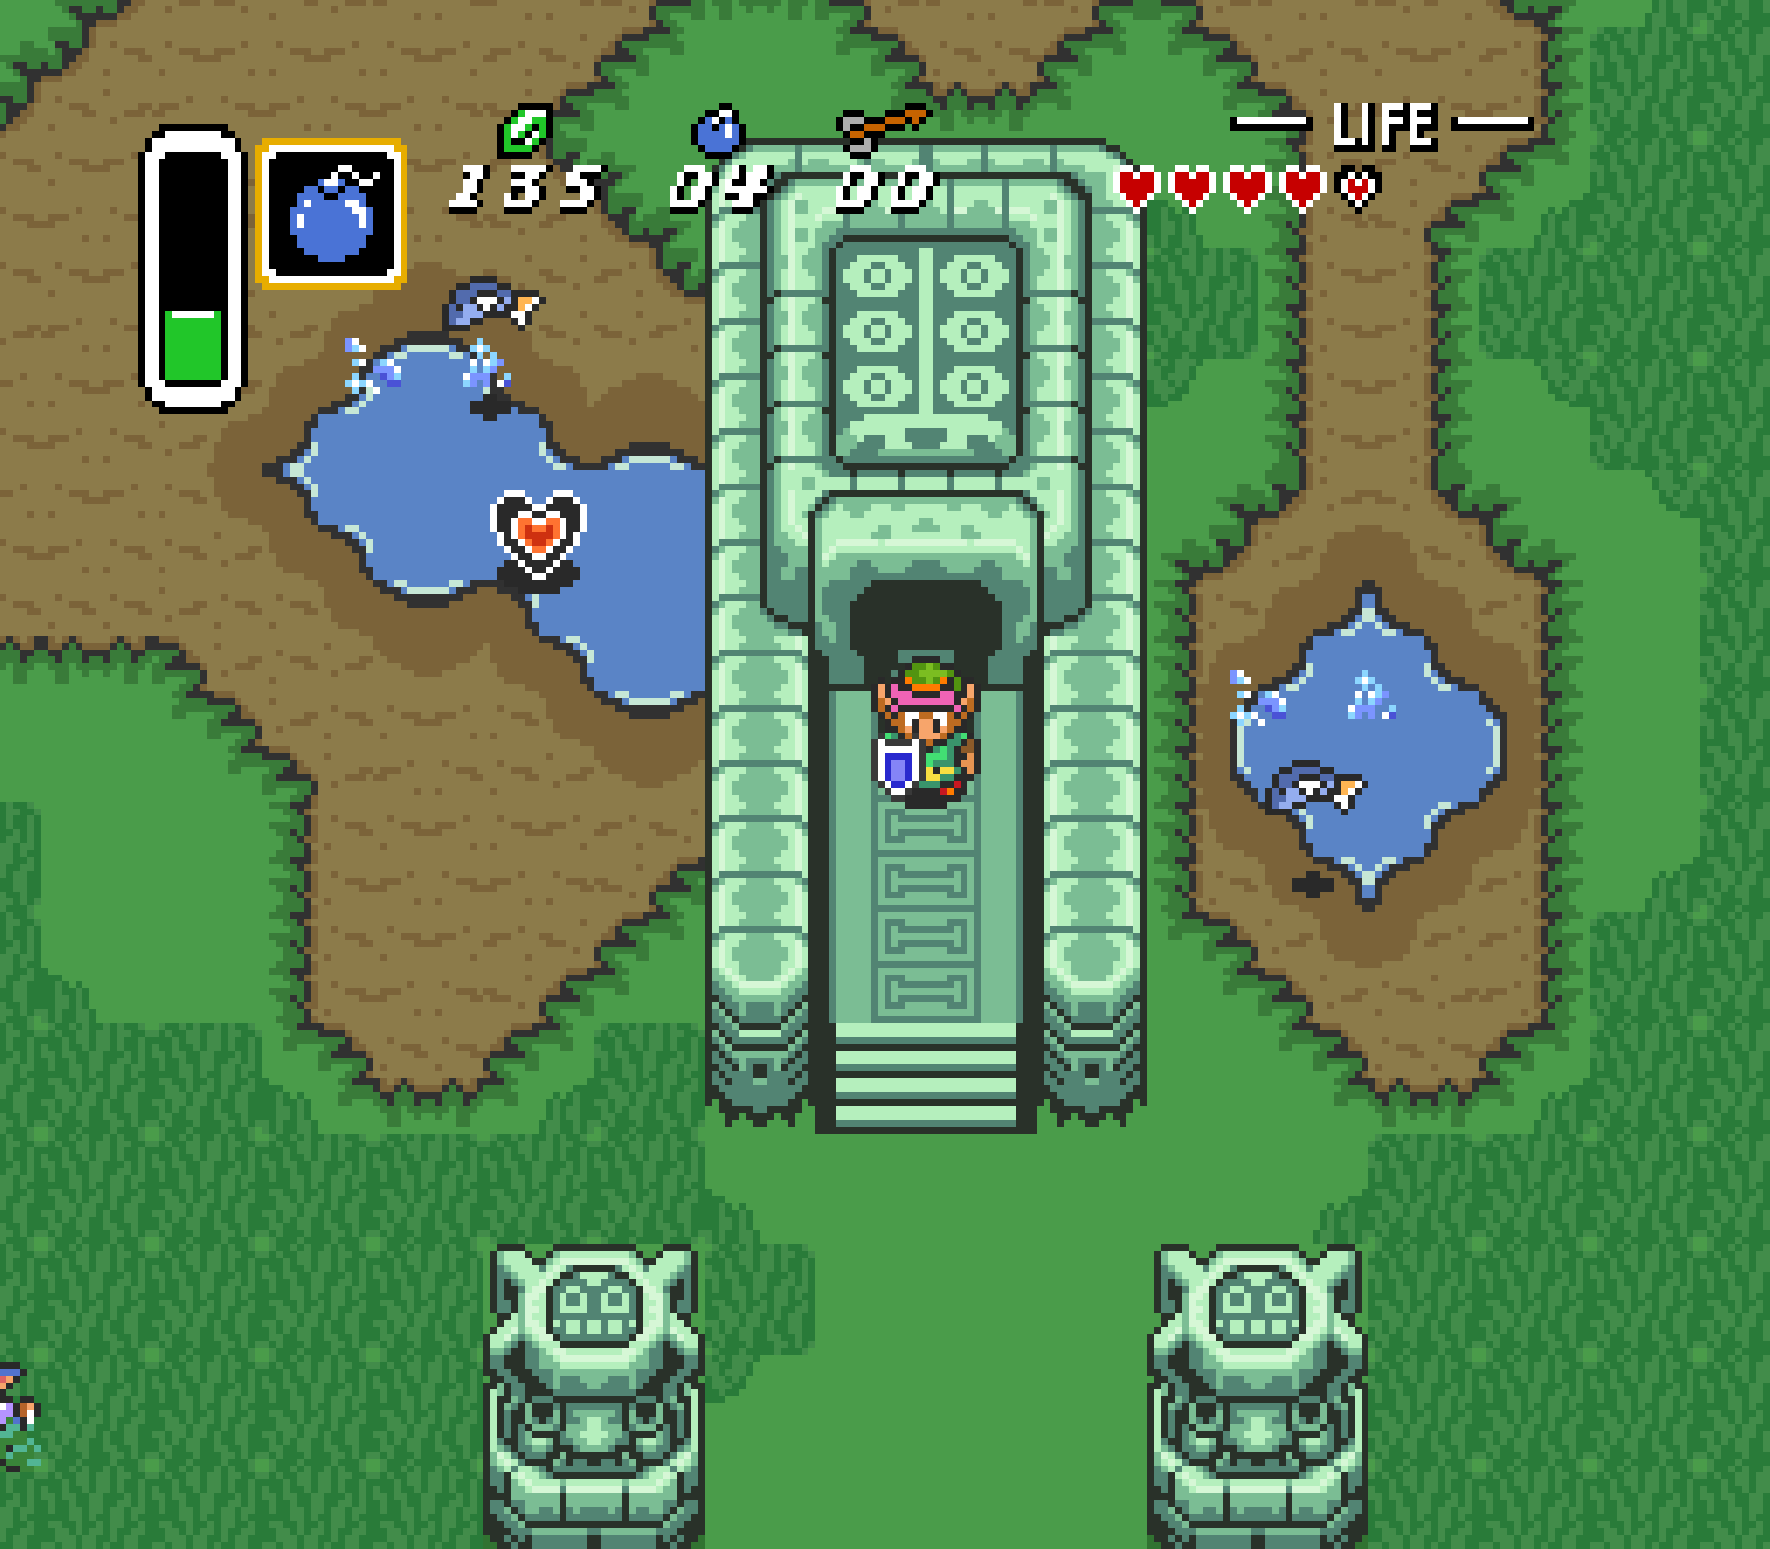
It is absolutely impossible to miss this Piece of Heart. You’ll pretty much have to walk right by it on your way to the Tower of Hera. When you reach Spectacle Rock, head east to the Magical Warp Tile leading to the Dark World. Stand in the light-colored patch of rock that represents Spectacle Rock there and use the Magic Mirror. You’ll end up right next to the Piece of Heart, and you can collect it easily.
11
Pyramid of Power
First Chapter Available: Chapter 6
Items Required: Master Sword
When Agahnim sends you to the Dark World, he’s actually secretly doing you a favor. If you head towards the right hand side of the Pyramid of Power and jump off of this cliff, you’ll find a small corridor that leads around towards the back of the pyramid. If you go far enough, you’ll find this Piece of Heart completely unprotected.

12
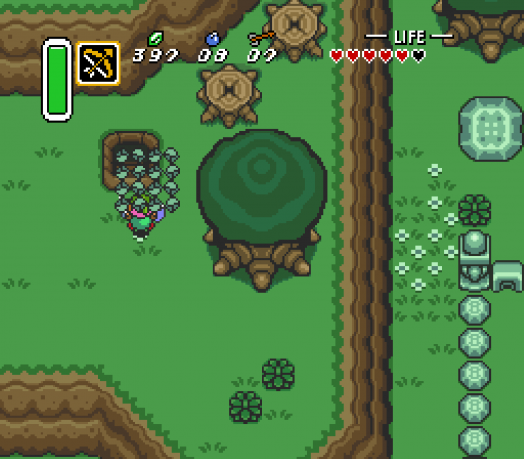
The woodsmen’s tree
First Chapter Available: Chapter 6
Items Required: Master Sword, Pegasus Boots
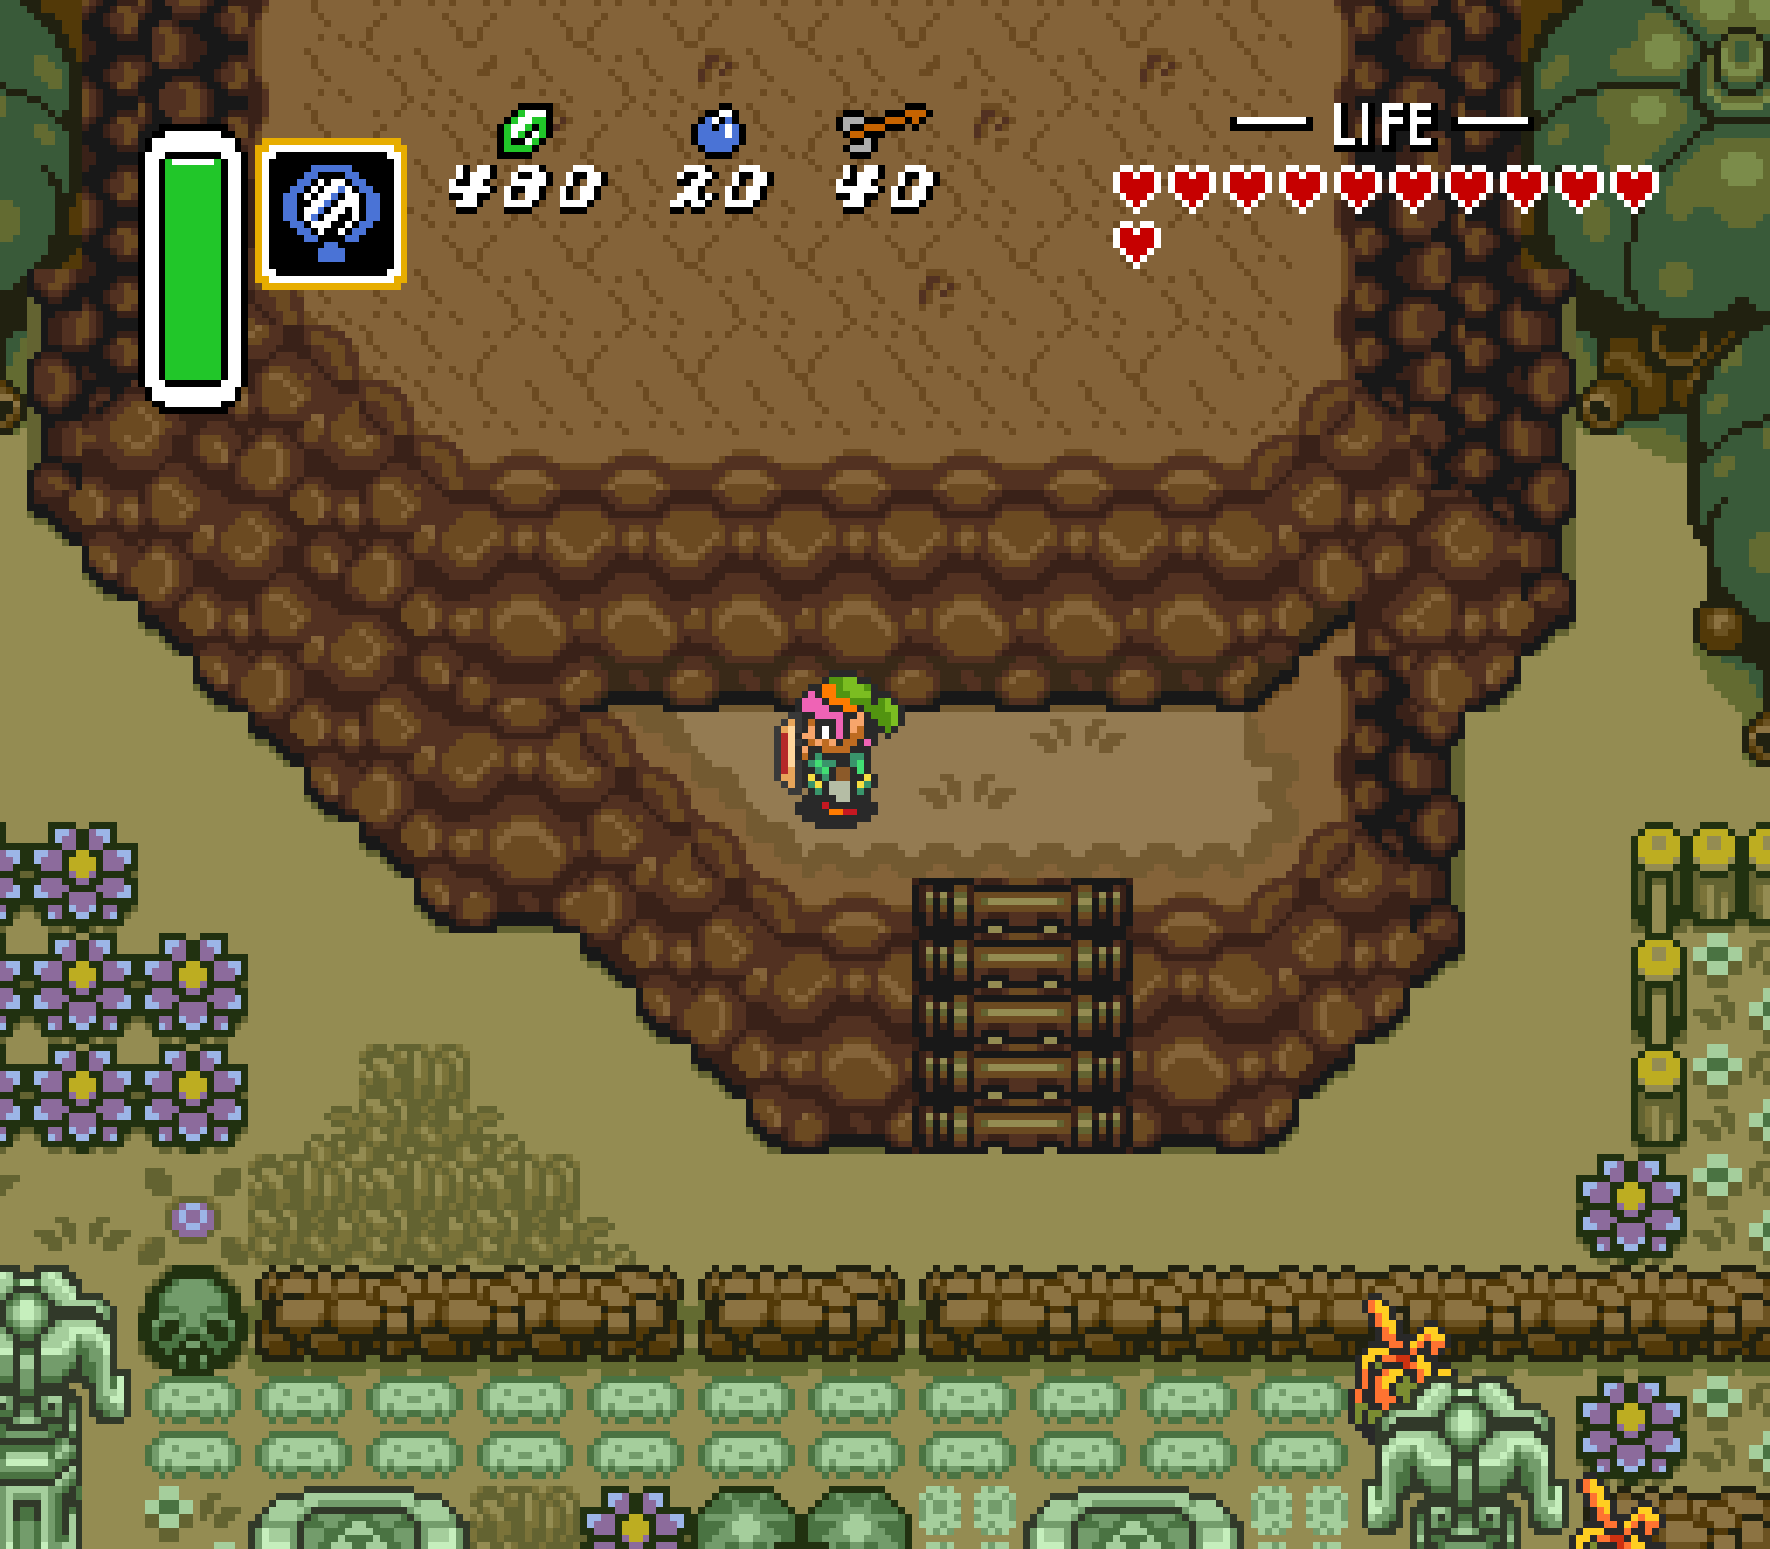
You can spot this tree that the woodsmen are cutting much earlier in the game, but unfortunately they won’t allow you access to the tree; they’ll just keep sawing away at it despite the fact that they seem to think it’s a little odd. After Agahnim sends you into the Dark World, you should come back to the Lost Woods outskirts and revisit this tree. The woodsmen will have gone back inside, and this tree will have taken on a slightly more dead coloration. You can see the notch in the tree from their saw, and so you might guess that it is a little unstable. Use the Pegasus Boots to ram the tree. It will completely shatter, leaves flying everywhere. Dive into the hollow of the tree and then head through the door to the east. You’ll find a Piece of Heart high on a ledge.

-
- You can find this tree before you defeat Agahnim, but the woodcutters won’t give you access to it.
13
The Zora Falls forest
First Chapter Available: Chapter 7 (Chapter 4 via sequence break)
Items Required: Zora’s Flippers
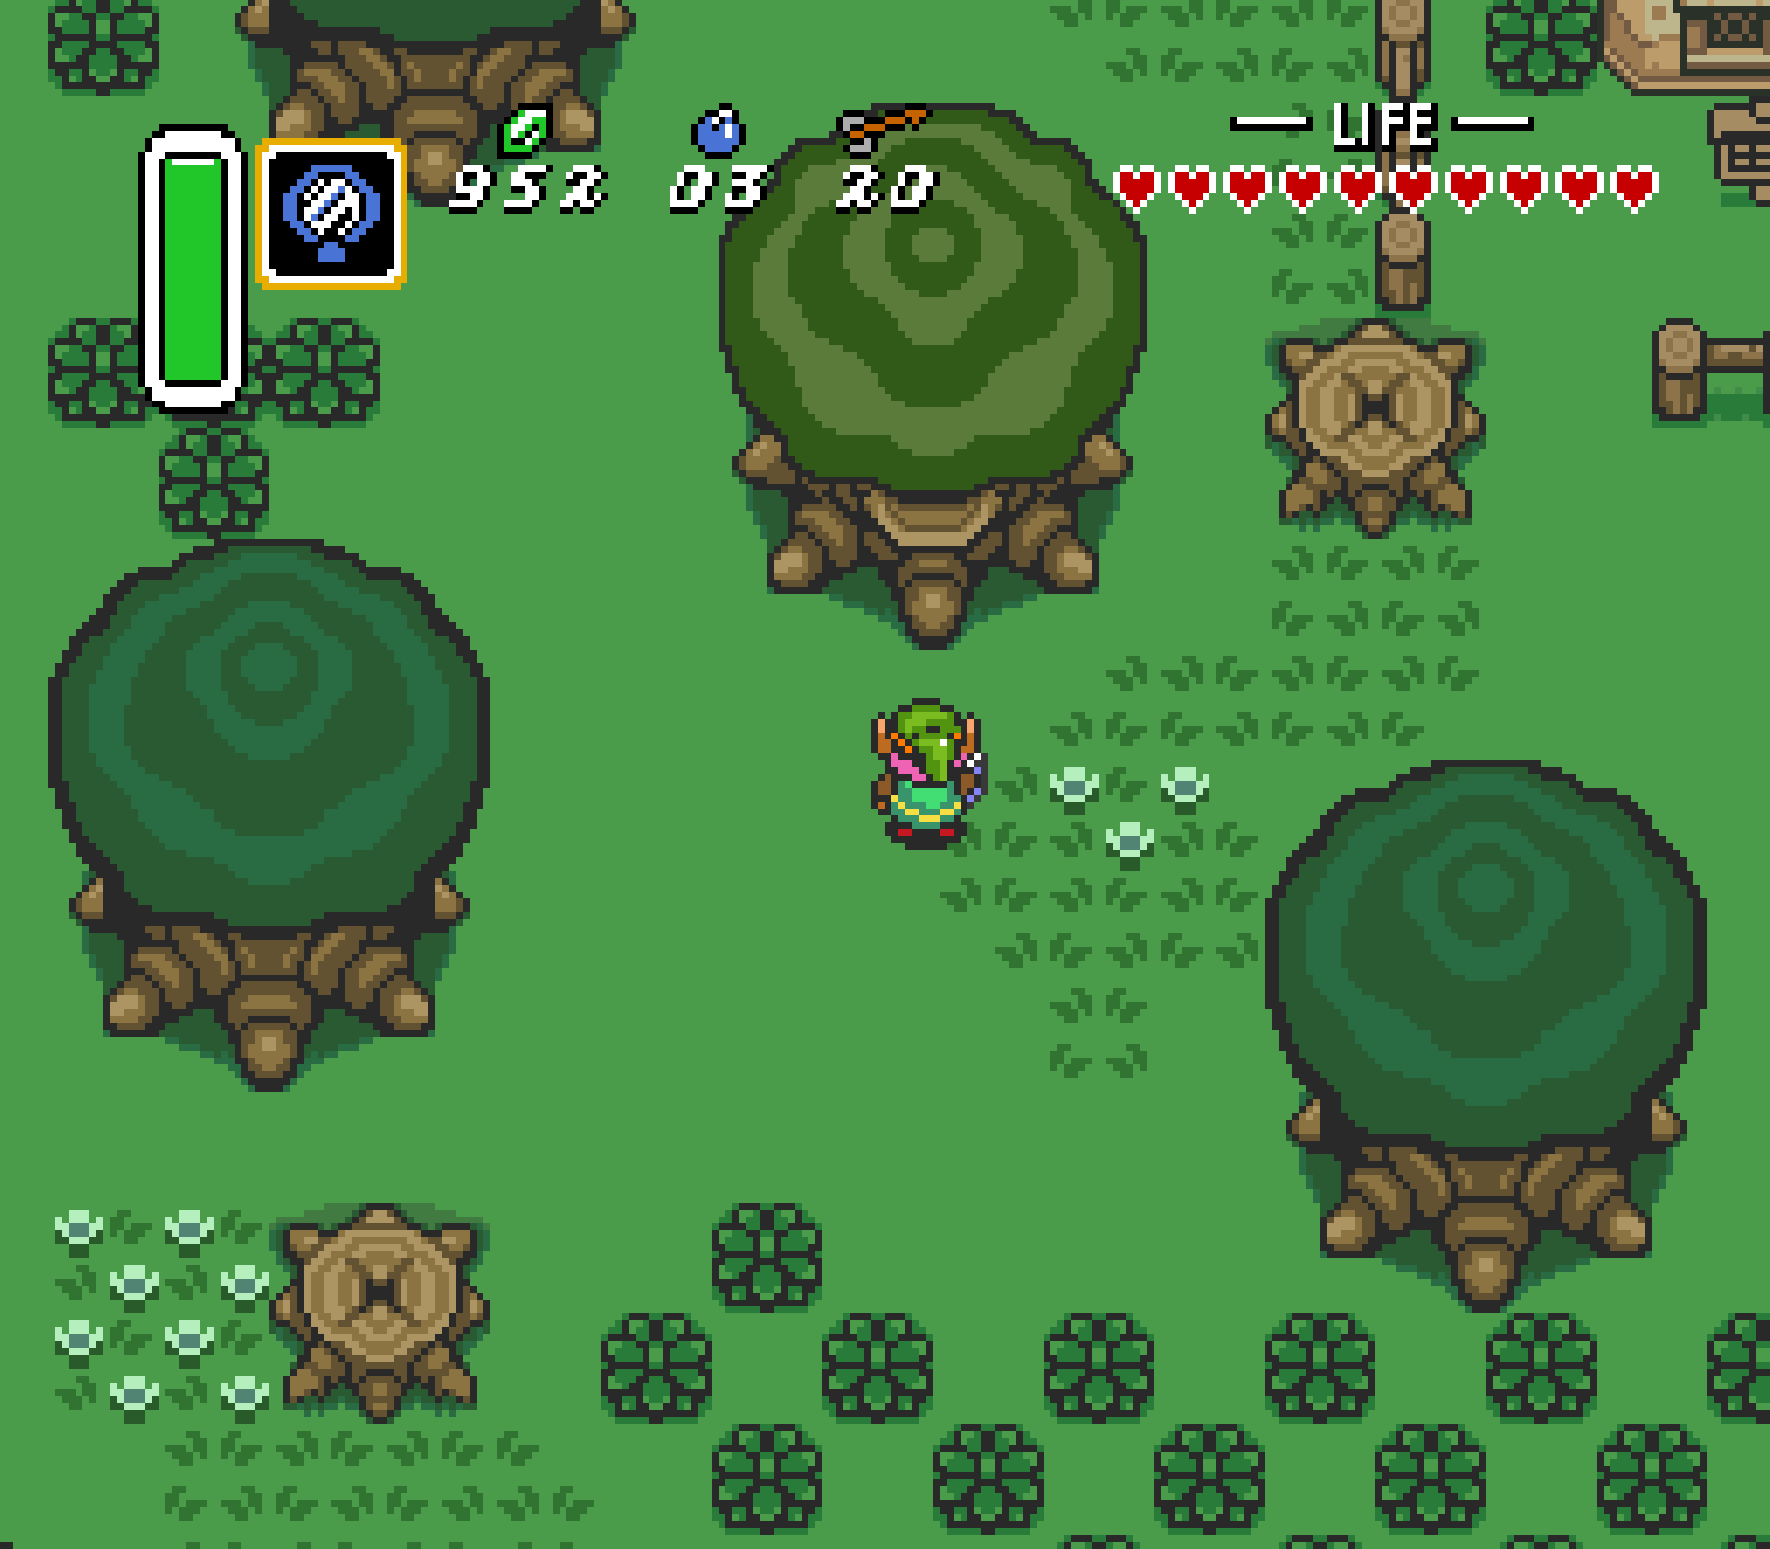
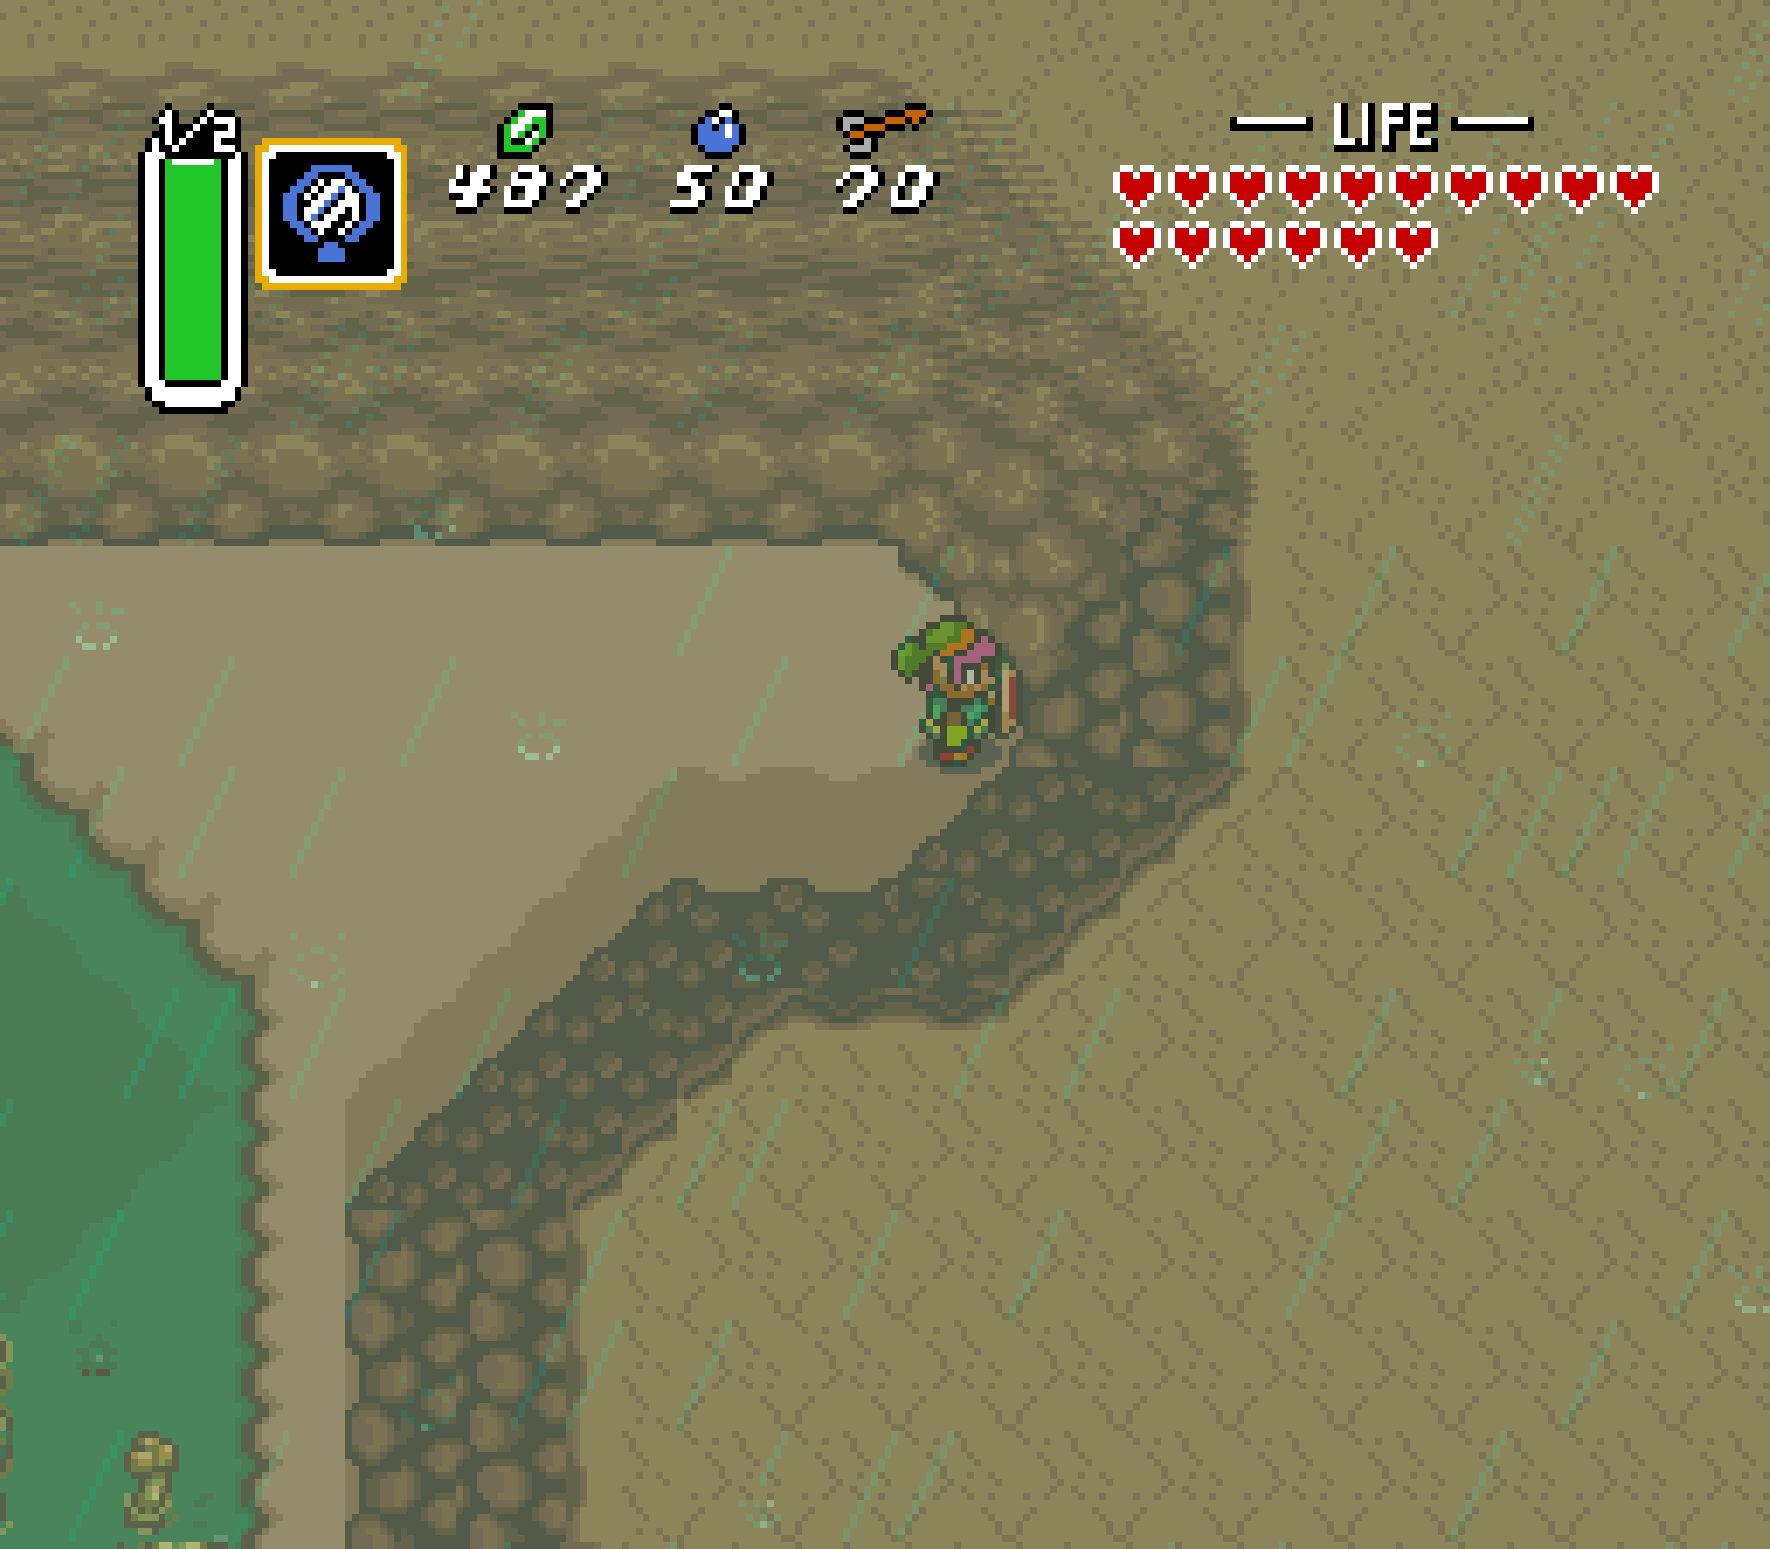
After you purchase the Zora’s Flippers from the Zora King for 500 Rupees, you’ll have the capacity to swim the open seas and go to where your heart contents. The first place your heart should content is to head straight south. Swim out of the shallows and over the waterfall. You’ll see an island in the middle of their domain to the left, and eventually you can find a way to come ashore amongst all the green trees. There at the end of a nature trail is a Piece of Heart.
-
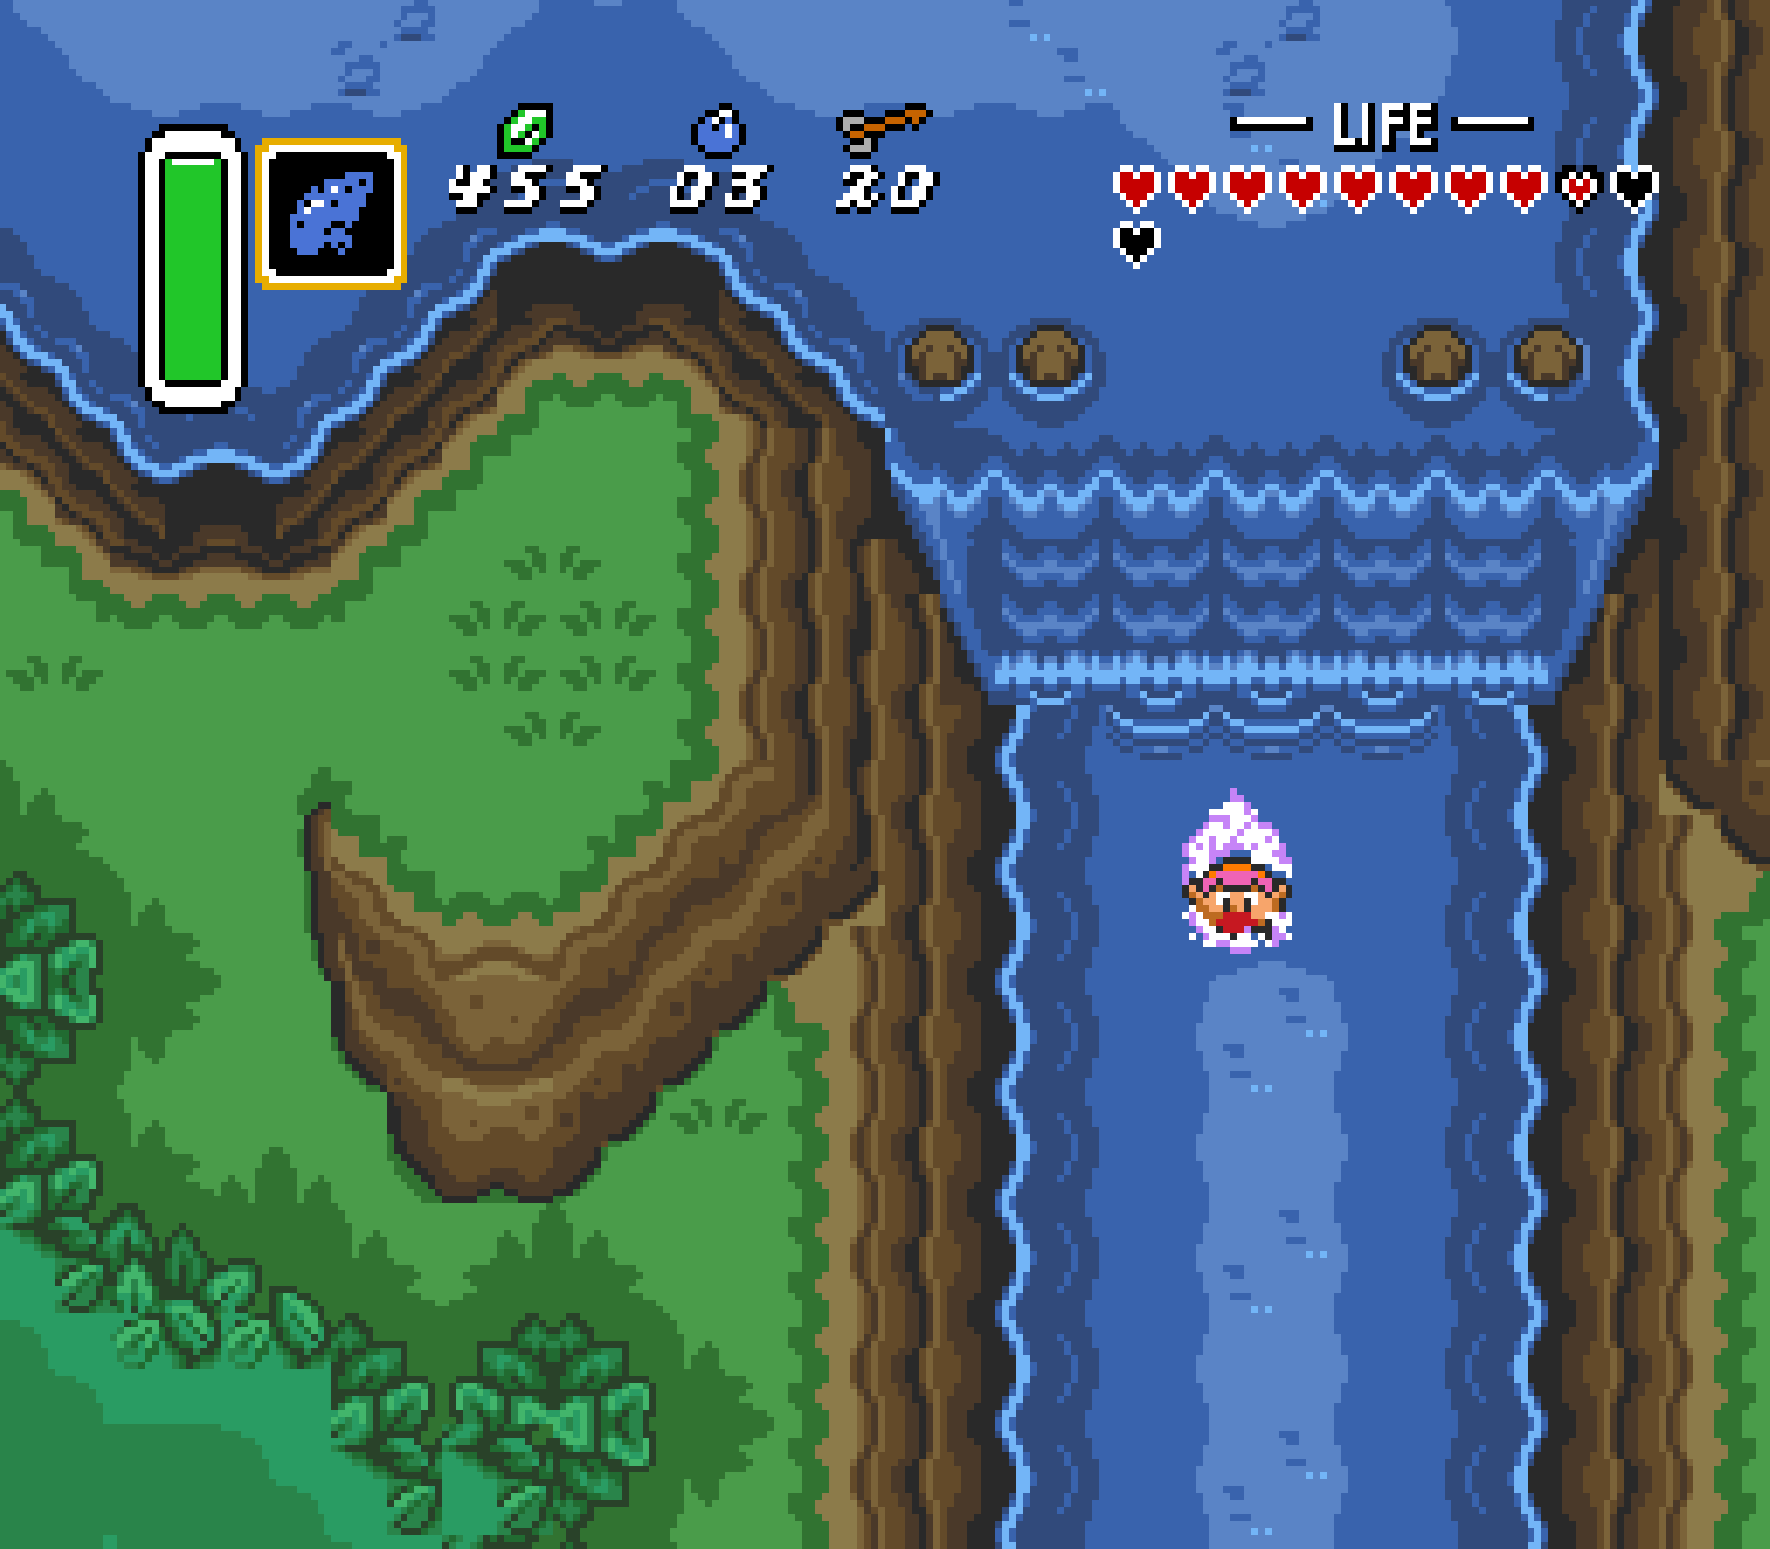
- Head south from King Zora after having purchased his Flippers.
-

- Journey through the dense green foliage and you’ll come across a Piece of Heart.
14
The iced lake
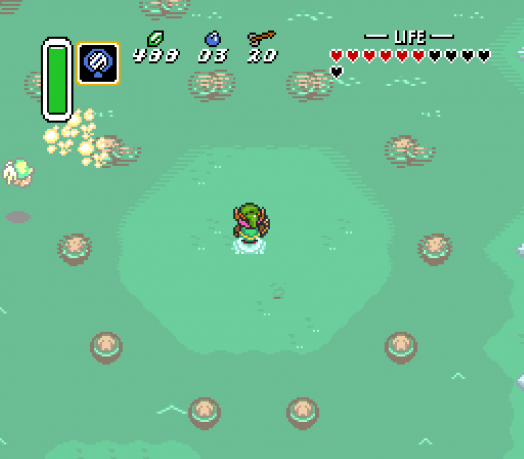 First Chapter Available: Chapter 7
Items Required: Zora’s Flippers, Magic Mirror, Magic Hammer
Once you’ve obtained the Zora’s Flippers from King Zora, you should take them into the Dark World for a little bit of exploring. Head over to the Ice Lake — the Dark World version of Lake Hylia — and on the western end you will find this curious ring of stones with a patch of shallows in the center. Stand in the center and use the Magic Mirror; you’ll end up in the Light World standing on an island next to a Buzz Blob and a Piece of Heart.
15
The treasure field
First Chapter Available: Chapter 7
Items Required: Magic Hammer
In the southern outskirts of the Village of Outcasts, to the west of the Shooting Gallery game, you will find this large field just ripe for the digging. Apparently some enterprising entrepreneur has decided to stake his ground and lay claim to it. But apparently there’s a lot of treasure in this field, so maybe passers-by would be keen on paying money for the privilege. It costs 80 Rupees, but it’s easy to make up that amount just by digging; even if you don’t get your 80 back, you’ll get very close. However, a more elusive treasure hidden within the field is a Piece of Heart. It’s position is random; in fact, each dig into the earth is technically random. The Piece of Heart doesn’t have a precise position even within a single game. It’s just as likely to be your first dig as it is your last. Just find a comfortable route that allows you to constantly dig new spaces to optimize how many digs you get. You’ll eventually unearth it given enough time.
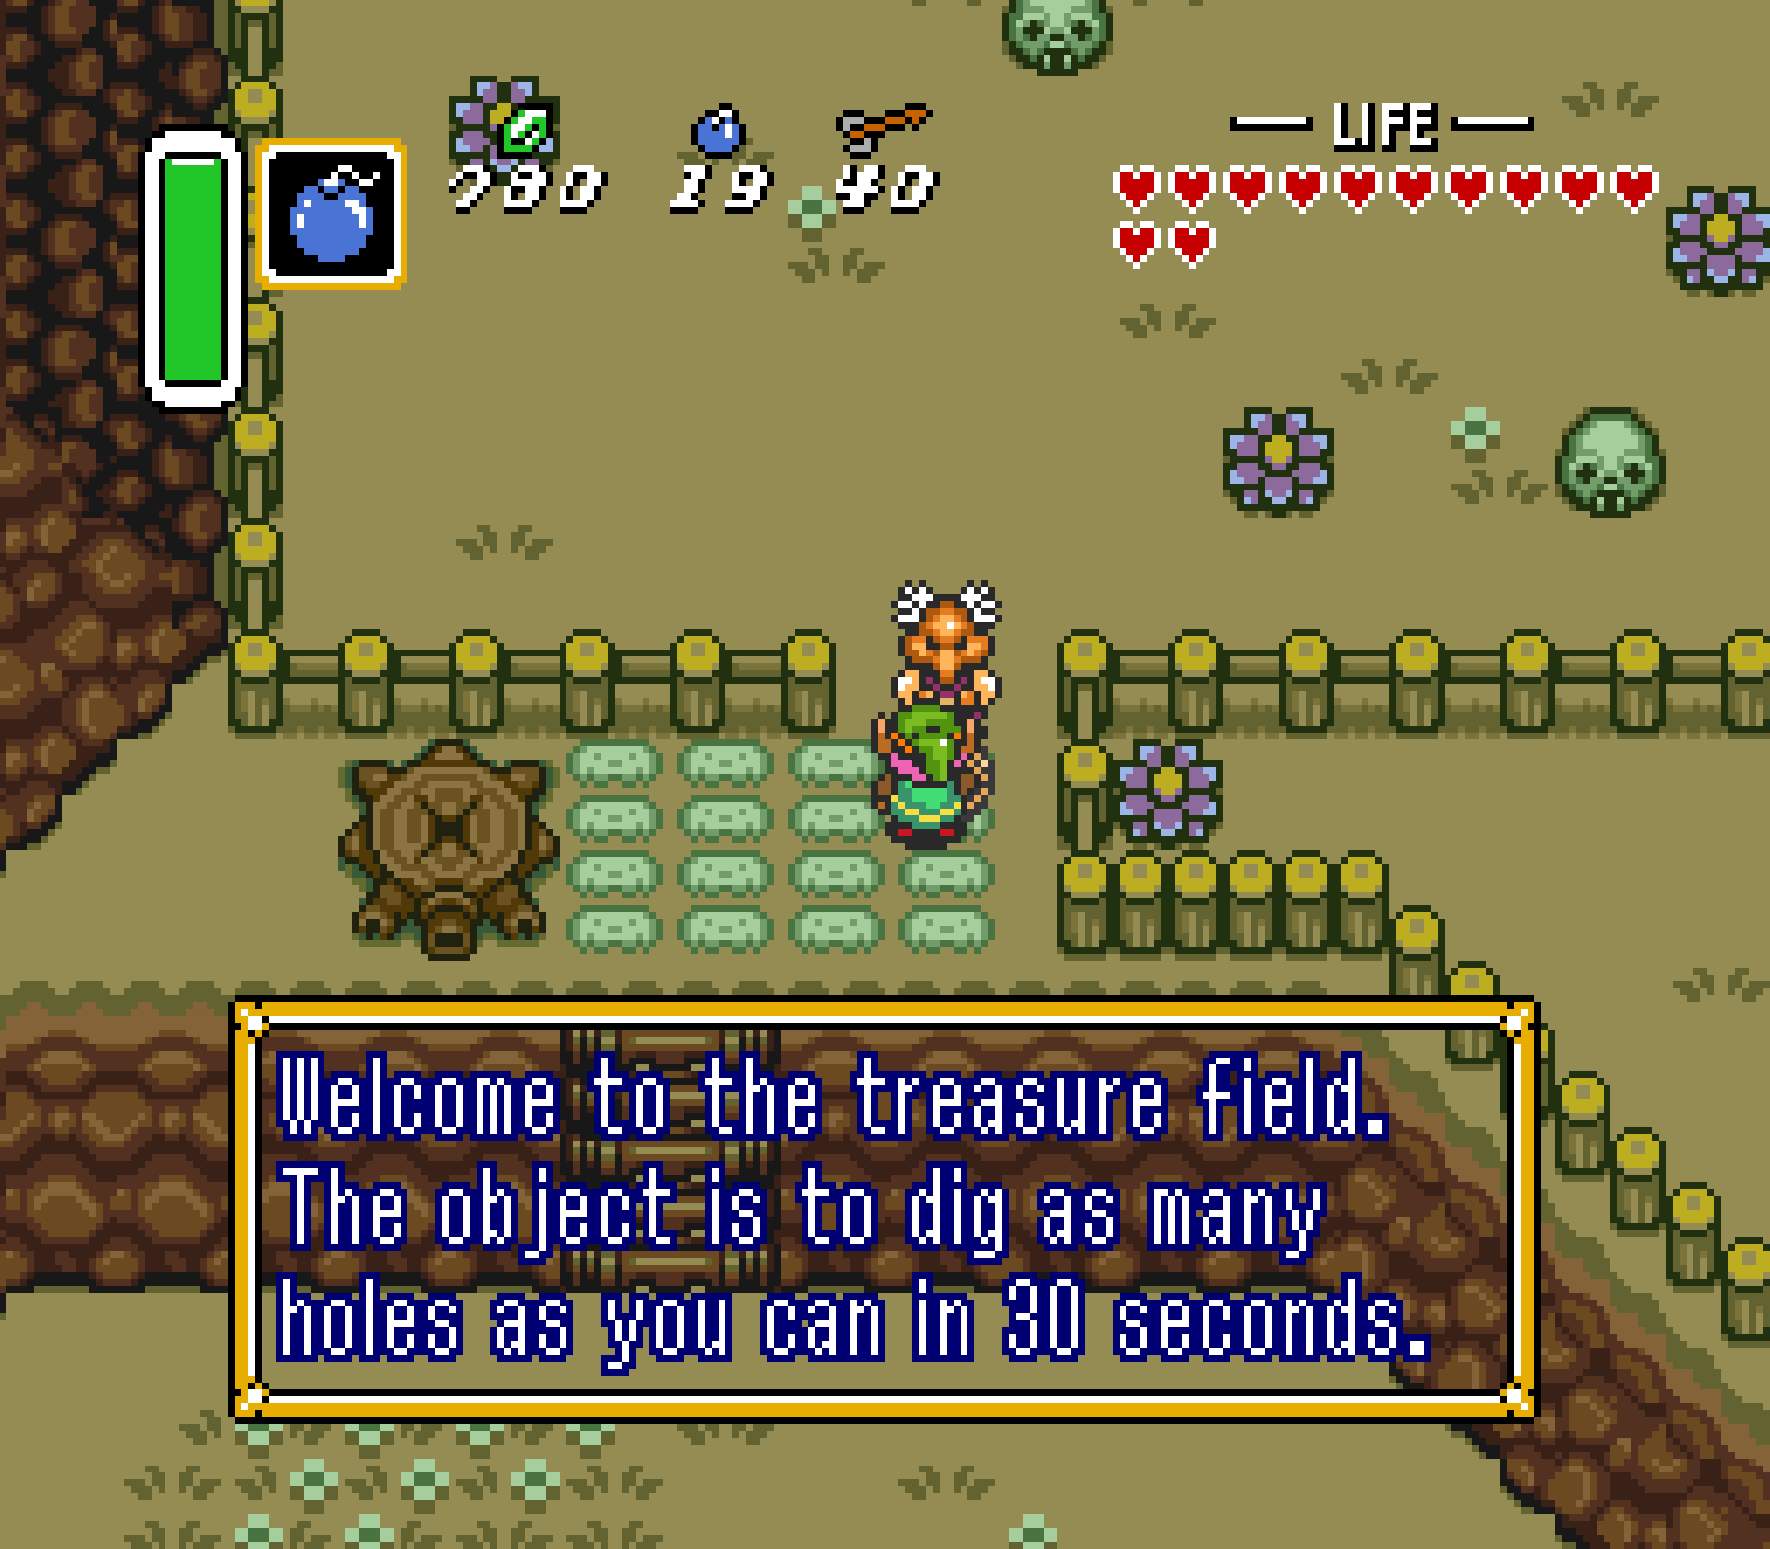
-

- This Piece of Heart is one of the more troublesome ones to get, but at least it’s profitable.
16
The treasure chest game
First Chapter Available: Chapter 7
Items Required: Magic Mirror, Magic Hammer
At the western edge of the Village of Outcasts is a building with a symbol of a treasure chest atop it. Within is an animal shopkeeper who has a proposition for you. For the low, low price of 30 Rupees, you can open any two of the 16 treasure chests within. Several of them don’t contain much: a single arrow or a single Rupee. Others have great rewards inside: 100 Rupees and even an illustrious Piece of Heart. The truth of the matter is that the chests are completely random. There’s no single chest that contains the Piece of Heart; what’s in the chest is decided the moment you open the chest. So it’s certainly another random hunt, but given enough Rupees you’ll find the thing you’re looking for.


17
The cemetery overlook
First Chapter Available: Chapter 7
Items Required: Magic Mirror, Magic Hammer
At the north end of the Dark World, just within the shadow of Death Mountain, you’ll find the Ghostly Gardens where the Light World Cemetery would be. Head to the north end of the gardens; you’ll be able to make your path without any real effort. There at the north end you’ll find a staircase leading up to a small cliffside outlook over the gardens. Use the Magic Mirror here to go to the Light World, and you’ll find there’s a cave entrance on that overlook. The pots inside all contain Rupees, but if you place a Bomb at the end of the hall, you can find a Piece of Heart there within.
-
- Head to the north of the Ghostly Garden and use the Magic Mirror.
-
- You’ll find a cave in the Light World, and use a Bomb to get the Piece of Heart.
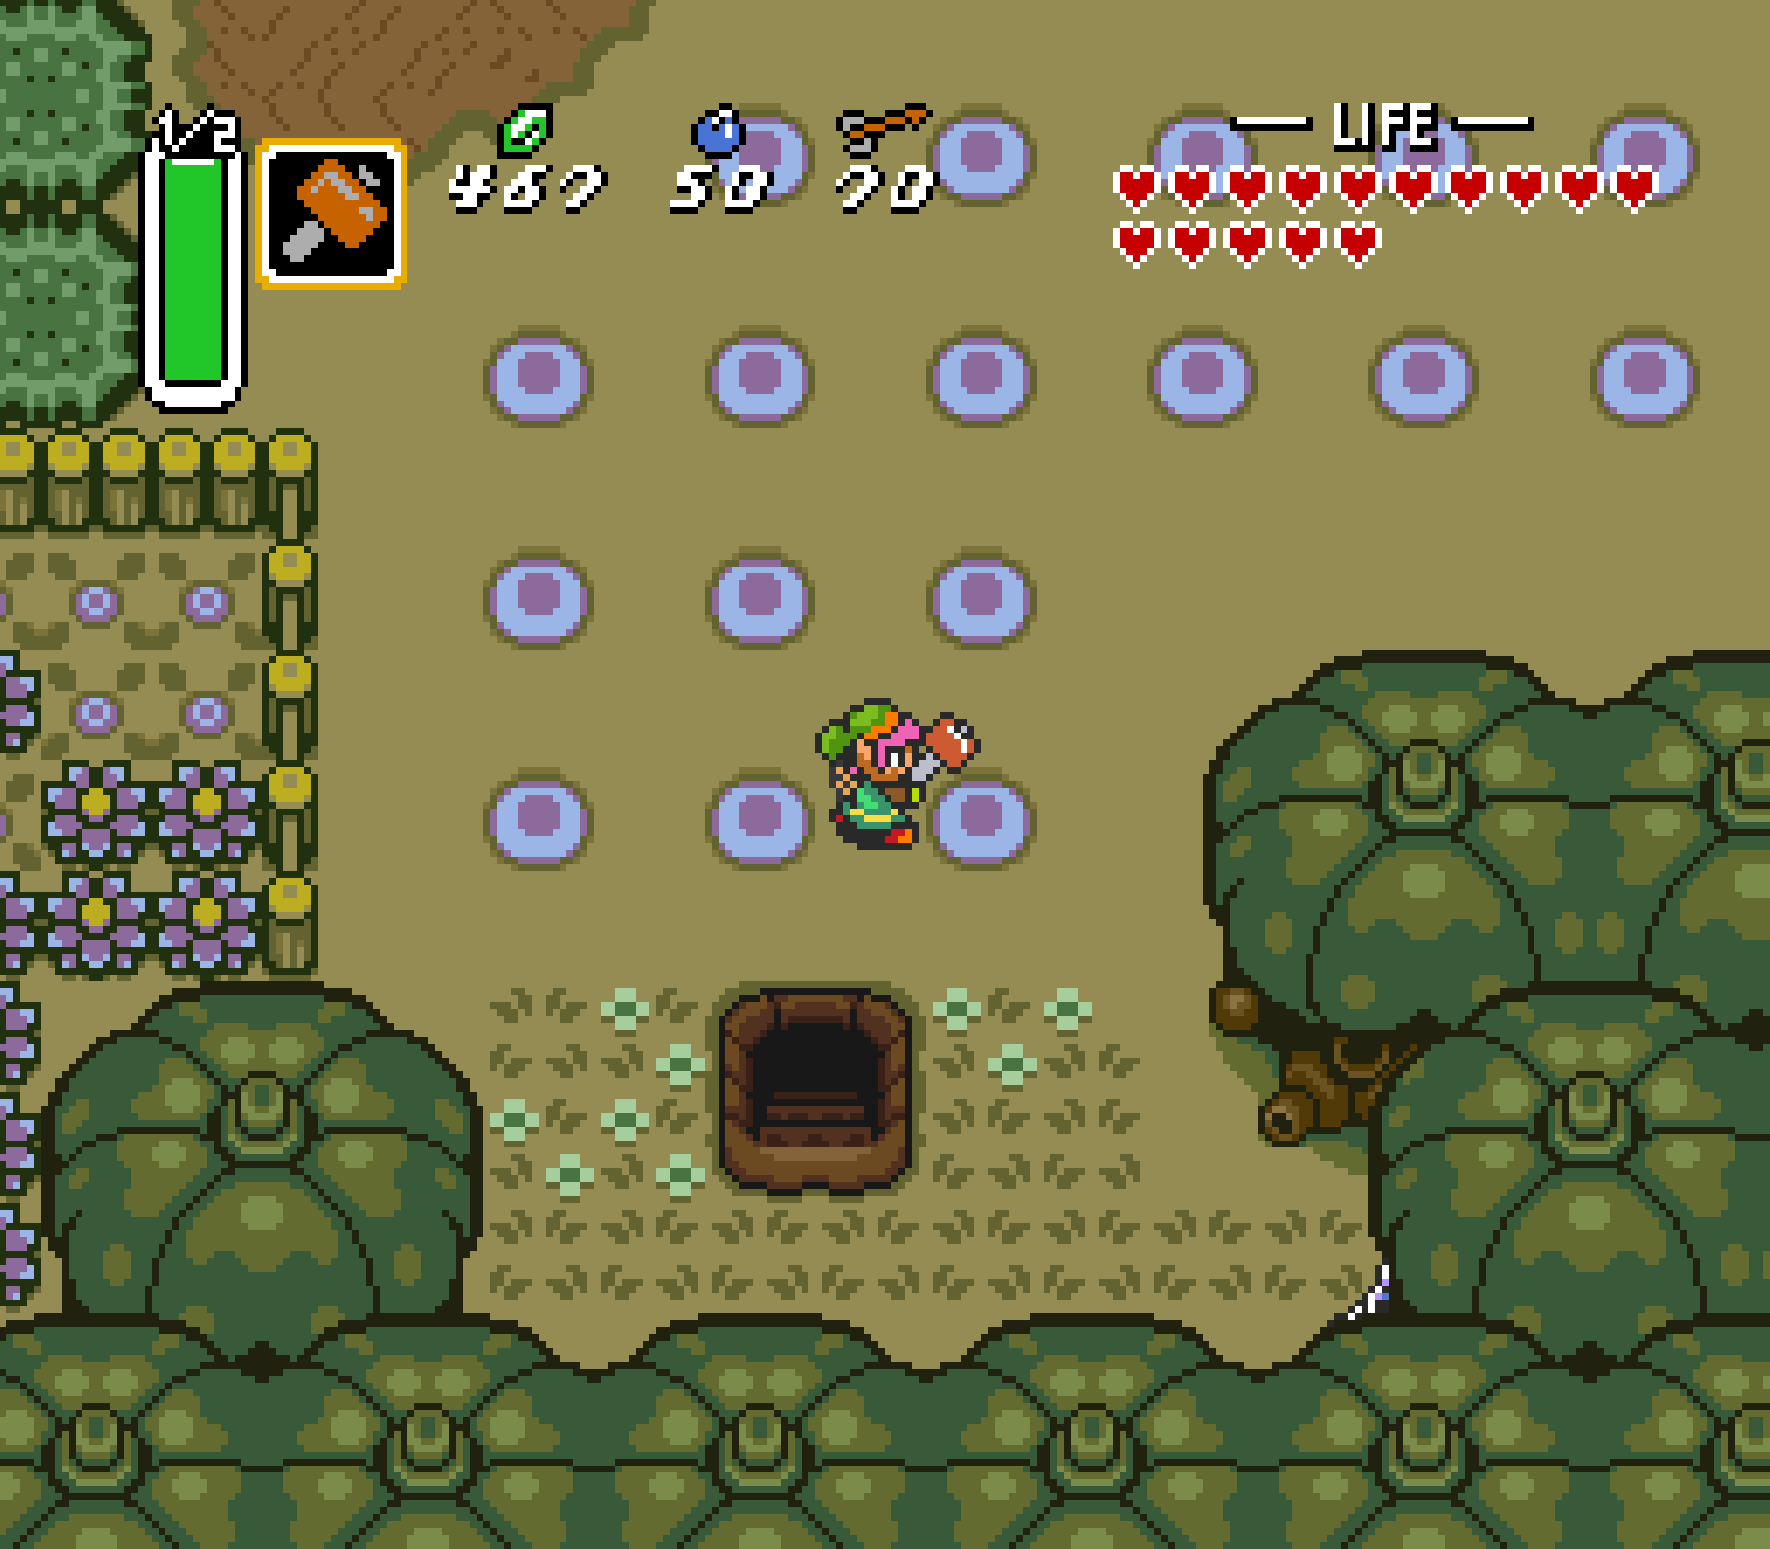
18
The haunted grove
First Chapter Available: Chapter 7
Items Required: Magic Mirror, Magic Hammer
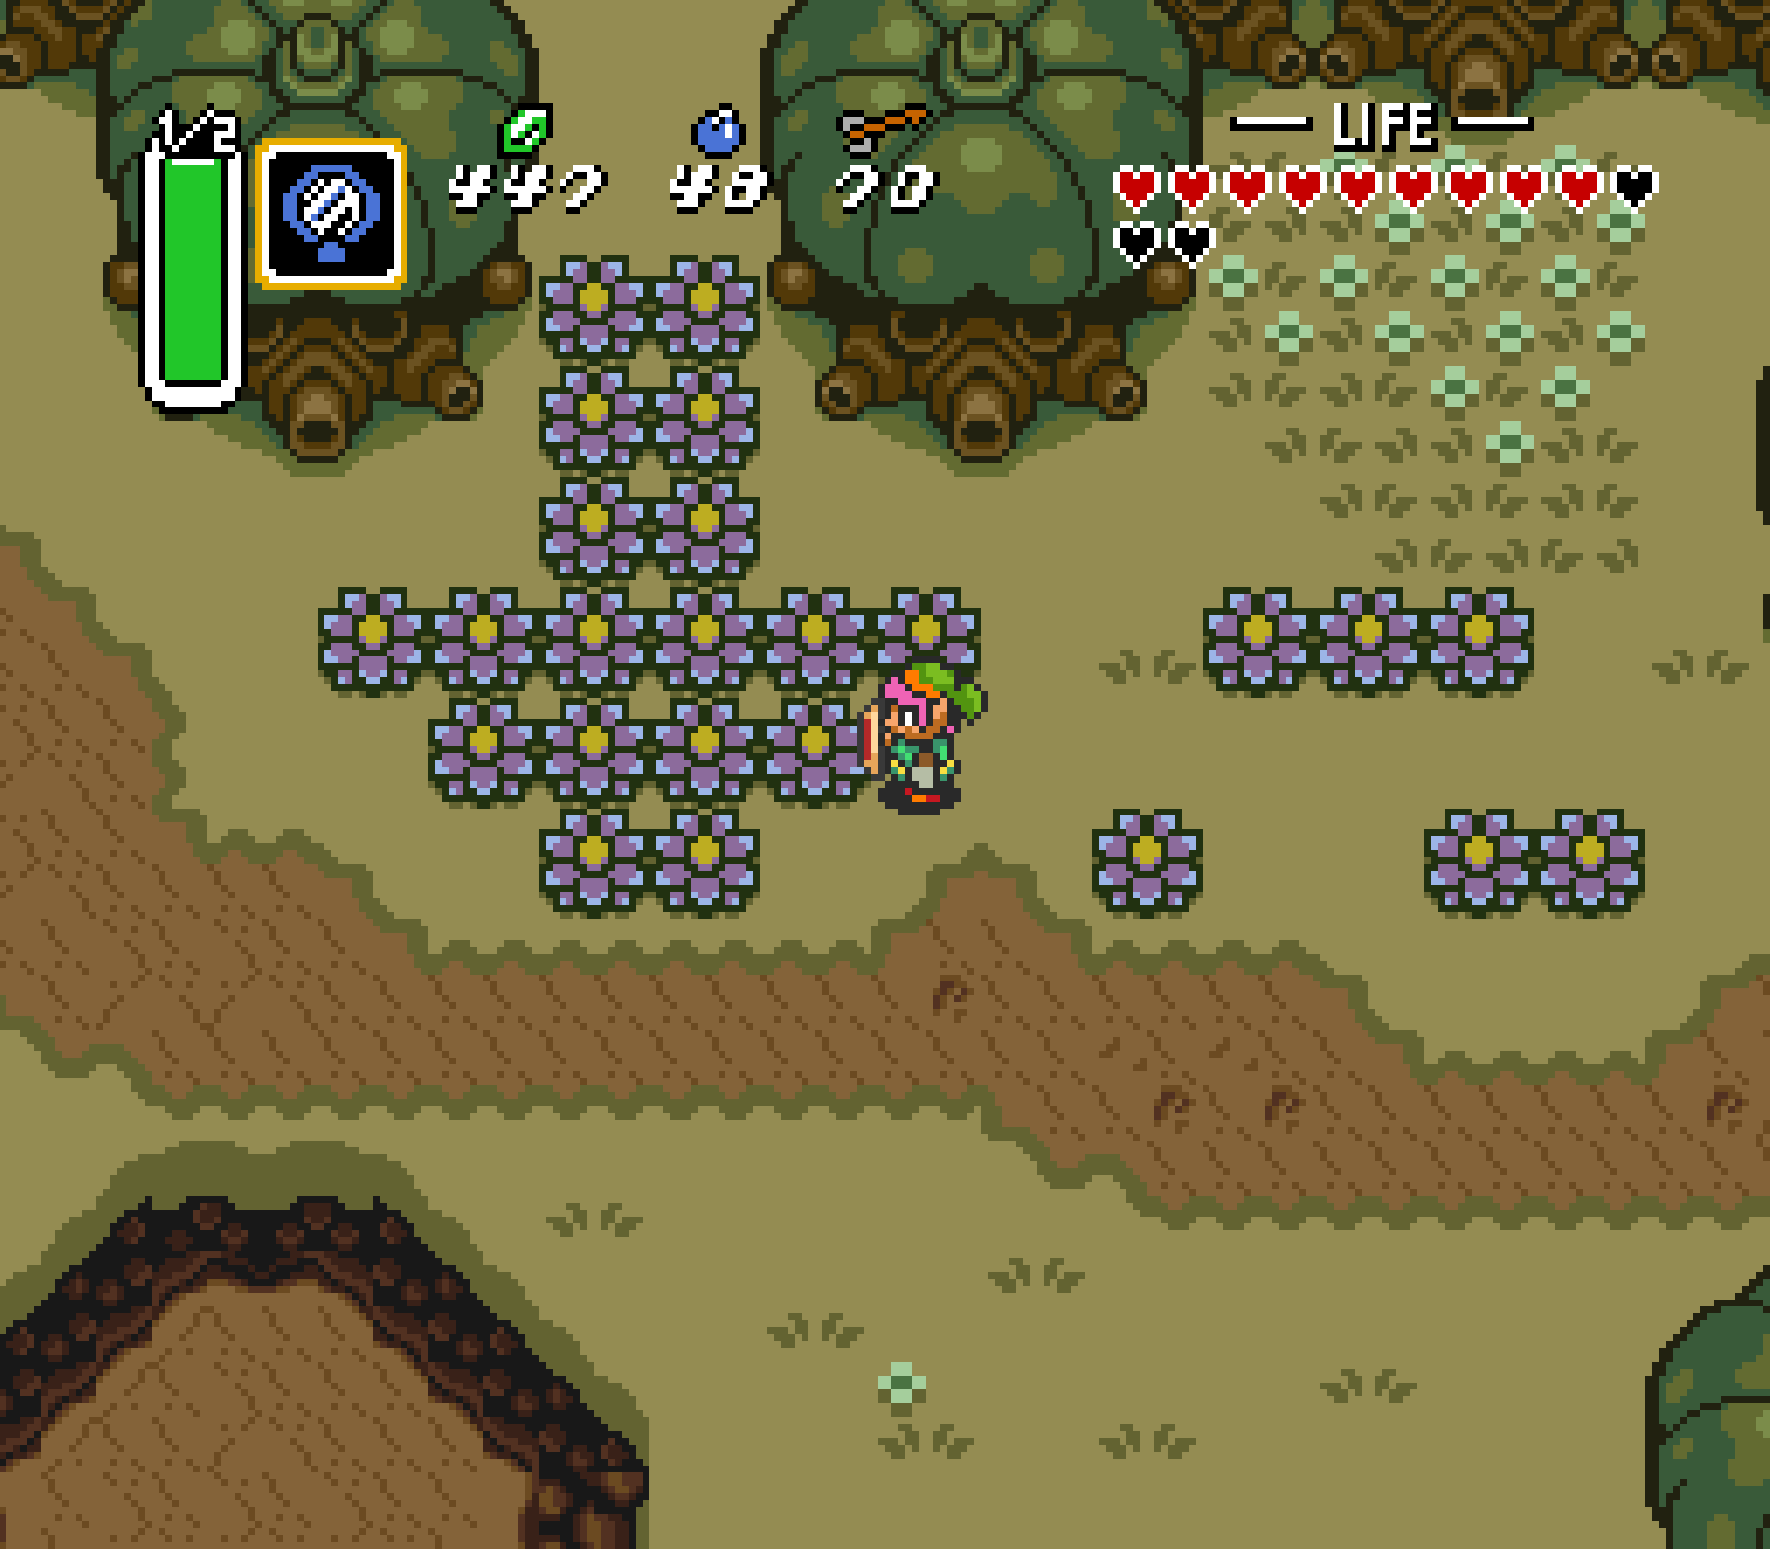
South of the Haunted Grove in the Dark World, where you find the dog that used to be the Flute Boy, you’ll find a circle of bushes within a small valley in the mountains. If you have trouble finding it, follow the arrow of bushes from the Haunted Grove, and you’ll eventually come by it. Step inside the circle of bushes and use the Magic Mirror. You’ll come up to a plateau in the Light World that contains a cave entrance. Inside, there’s a Piece of Heart ripe for the taking.
-
- Use the Mirror within the circle of bushes to find an otherwise unreachable cavern.
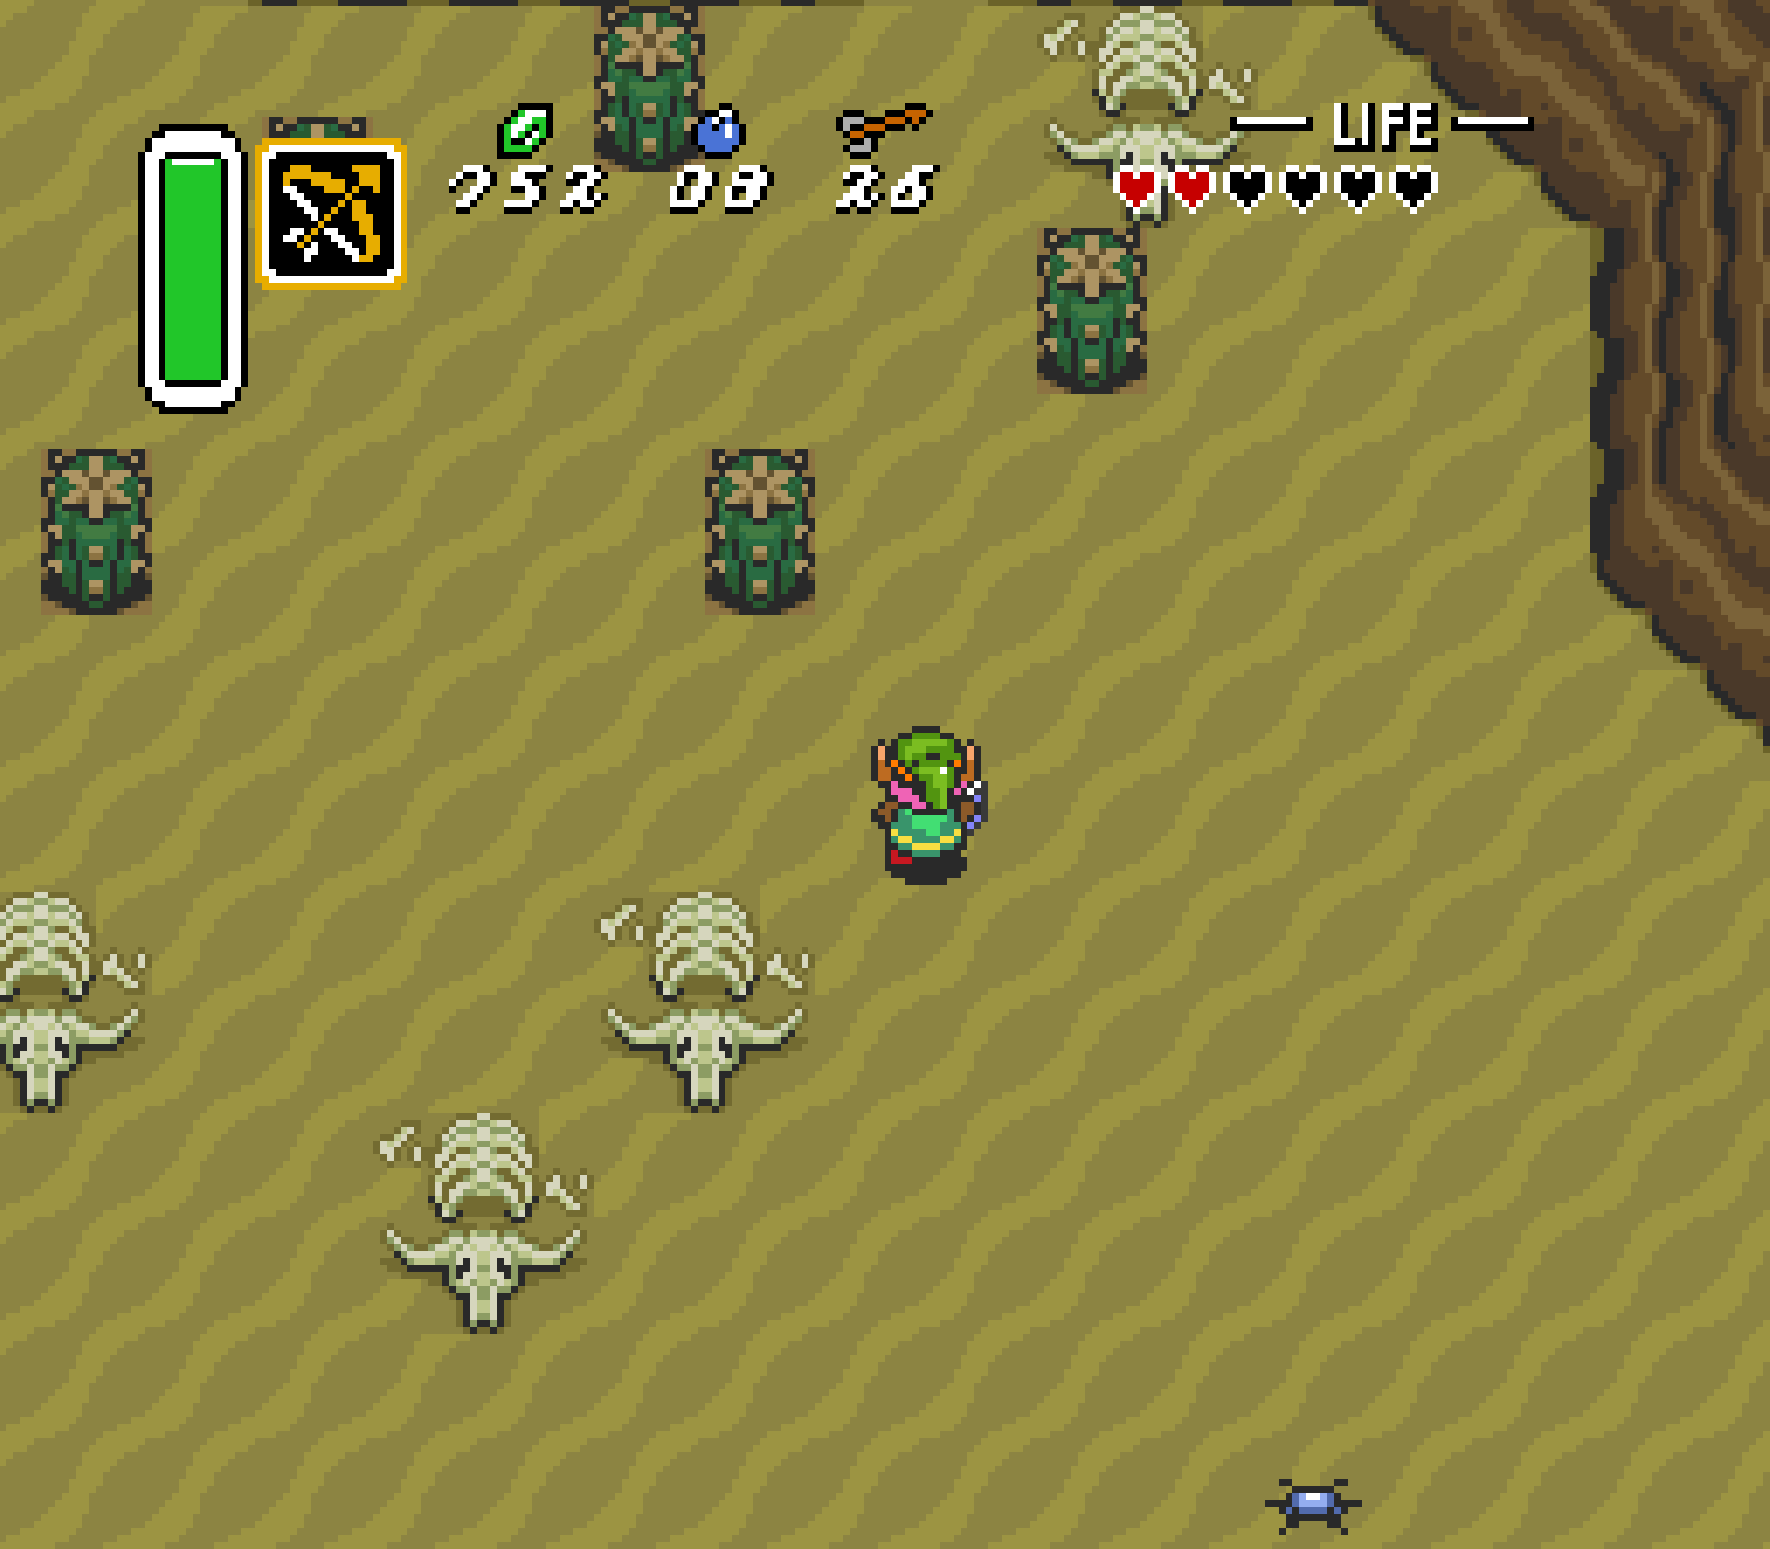
19
The field of stakes
First Chapter Available: Chapter 10
Items Required: Titan’s Mitt, Tempered Sword, Magic Mirror
Once you have the Titan’s Mitt, head to the place in the Dark World near where the Swordsmith’s House would be. This, incidentally, is the same location where you would find the treasure chest containing the fourth and final Bottle of the game. In the field just below the decrepit house is a field of stakes, 22 in all. You’ll want to pound down each of those stakes into the ground with the Magic Hammer. There are a handful of skeletal Cucco about that will probably take collateral damage, but so long as you don’t go out of your way, they won’t take anywhere near enough damage to attack you unless you explicitly go chase them. Once you hammer down the last of the stakes, the tree stump just below it will be replaced with a staircase into the earth. Descend, and a Piece of Heart will be yours.

-
- If you slam down all the stakes before the Cuccos take too much abuse, a Piece of Heart is in your future.
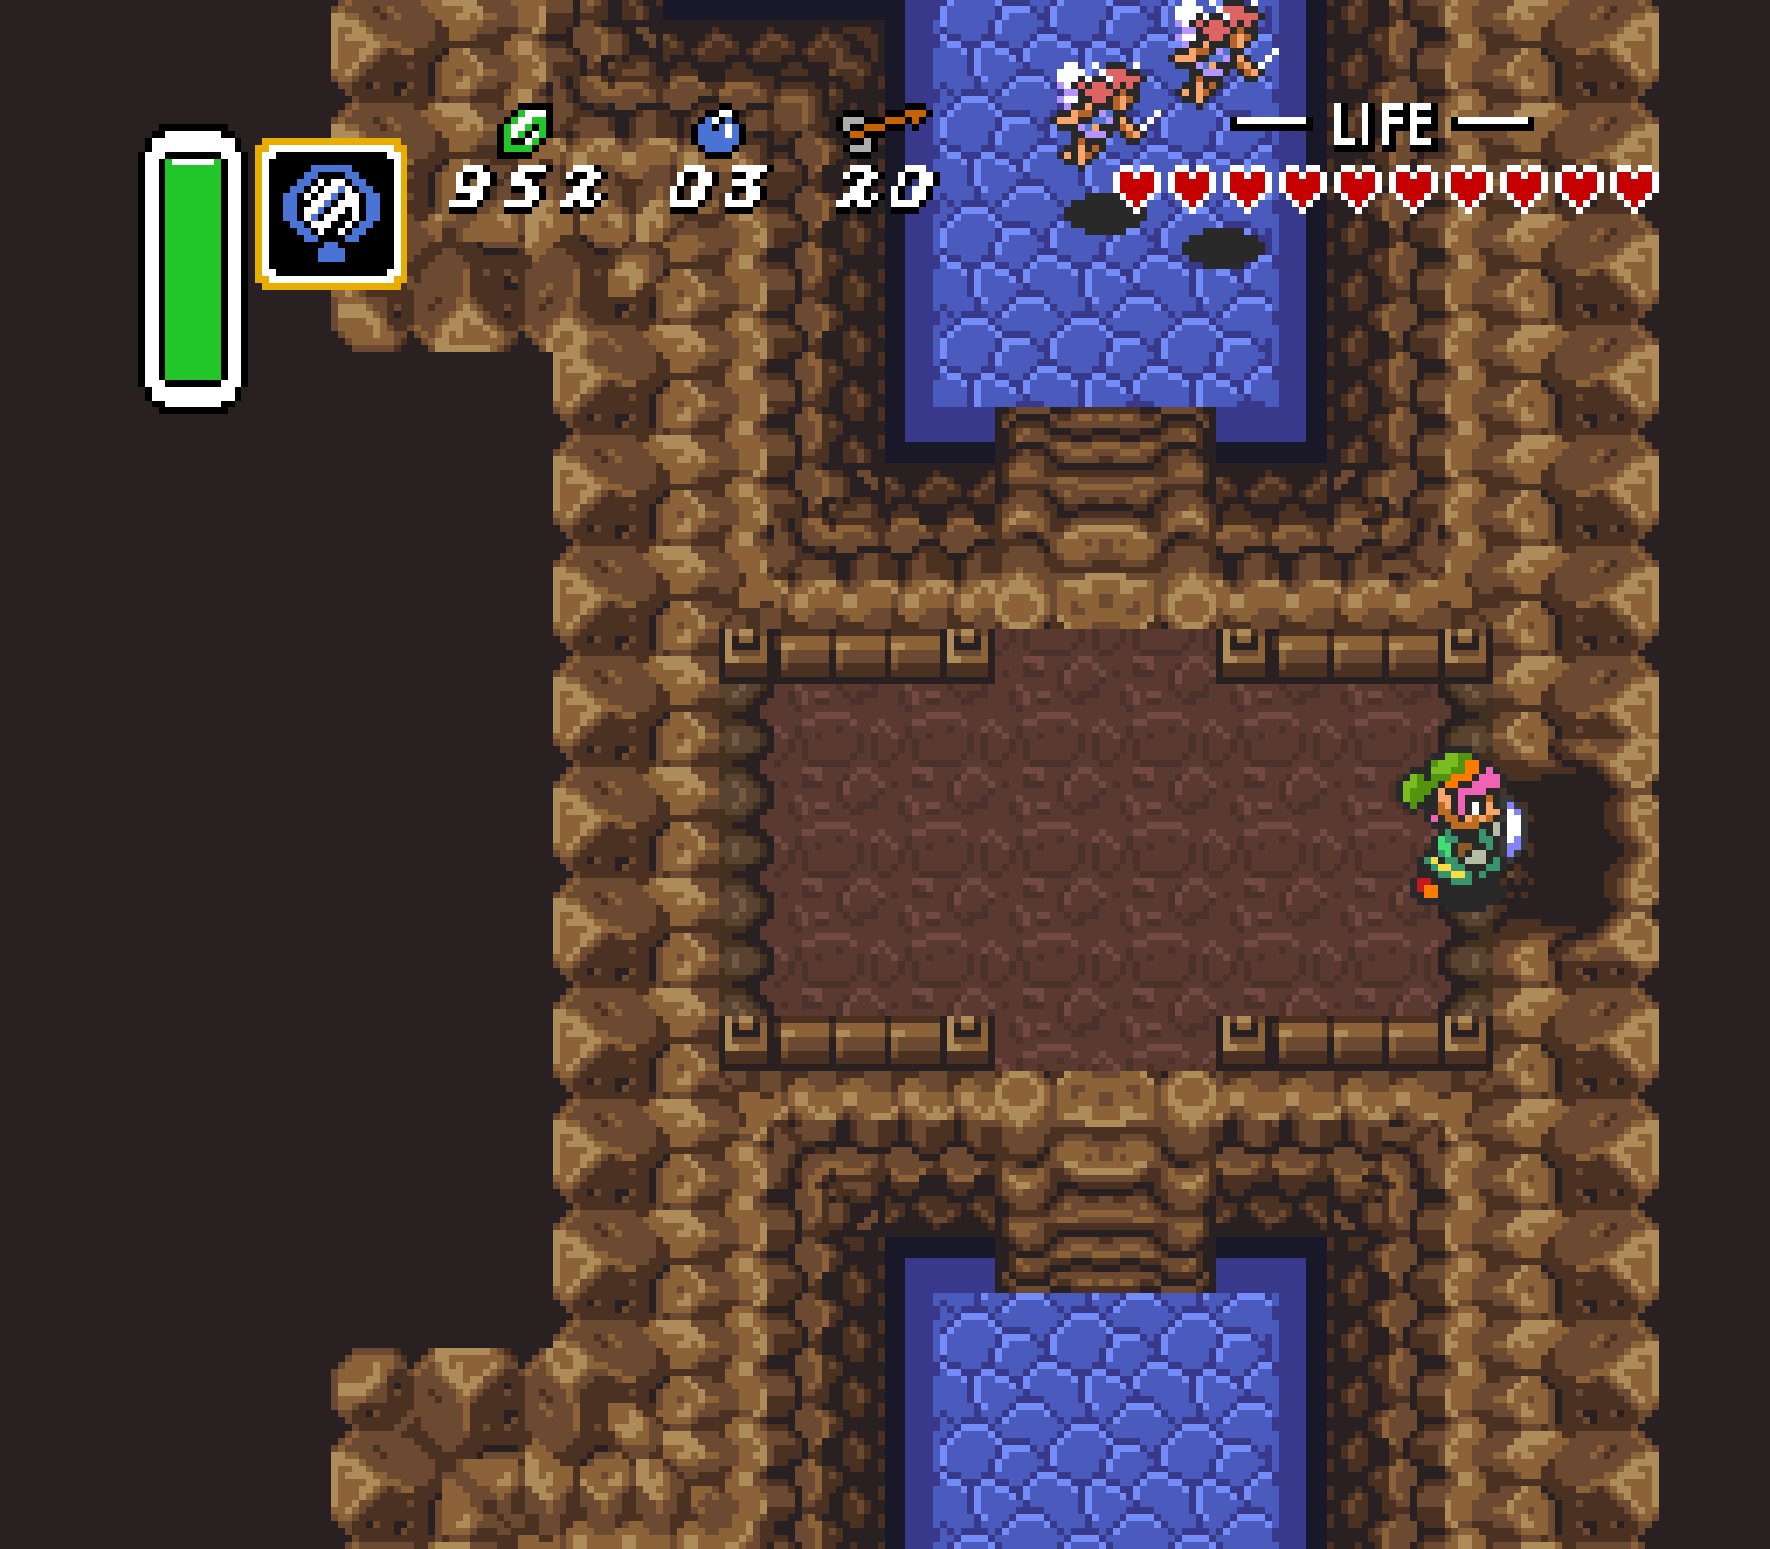
20The cave near Skull Woods

Finding this Piece of Heart isn’t hard; obtaining it is the tricky bit.
First Chapter Available: Chapter 10
Items Required: Titan’s Mitt, Hookshot, Magic Cape
Just to the east of the Skeleton Woods, you’ll find the Dark-World analog of the cave that leads up to Death Mountain. This cave, however, has no such path up the mountain; instead, a sign outside the cave mentions that, provided you’ve got the Magic Cape, a Piece of Heart can be yours. Well, you’ll technically need a few more things than that, but the Magic Cape is the most elusive of the three items you need.
Lift up the heavy rock just to the left of the cave entrance and head inside. You’ll find a few Hardhat Beetles inside, and you’ll probably want to rough them up a bit before proceeding. You’ll eventually find a staircase leading up. Head upstairs, and you’ll find a pit that will drop you back down from whence you came. The skulls across the pit are a perfect Hookshot target, so let them carry you across. Just further on, an impenetrable Bumper blocks the path. This is the spot where you have to have the Magic Cape; don it, and you’ll be able to just walk straight through it as if it weren’t there. The cave exit is just up ahead. Walk out, and you’ll be next to the Piece of Heart.

-

- You’ll need the Hookshot and the Magic Cape to make it to the exit near the Piece of Heart
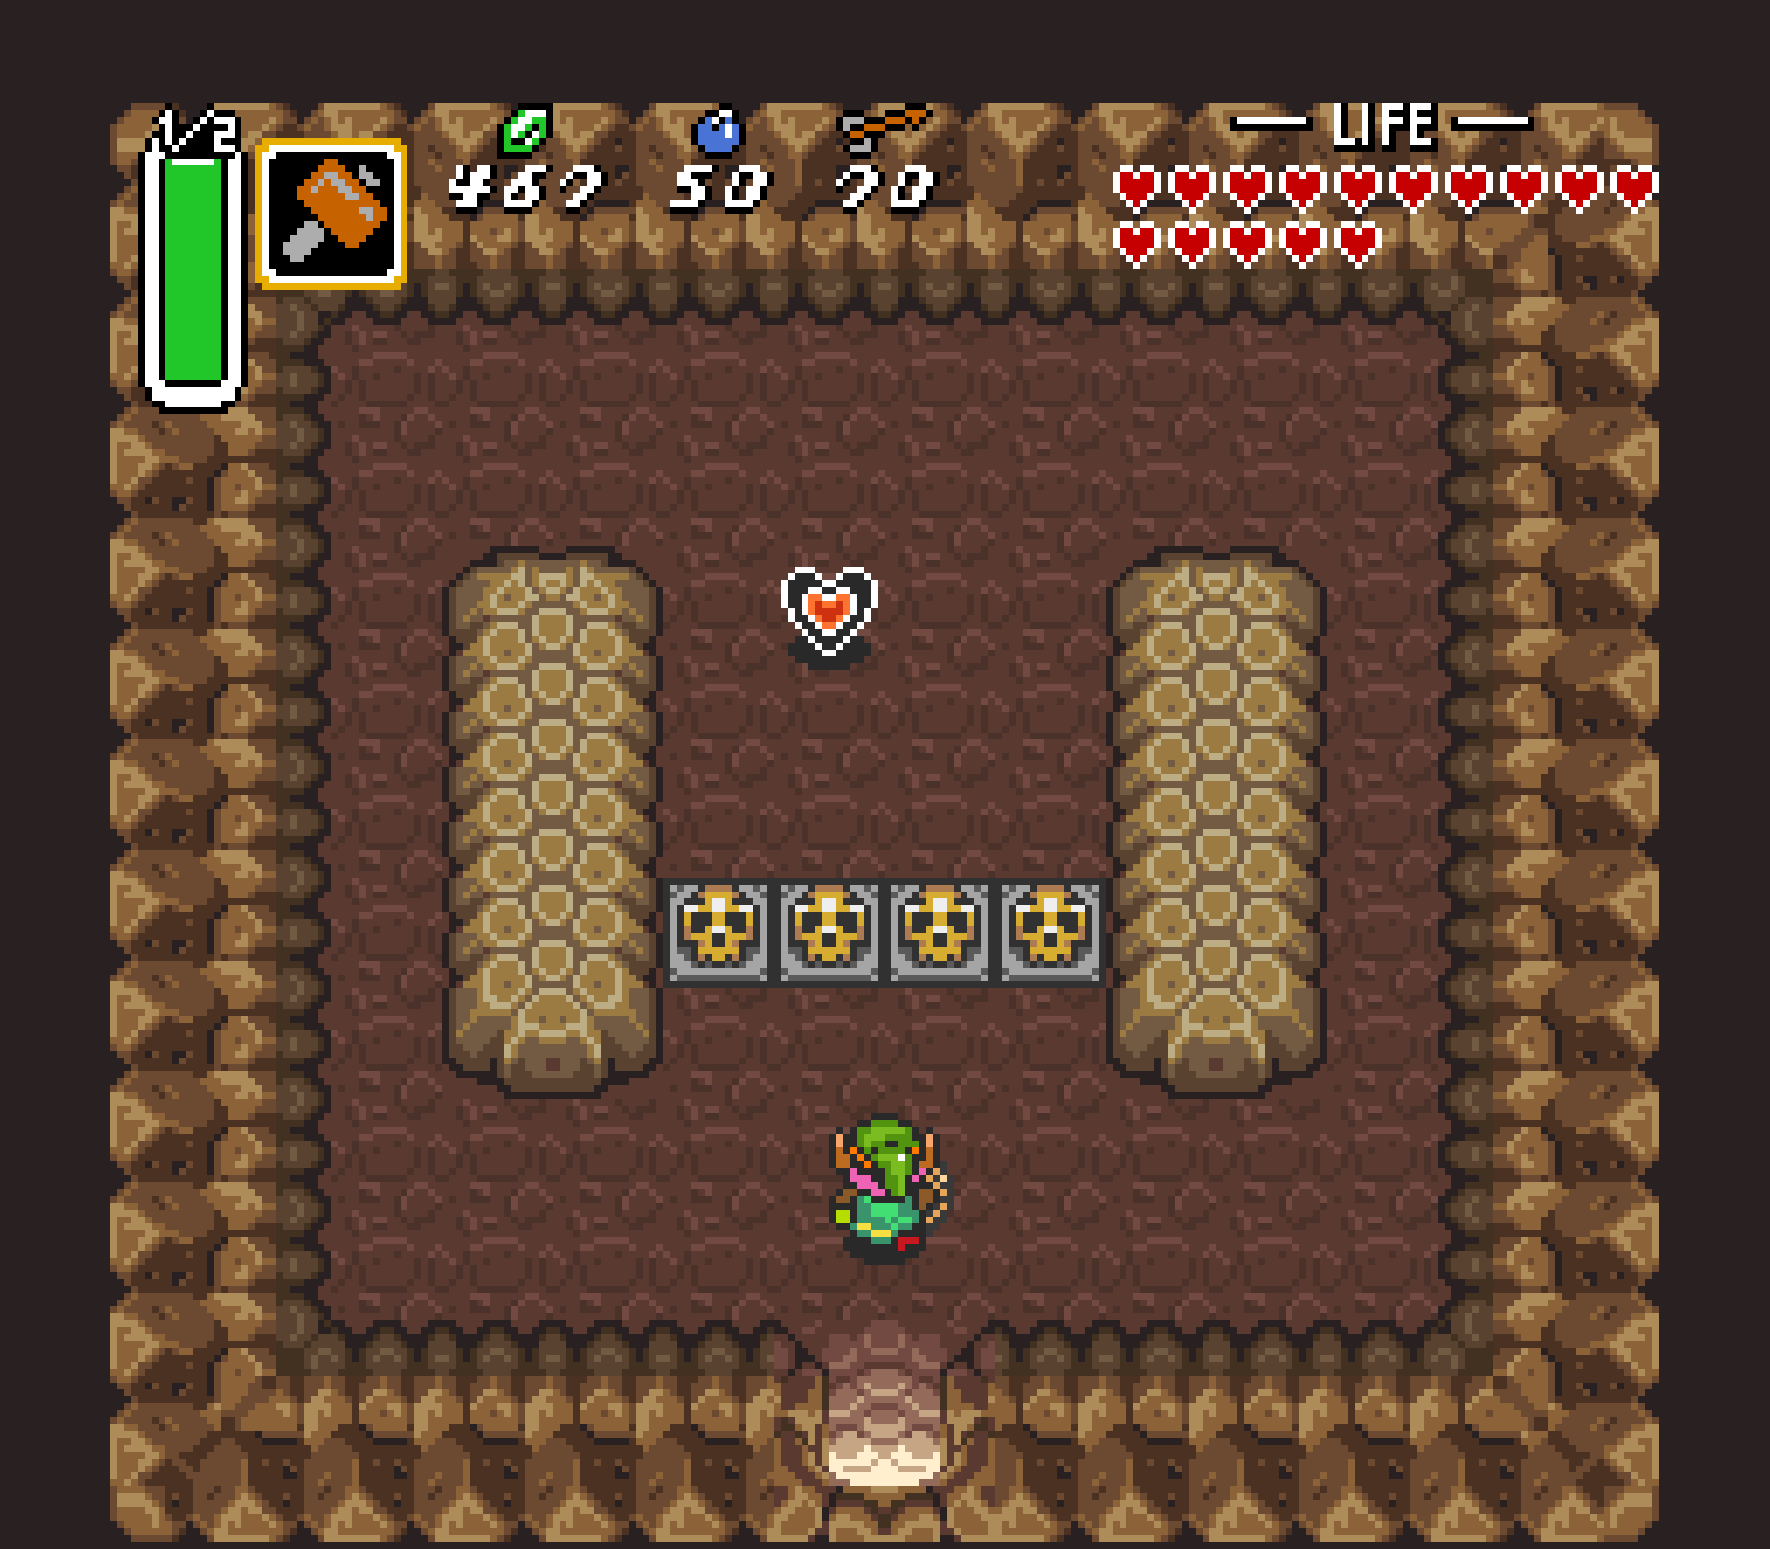
21
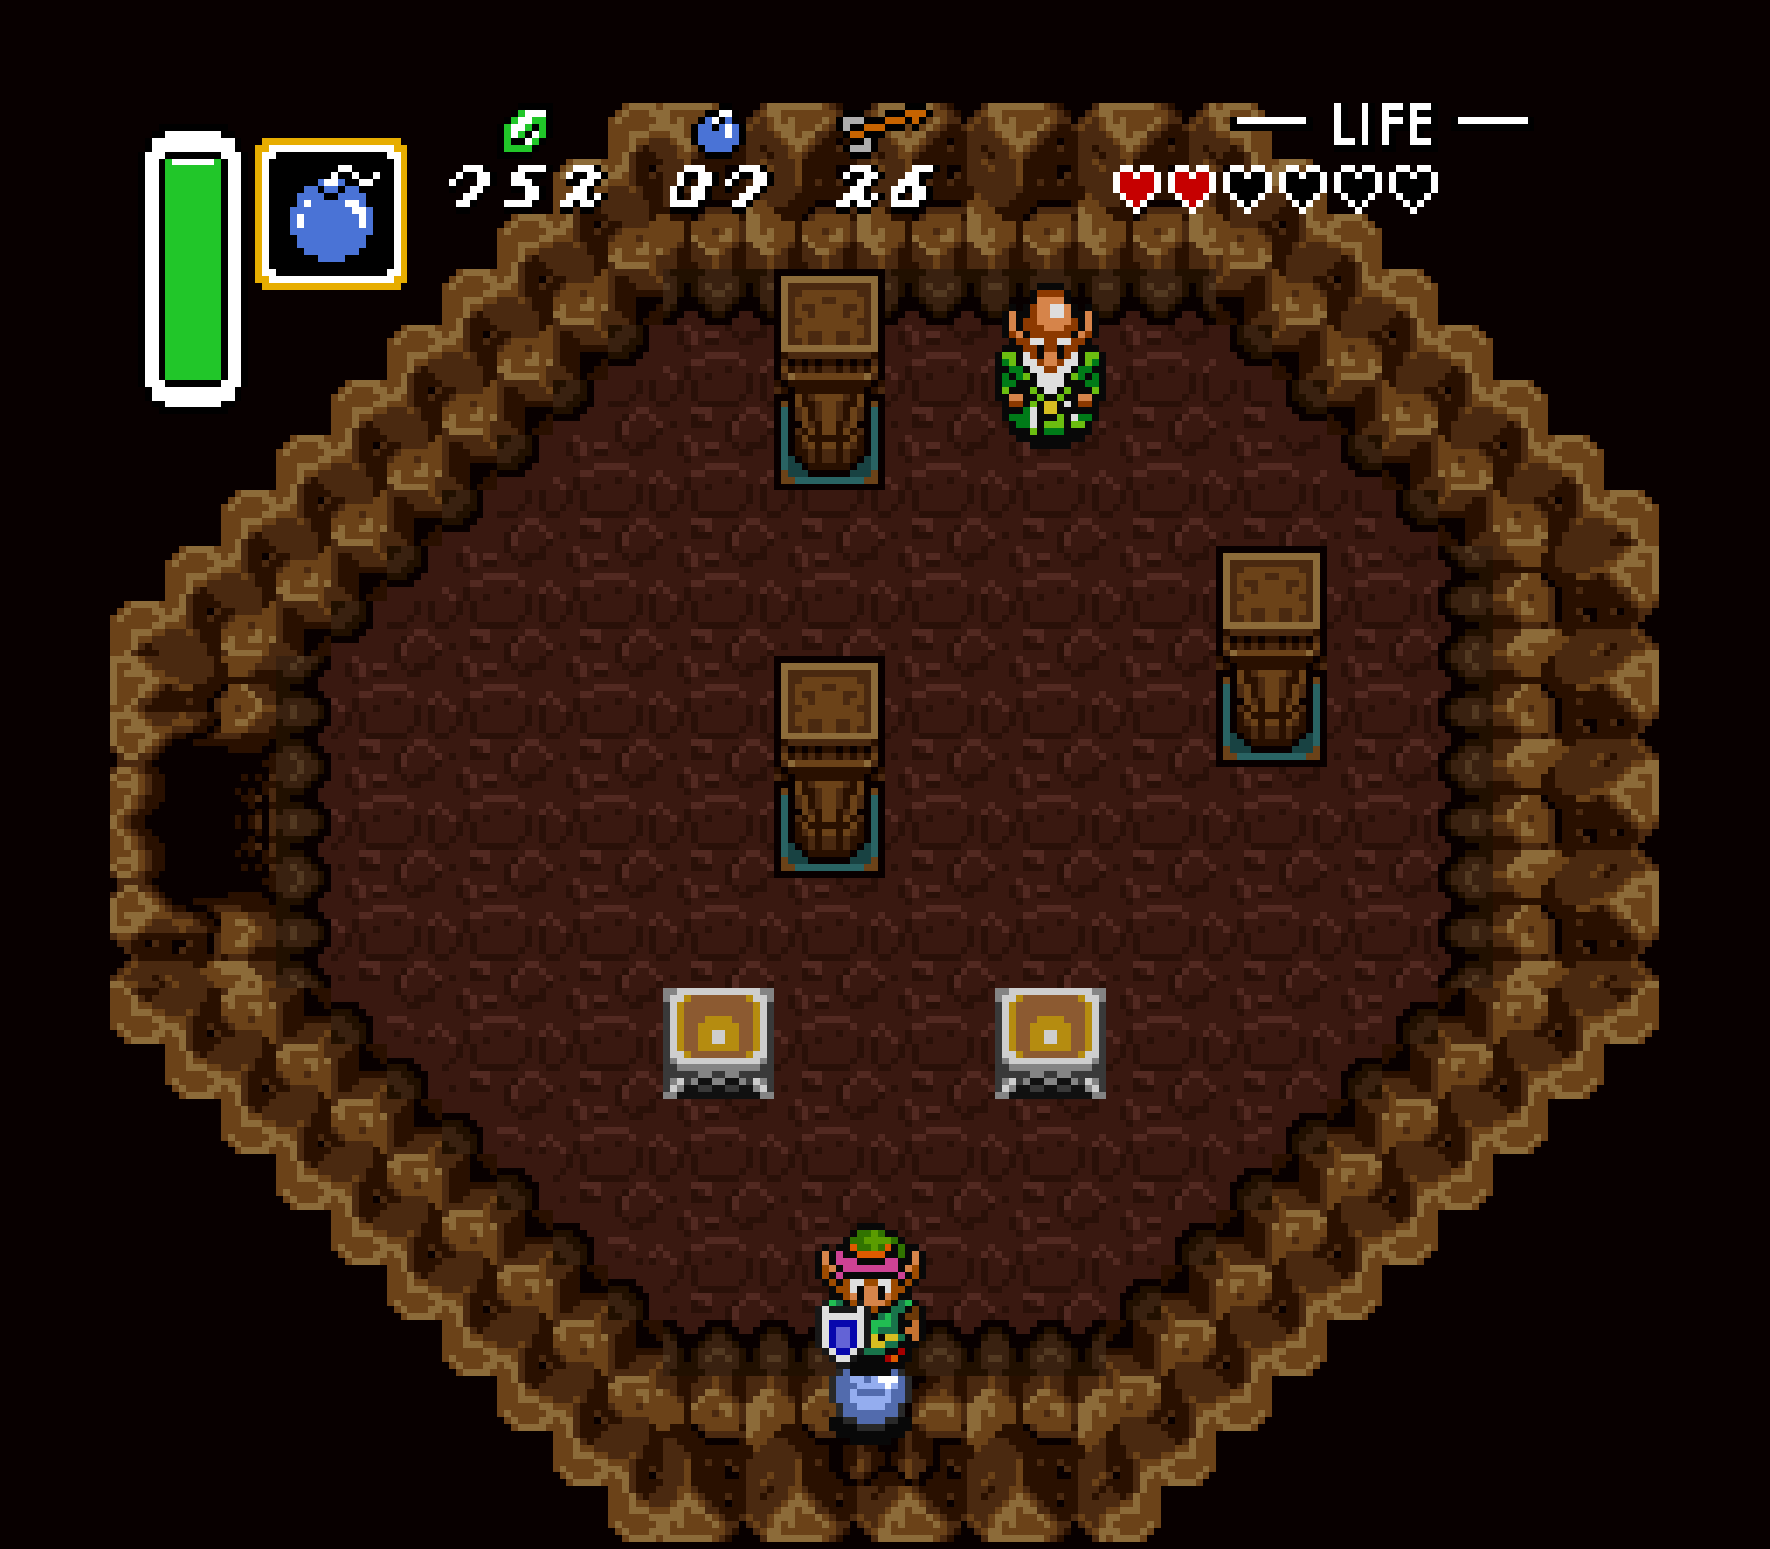
Misery Mire’s outbuilding

To the left of Misery Mire’s dungeon is a small cave containing a Piece of Heart.
First Chapter Available: Chapter 10
Items Required: Flute, Titan’s Mitt
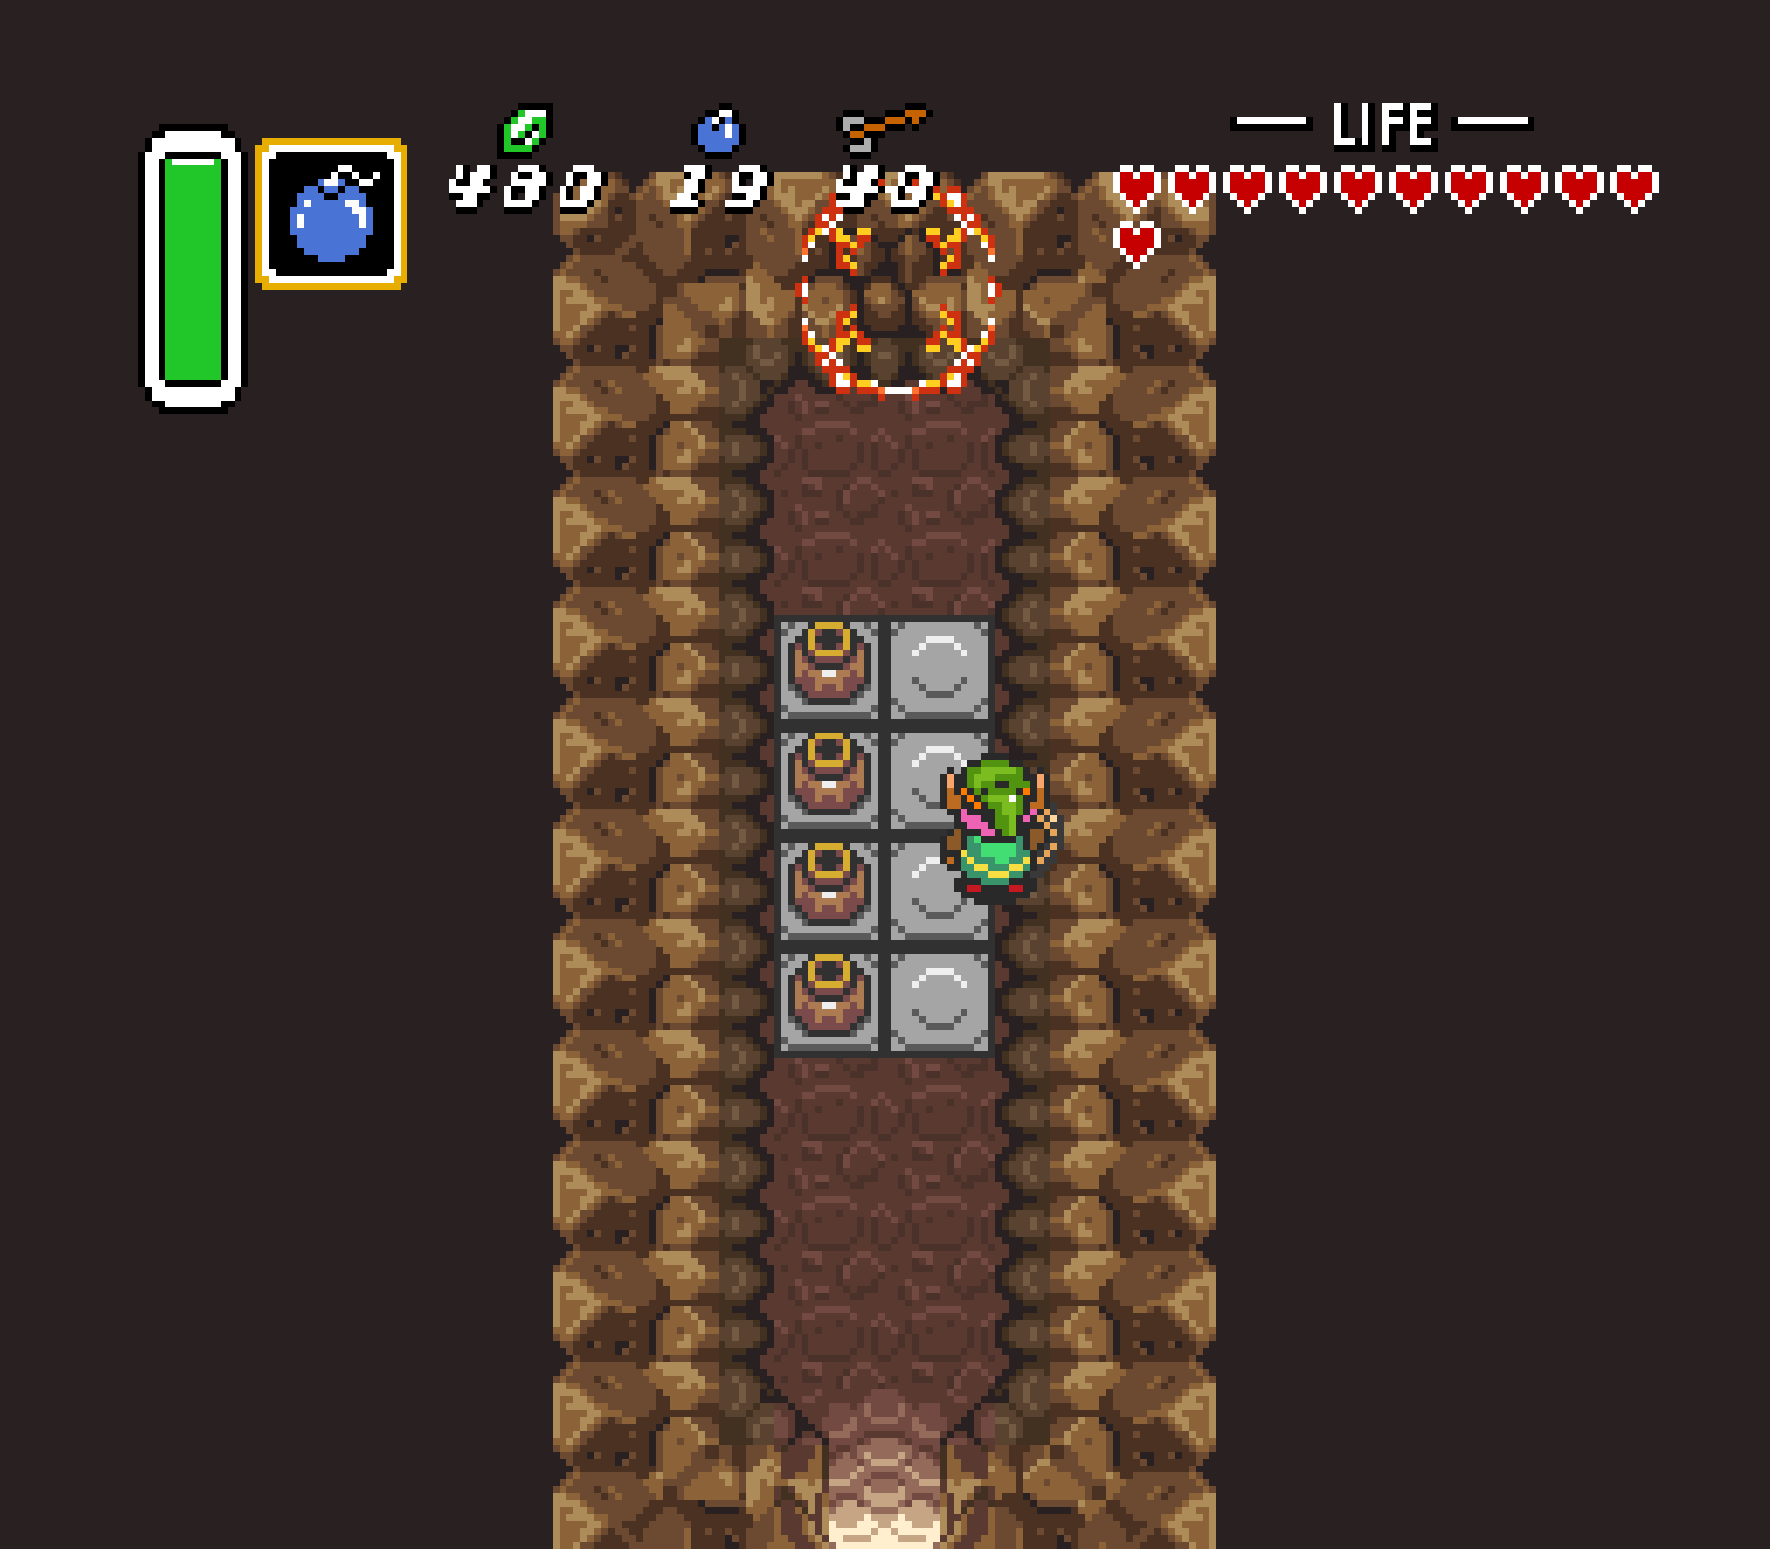
The Swamp of Evil is the home of Misery Mire, but it’s also the home of two other face-shaped buildings to the left and the right of it. If you enter into the building just to the left of Misery Mire, you’ll find a long hallway inside. Two Sparks patrol the narrow corridor, but it should be easy to bypass them, either via the center aisle or one of the outside aisles. Eventually you’ll reach a small block puzzle containing two chests within the center.
The solution to the block puzzle is fairly straightforward. Push the right block on the bottom row right and the left block on the bottom row left, thus pushing it outside of the 4×4 grid. The block just above you can then be pushed up, and then the final block in front of the left chest can be pushed left to free it. The left chest will contain your Piece of Heart.

-

- This Piece of Heart isn’t hard to get provided you think outside the box.
22
The Desert of Mystery cliffs
First Chapter Available: Chapter 10
Items Required: Flute, Titan’s Mitt, Magic Mirror
Just to the northeast of Misery Mire’s right building, you can find a rather curious alcove that doesn’t seem to have any purpose. There’s a small patch of (relatively) dry land that ends abruptly. As with most things between the Light World and Dark World, so many curious little signs means that there’s something incredibly interesting on the other side. Continue all the way into the alcove until you reach the far wall. Once you get there, that’s your cue to use the Magic Mirror and warp back to the Light World.

Indeed, you’ll find that you’ve arrived onto an otherwise inaccessible cliff in the northeast of the Desert of Mystery. A small rock blocks a cavern entrance down into the earth. Lift it up, and head down inside. You’ll find another block puzzle awaiting you. Thankfully, you can mess up the puzzle as many times as you want, and you can always reset it and try again. If you stand to the left of the left block on the bottom row, you can follow this sequence until you reach the Piece of Heart:
- Push the left block on the bottom row right one space.
- Walk up one space, and then push the block above you up one space.
- Walk right one space, and then push the block to the right of you right one space.
- Walk up one space, and then push the block to the right of you right one space.
23
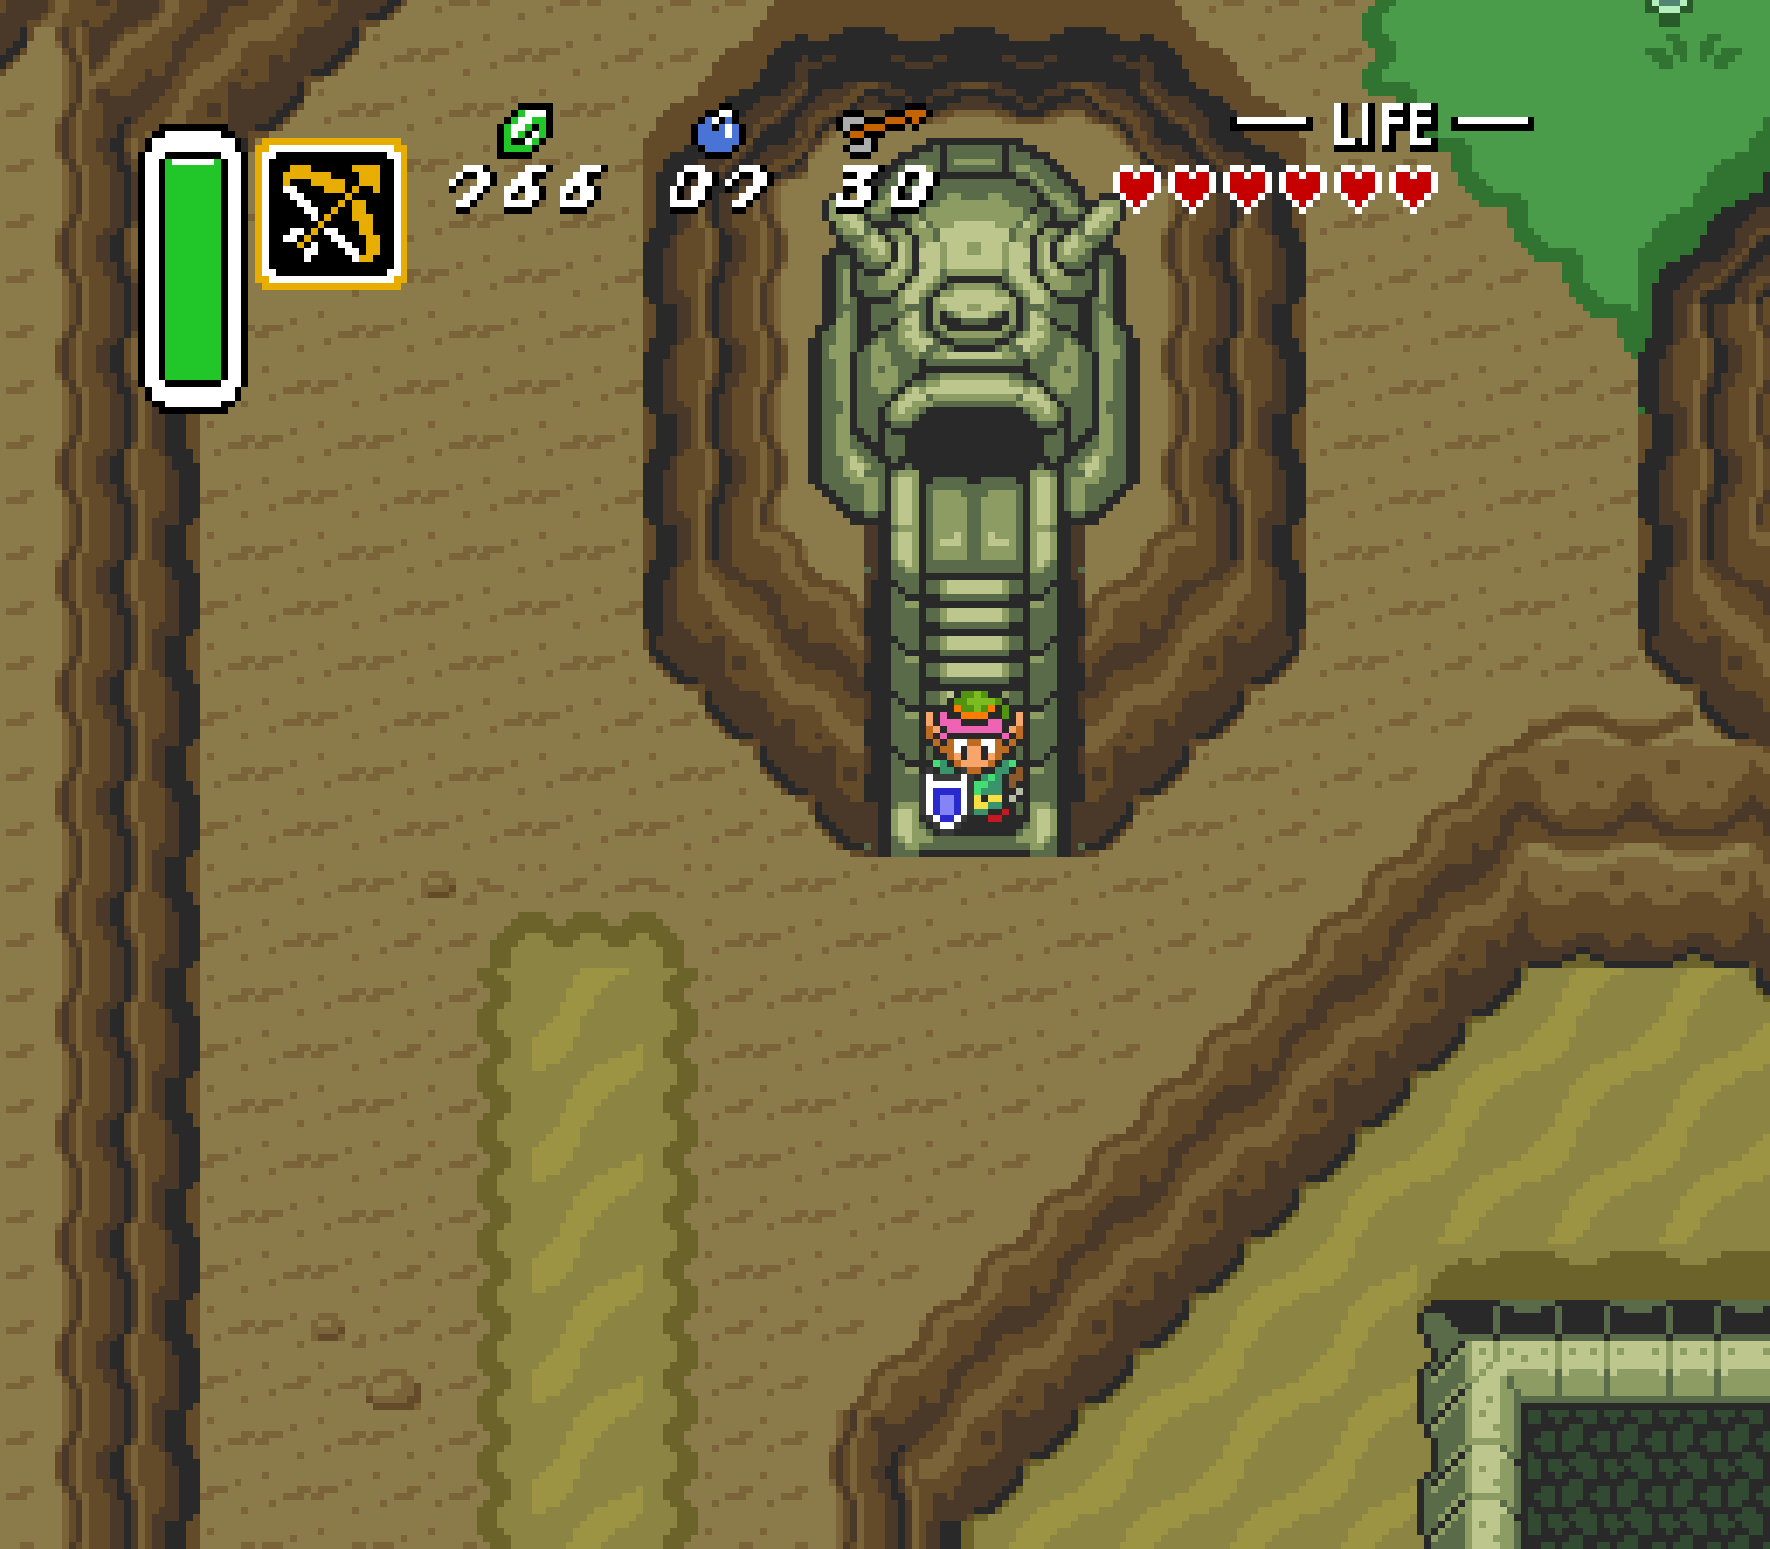
Death Mountain’s floating island
 First Chapter Available: Chapter 11
Items Required: Titan’s Mitt, Magic Mirror, Ether Medallion or Cane of Somaria
This Piece of Heart is perhaps the most convoluted and involved Piece of Heart out of all 24 of them. To reach this Piece of Heart, you’ll need to travel just west of Turtle Rock high upon the Dark World version of Death Mountain. Near the screen transition that will lead you to the bridge heading to the western half, you’ll find a heavy boulder near a cavern entrance. Lift it up to reveal a secret staircase into the mountain. Head inside.
The pathway inside will continue north and suddenly end abruptly. It just simply looks like there’s nothing else and that the true path through this cave is by using the Hookshot to latch yourself onto the skulls using the open gap to the west. This simply isn’t true; there actually is a secret walkway that you just can’t see. You can reveal it in one of two ways.
-

- The Ether Medallion will light up the hidden path over the black pit.
-
- Using the Cane of Somaria is certainly slower, but it will use far less magic.
The first way is to use the Ether Medallion; while you’re being surrounded by magic, the pathway will illuminate in white until the spell fades; that should give you enough intel to find your way across. The second way is to use the Cane of Somaria; the blocks made by the Cane will be supported by the invisible pathway. If you push or throw the blocks forward, you’ll know the moment the pathway ends.
Technically speaking, you don’t need to use either if you know what the path looks like, but technically you’re “supposed” to have them.
Once you’ve followed the invisible pathway, you’ll see a good spot for a Bomb placement along the northern wall. Set a Bomb there, back up, and wait for the opening to be revealed. It will take you two a four-way intersection; again, you’ll want to place another Bomb but this time on the western wall. Head through the western exit, and you can find a cave exit to the south.

-
- Use some Bombs to find the cavern exit out onto the floating platform.
This will take you onto a floating land mass just northwest of where you started. There’s nothing of interest here, but that’s usually sign that there’s something interesting in the other world. Use the Magic Mirror to transport yourself to the Light World. There you’ll find your Piece of Heart.

Use the Magic Mirror while on the floating island to find your well-earned Piece of Heart.
24
Turtle Rock interstitial
First Chapter Available: Chapter 12
Items Required: Quake Medallion, Magic Hammer, Cane of Somaria, Bow, Magic Mirror
-

- You’ll find this cave outside the B1 entrance to Turtle Rock.
-
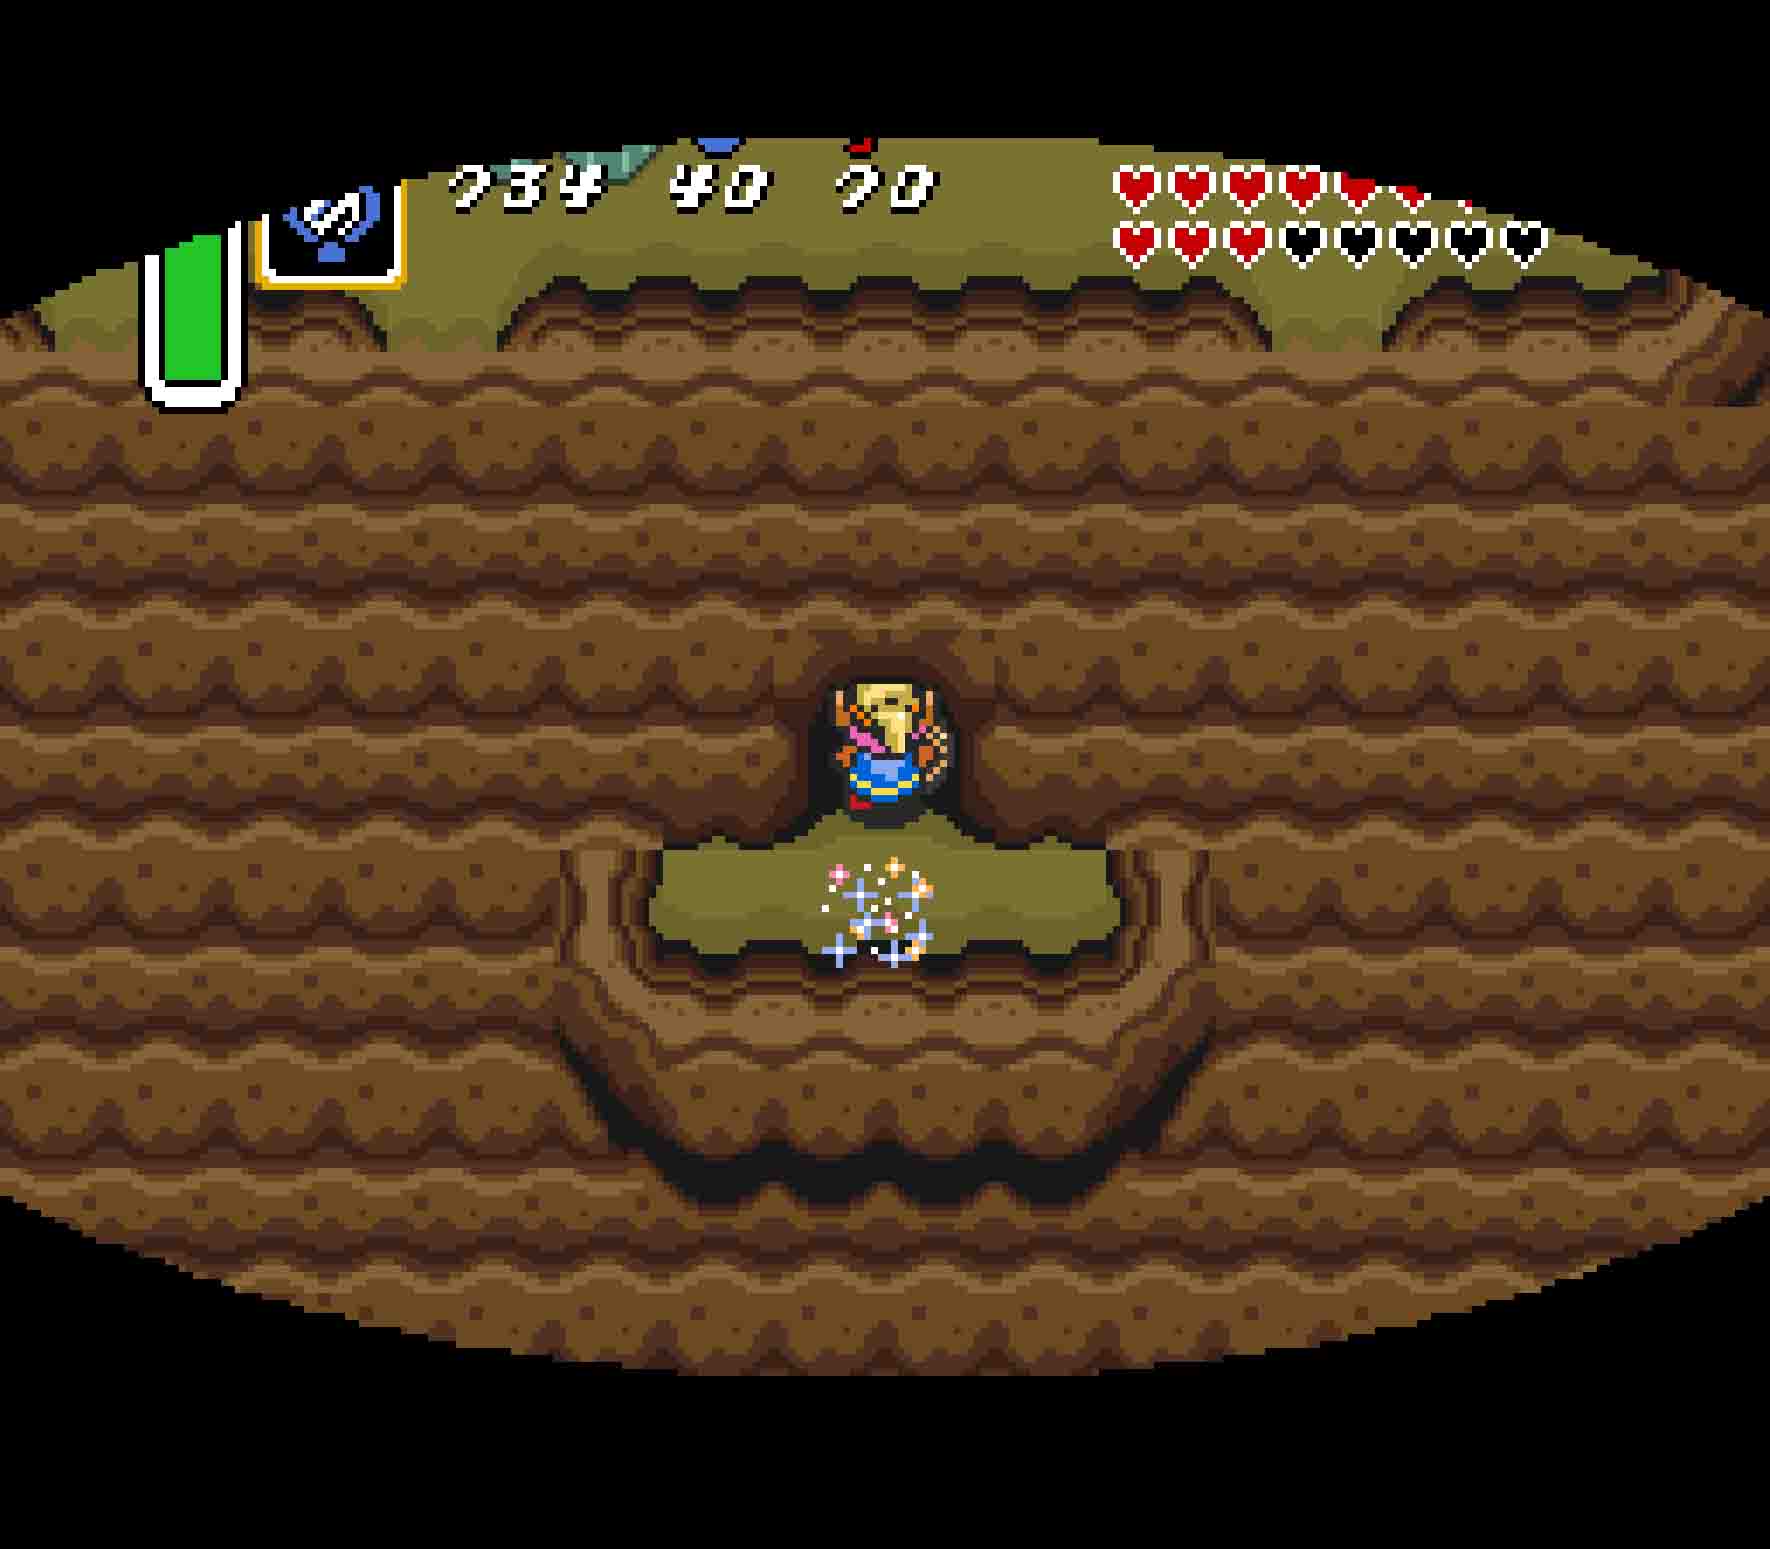
- Use the Magic Mirror and find a cave in the Light World.
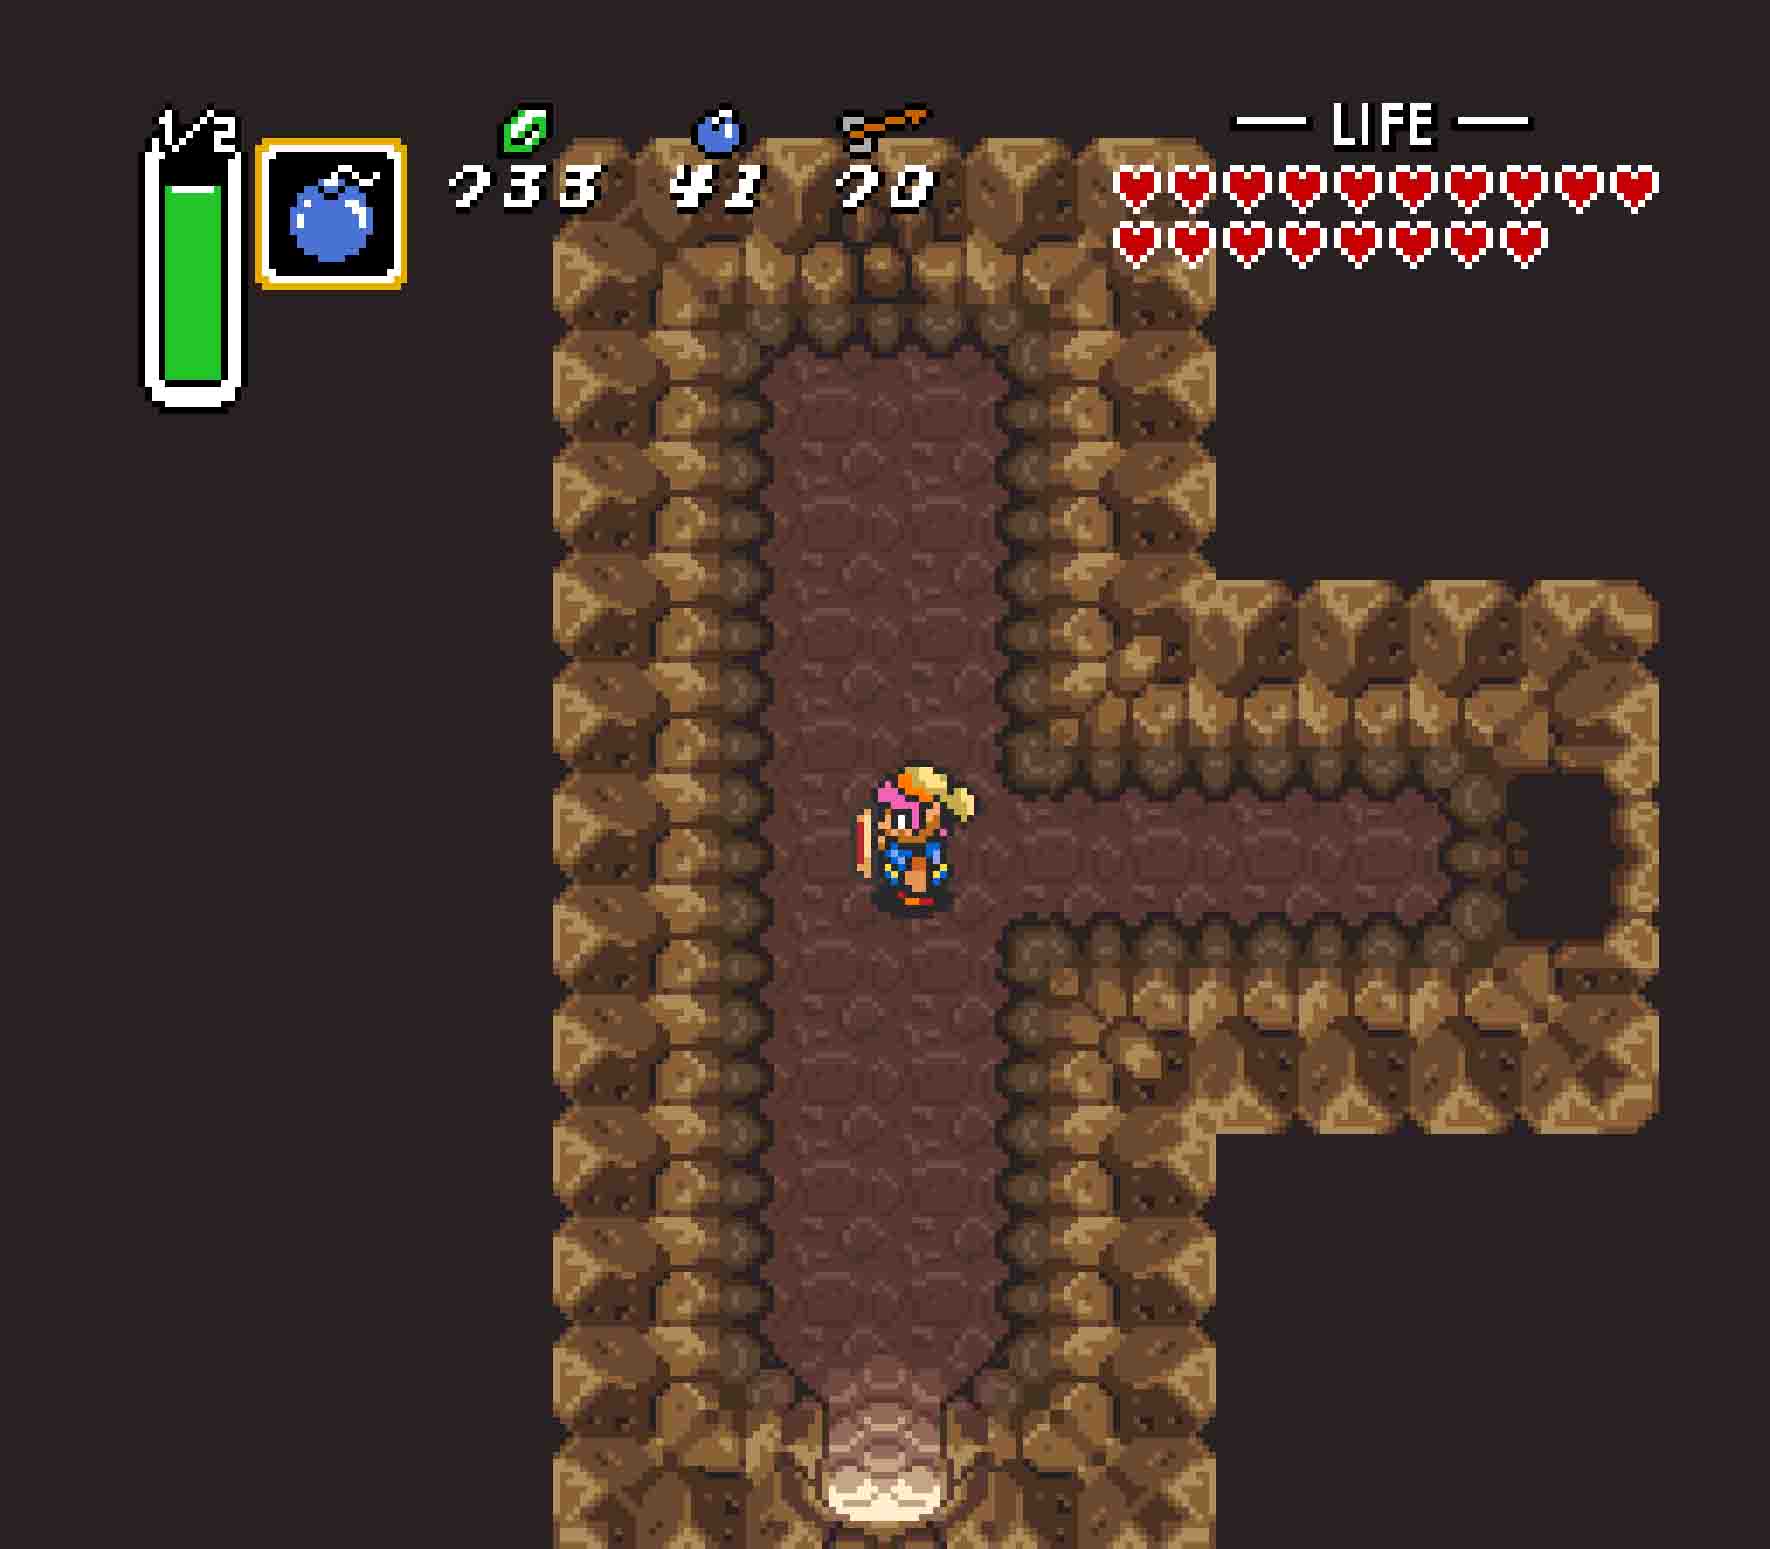
In the middle of Turtle Rock, you will need to head outside the dungeon in order to obtain the Mirror Shield. When you exit the dungeon through the bombed-open entrance in the room with the five Laser Eyes, you will emerge on a narrow cliff that takes you to the entrance that contains the Big Chest, within which is the Mirror Shield. If you stand just outside that entrance to the room with the Big Key and use the Magic Mirror to warp to the Light World, you will find a similar cavern exists on the Light World version of Death Mountain. Enter that cave.
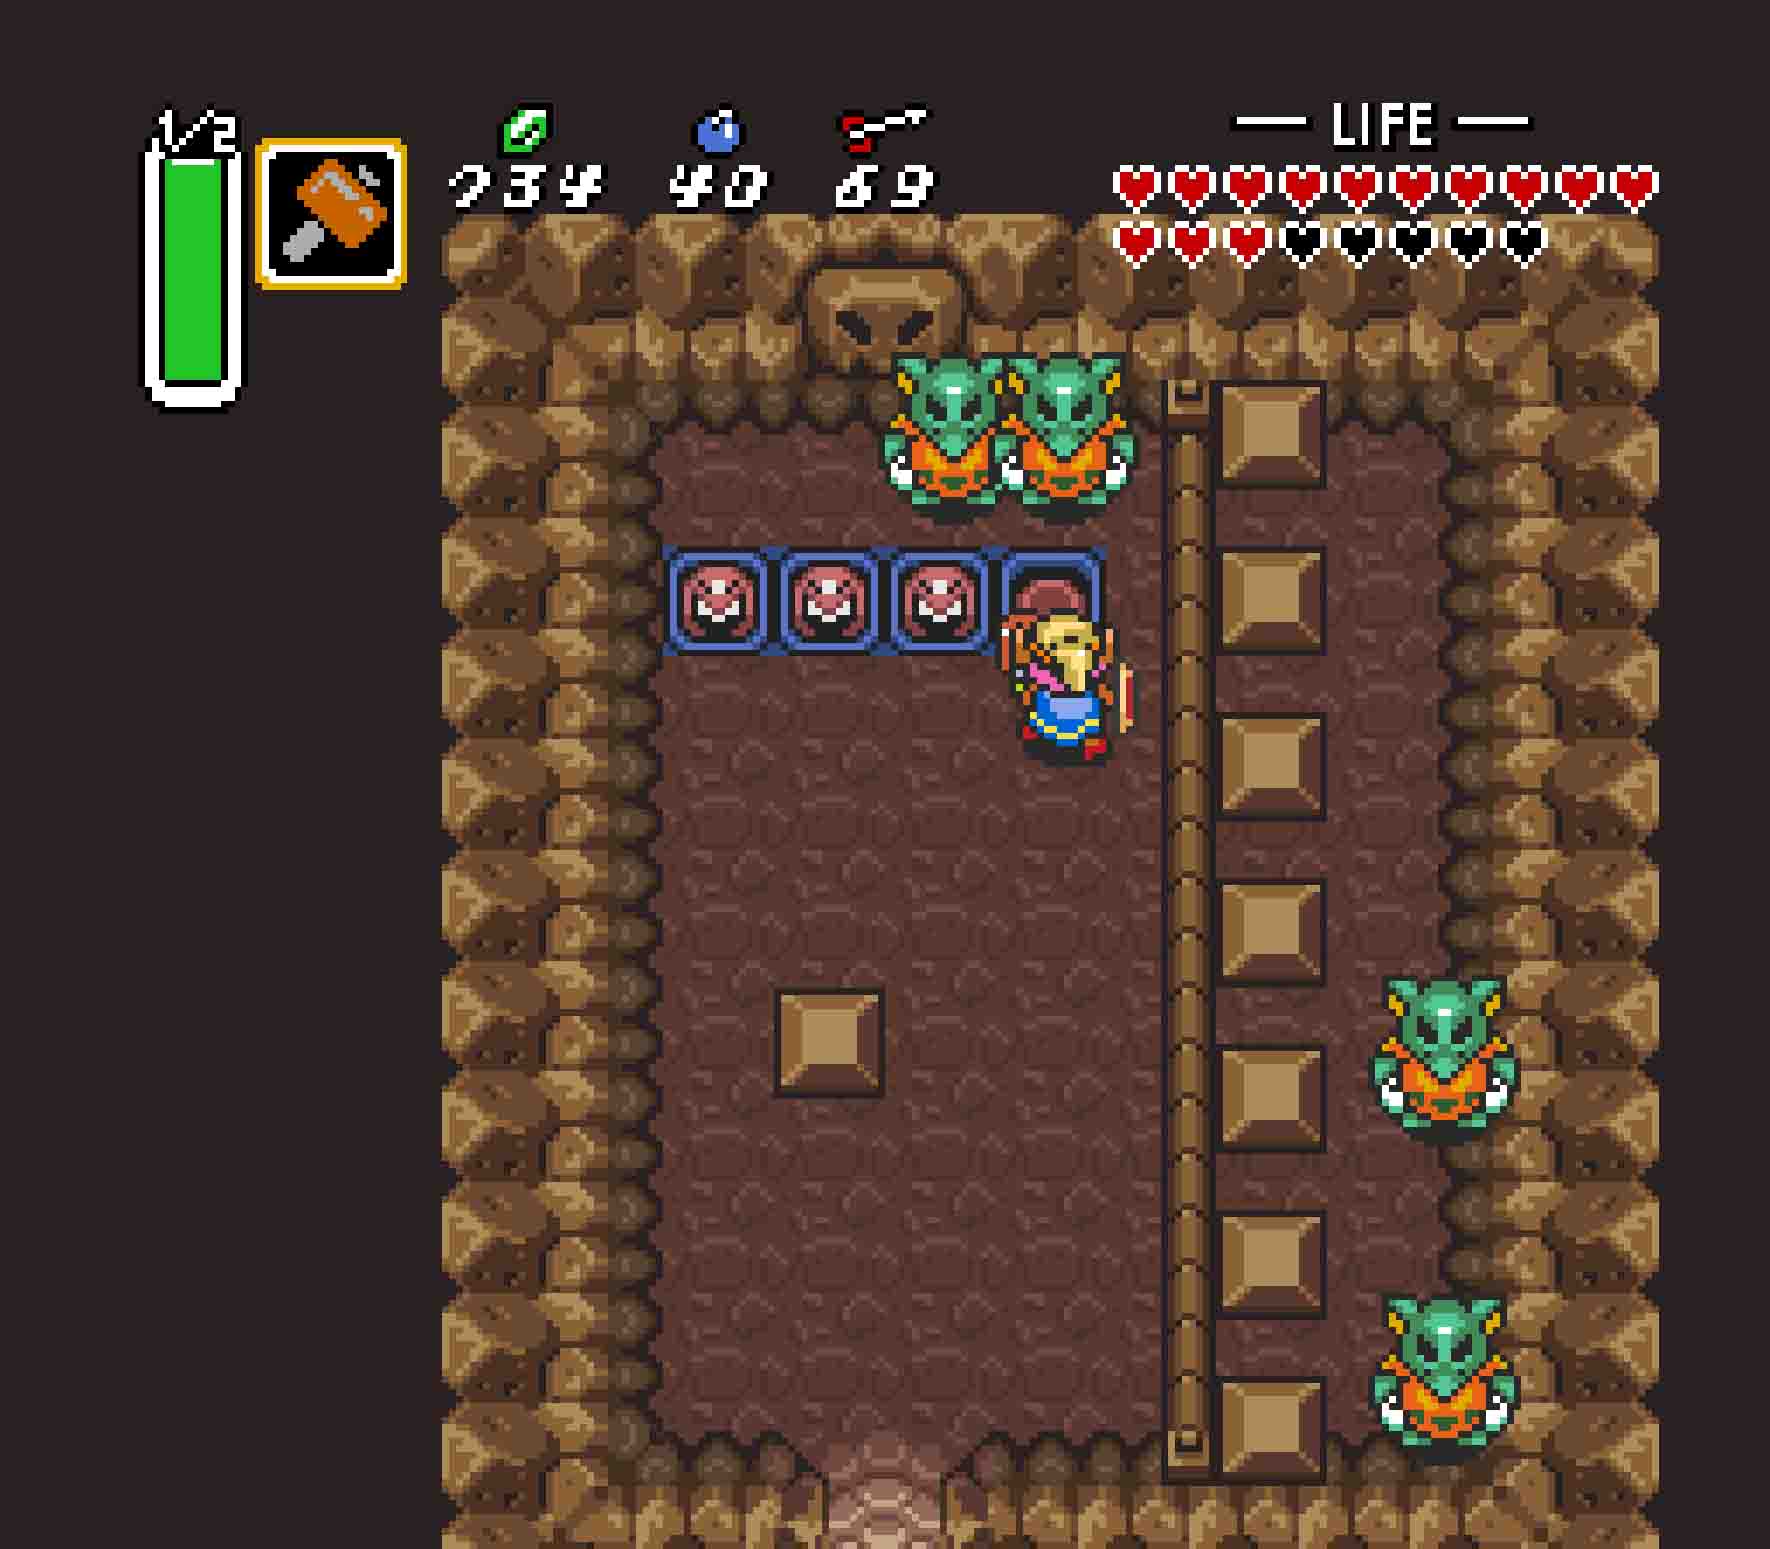
Inside you will find a quartet of green Goriyas. Two of them are easy to reach with your sword, especially after you use the Magic Hammer to smack the Moles down into the ground. However, the two Goriyas on the right side of the barrier are slightly more tricky to hit, seeing as they will always flee to the far right, just out of sword’s reach. You will need to use the Bow and Arrows to defeat them. If you can line up a shot perfectly, that’s the way to do it. However, you might need to take the closest shot possible and then, after firing, move in such a way that the Goriya walks into the arrow. Killing all four Goriya will cause the sealed door to open, and inside you’ll find the Piece of Heart.
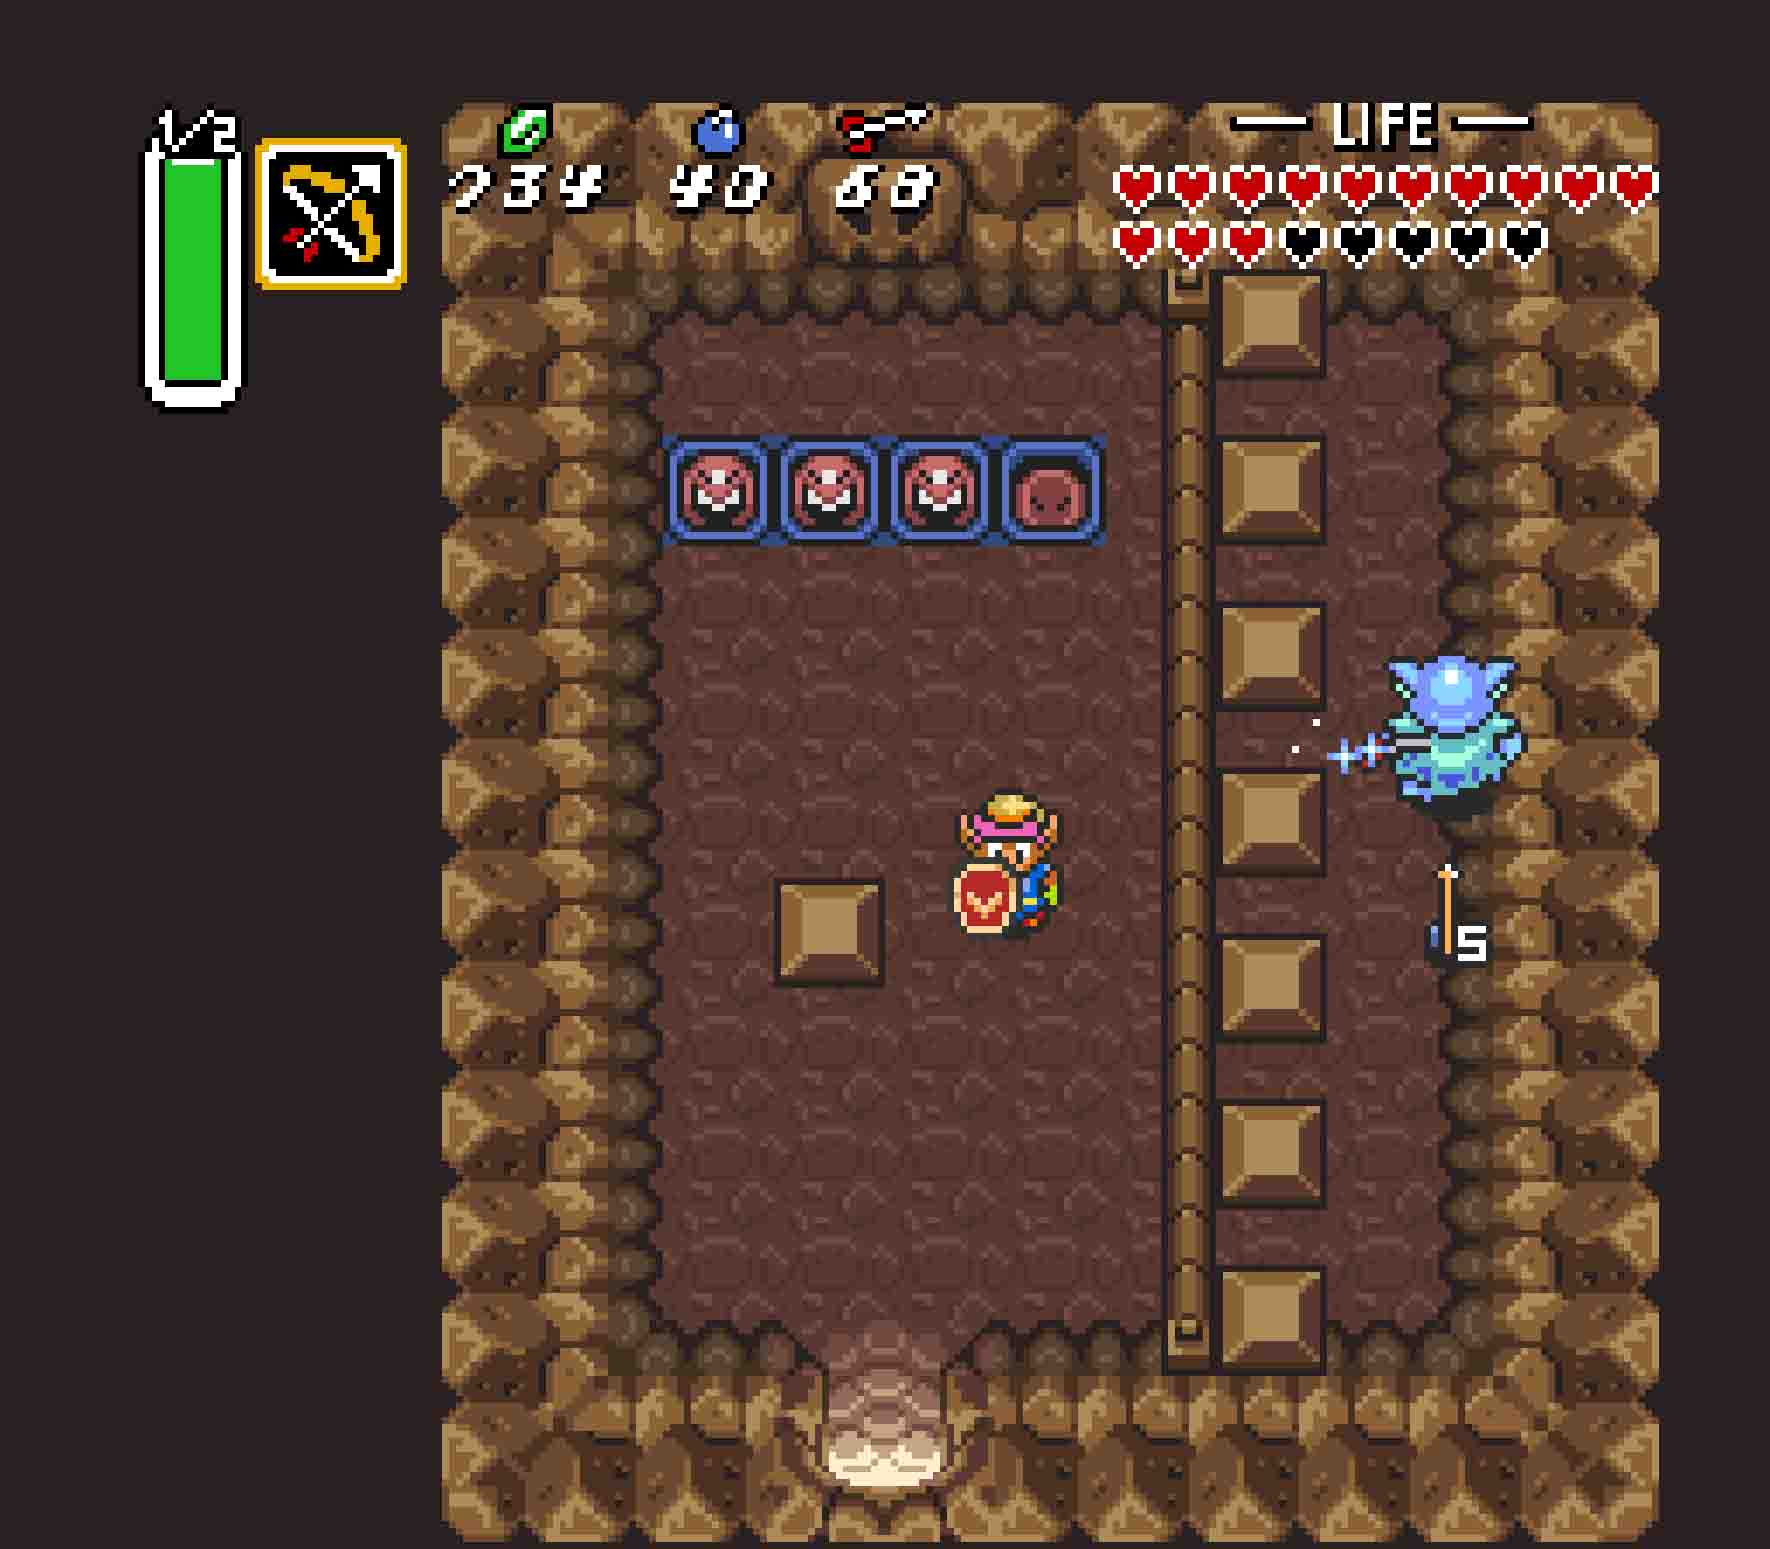
-

- Kill the Goriya within the cave to reach the final Piece of Heart.